Photographic practice
My process, research, ideas and inspiration behind the project.
Research

Erika Zolli

Gerwyn Davies
Idea generation and planning
To start this process I first generated a mind map to gain some ideas to work from.
I then expanded upon these by generating some quick sketches from which I could plan my shoots around.


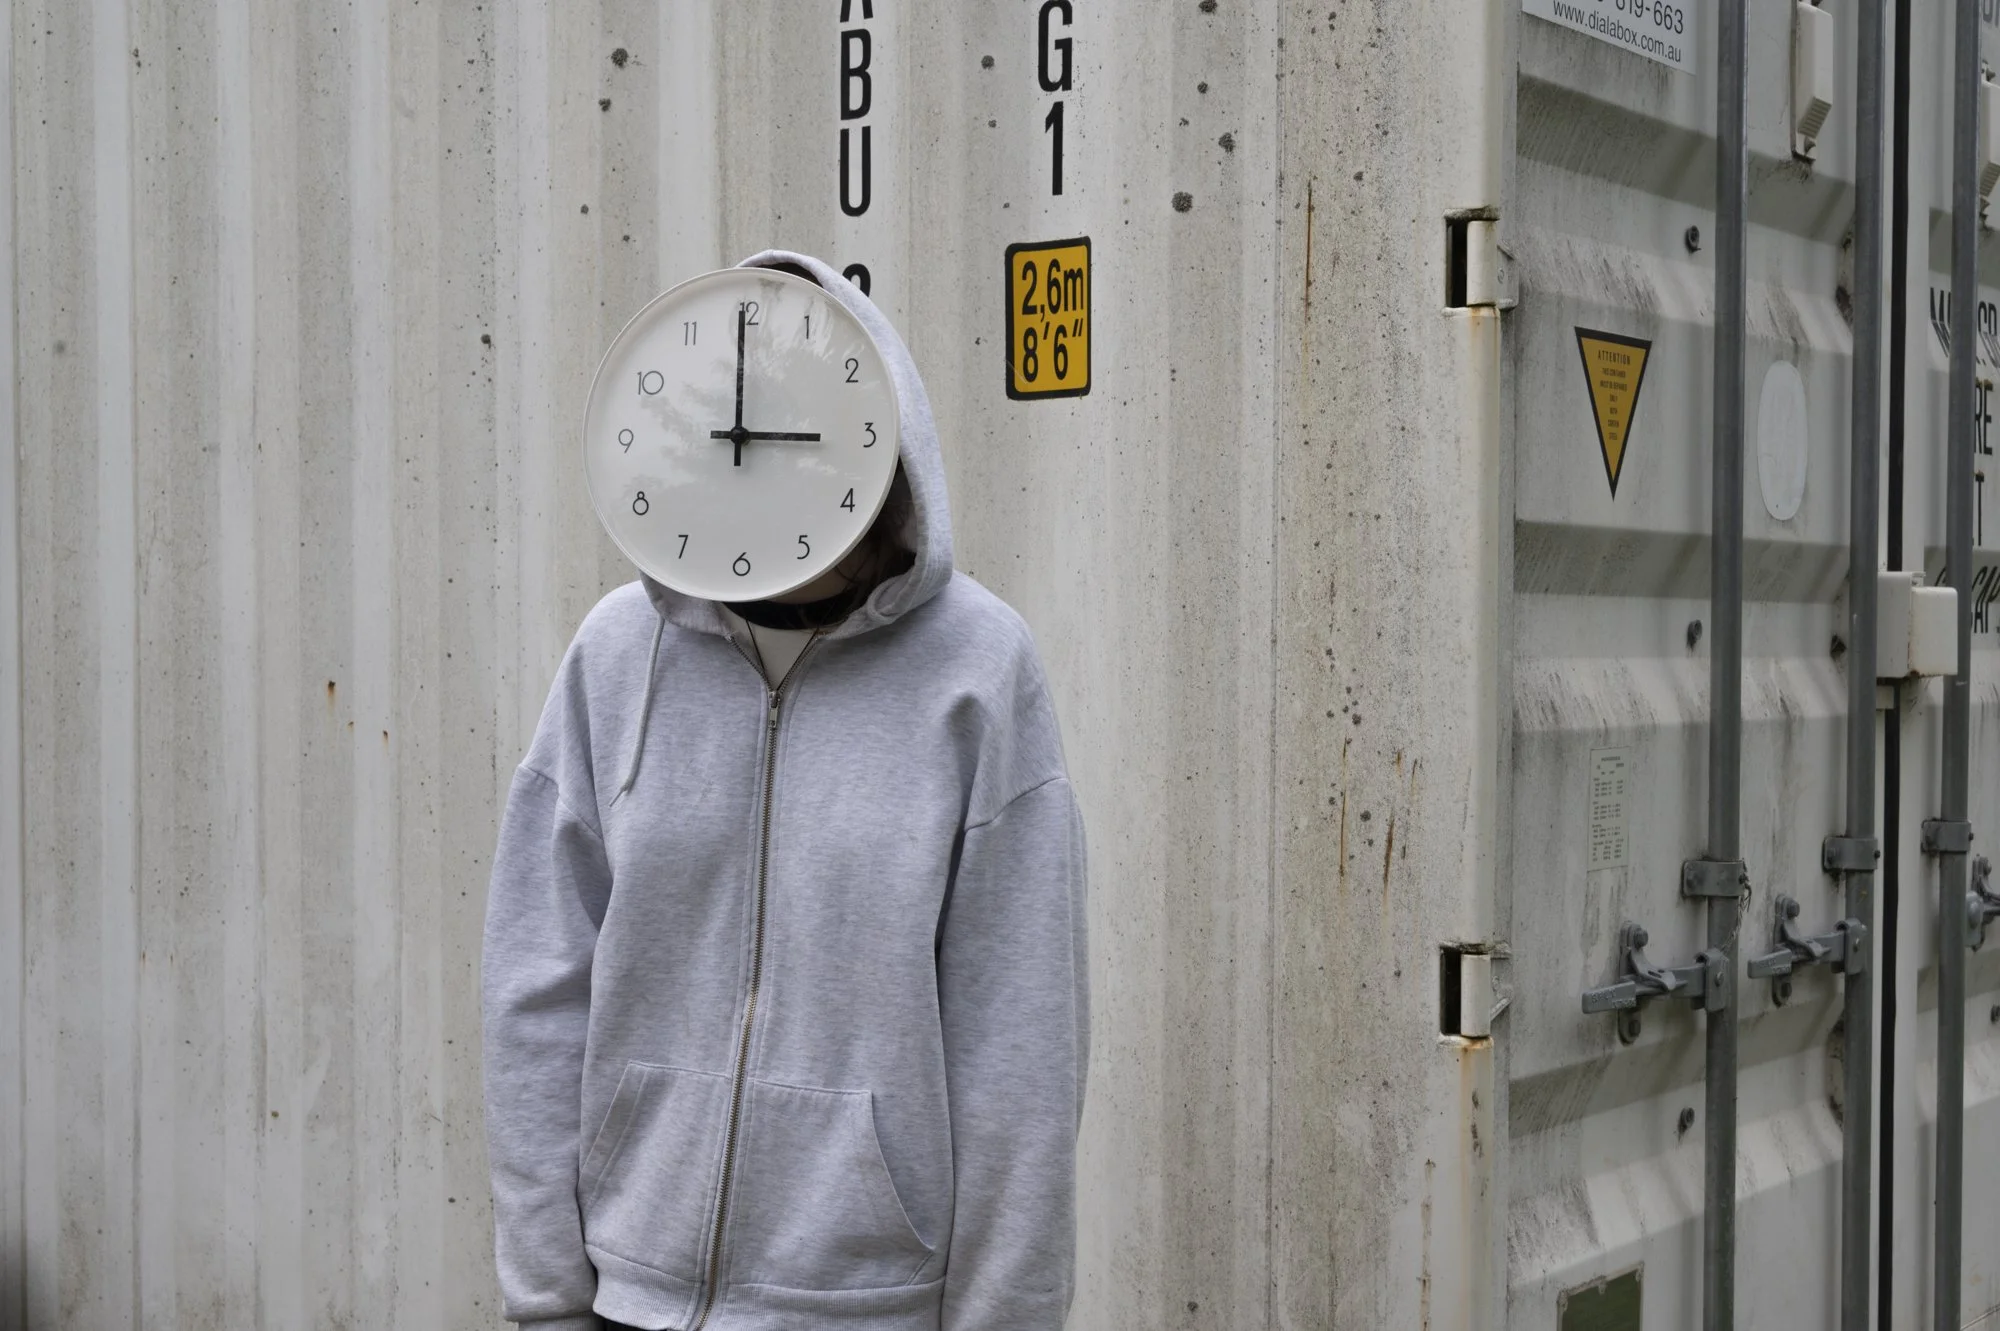
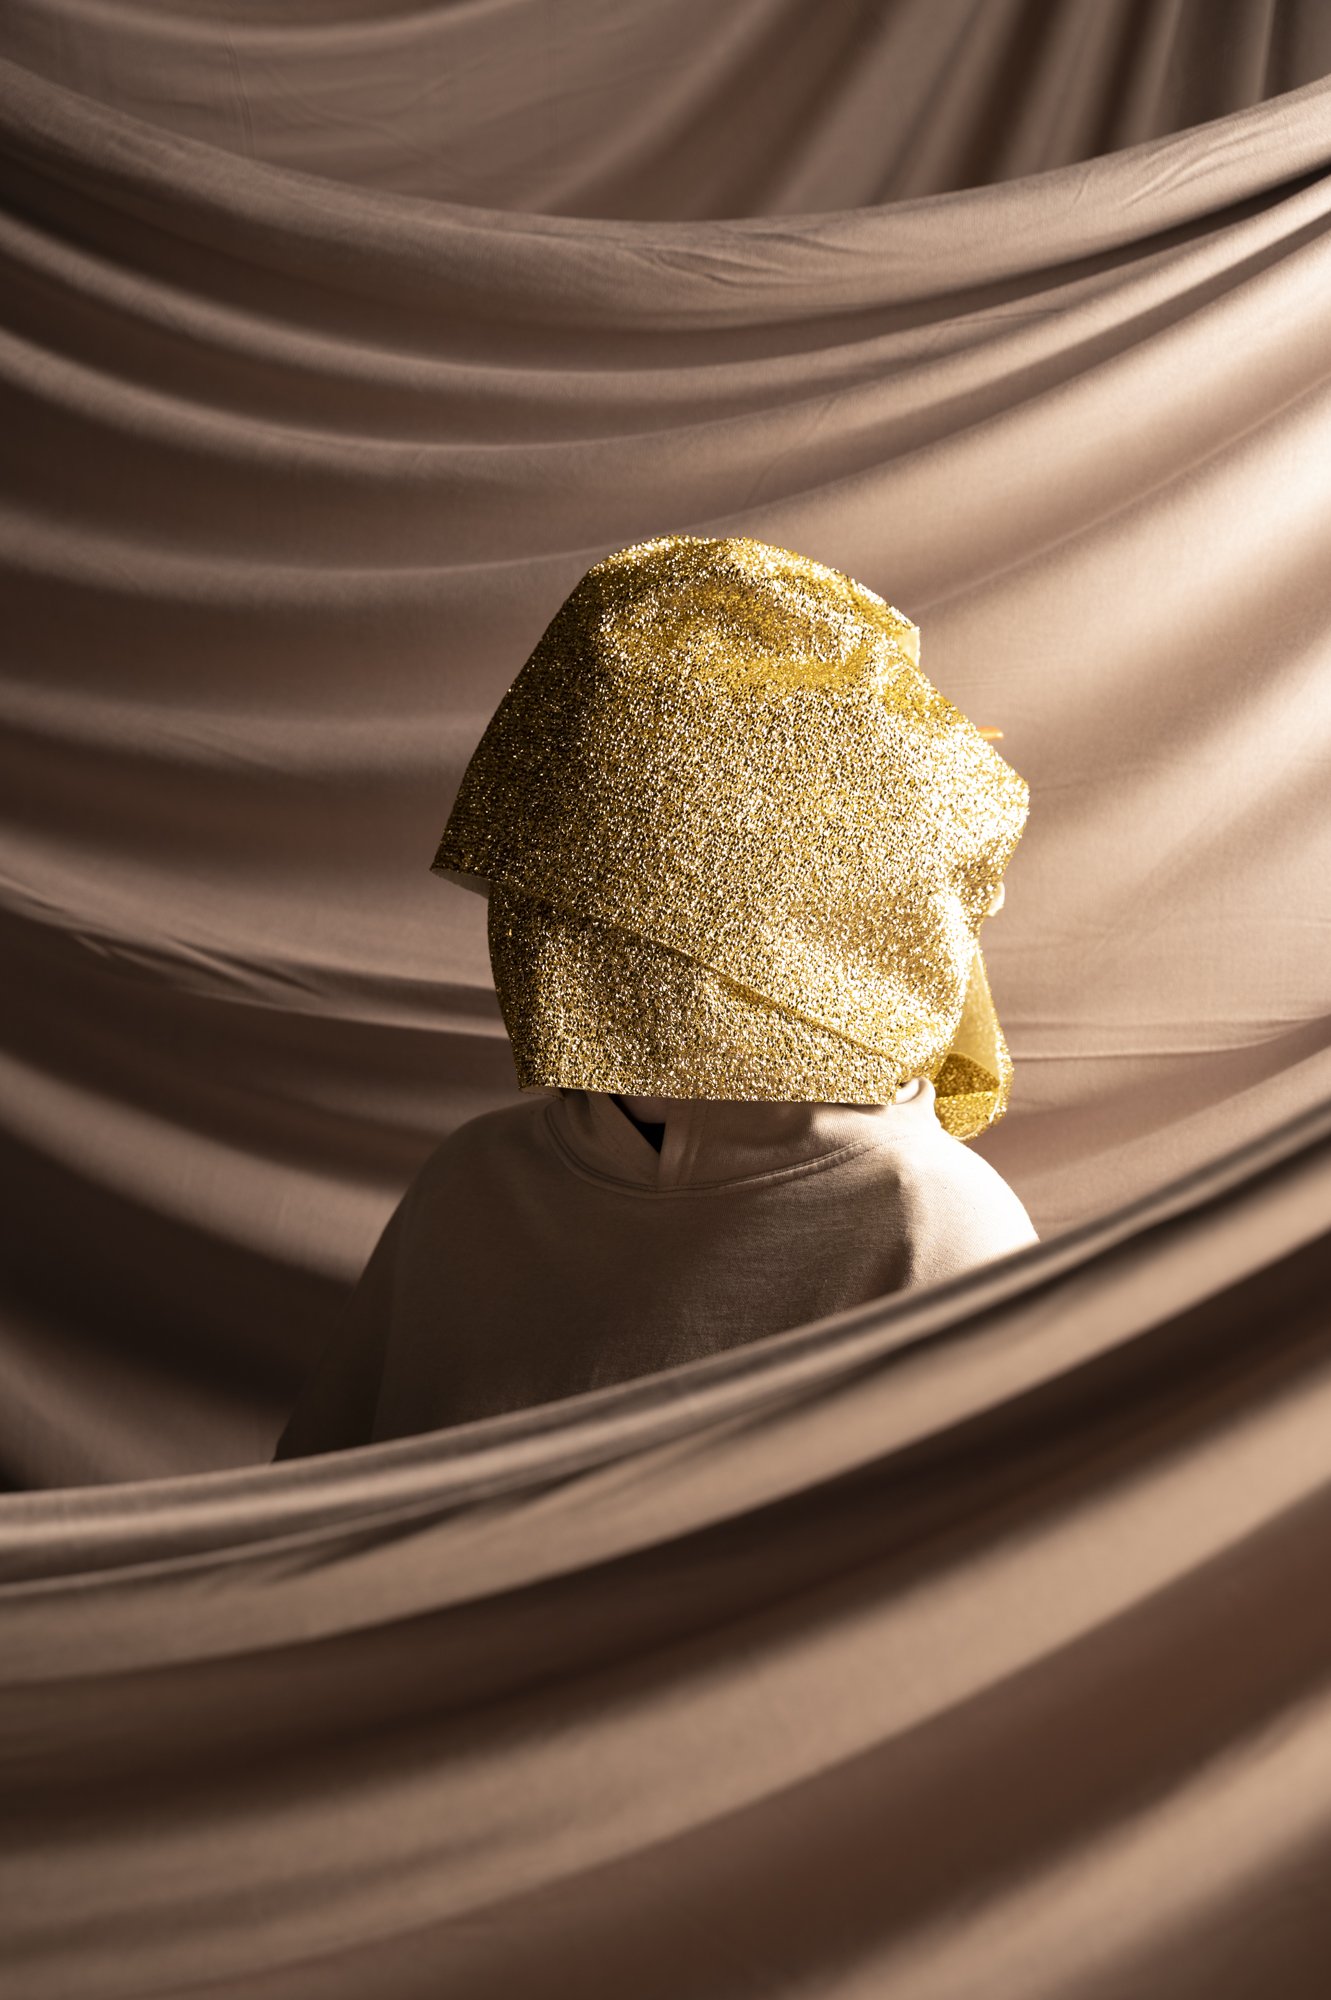
Shoot 1
When: 18/10
Where: Home (Outdoors)
Lighting: 1 x Godox AD200 + Strip box
Reflection:
What worked?
The use of side lighting on the subject works quite effectively. It allows the subject matter to be sculpted revealing its form and texture whilst also creating highlights that help seperate the subject from the background.
The simple costuming and industrial, minimal background works well to allow the props to remain the focus.
What didn’t work?
Shooting from home I had limited backgrounds available. With injury I am unable to really travel further and so this makes shooting outdoors an unlikely path forwards.
What next?
I need to consider ways in which I can bring this shoot into the studio, as well as consider the styling of the subject. I may think about curating an outfit to match each prop potentially.


Research
Following my previous shoot I did some additional research hoping to find a direction to take the shoot in the studio. I came across Ziqian Lui’s work which inspired me in it’s sense of stillness. There is an almost unnerving calmness found in the photographs.
She uses mirrors to isolate parts of her body, creating a disjointed still life and portrait crossover.
I am considering using fabric to isolate parts of my subject for more intentional emphasis and compositional control inspired by her work.
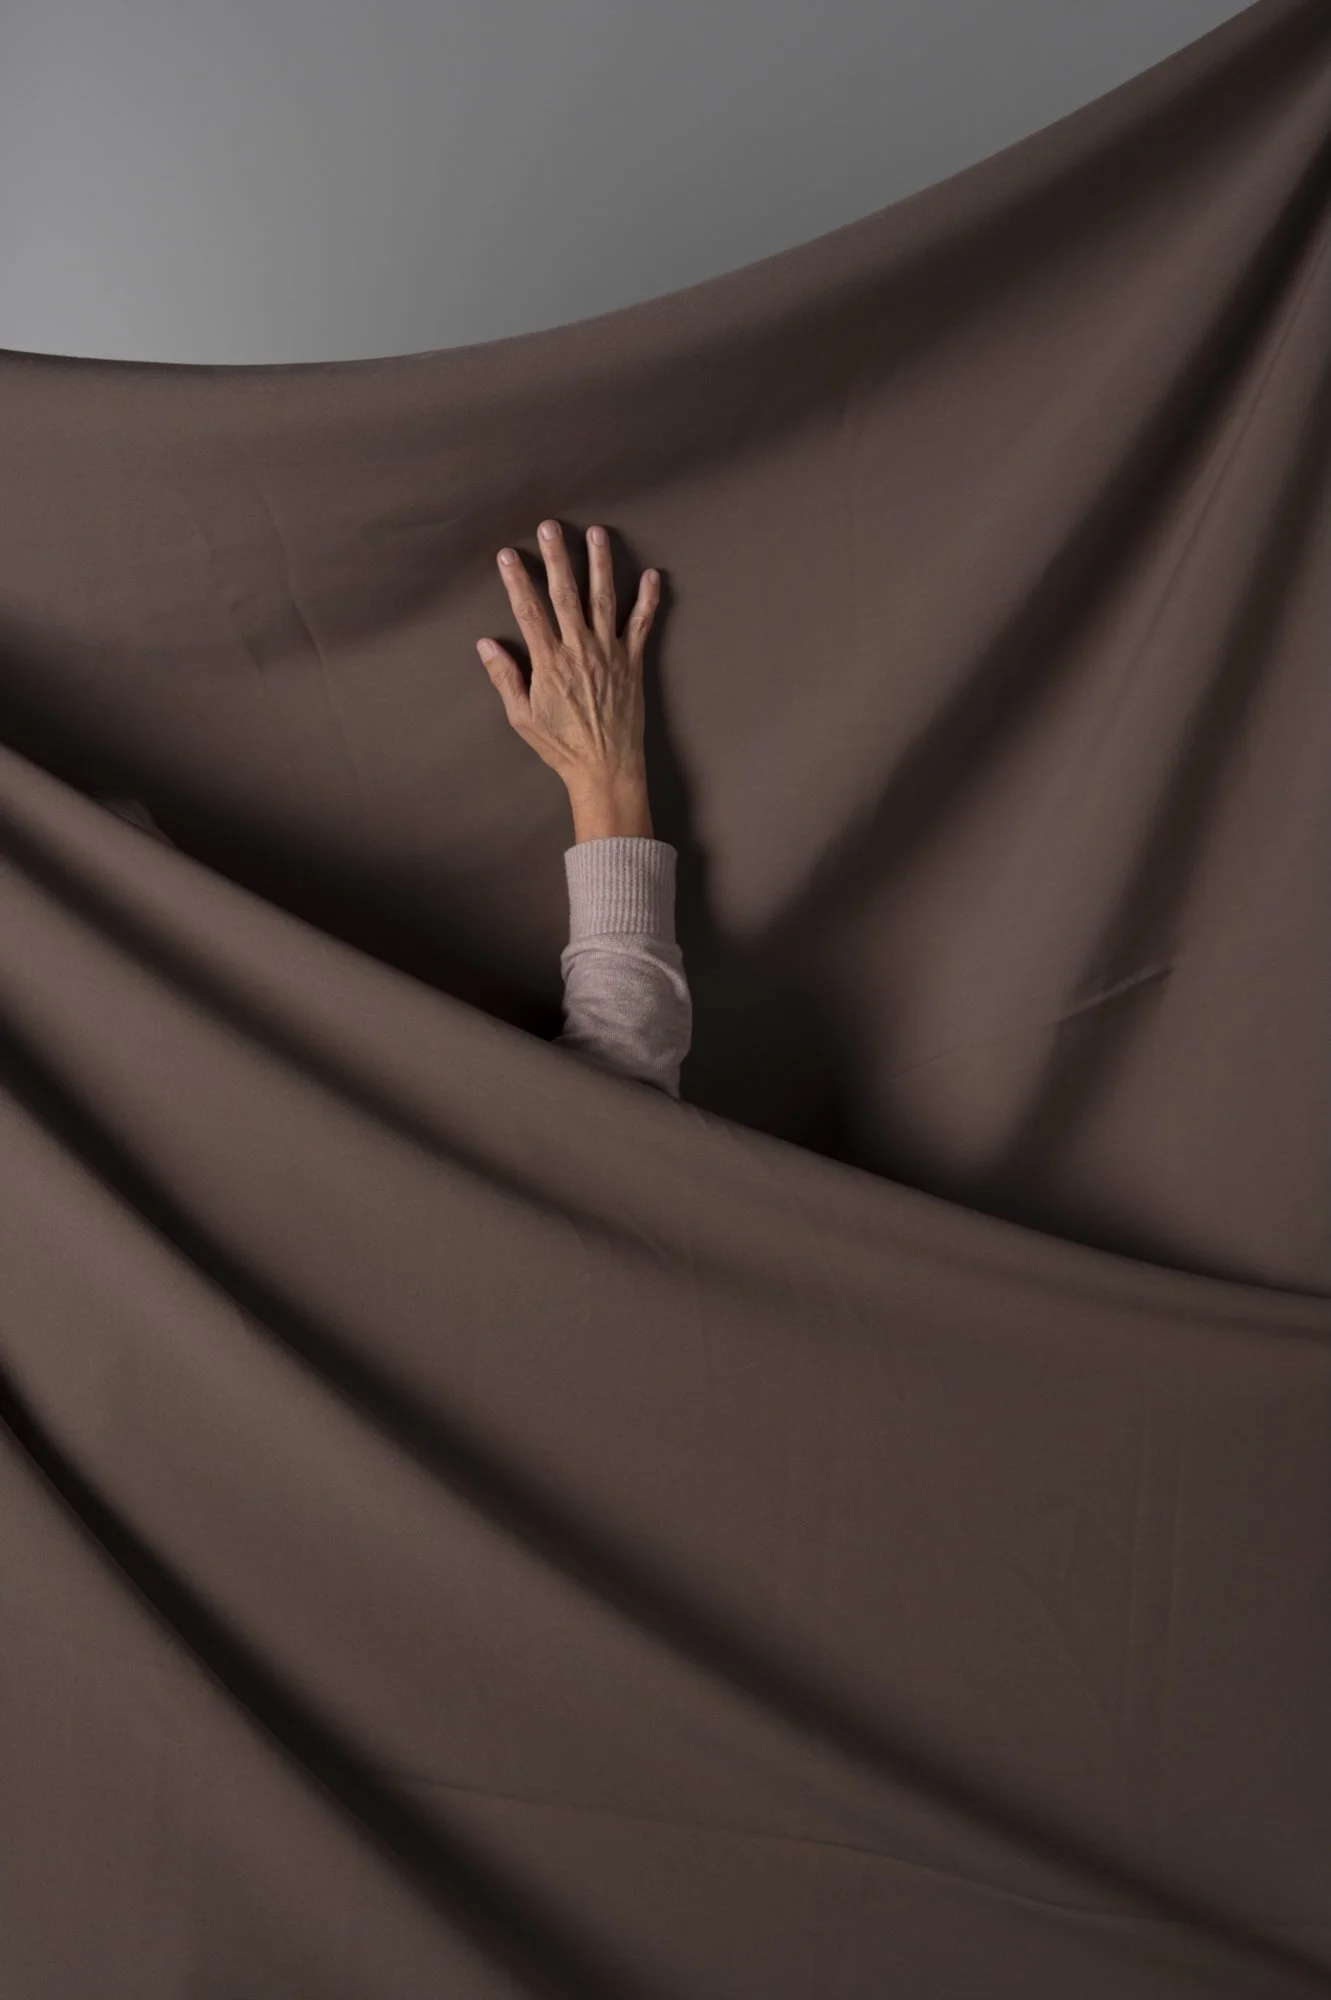
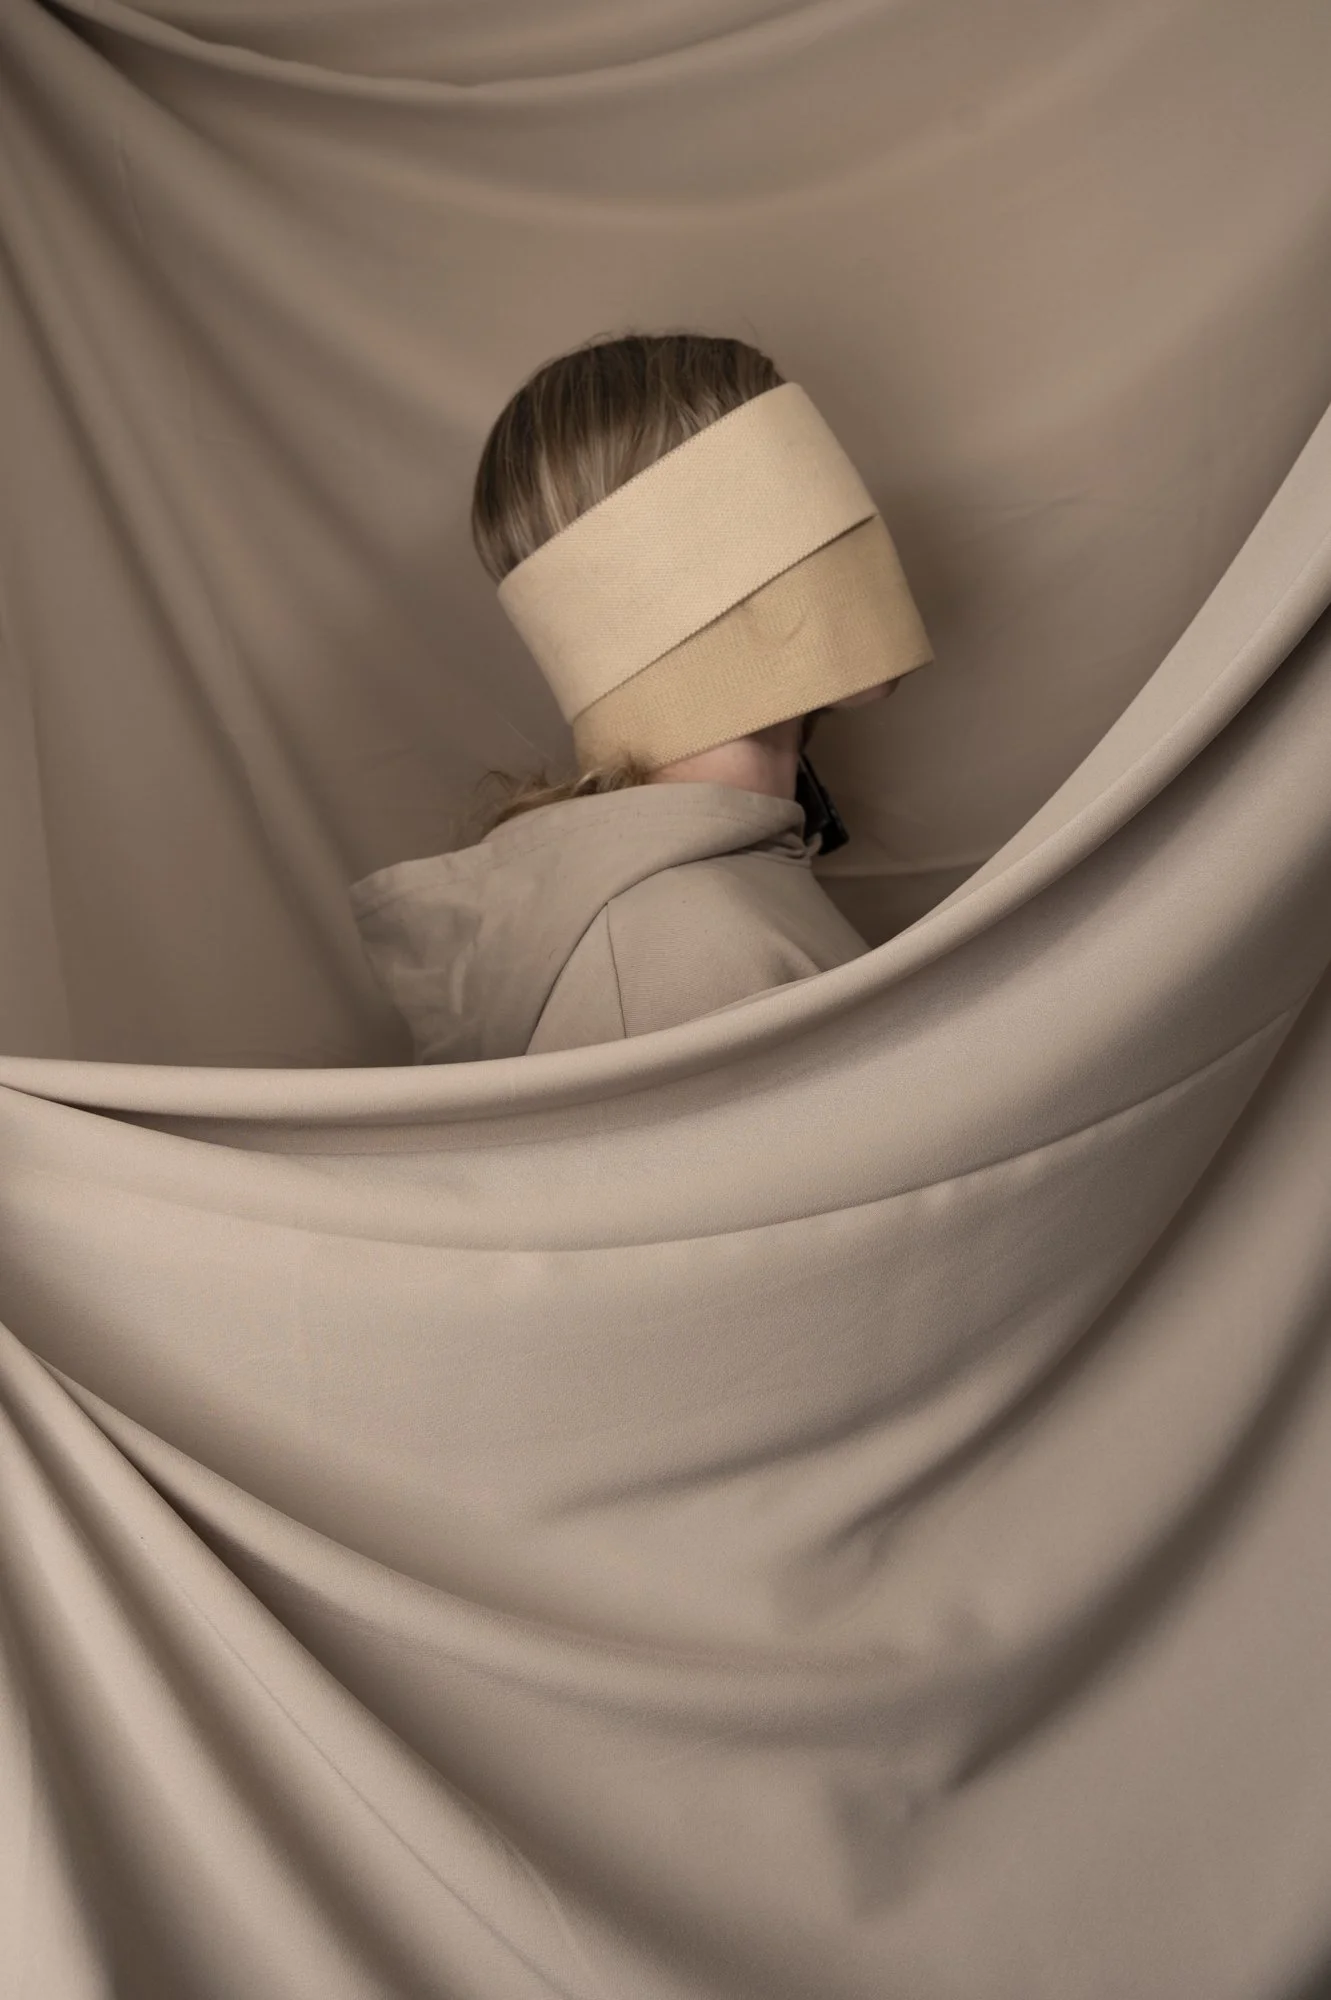
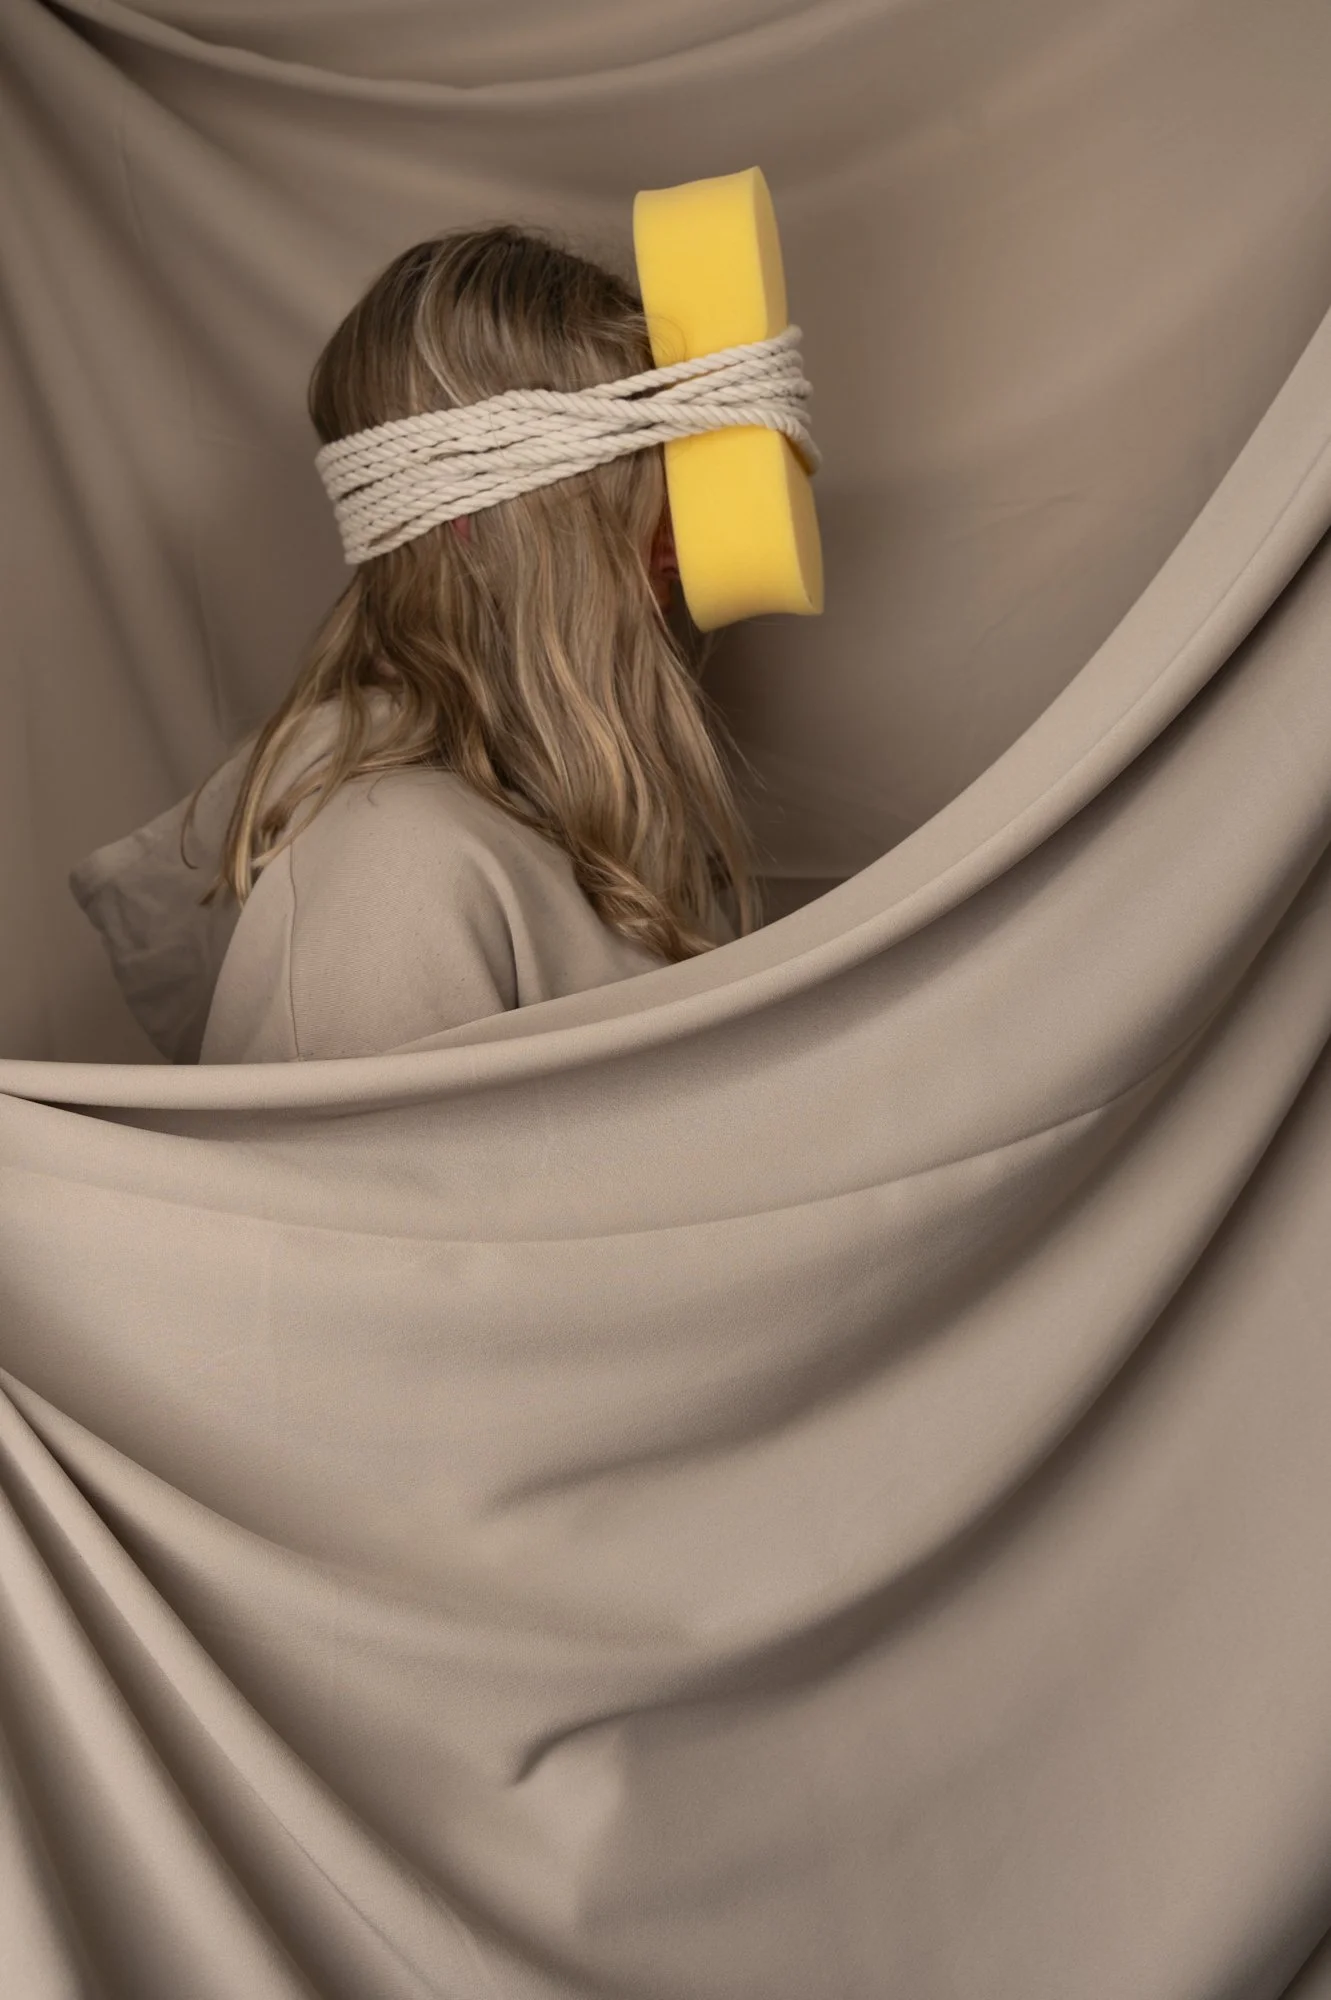
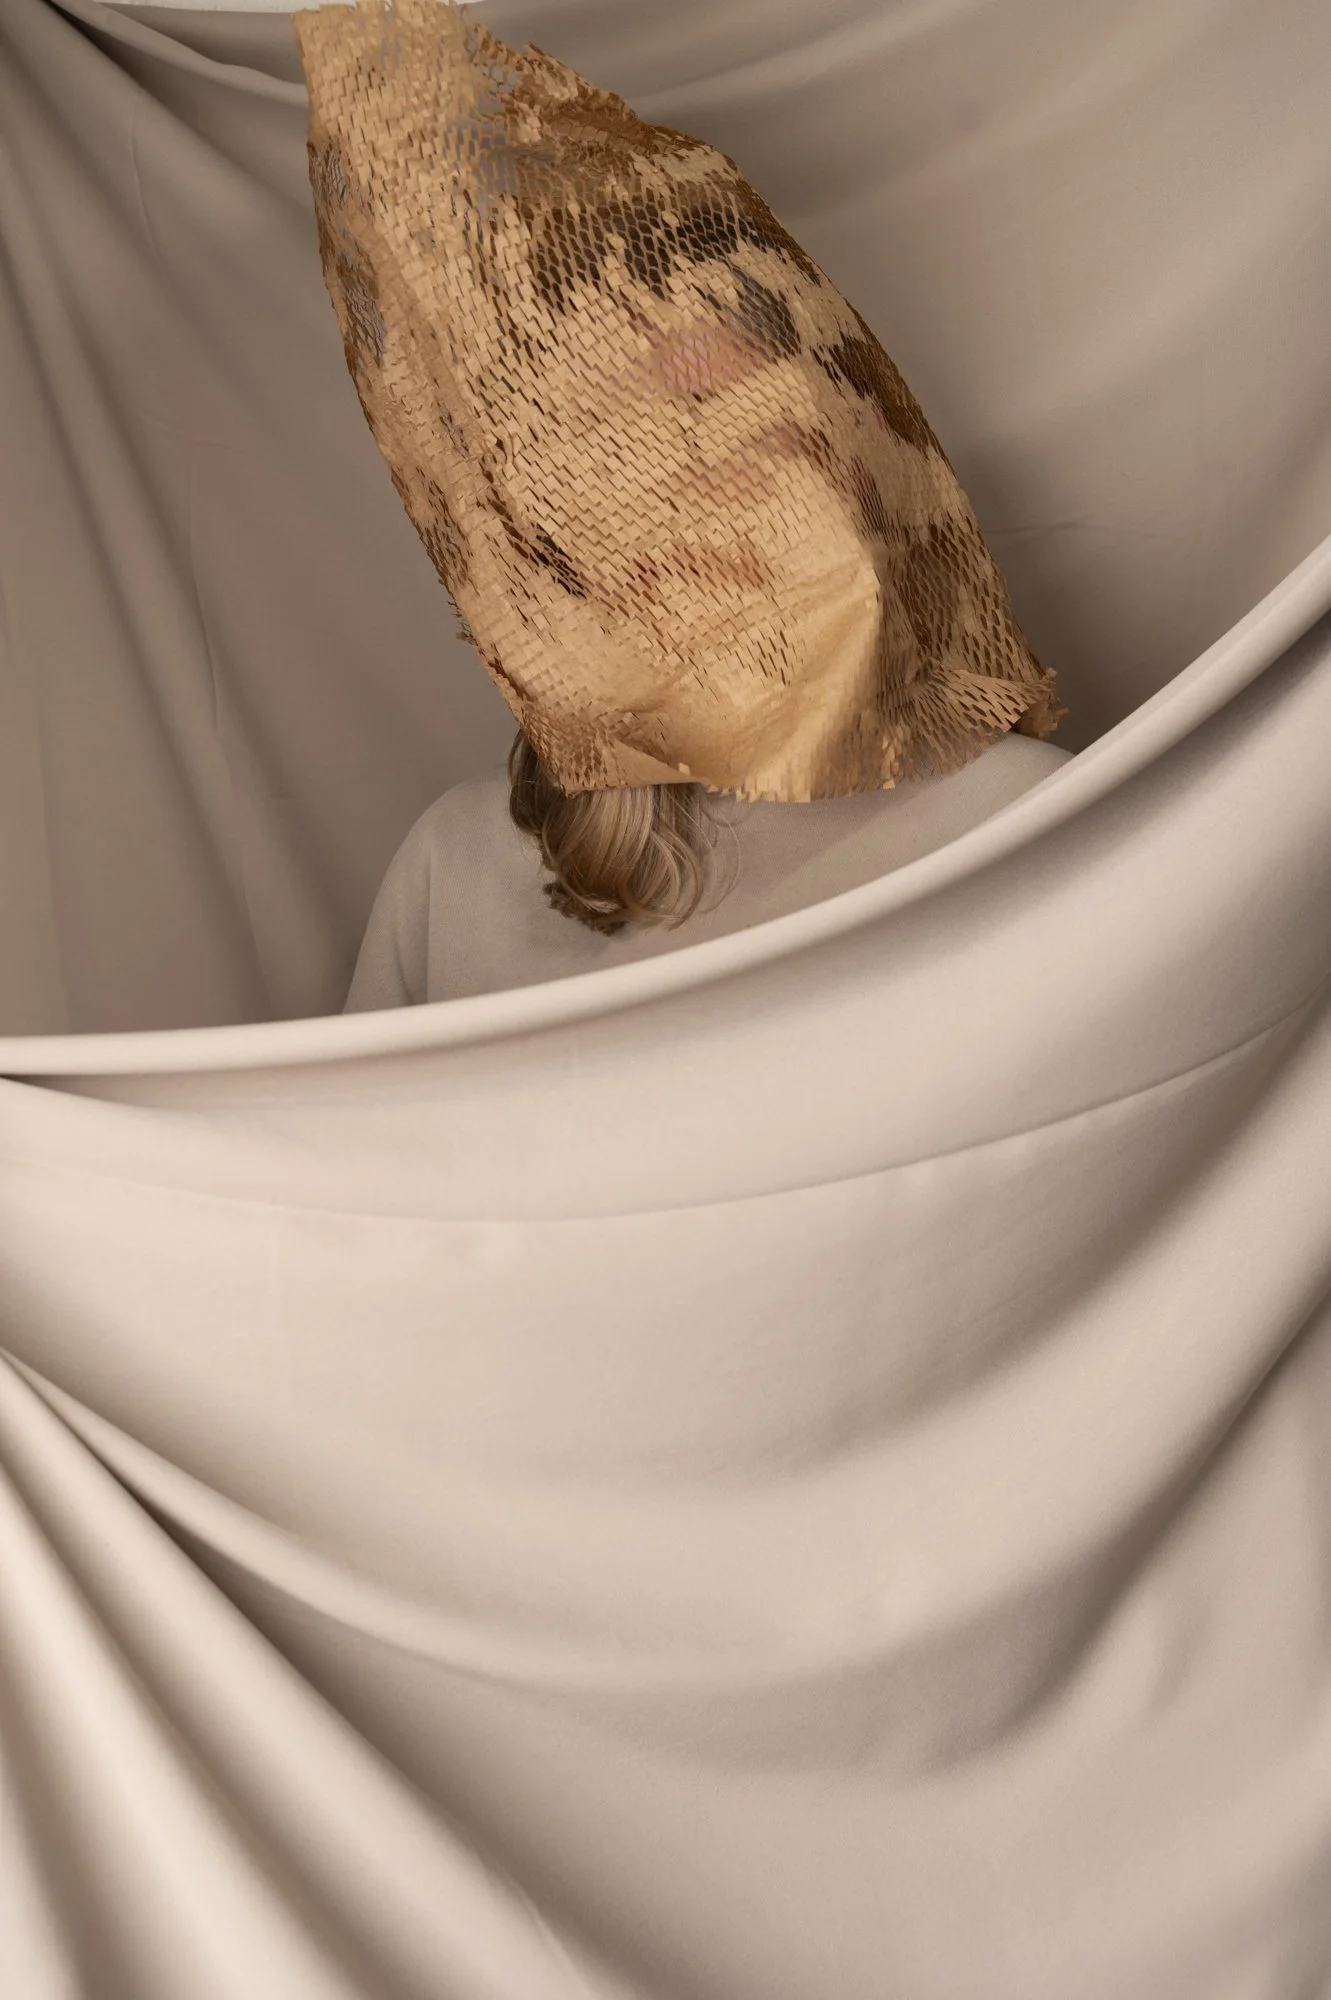
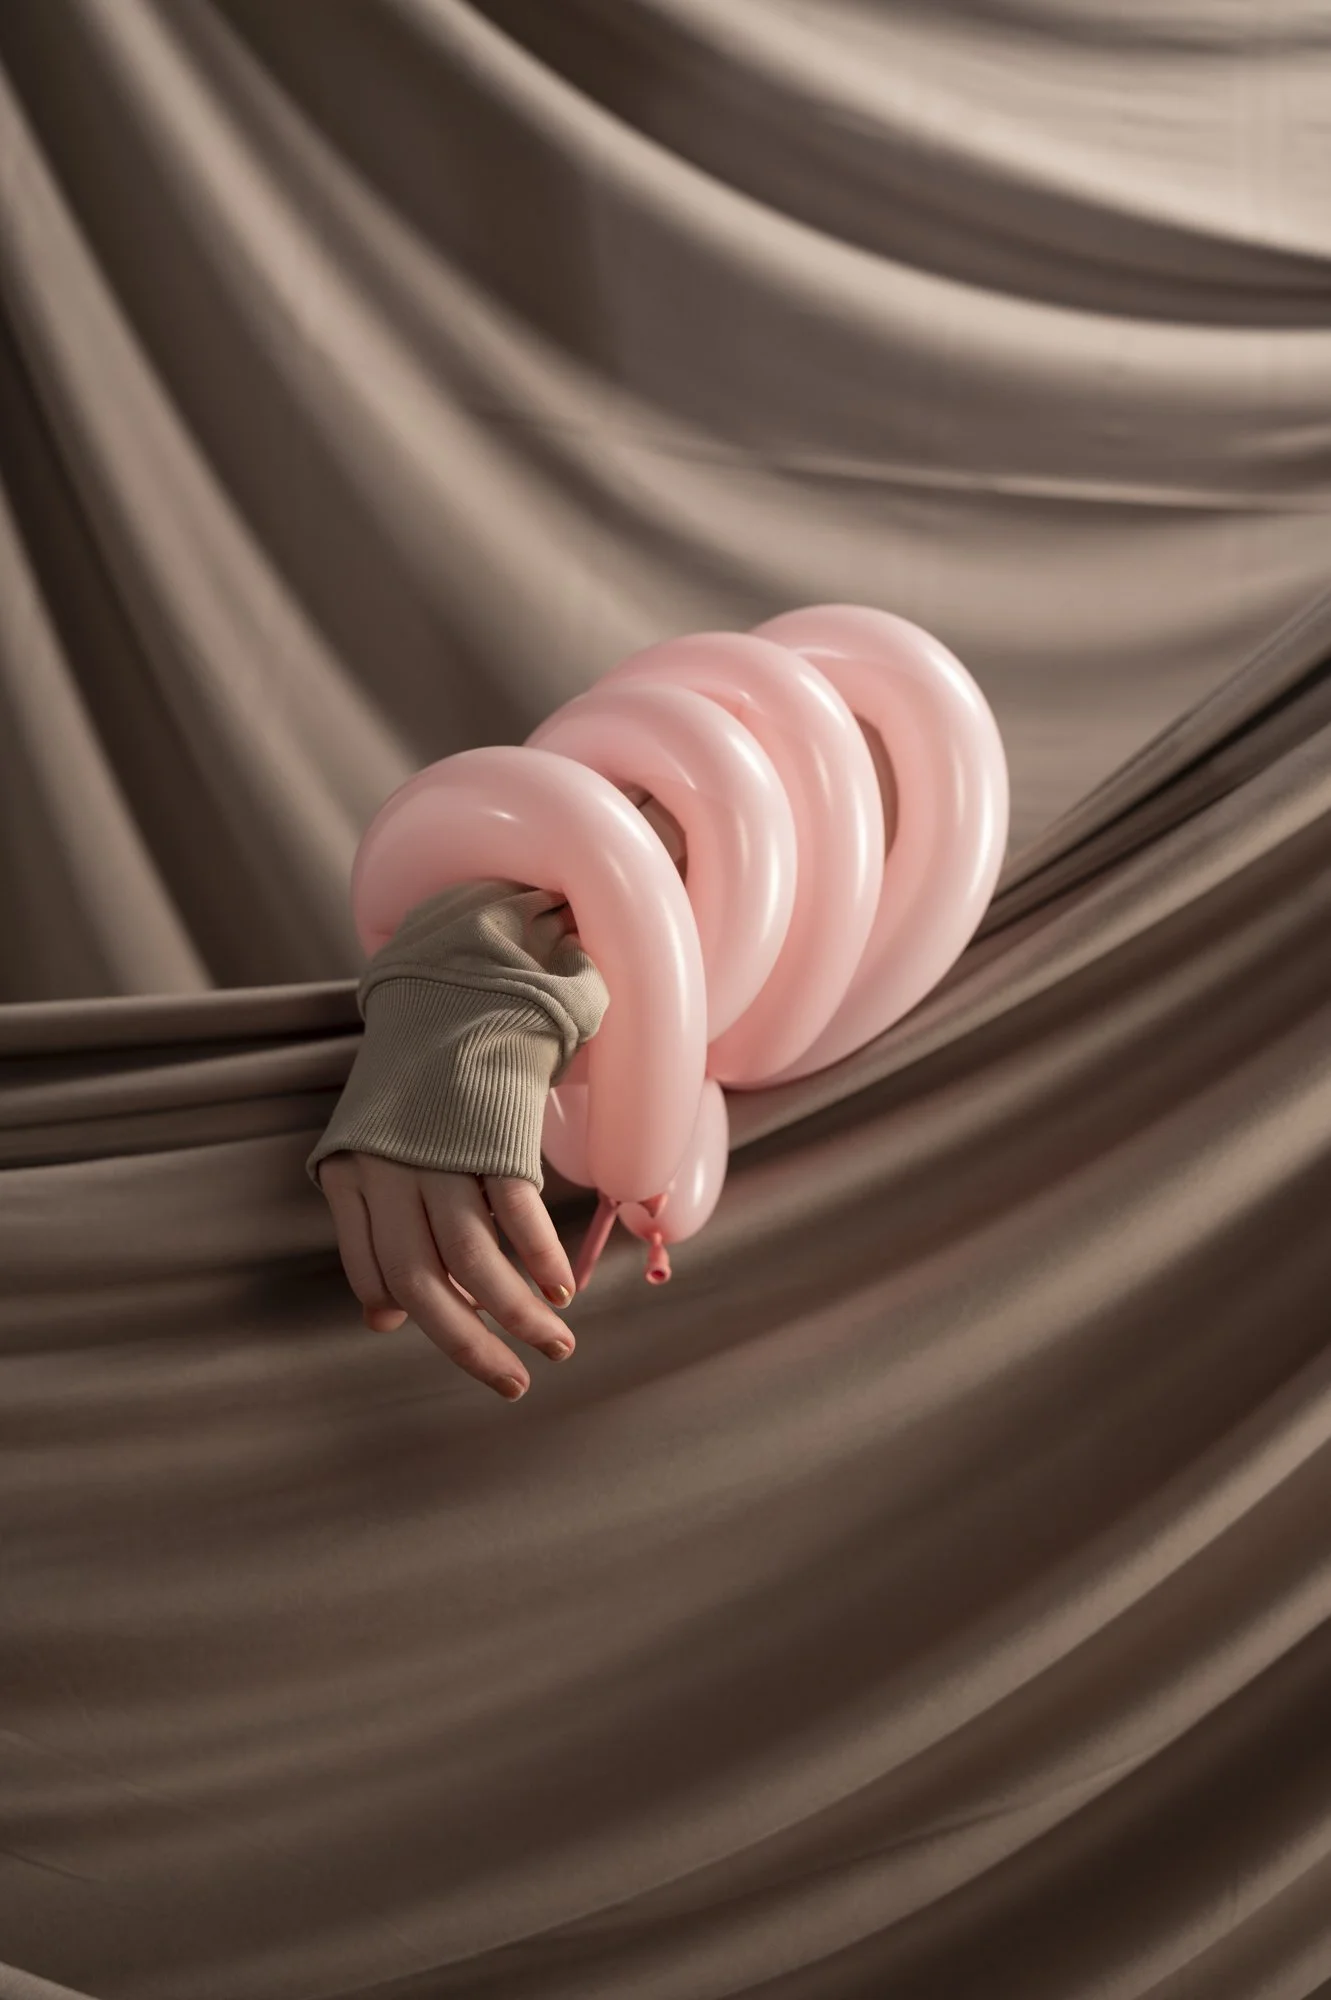
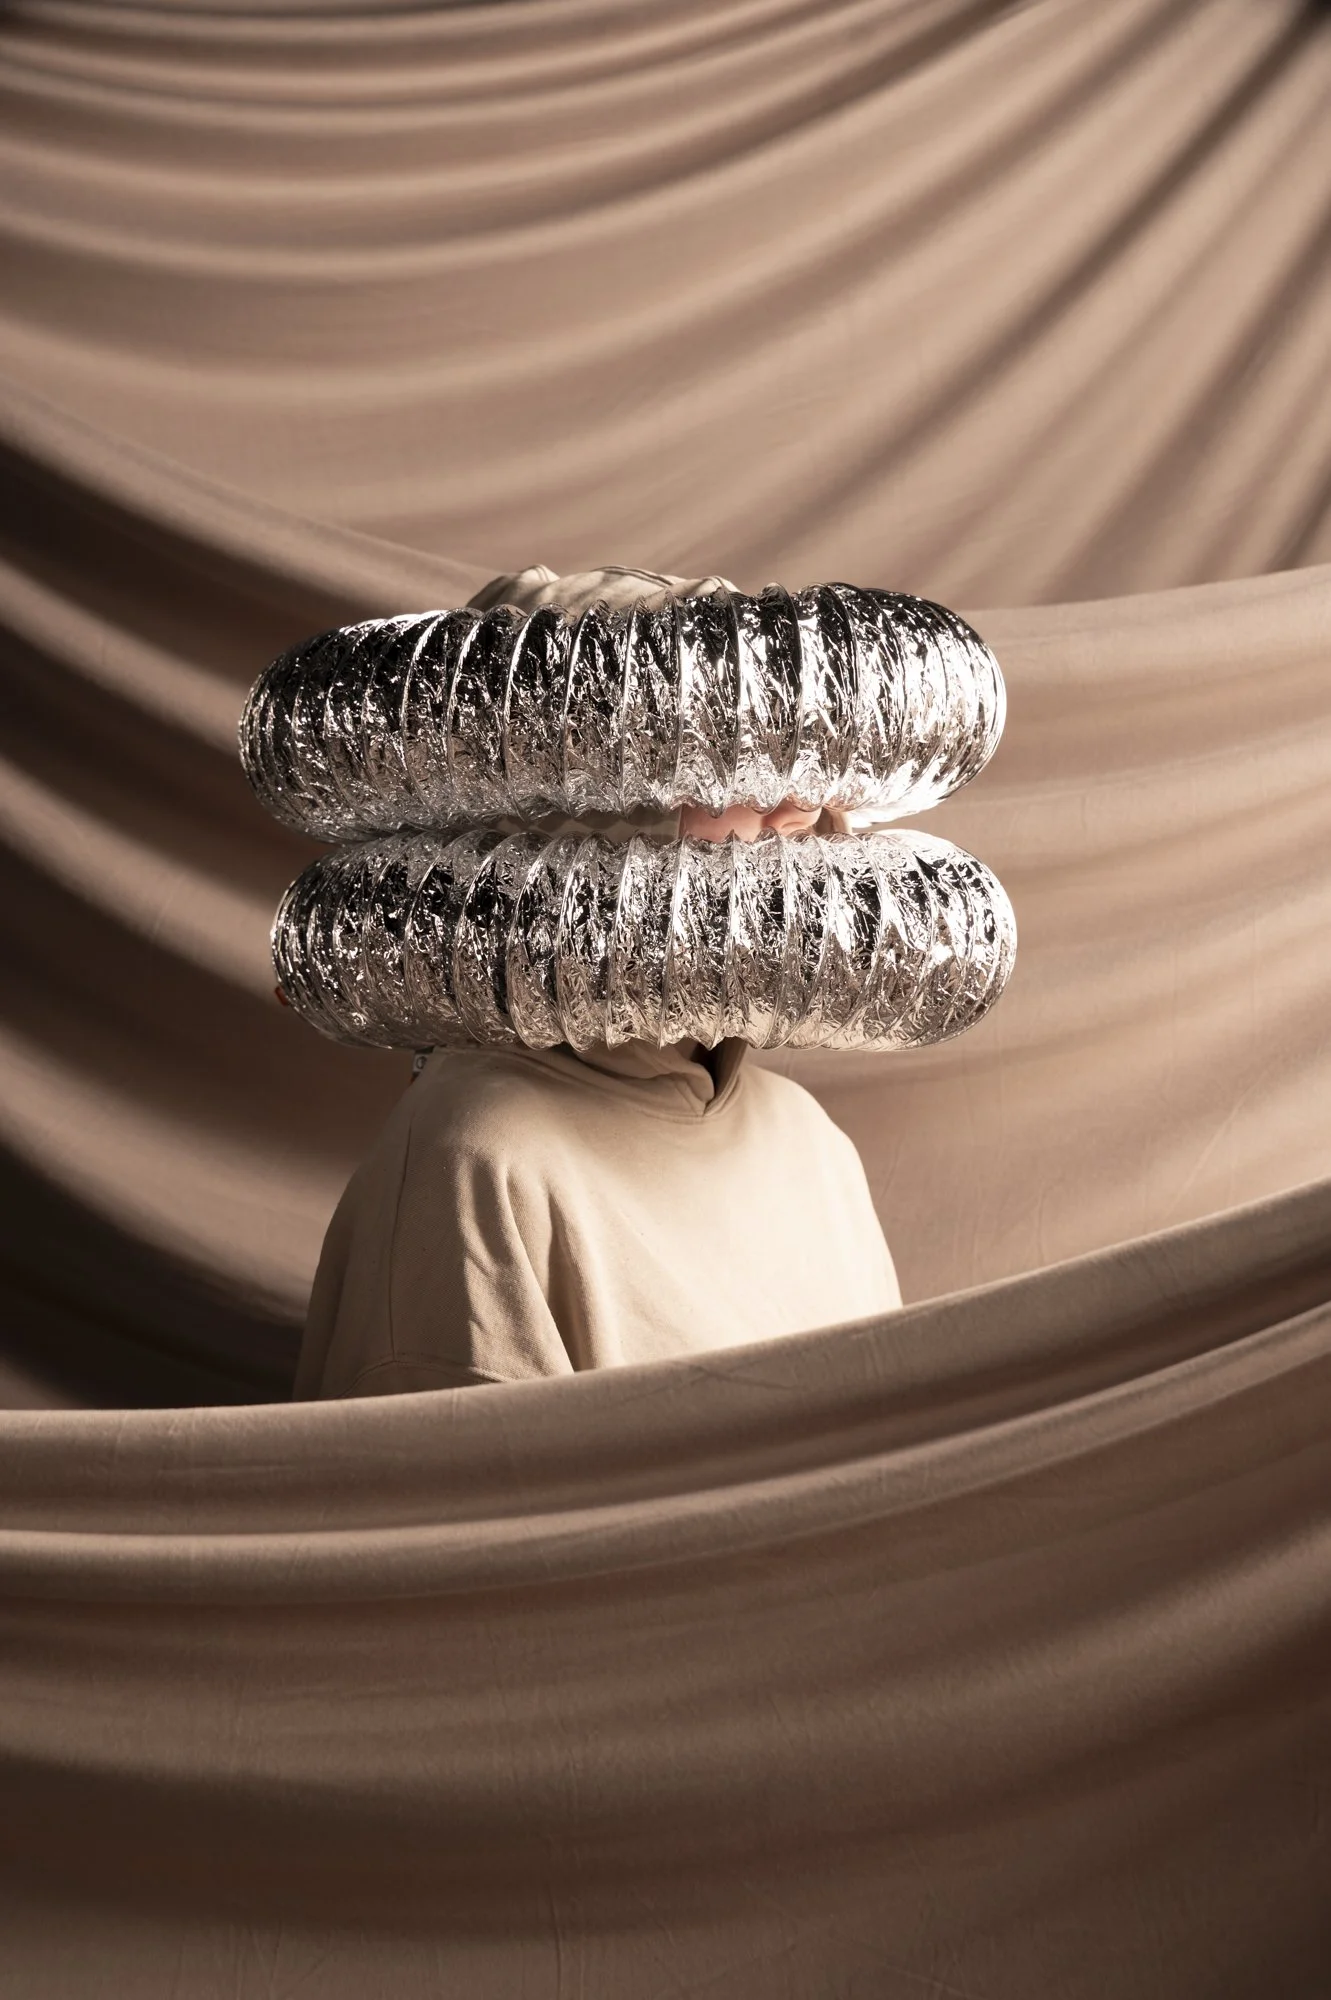
Shoot 2
Details:
When: 28/10
Where: Home (Indoors)
Lighting: 1 x Godox AD200 + Strip box
1 x Godox AD400II Sq soft box
Shoot Plan:
IDEA?
Inspired by Ziquian Lui and and old shoot of mine (pictured here) I would like to investigate ways in which I can use fabric to draw focus to specific parts of my subject as well as to create a more interesting set.
Reflection:
What worked?
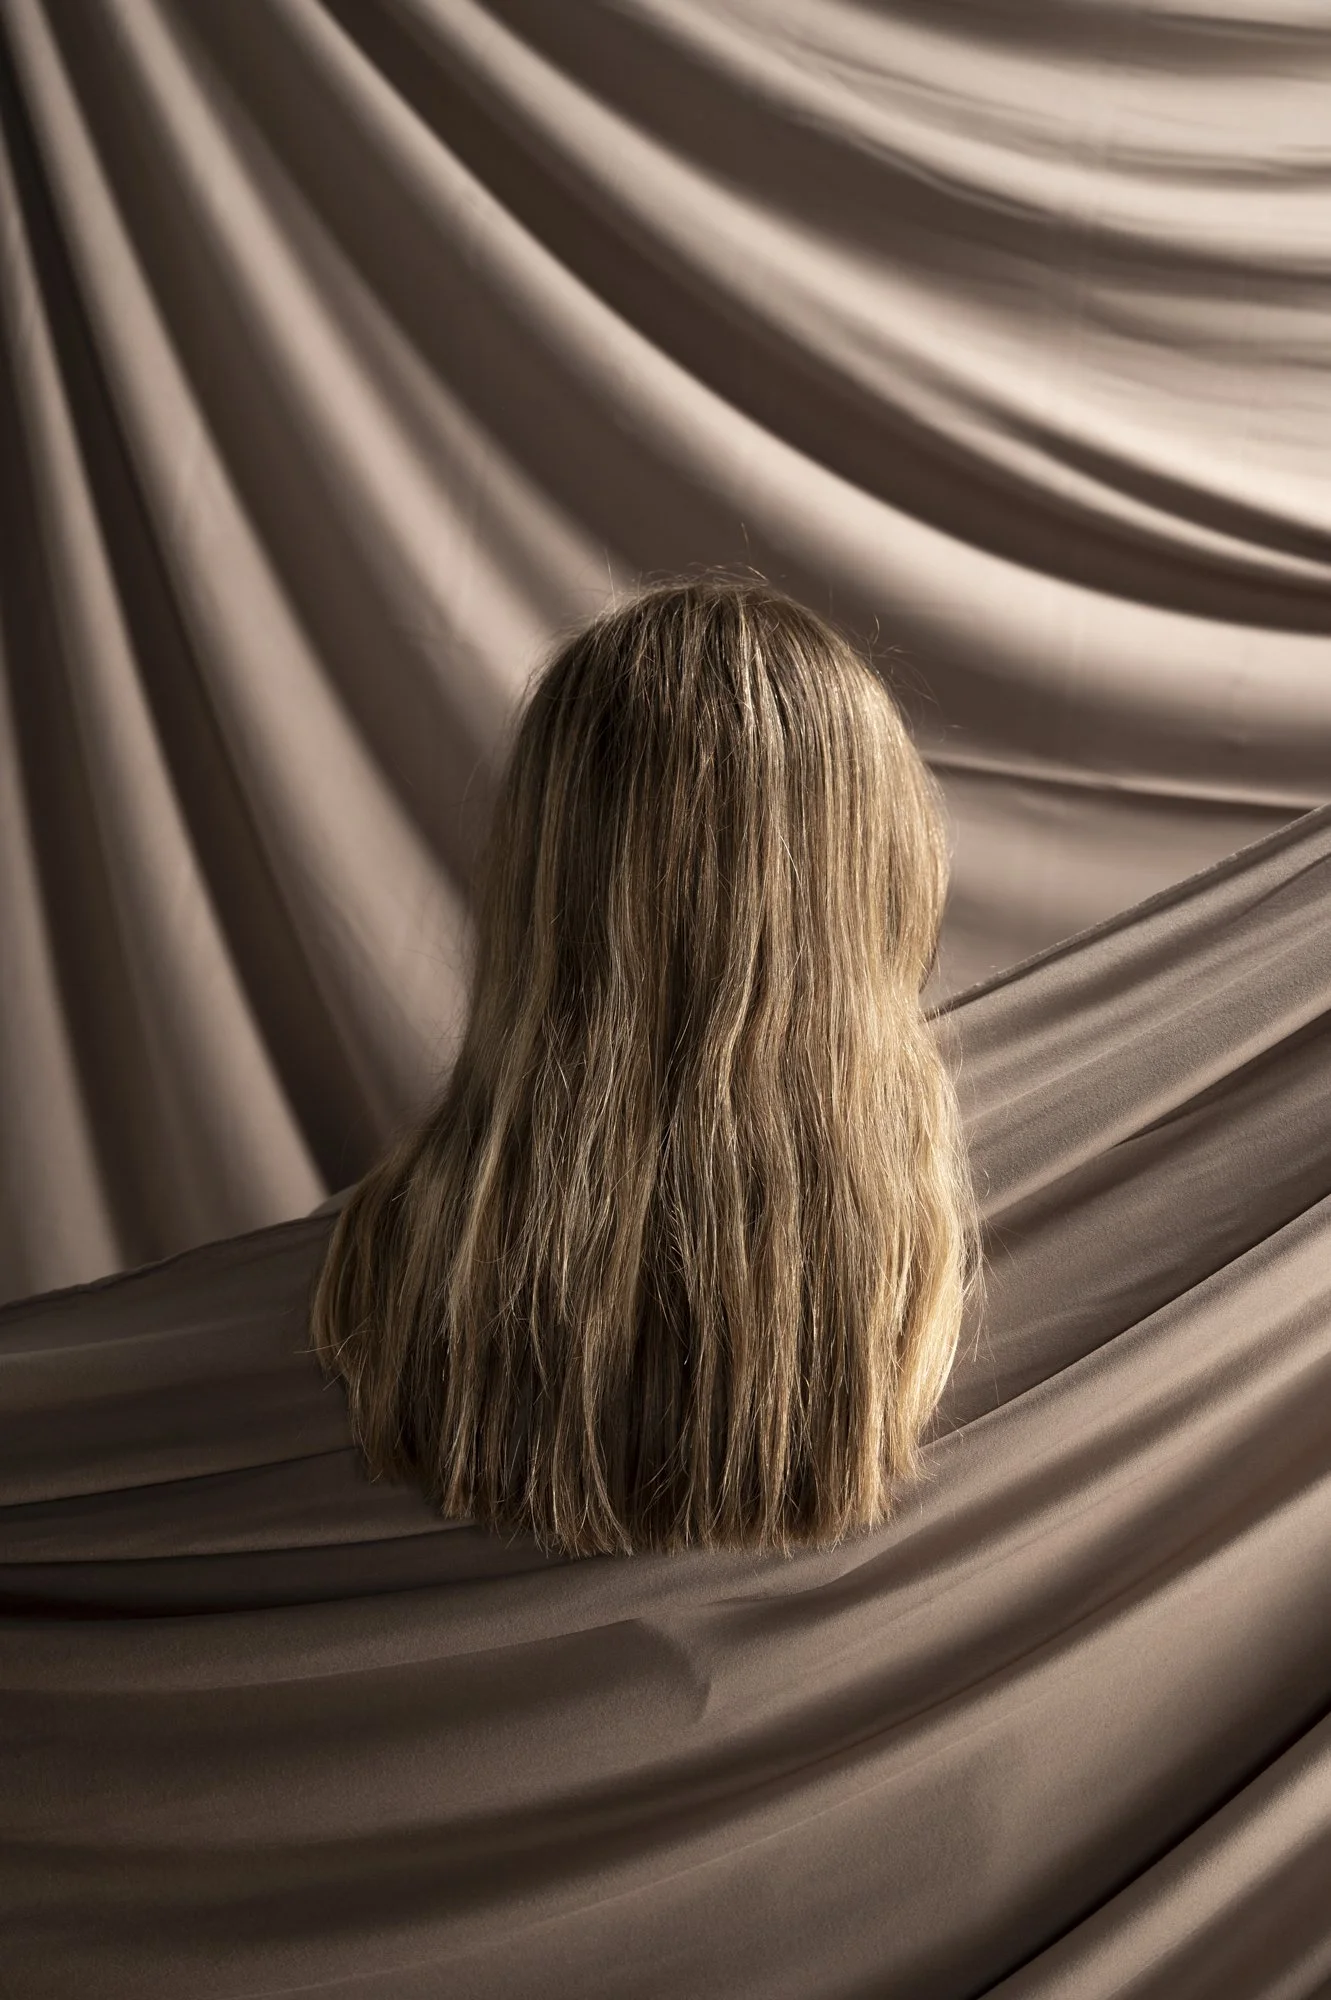
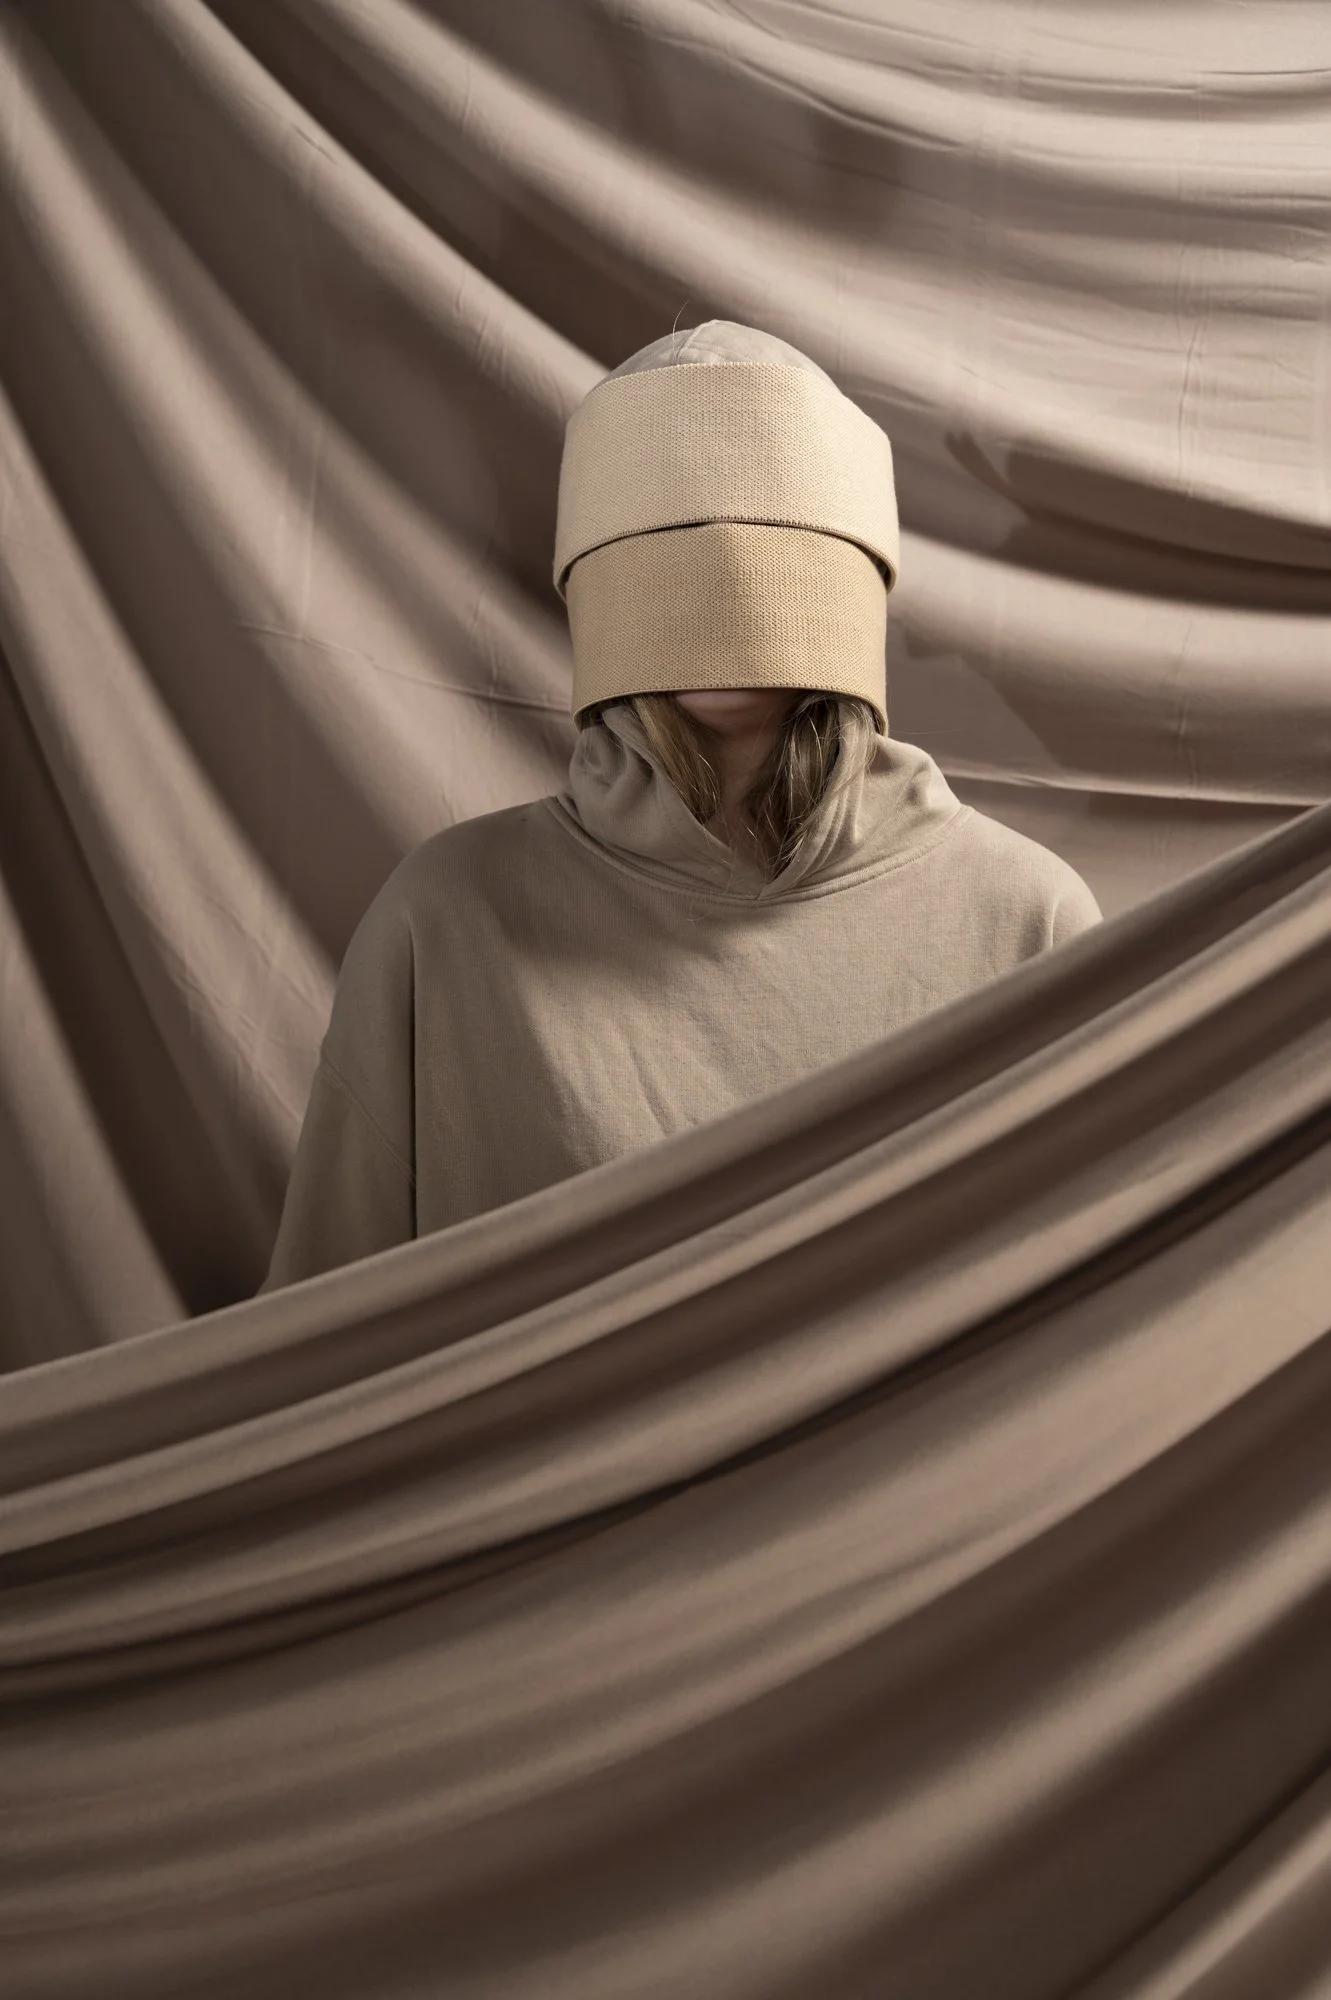
Isolating parts of the subject through use of the fabric worked really effectively. The neutral colour combined with the similar coloured hoodie allow the props adorning the subject to become the focus.
The folds of the fabric work well to create visual interest around the subject too. Compositionally speaking the fabric folds also create seemingly flowing leading lines that pull the viewers eye to the subject effectively. The flow adds a sense of movement too.
The separations between the fabric layers builds depth within the photo which works well too.
What didn’t work?
The lighting across the front fold of fabric in these images is too light, though this is largely due to the limited space and the light already being at its lowest setting.
Doing this series as a self portrait did not work very well. Due to injury navigating the stands with a timer and with restricted vision (due to the props) was difficult and made focus and timing problematic. Next time I will use a model.
What next?
From here I would like to refine this setup in the studio with a model. Having more appropriate equipment and space will allow me to create a more deliberate scene.
Lighting wise, I would like to explore the use of slightly more side on light as this will help bring out the shadows on the fabric folds, enhancing their form as well as creating a key light for the subject/prop.


styling plan
The plan for future shoots. This should enable me to experiment with isolating particular parts of the subject as well as create more interest in the background.
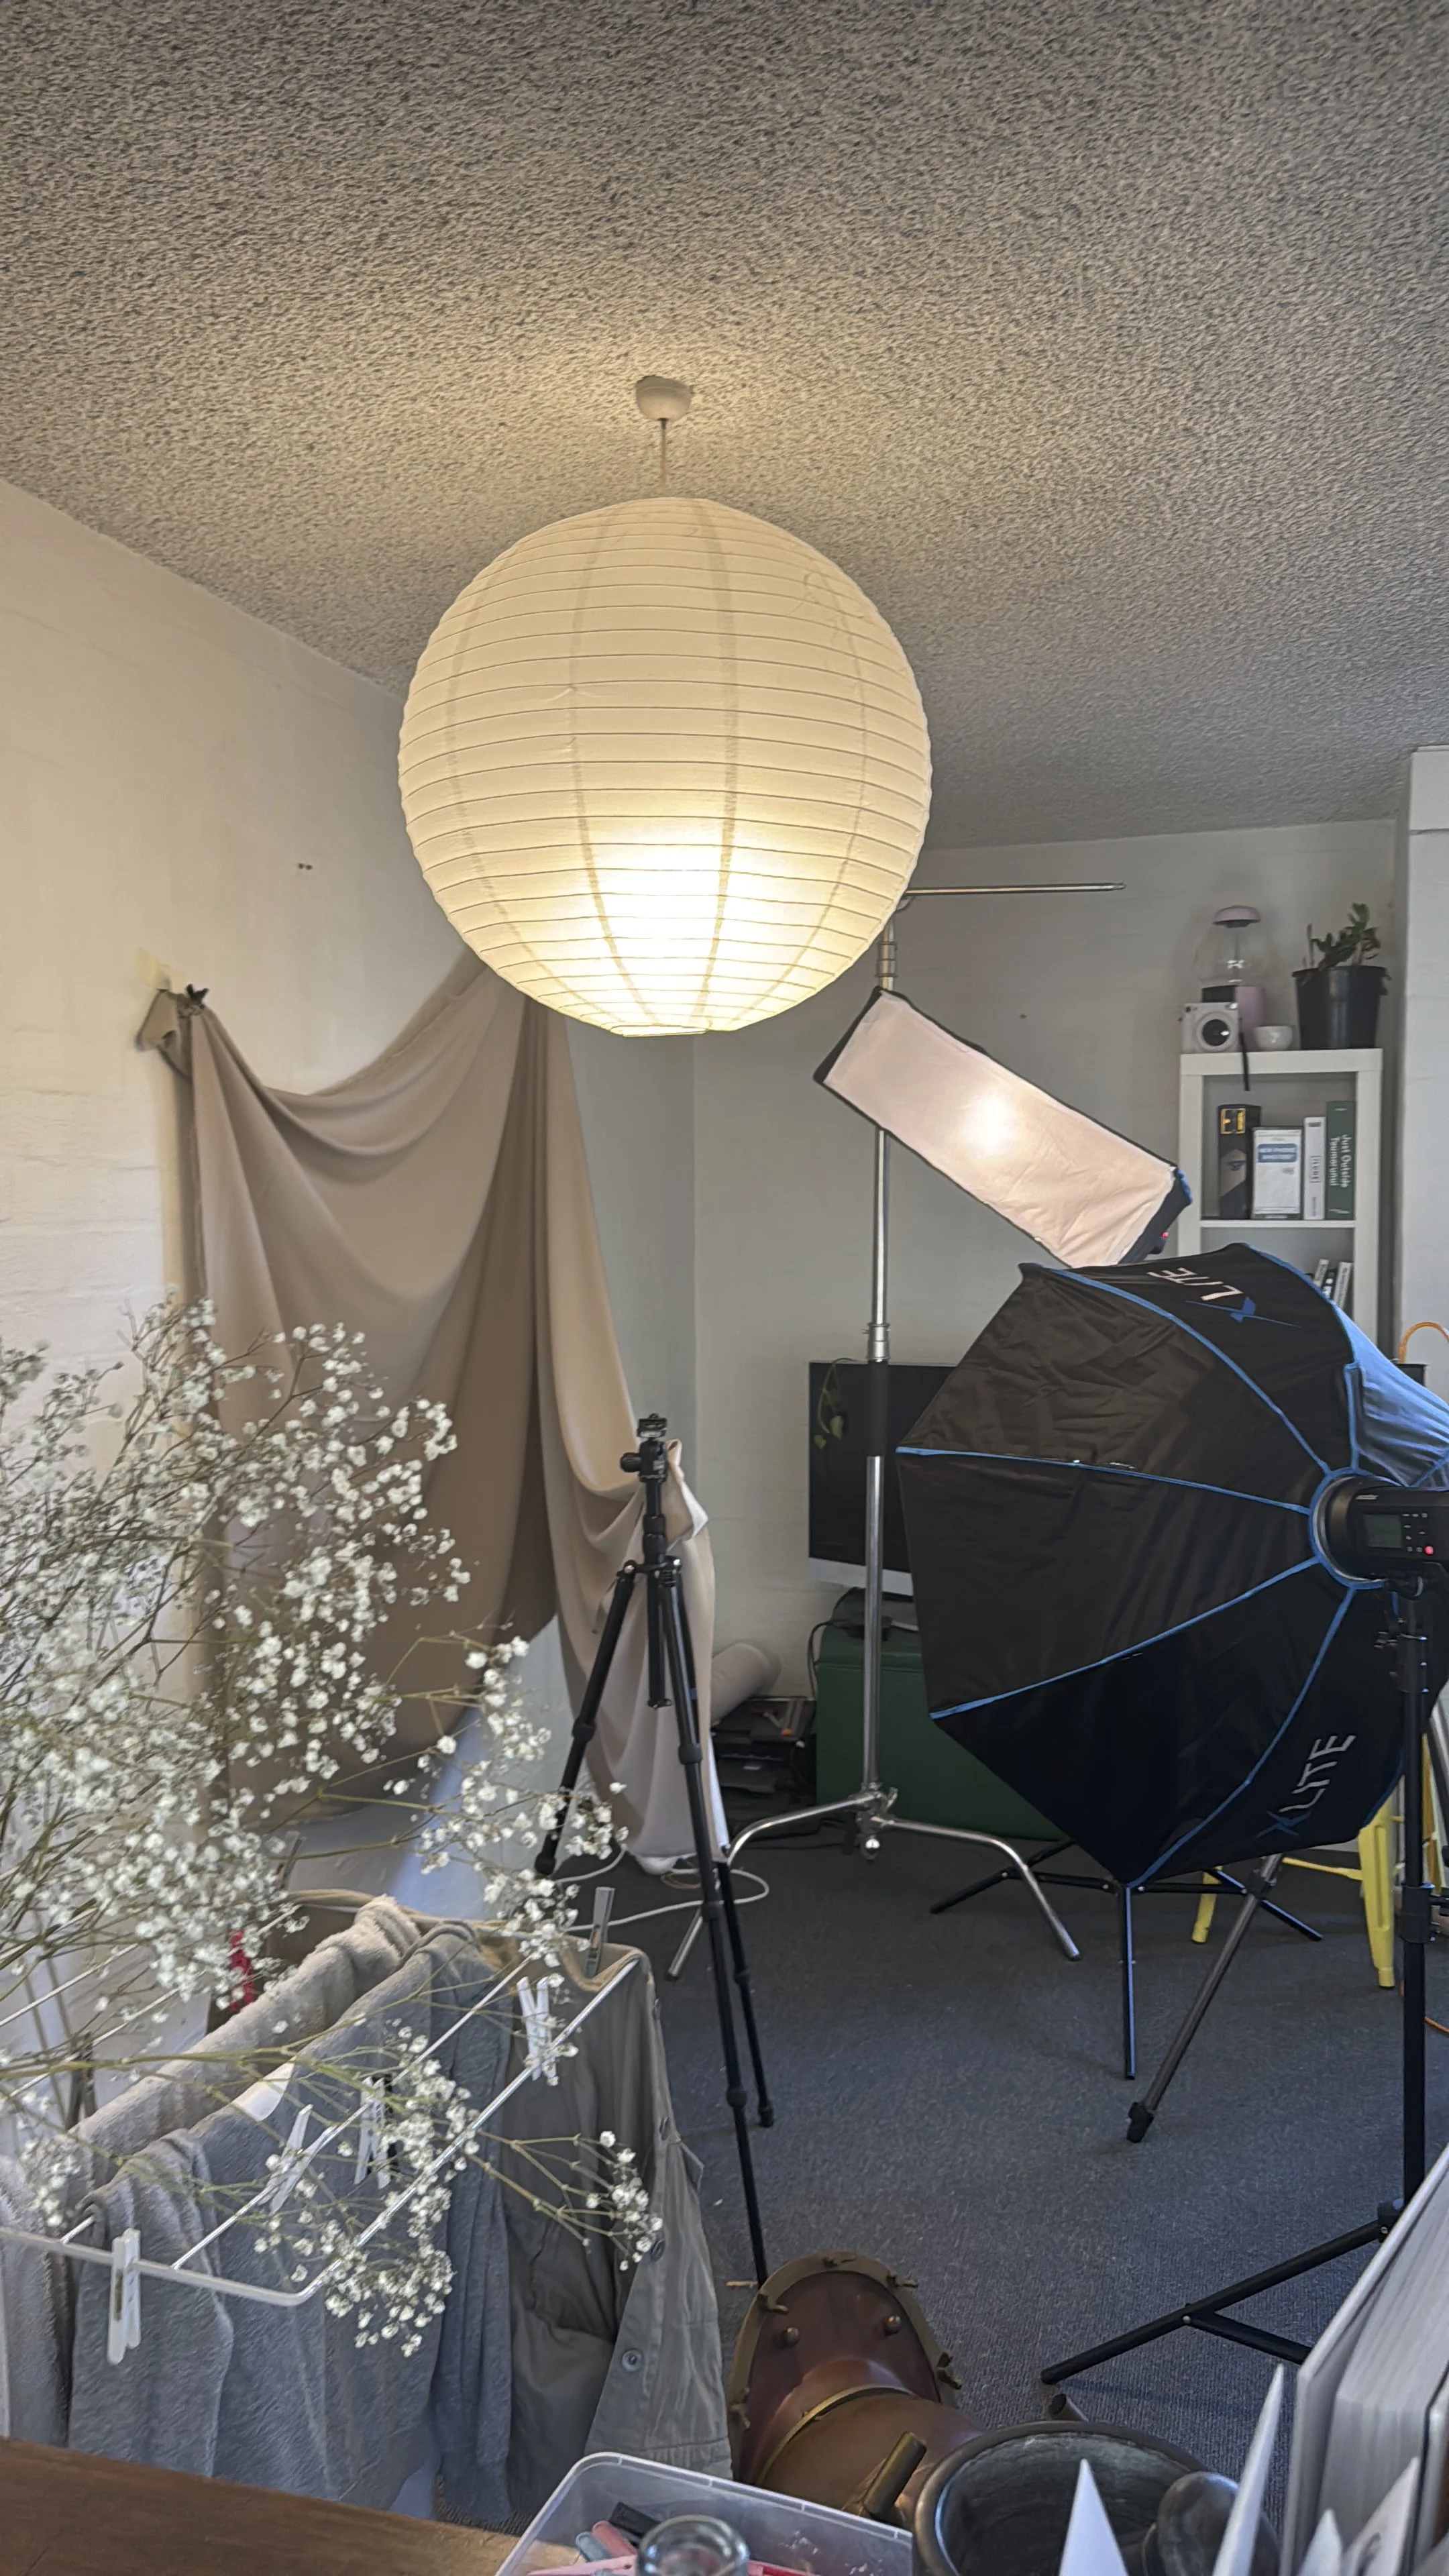
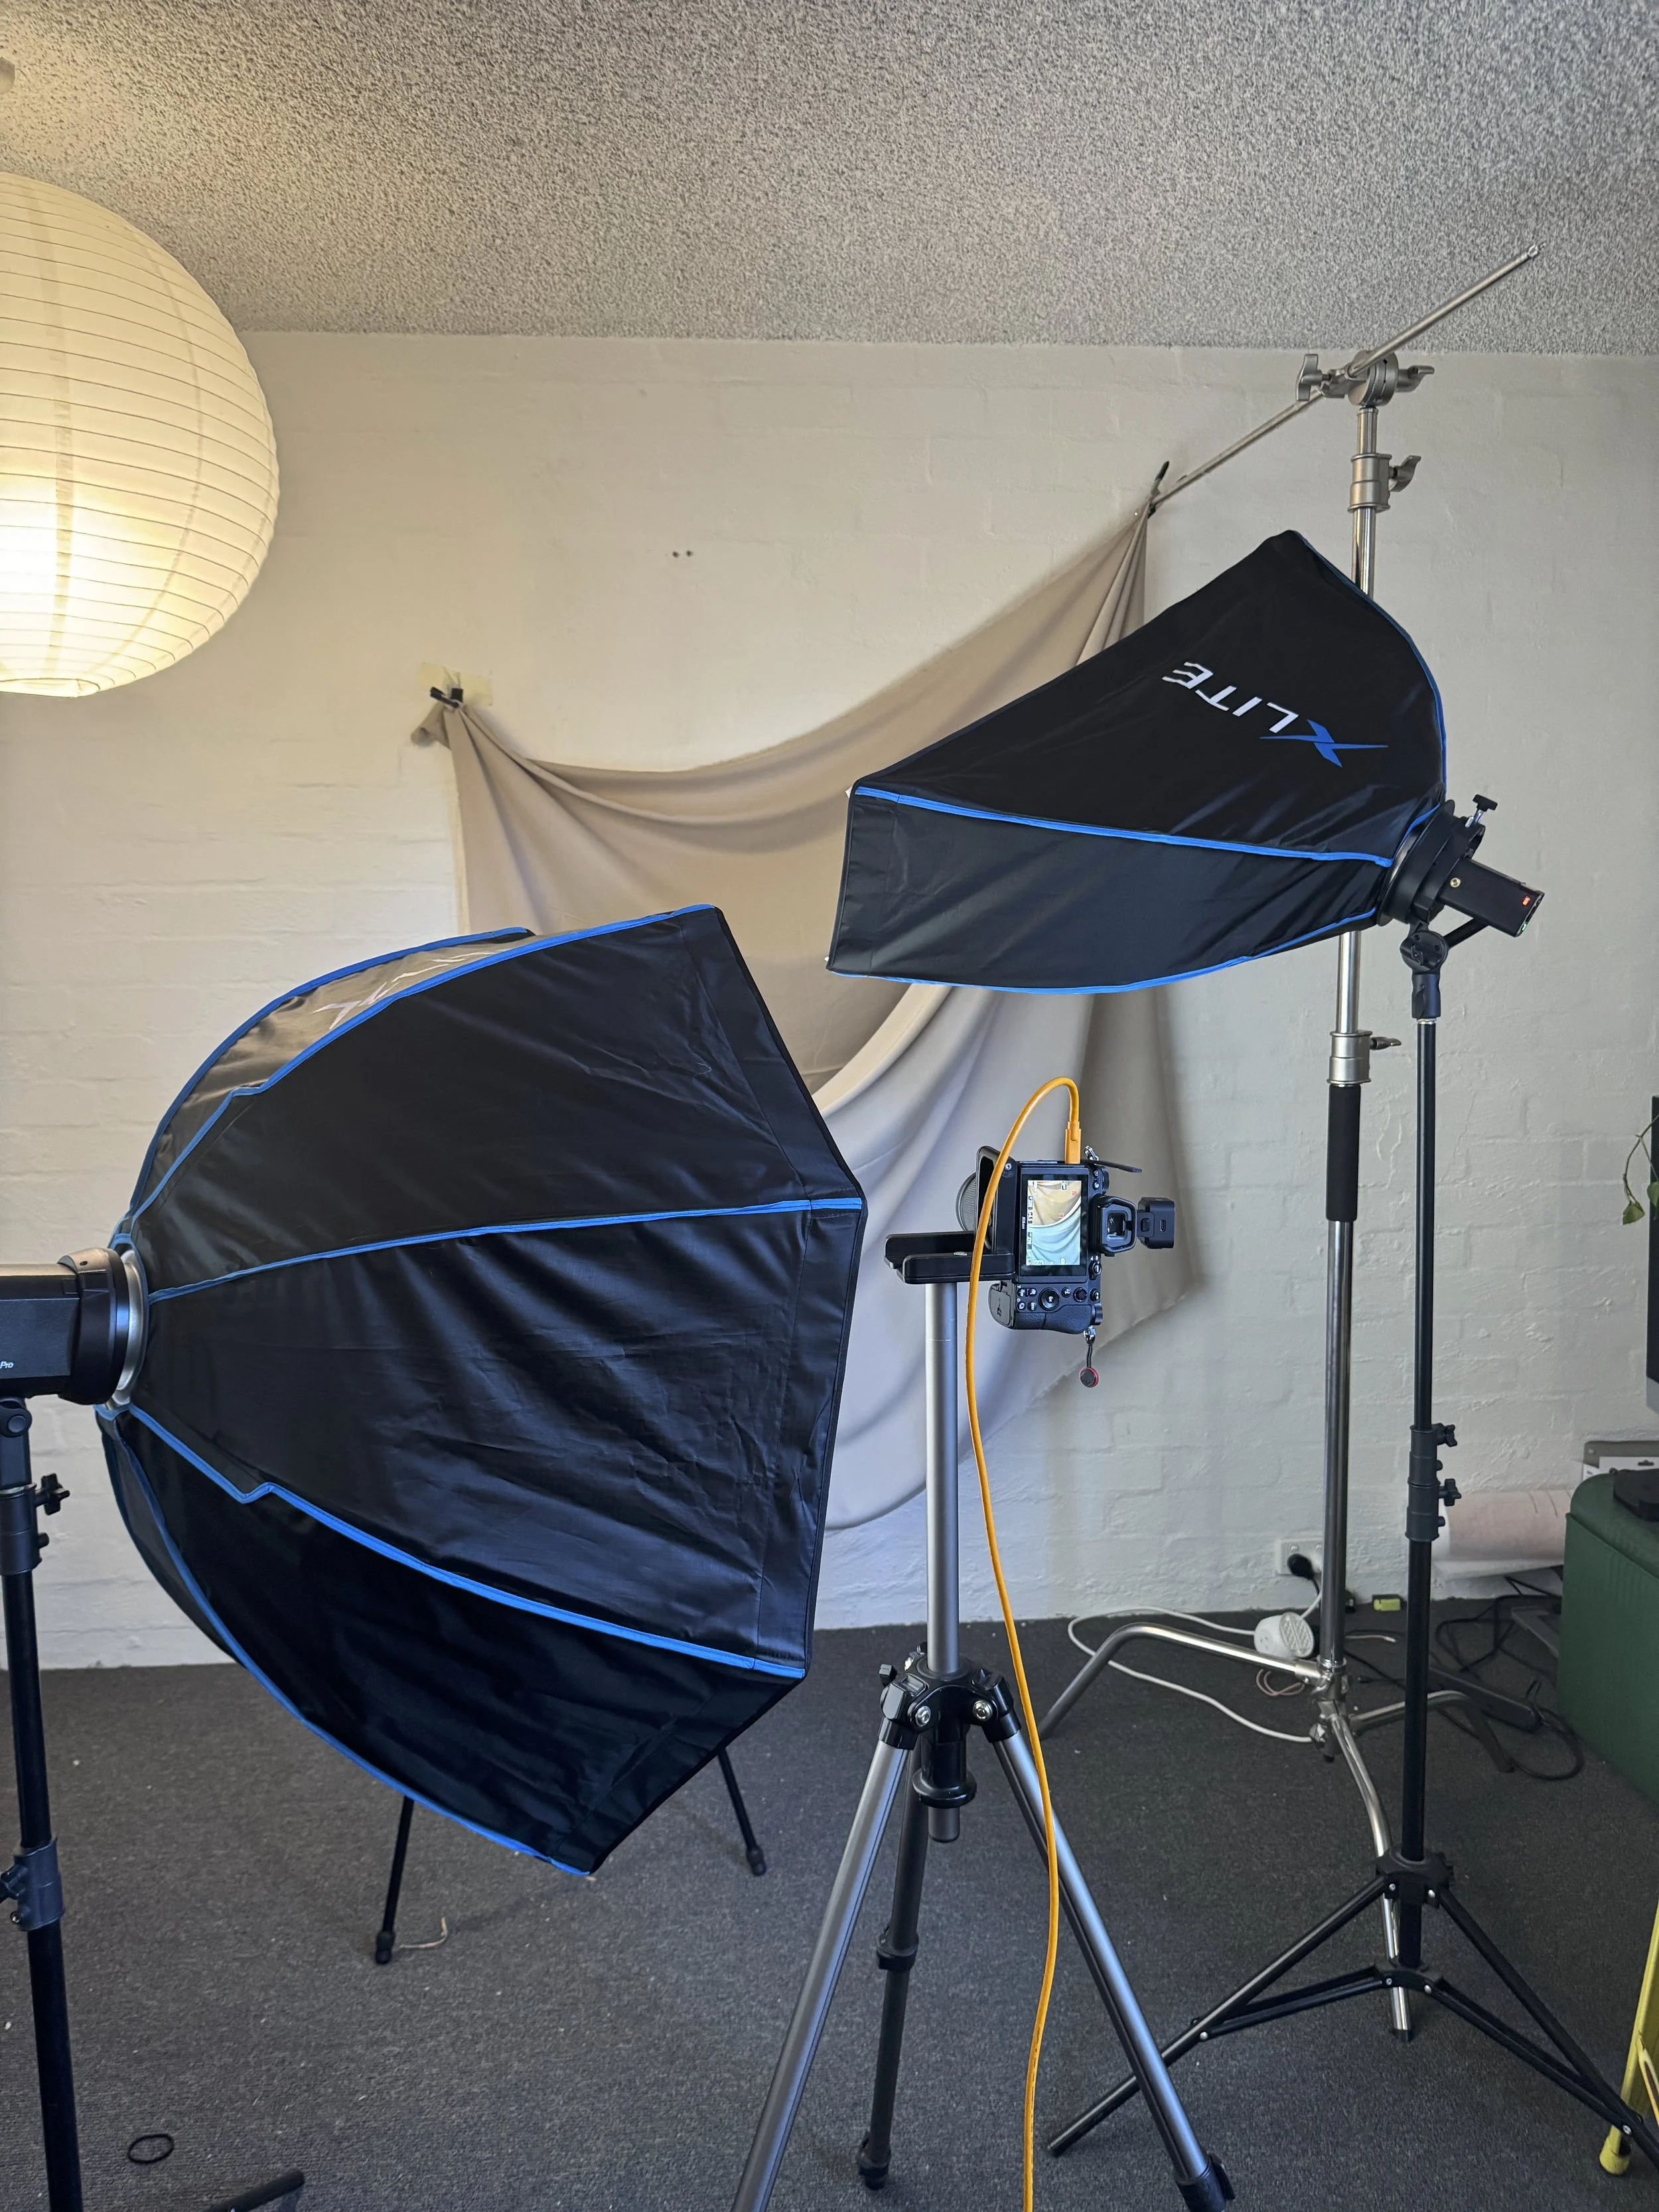
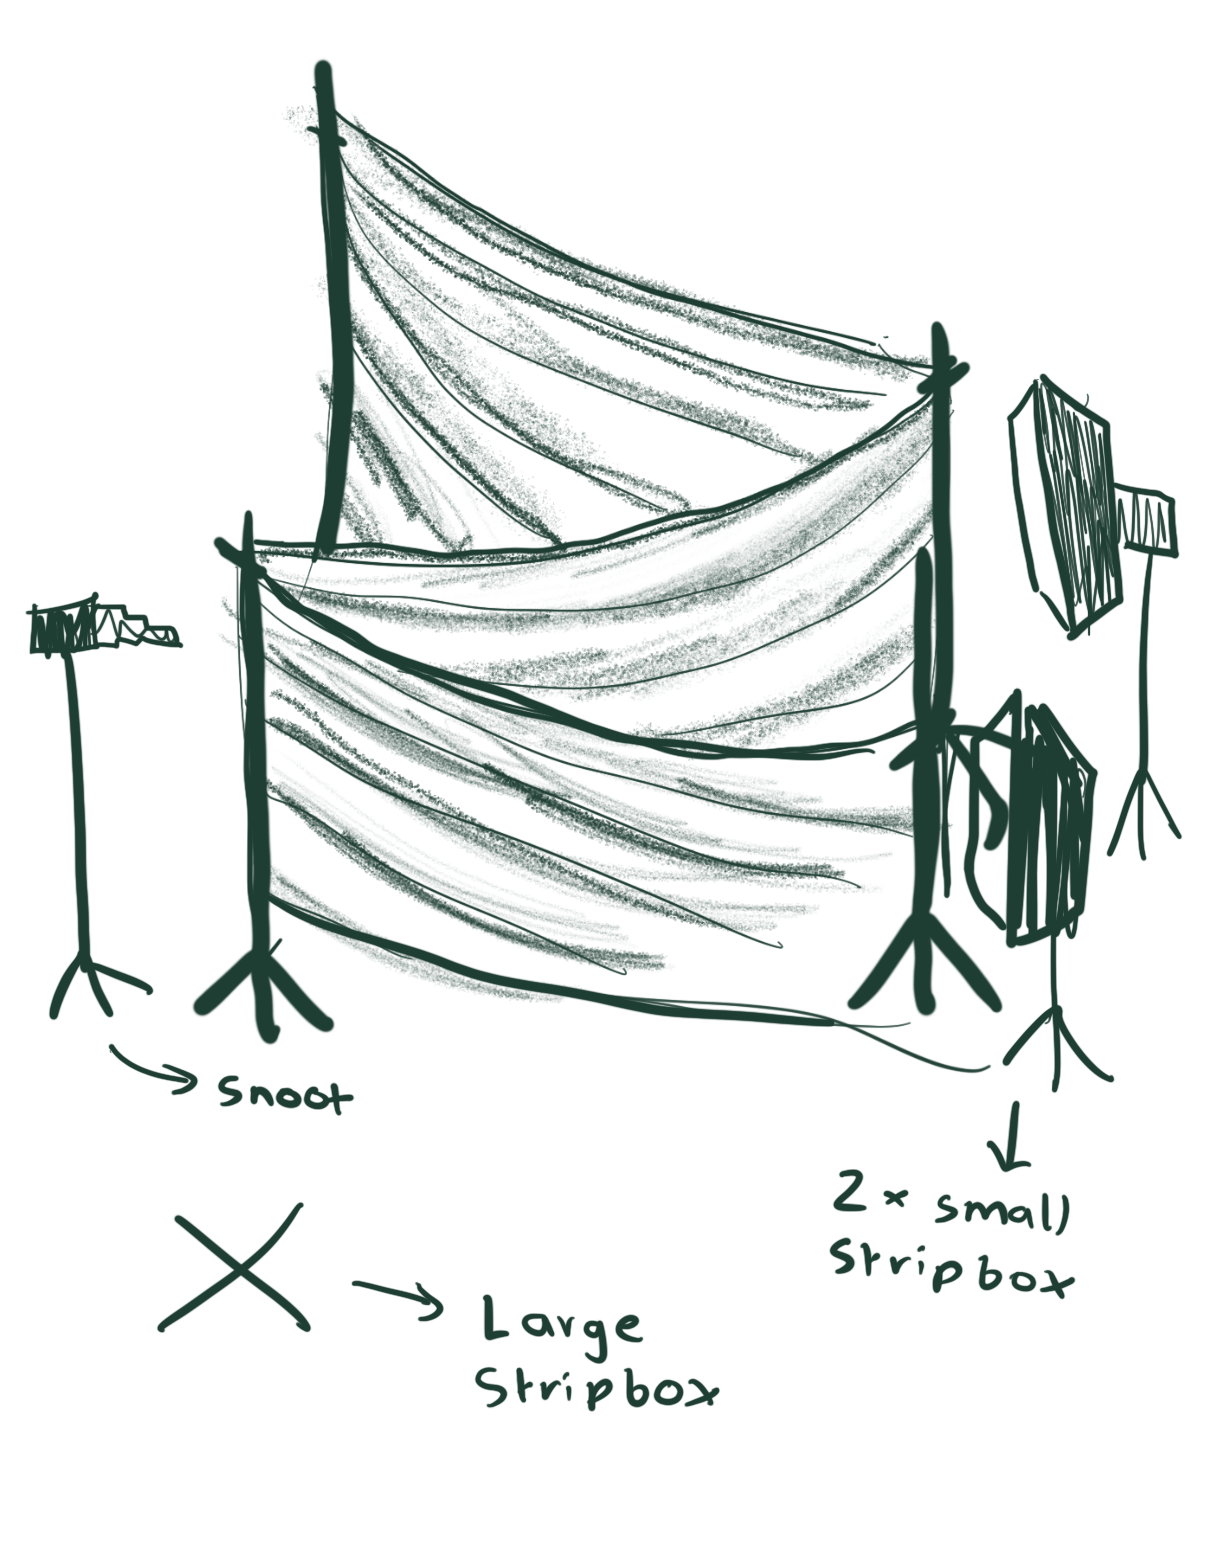
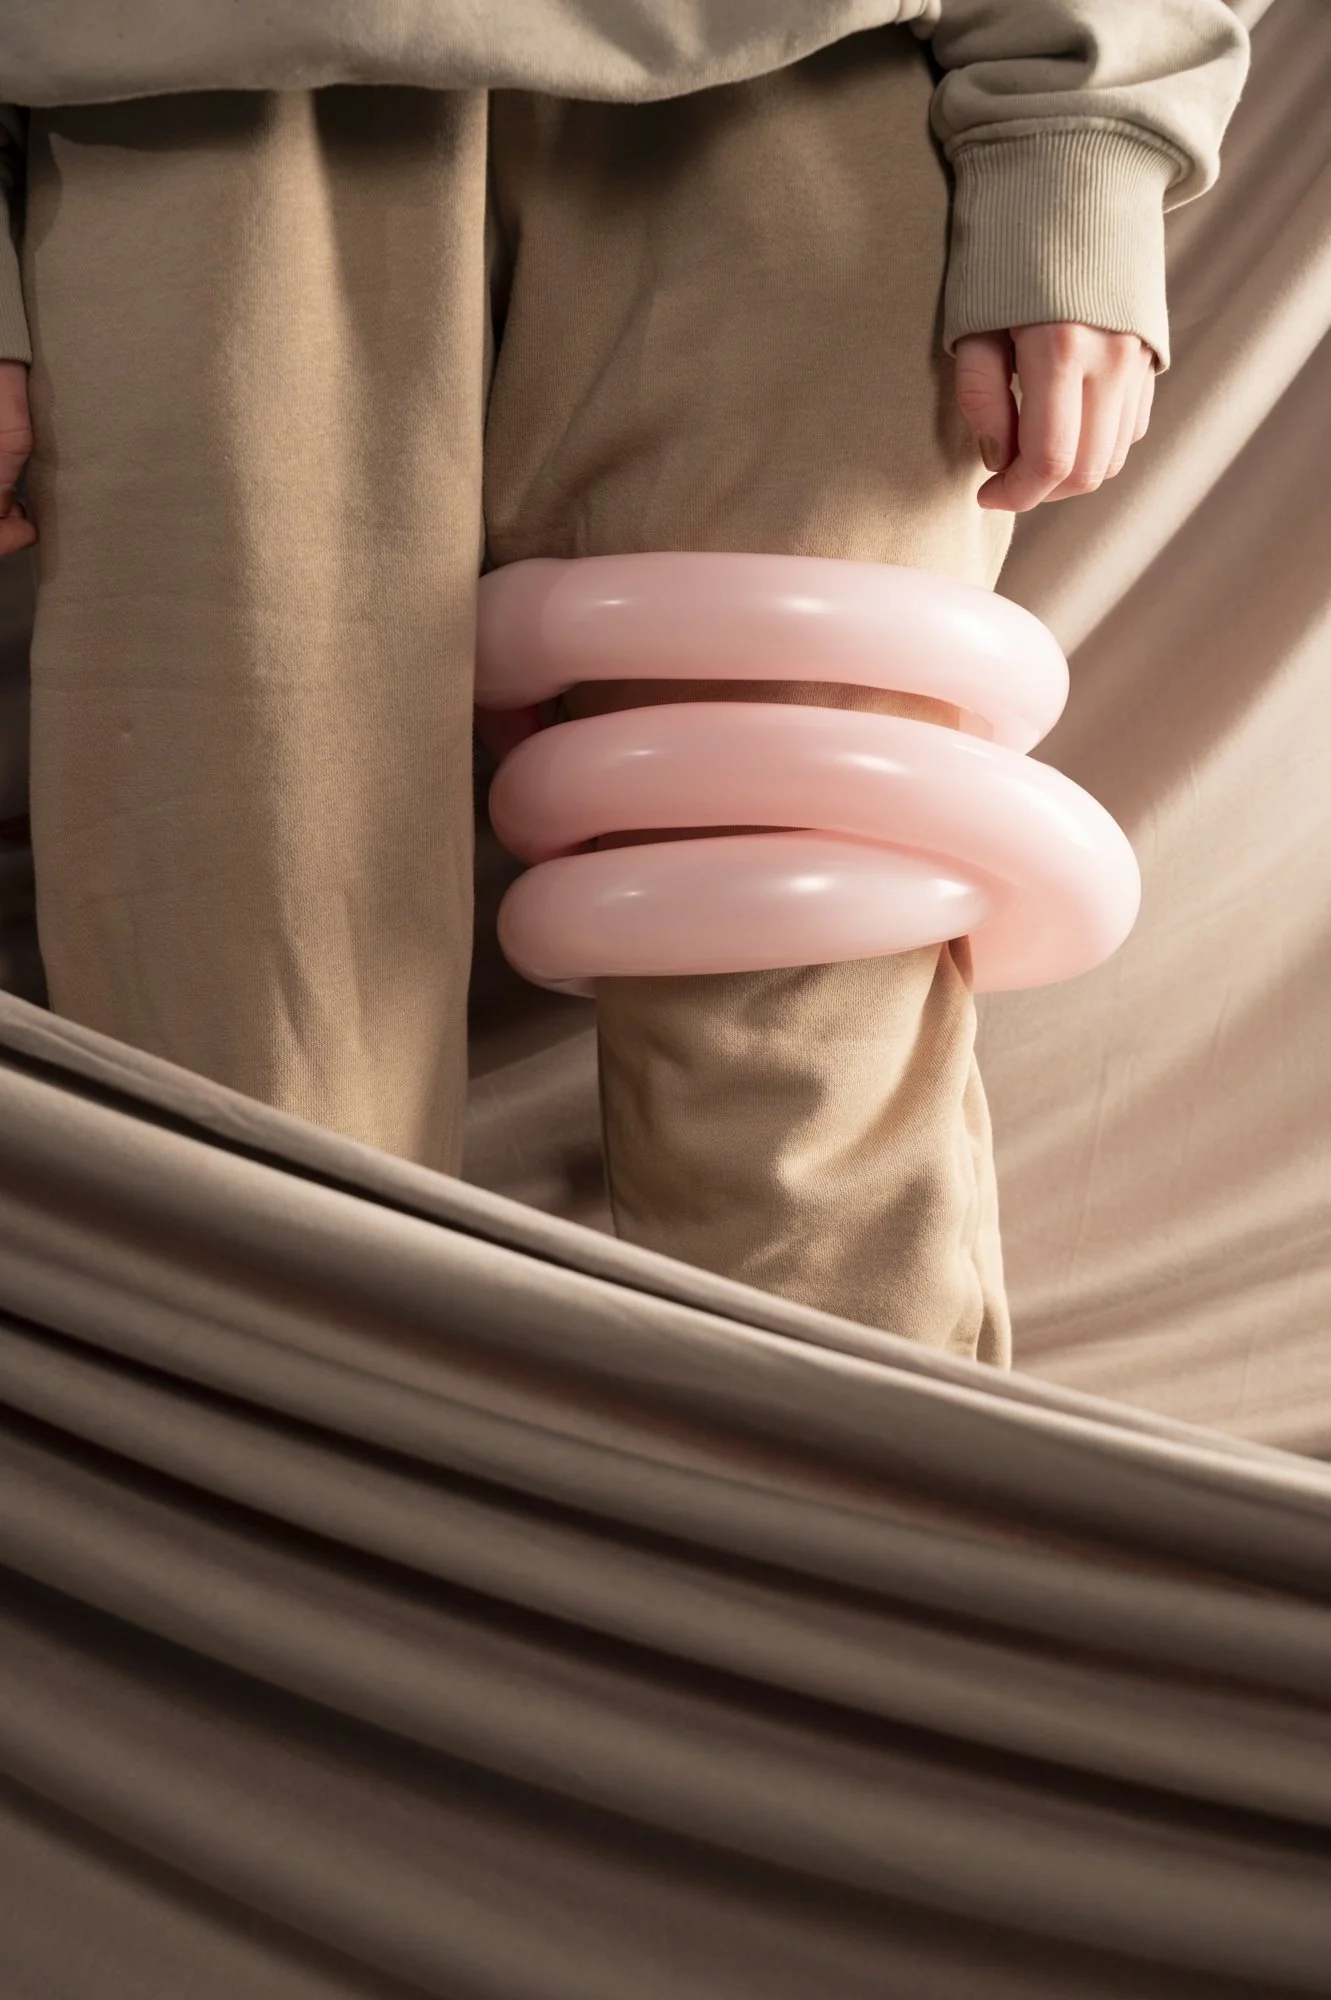
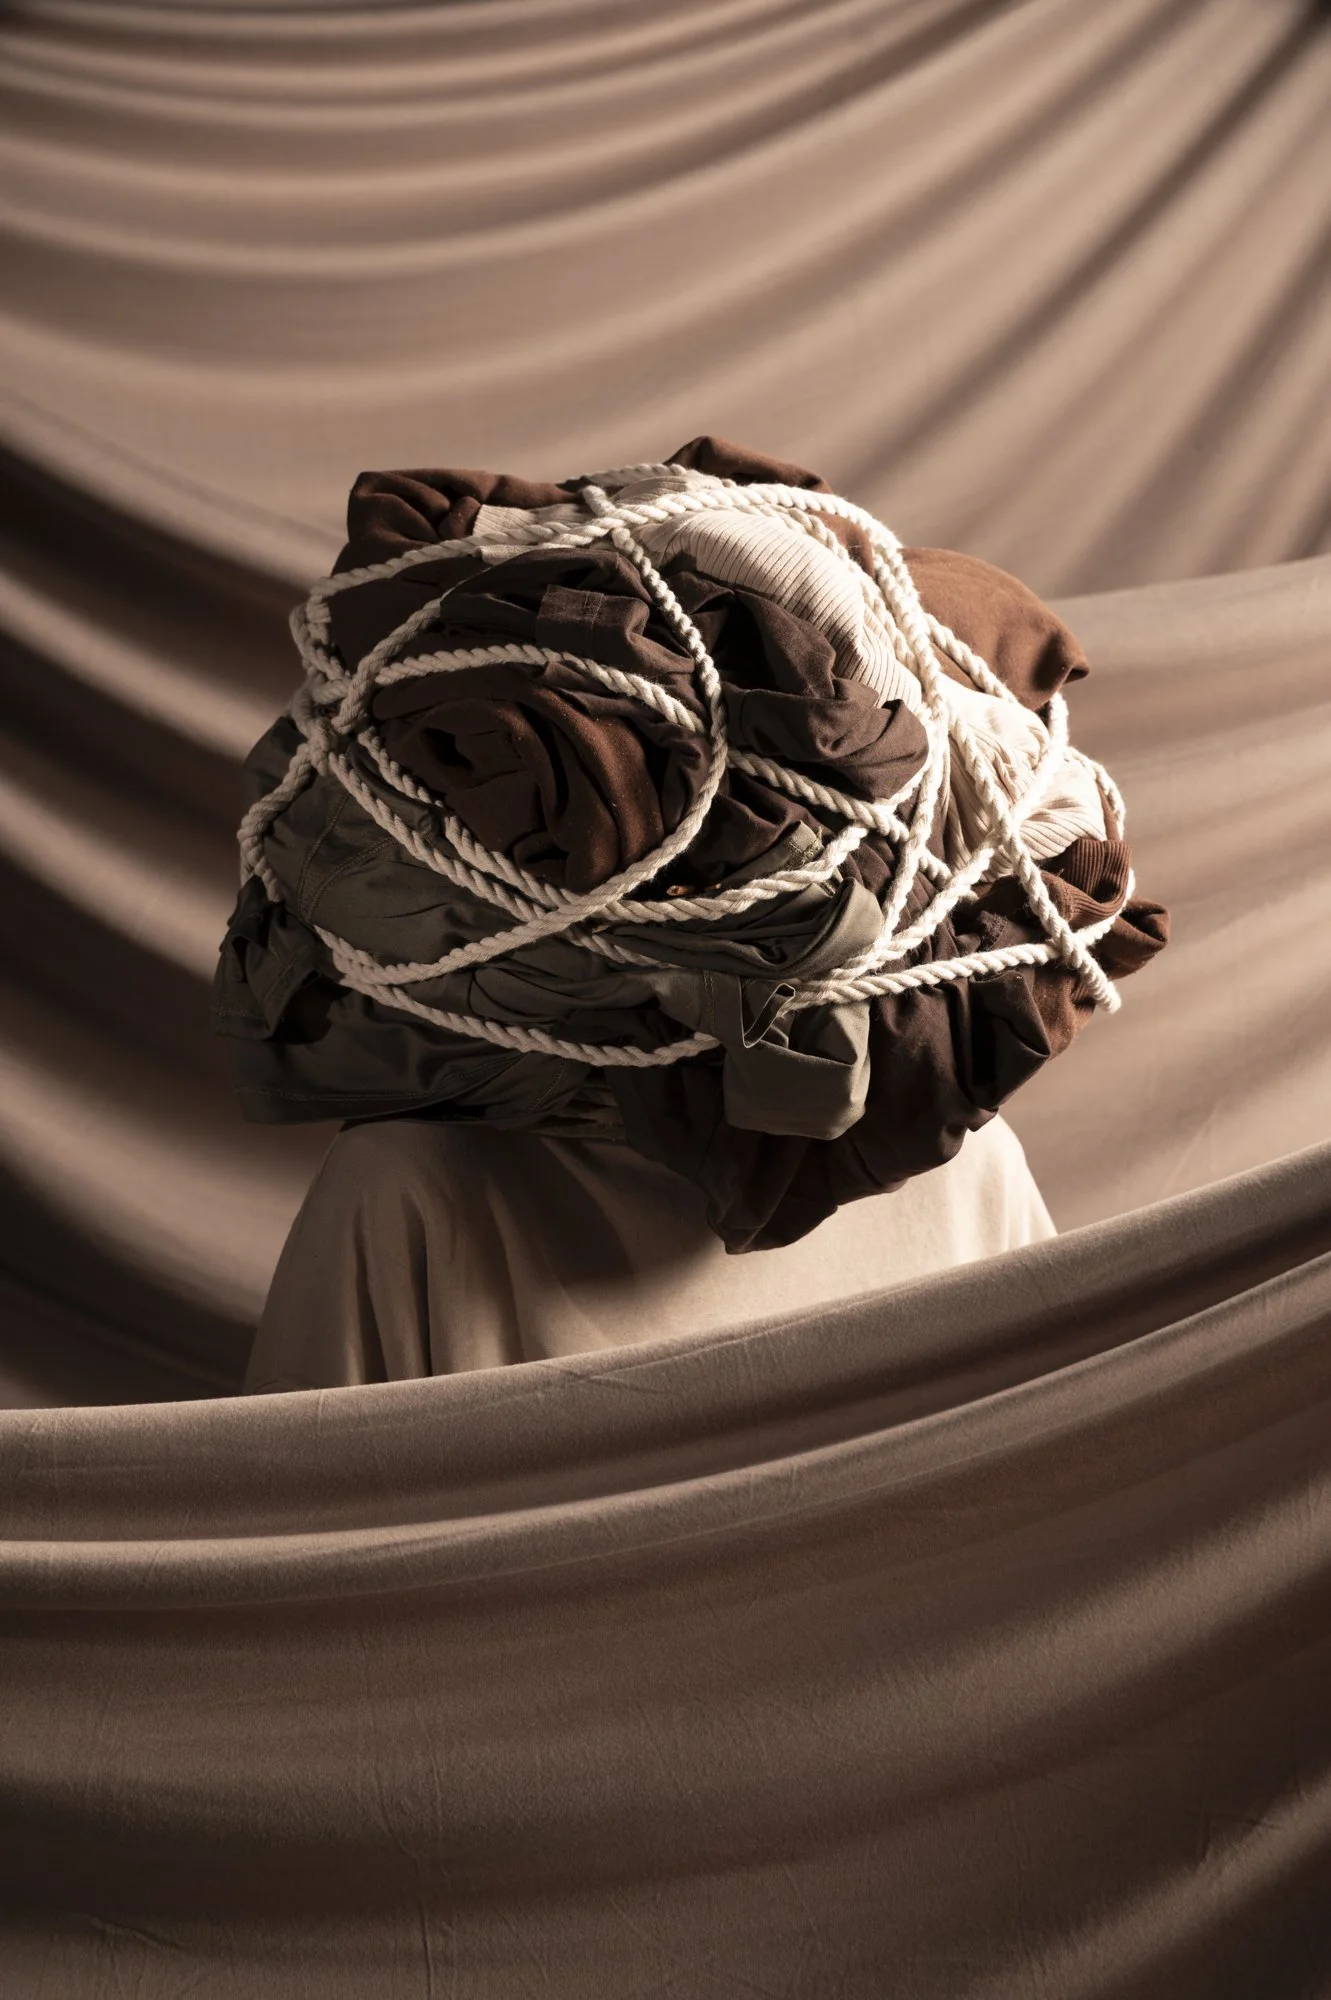
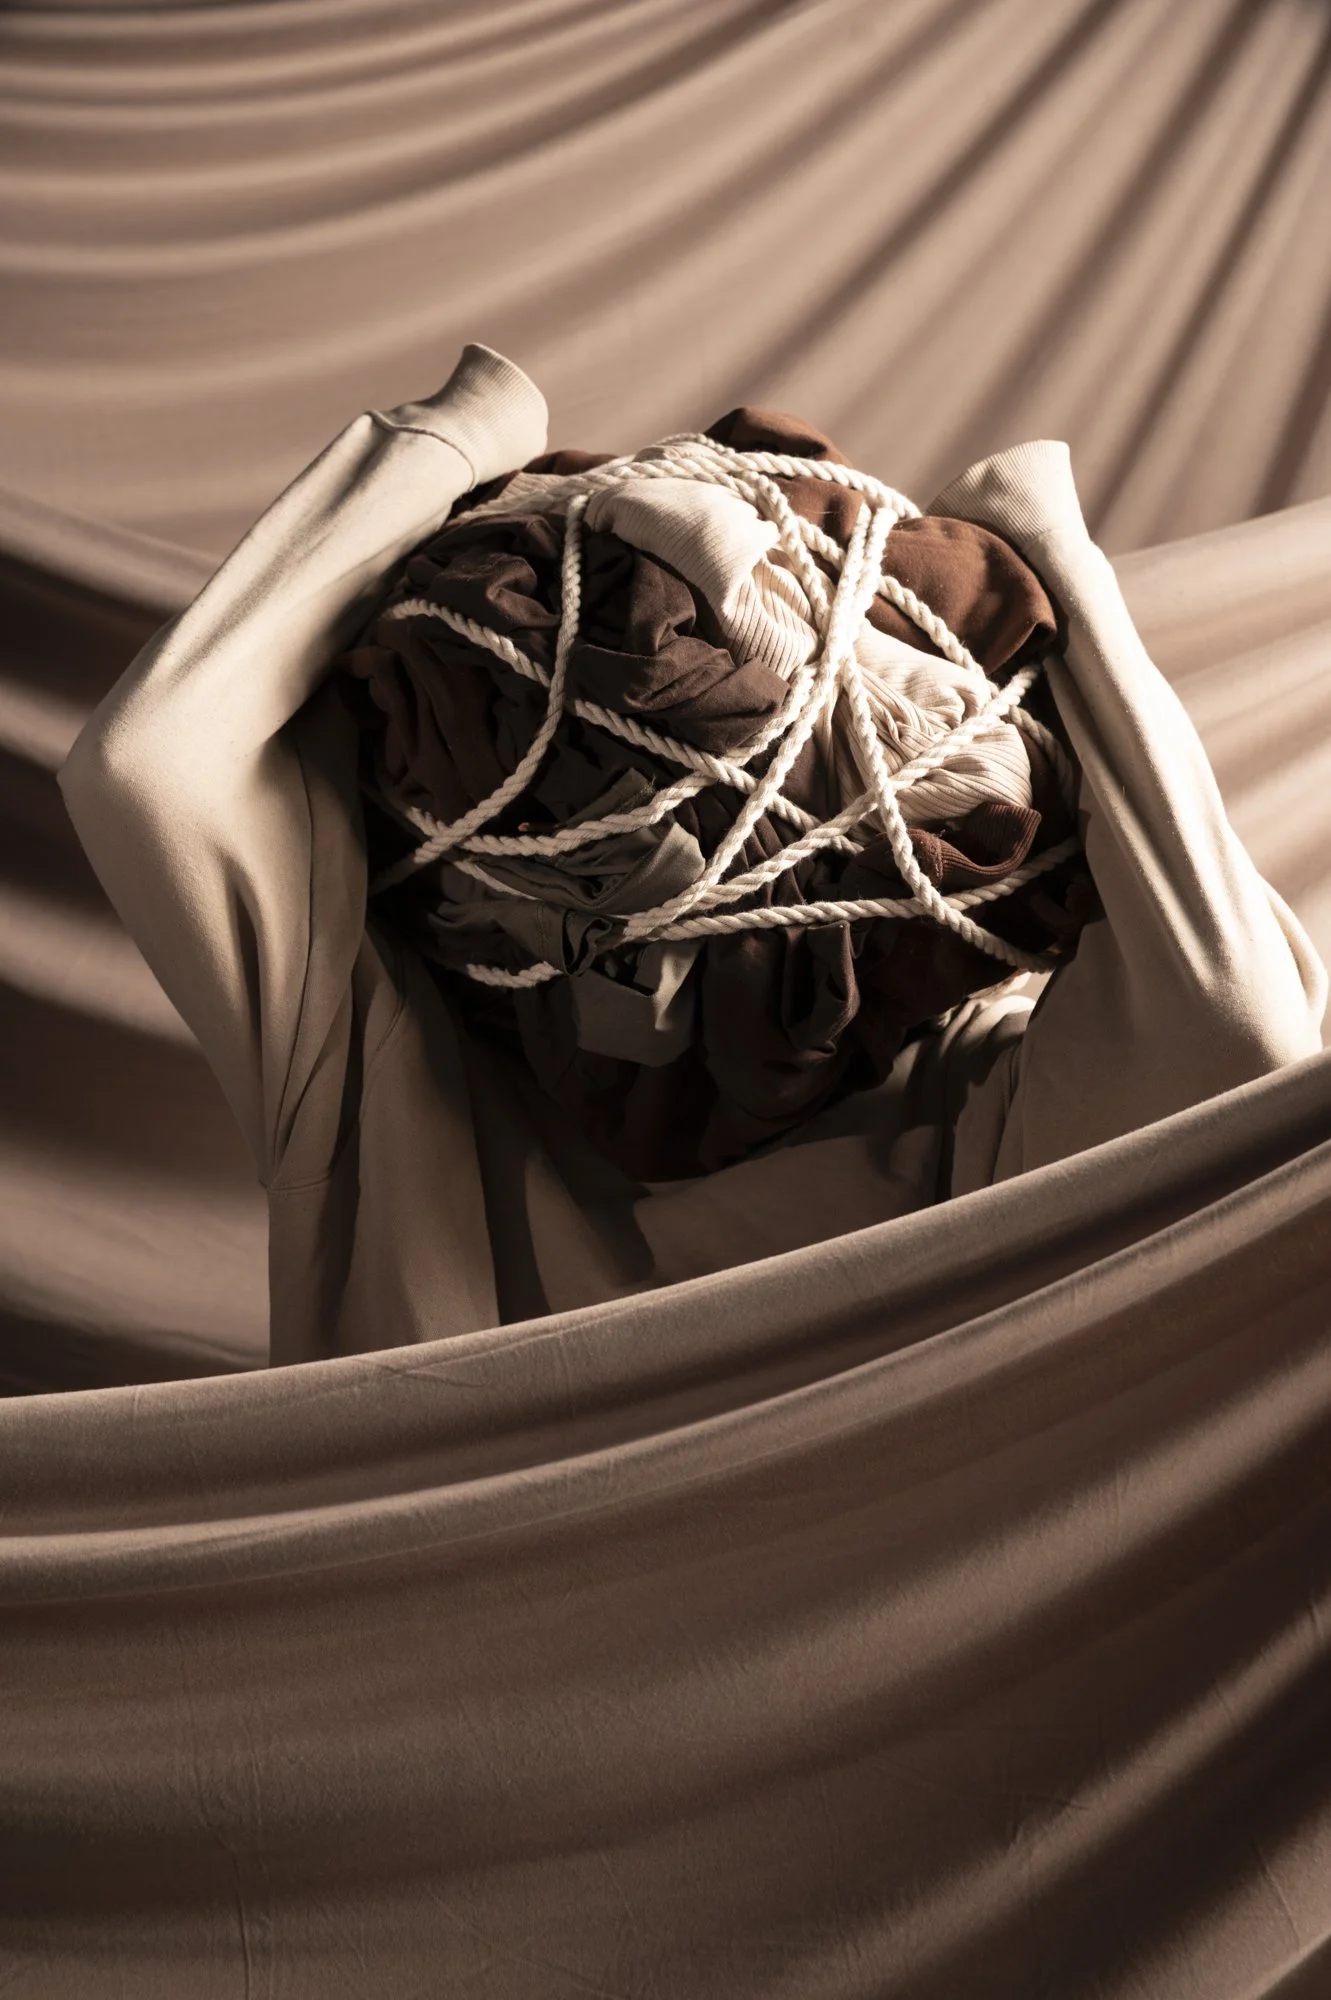
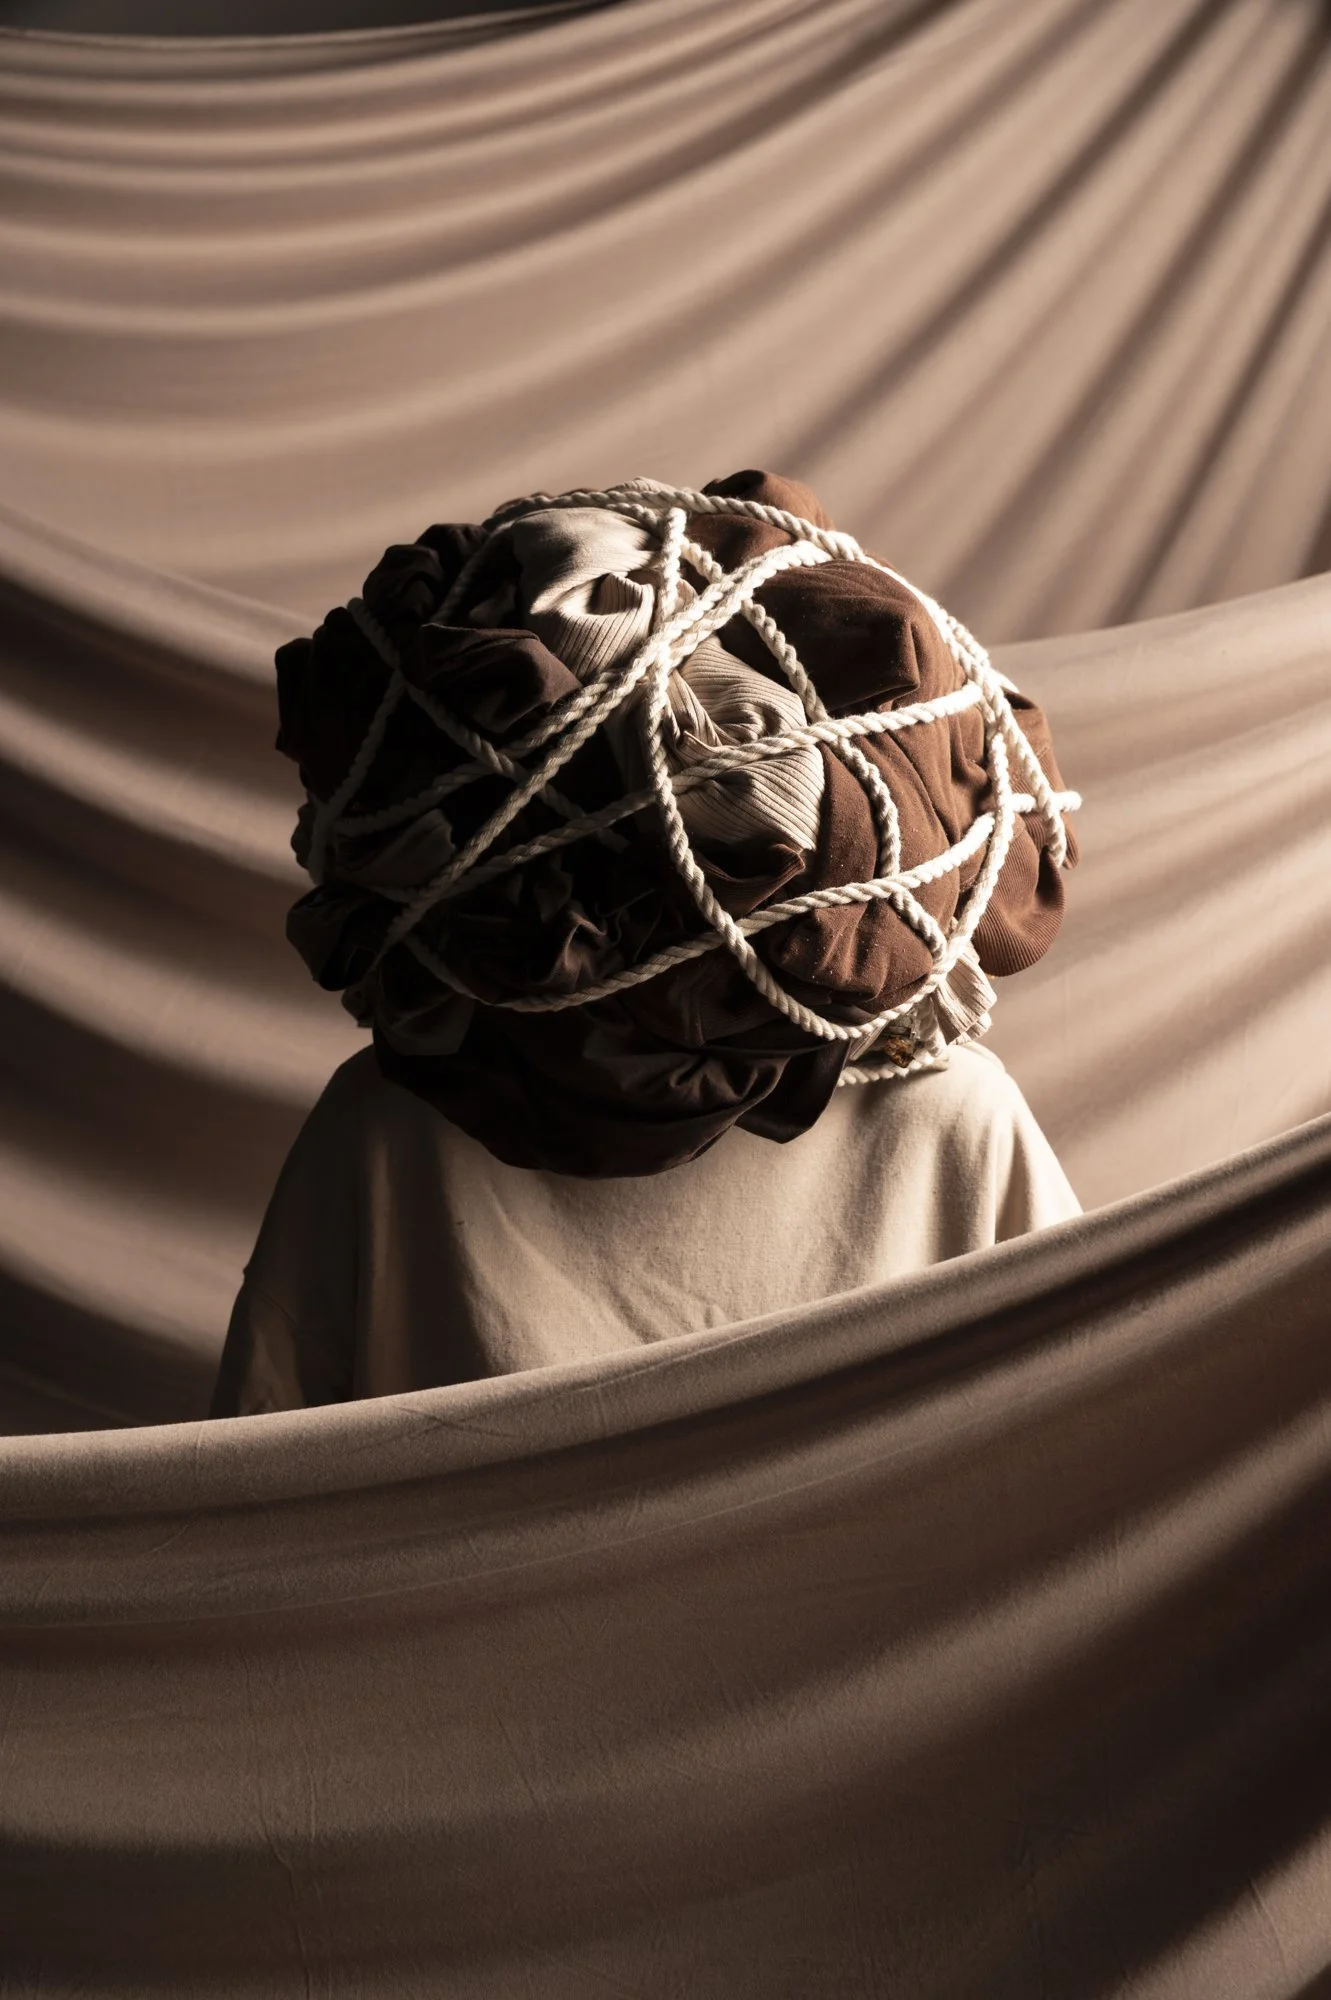
Shoot 3
Details:
When: 31/10
Where: PSC Studio
Lighting: 4 x Elinchrom Lights
2 x Small Strip Box
1 x Large Strip Box
1 x Small Snoot + Grid
Shoot Plan:
Lighting plan:
First small strip box as key light down onto subject from the side. The side lighting will also assist in sculpting the fabric folds.
Second Small strip box to sculpt the fabric in the foreground.
Large Strip box front on as a fill
Snoot to spotlight some of the props when needed.
Styling:
Fabric suspended between 5 C-stands and light stands.
Reflection:
What worked?
Shooting in the studio was a game changer for this photoshoot. It enabled me to control the lighting in a far more deliberate and slow manner as well as assemble the set in a more purposeful and practical way.
Using the side lighting worked far better than the previous shoot as more of the fabric’s drapery was emphasised due to more shadows being revealed.
The multi layered approach to the fabric’s positioning allowed me to create some depth within the image as well as isolate parts of the figure.
What didn’t work?
The height of the fabric was a bit of an issue with some of the larger props as the wall became visible above the subject.
The fabric may be a bit close together and the slightly to narrow aperture combined with this lost some depth within the image.
What next?
Next time I will experiment with potentially adding another layer of fabric behind the subject to fill in the top corner.
I may also experiment with spacing out the fabric folds and reducing the fill light to create a bit more contrast within the image.


Shoot 4
Details:
When: 3/11
Where: PSC Studio
Lighting: 4 x Elinchrom Lights
2 x Small Strip Box
1 x Large Strip Box
1 x Small Snoot + Grid
Shoot Plan:
The plan for this photoshoot was to expermiment with ways I could incorporate still life photography into my folio. I wanted to explore the idea of adding organic subject matter into the series as I felt the natural lines and geometry of the chosen props flowed on from the curves and movement suggested by the fabric’s folds in the portrait images.
Lighting plan:
Dish with grid as the key light. The grid will help to create a stream of light down the backdrop emphasising the props.
Large Strip box on the side as a fill.
Styling:
1 x Fabric between two C stands. Positioned on 2 tables with a board on top for a seamless surface.
Reflection:
What worked?
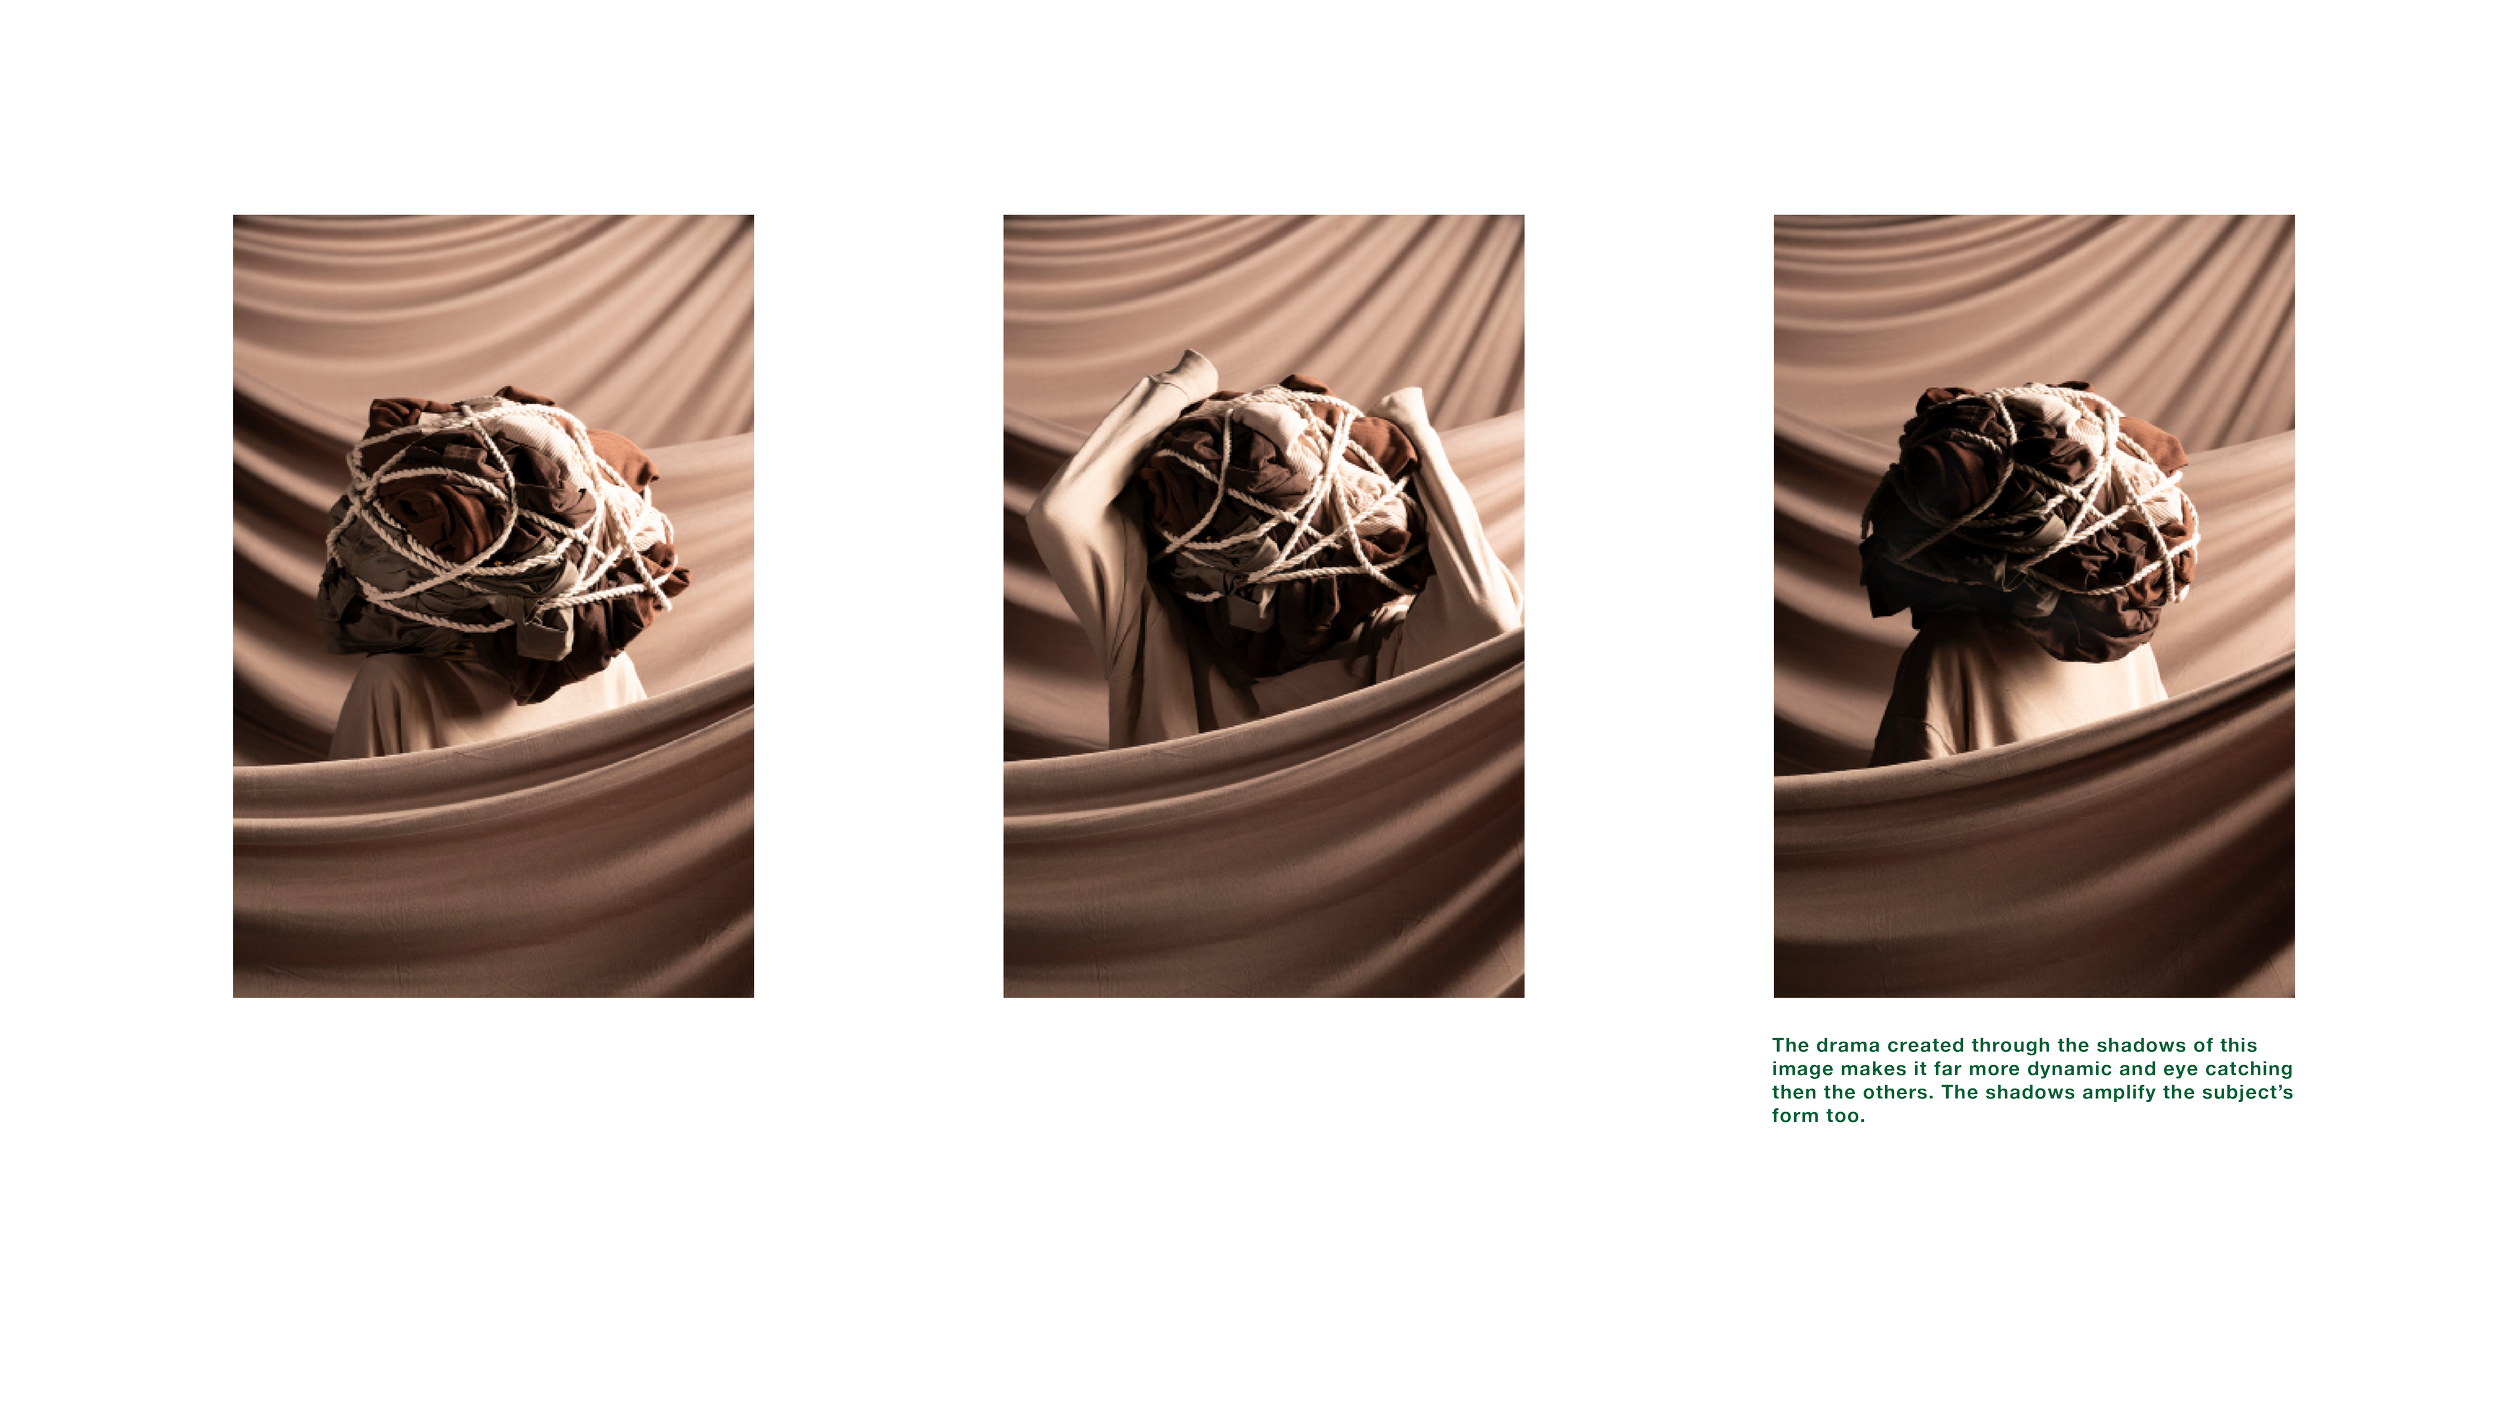
What I found to be most effective about this shoot was the lighting. The drama created through use of the thick grid angled at the subject from the side created a moody stream of light that pulls the viewers eye in and accentuates the subject.
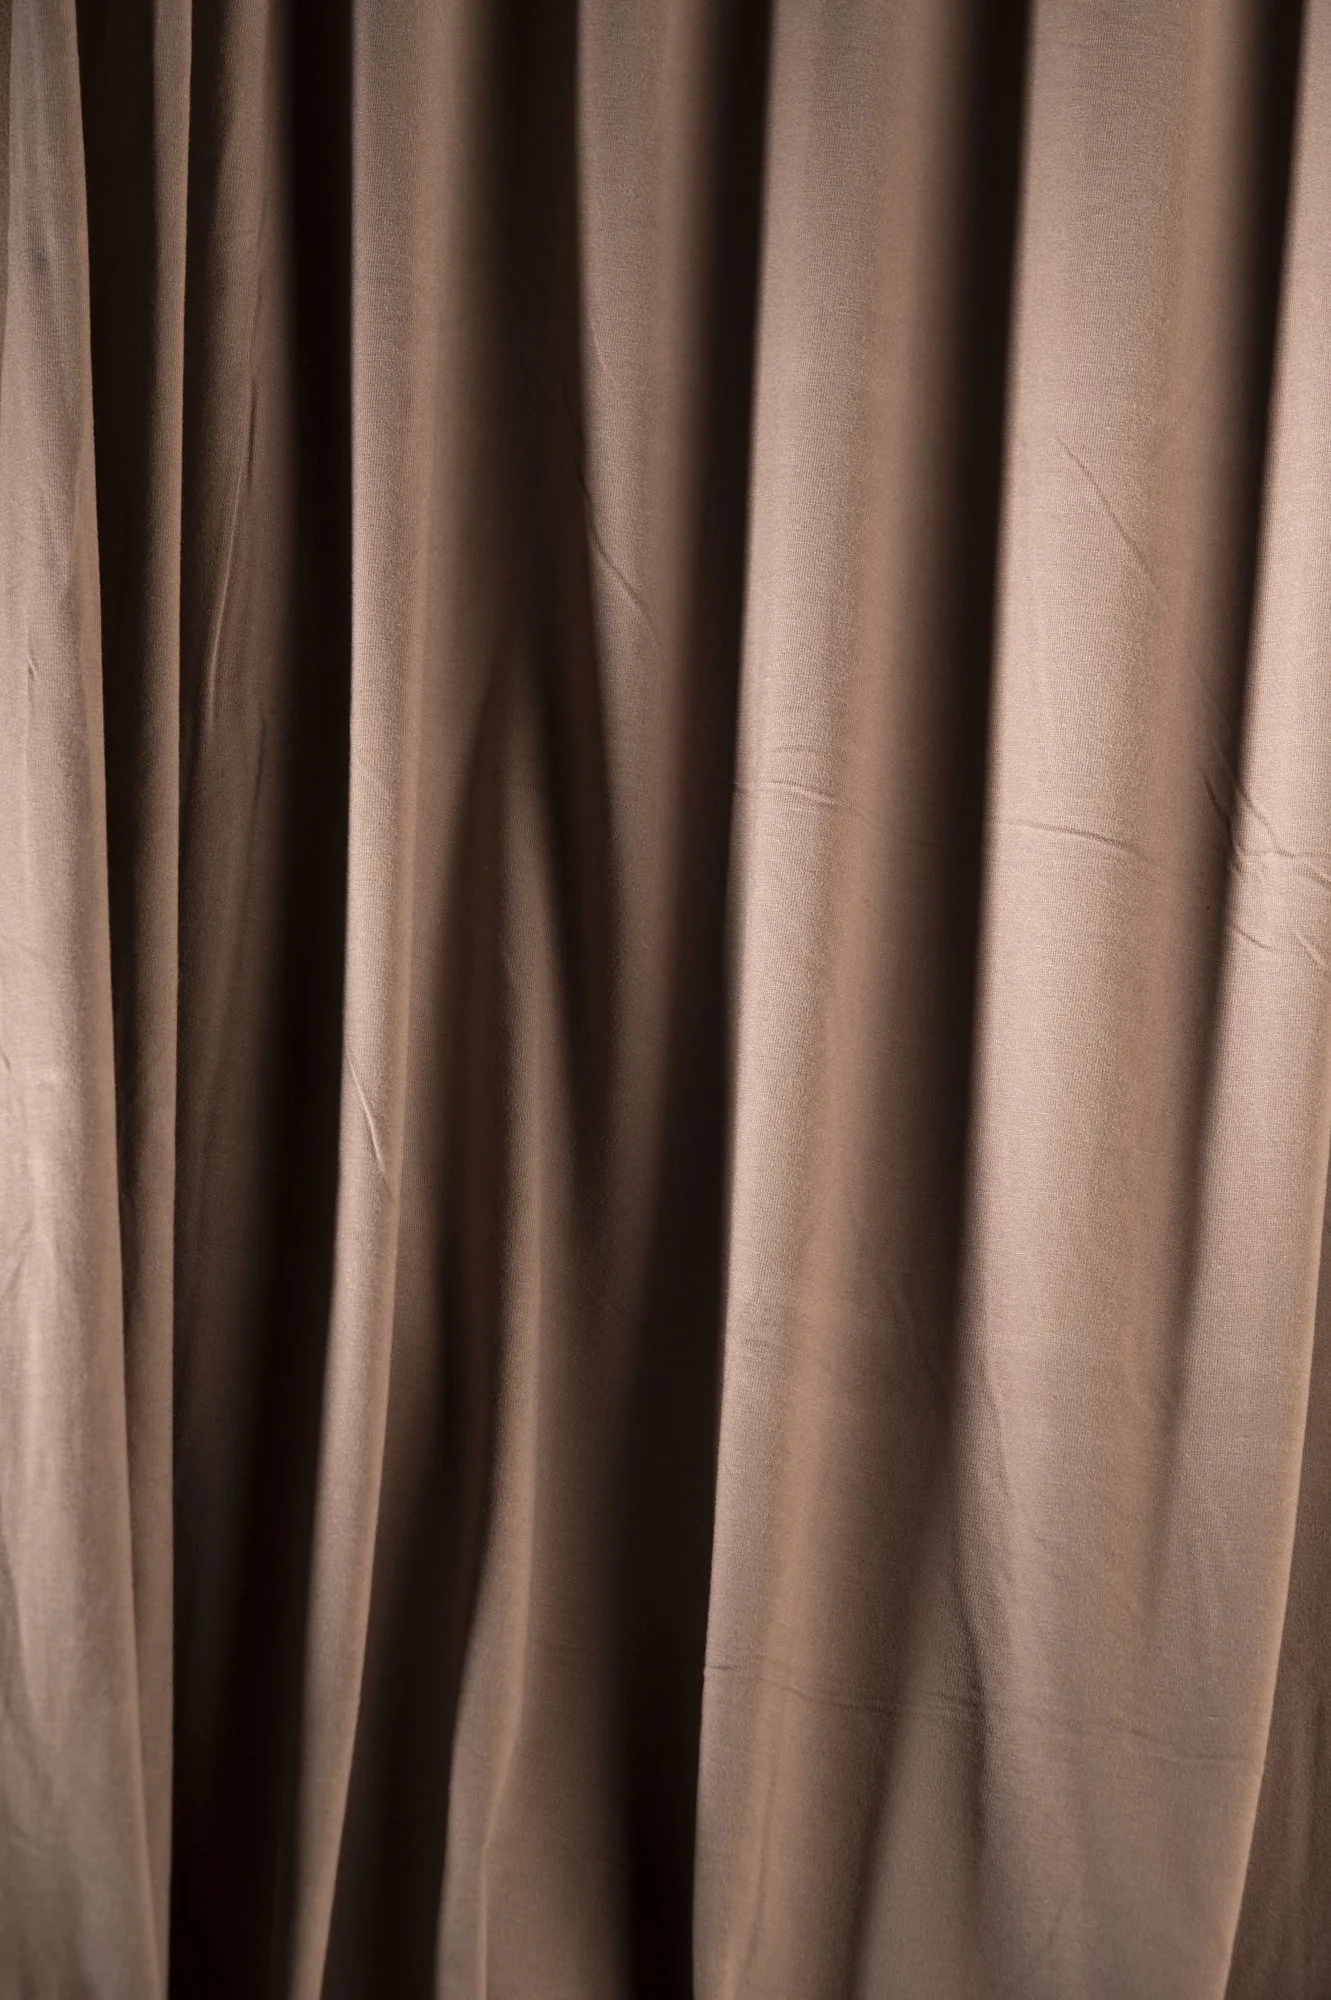
Despite much of it being unintentional, I am actually really happy with the subtle creases in this fabric. It’s suede like surface is one I chose for the detail and texture as I feel it adds detail and interest to the image’s backgrounds. I have removed some of the major creases in post but allowed my depth of field to simply soften the rest.
What didn’t work?
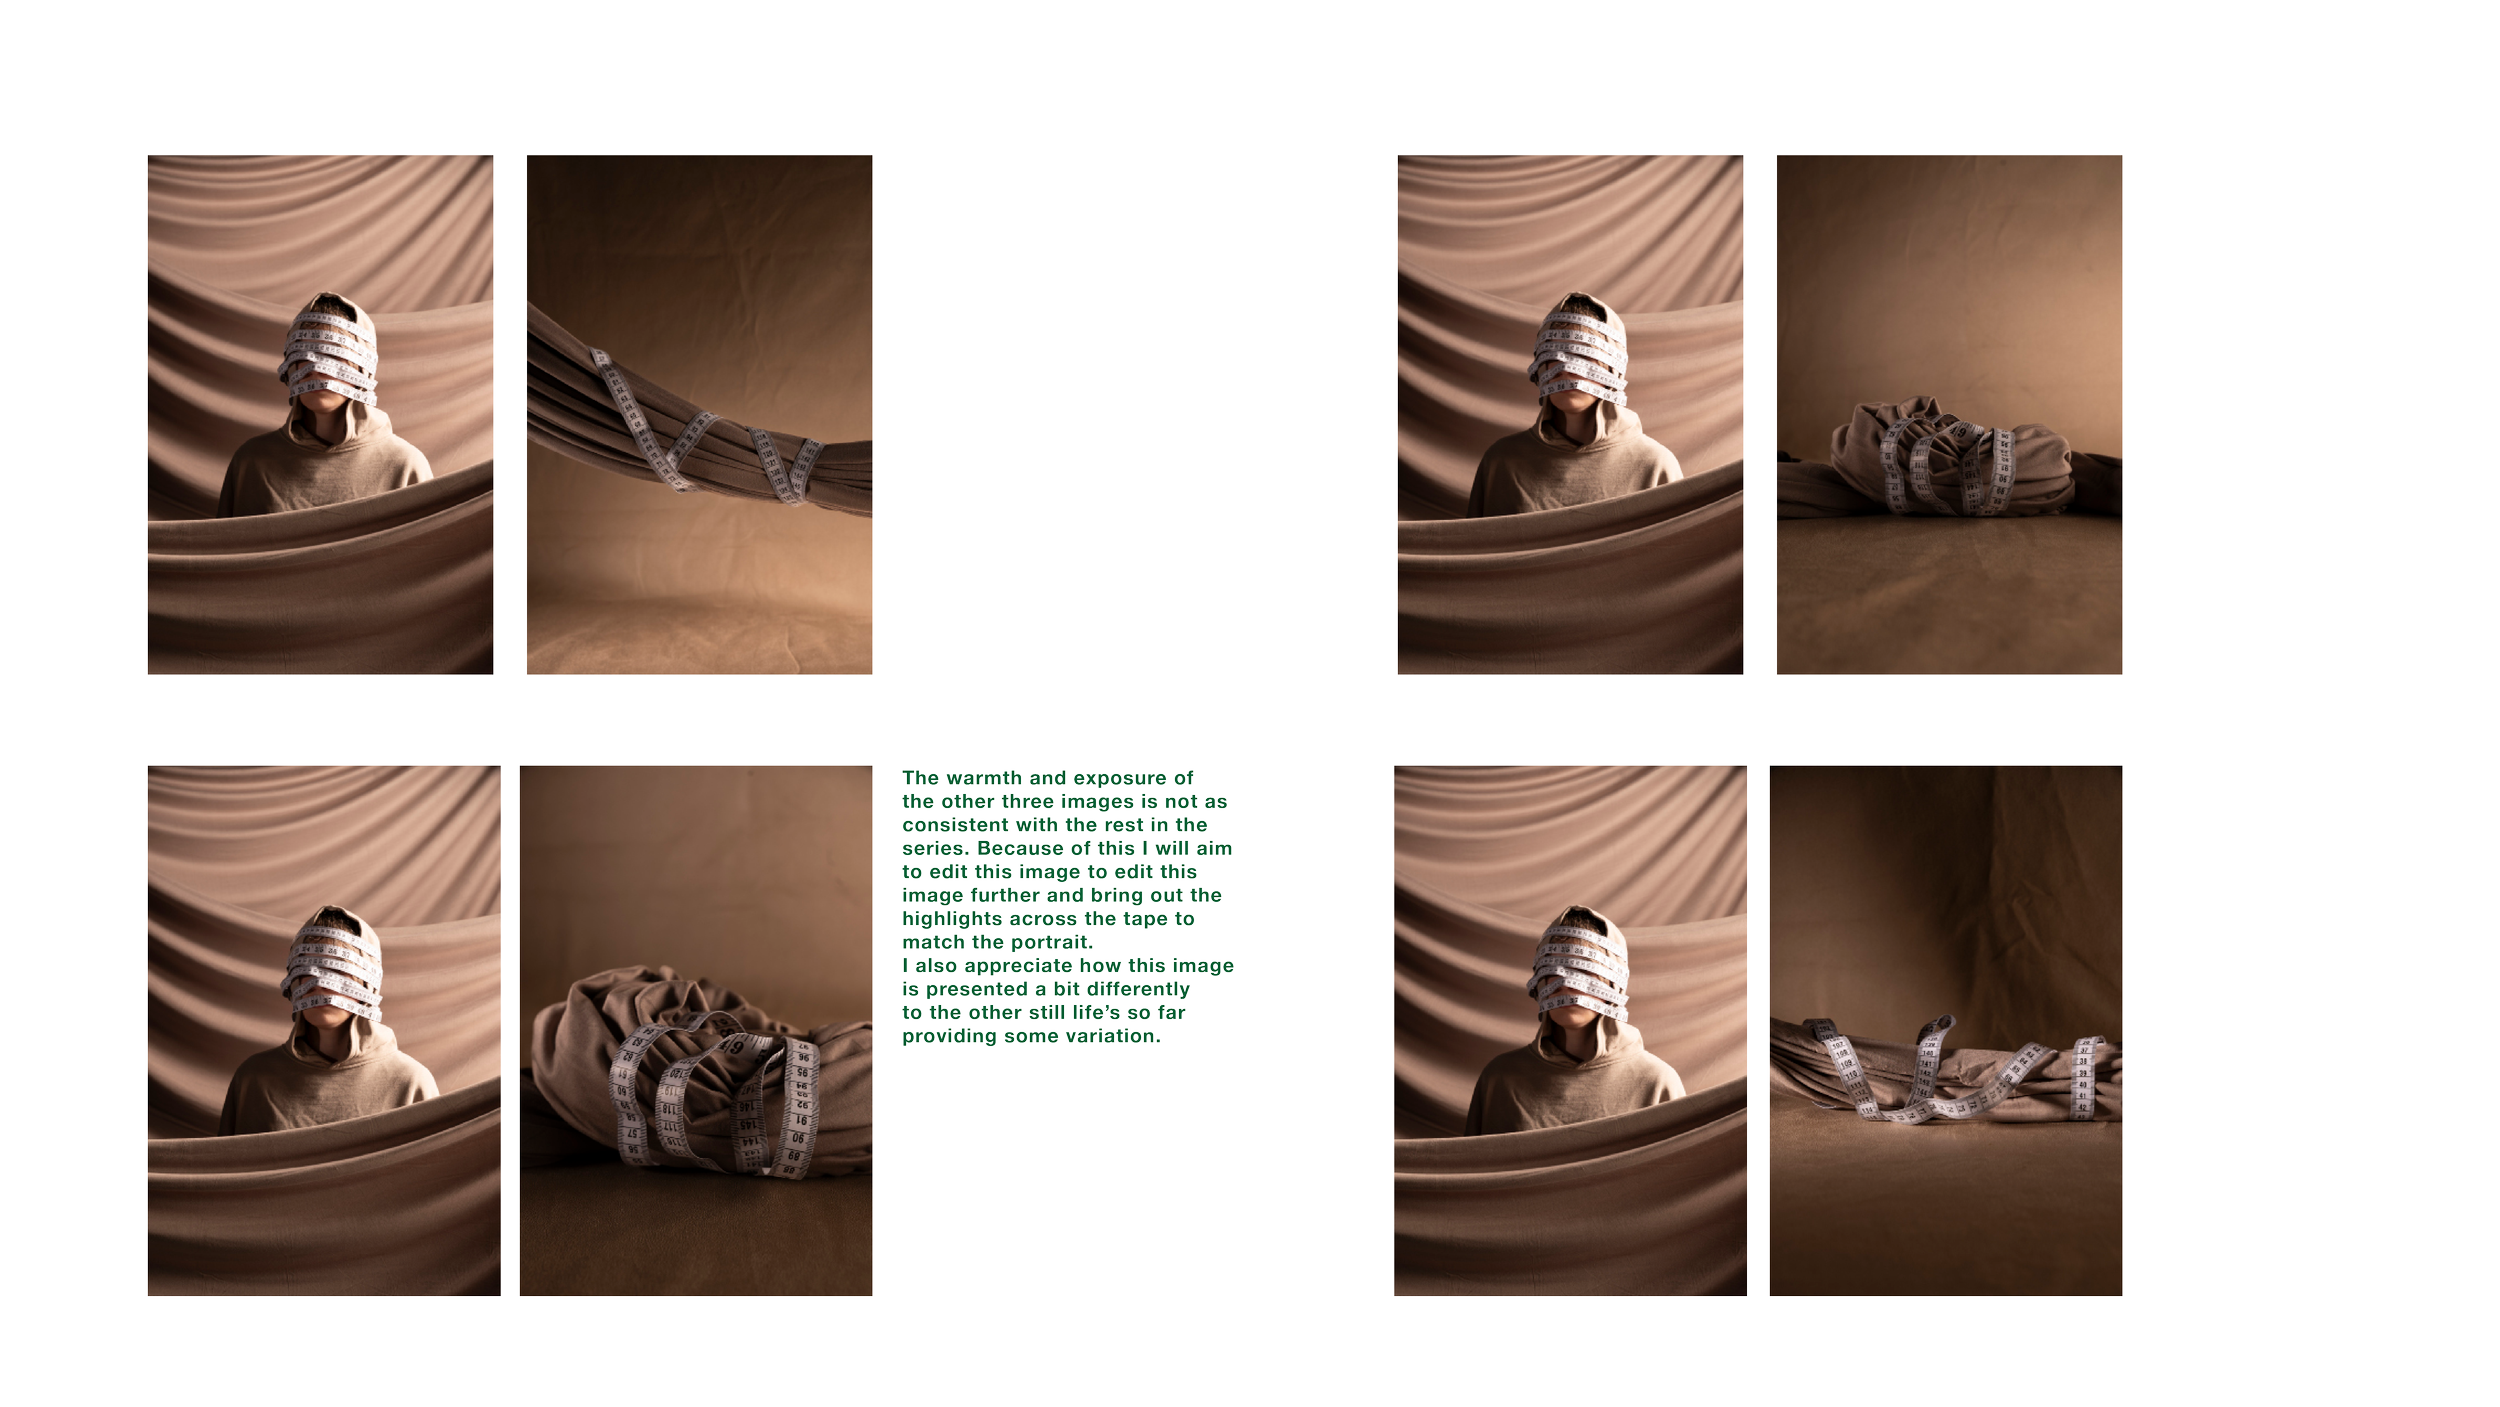
I am unsure if the organic subject matter works with the series. As a first attempt of bringing in still life’s to the series I appreciate the cohesion and slight variation provided through the colour scheme. Despite it being of a slightly darker shade the mood works well with the themes of the project.
What next?
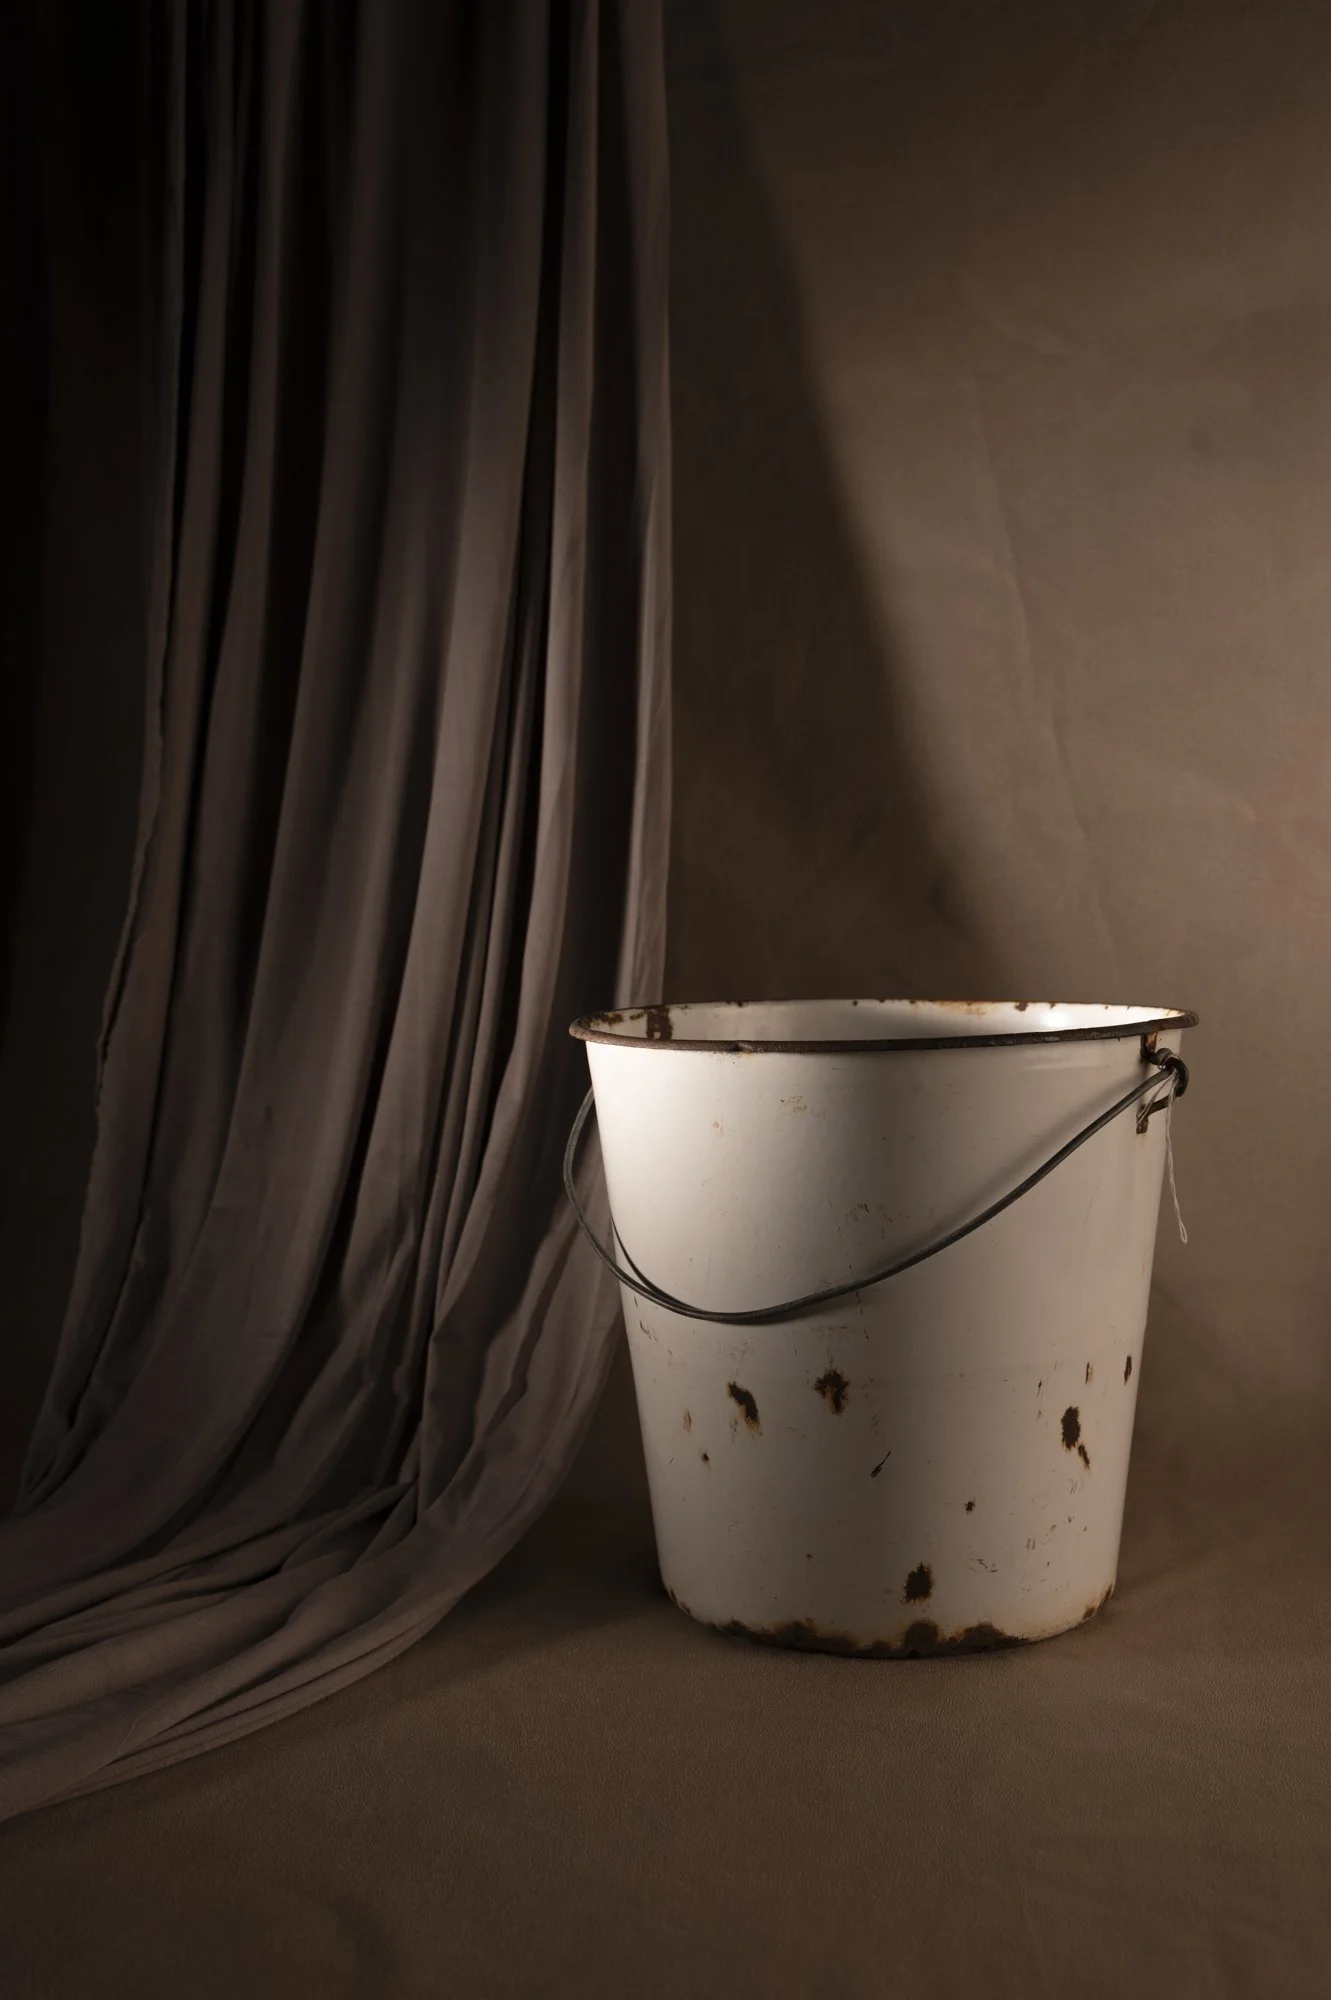
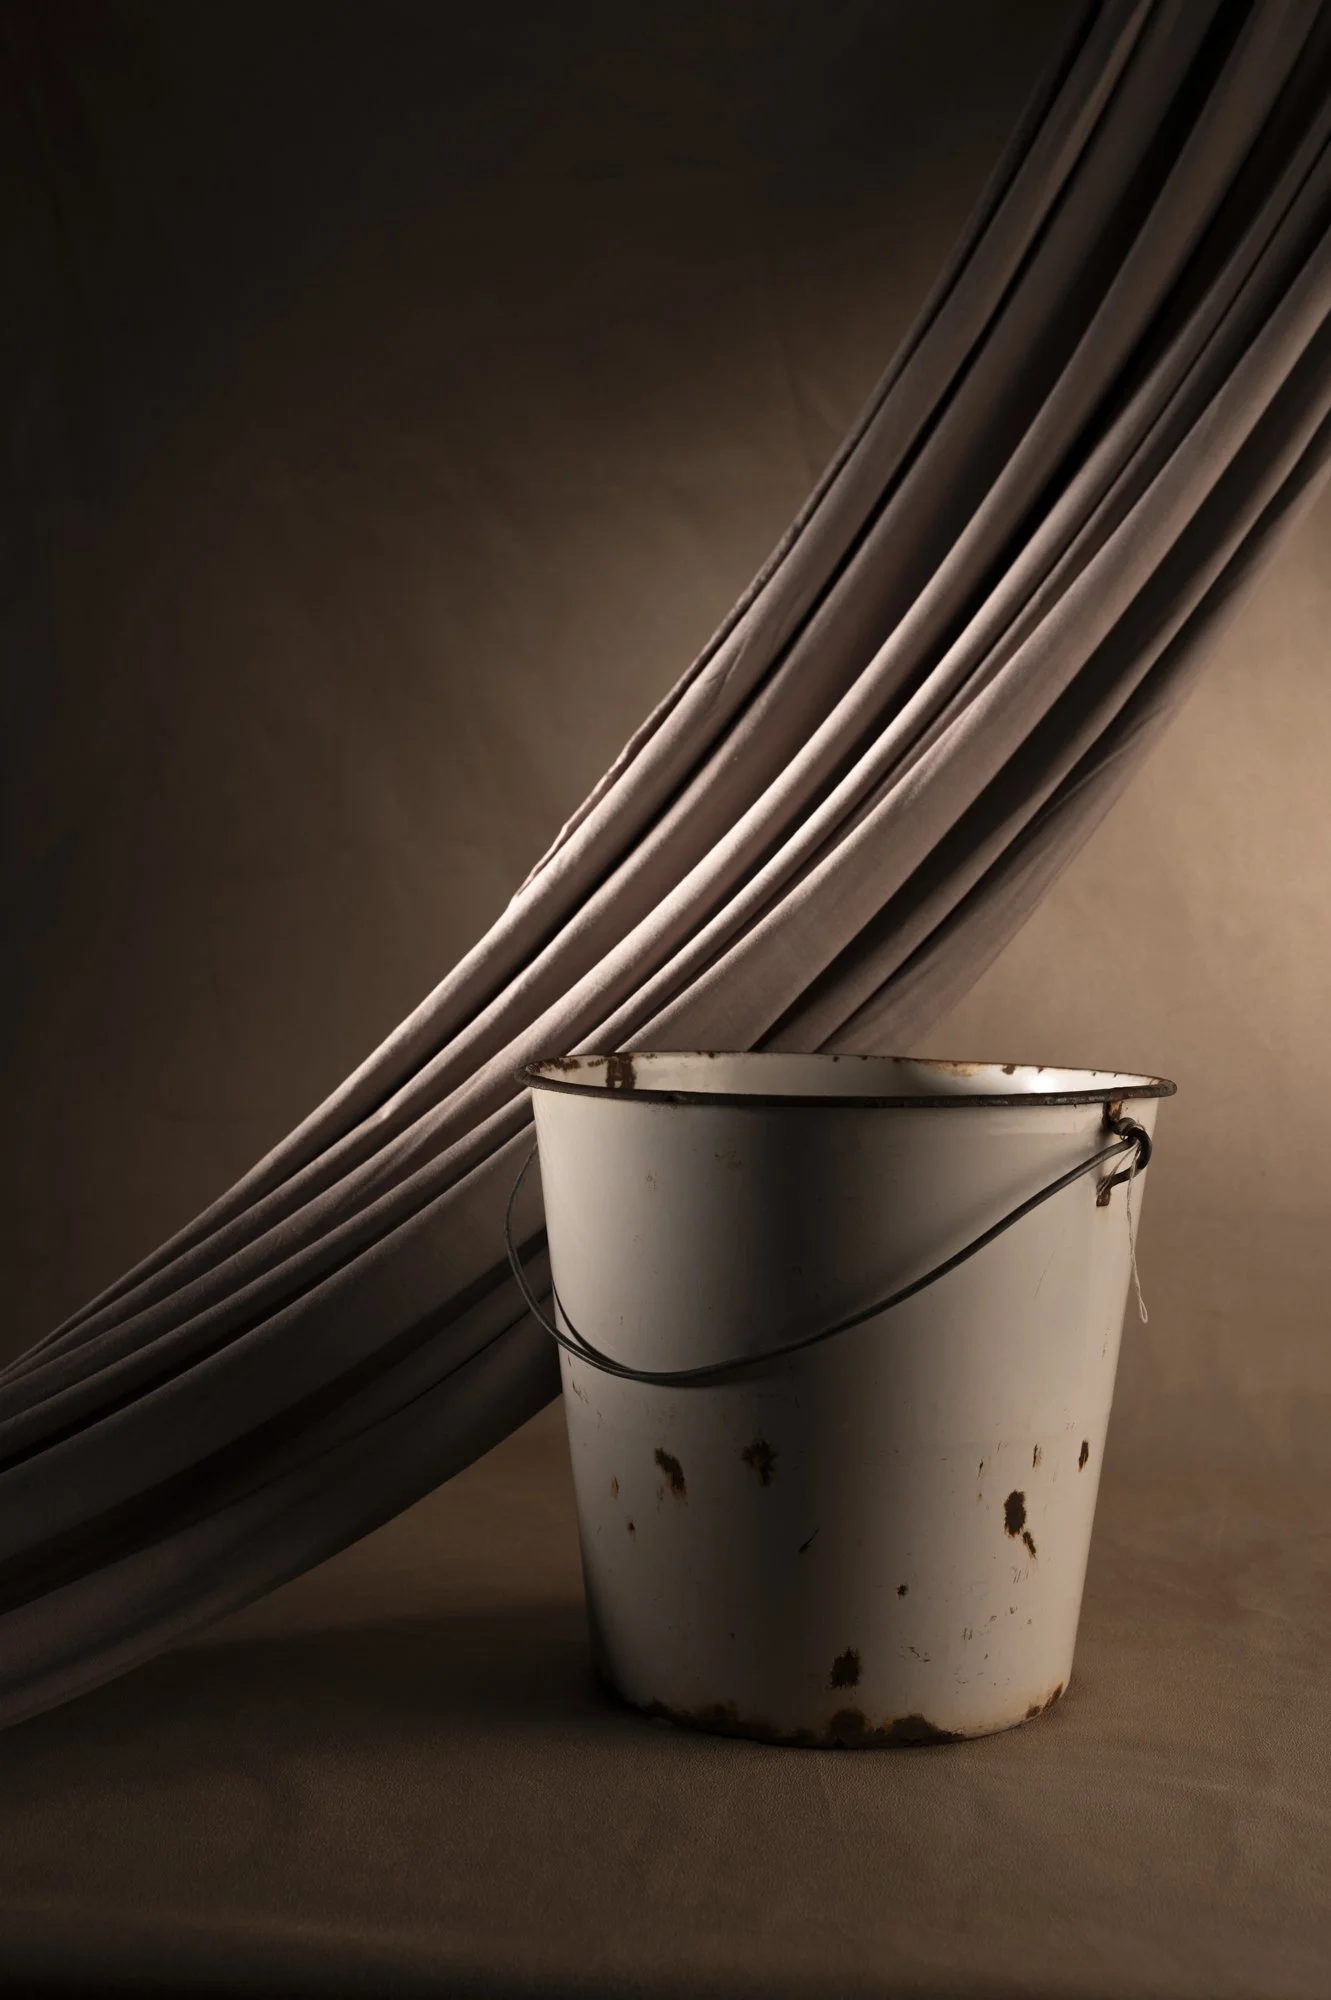
From here I would like to bring in some fabric to the still life shoot. I would like to tie the two together through that consistent use of drapery. I would also like to investigate ways I can add objects from the portraits into a still life form to continue and build upon their narratives and meaning.


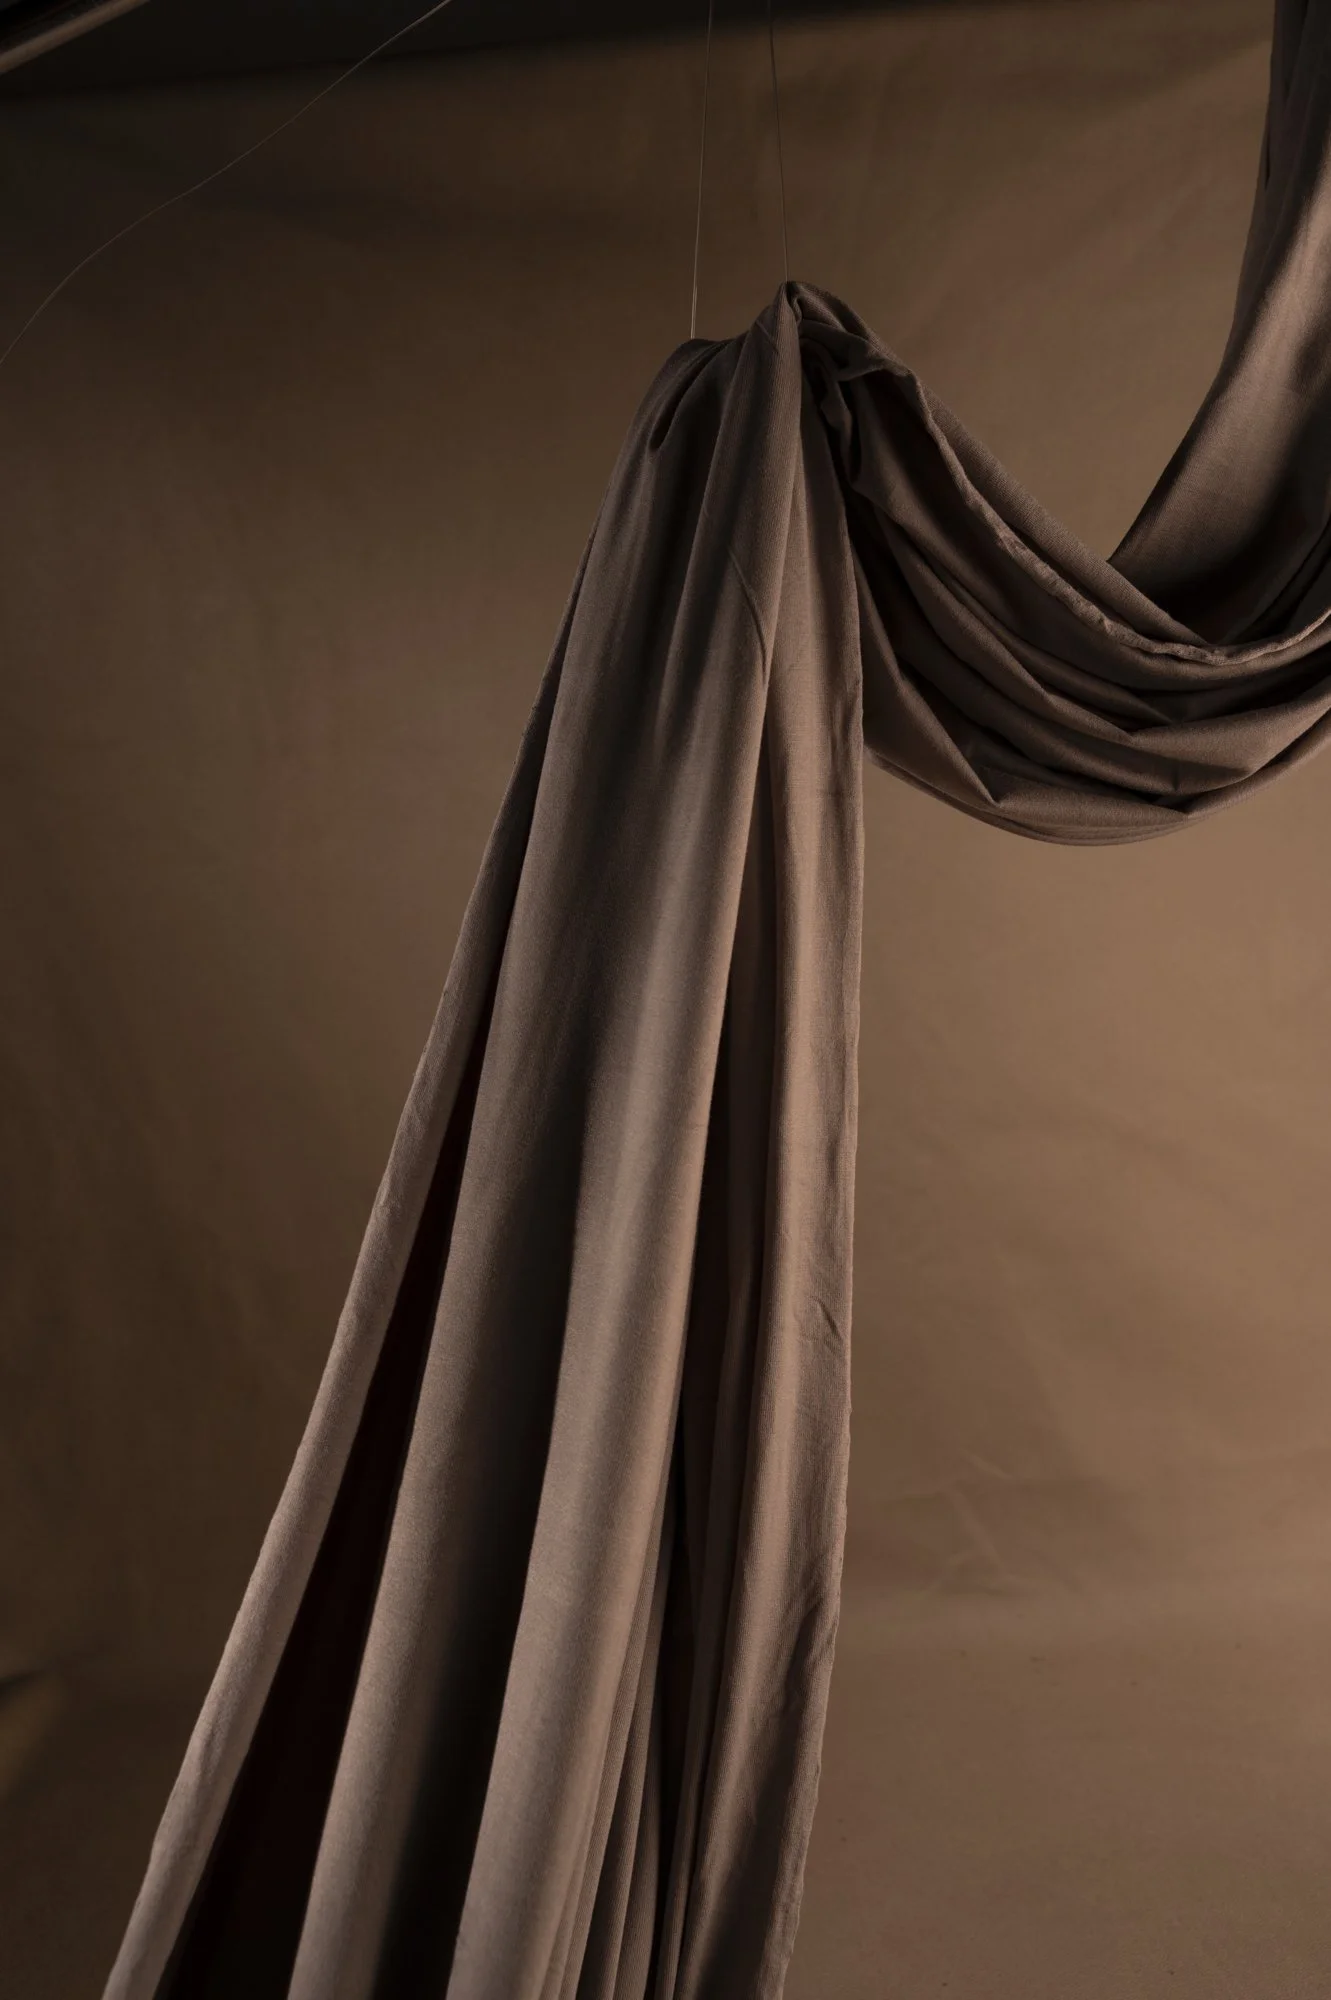
Shoot 5
Details:
When: 10/11
Where: PSC Studio
Lighting: 4 x Elinchrom Lights
2 x Small Strip Box
1 x Large Strip Box
1 x Small Snoot + Grid
Shoot Plan:
The main thing I was focusing on for this shoot was experimenting with the placement of the fabric. I decided to add an extra fold above the subject so that the wall behind wouldn’t be visible. I also wanted to refine the lighting, wanting to make it slightly more dramatic.
Lighting plan:
First small strip box as key light down onto subject from the side. The side lighting will also assist in sculpting the fabric folds.
Second Small strip box to sculpt the fabric in the foreground.
Large Strip box front on as a fill
Snoot to spotlight some of the props when needed.
Styling:
Fabric suspended between 5 C-stands and light stands.
What didn’t work?
One of the biggest challenges for this shoot was making sure the main key light was angled correctly. The fabric came in one large roll which I didn’t want to cut so to get it from the 3rd to the 4th light stand I had to find a way to allow the light to still pass through. I ended up allowing the fabric to slacken as much as possible through there to create a dip for the light to sit in, which worked well.
Reflection:
What worked?
A key change I made in this shoot was moving the fill light to my left. This allows the fill to be angled in a way that covered more of the fabric as it previously faced the same way as the key lights. From the left it made a slight but decent difference in being able to control the contrast in the left side of my images.
Moving the fabric in this shoot to allow another fold worked really effectively. It meant that when I was shooting the larger props and had to step back, the wall behind was no longer visible and there was a more continuous backdrop. The added depth provided by this changed worked really effectively too. I removed the front most fold of fabric as I felt it wasn’t necessary here.
What next? The next thing to do from here is to experiment with ways to build the works into a series. At the moment the scenes are fairly uniform and I would like some variation. Based on time constraints making major changes is difficult but I would like to begin adding some still lifes that incorporate the props and costuming used (or smaller versions). These still life’s may also use fabric to connect the images back to the portraits.
Shifting the subjects pose and direction between the images may also be beneficial in keeping the series interesting.


Halfway point
These are the current top selected images from my first 5 shoots.
Things I am happy with: I like the way in which the fabric has a sort of ‘stage-like’ effect on each image, as though it is revealing each portrait intentionally. This suits the theme and concept of the project as it places the object of meaning as a priority visually. The flowing nature of the background is symbolic of the ever-changing nature of chronic health conditions and the mental repercussions of such.
From here: I am largely concerned with the static nature of the series. It needs some variation of some sort to keep the viewer engaged. I think this can be solved through still life images where the folds of the fabric are retained but in a more interesting and varying manner.


DRAPERY MOOD BOARD
These images have been collected as a reference point for future shoots for when I create more still life images.
research
This artist’s use of fabric within their still life images has inspired me to investigate ways in which I could transfer the drapery of my portraits into my still life images from here.
Shoot 6
Details:
When: 17/11
Where: PSC Studio
Lighting: 2 x Elinchrom Lights
1 x Dish and grid
1 x Large Sq Soft Box
Shoot Plan:
This photoshoot marked the first attempt at experimenting with adding fabric into a series of still life images to support the portraits.
Lighting plan:
Dish and grid serve as the key light. This is angled to stream across the backdrop largely. This helps seperate the subject from the background, adding depth and visual interest.
Sq soft box is used to fill both backdrop and subject.
Styling:
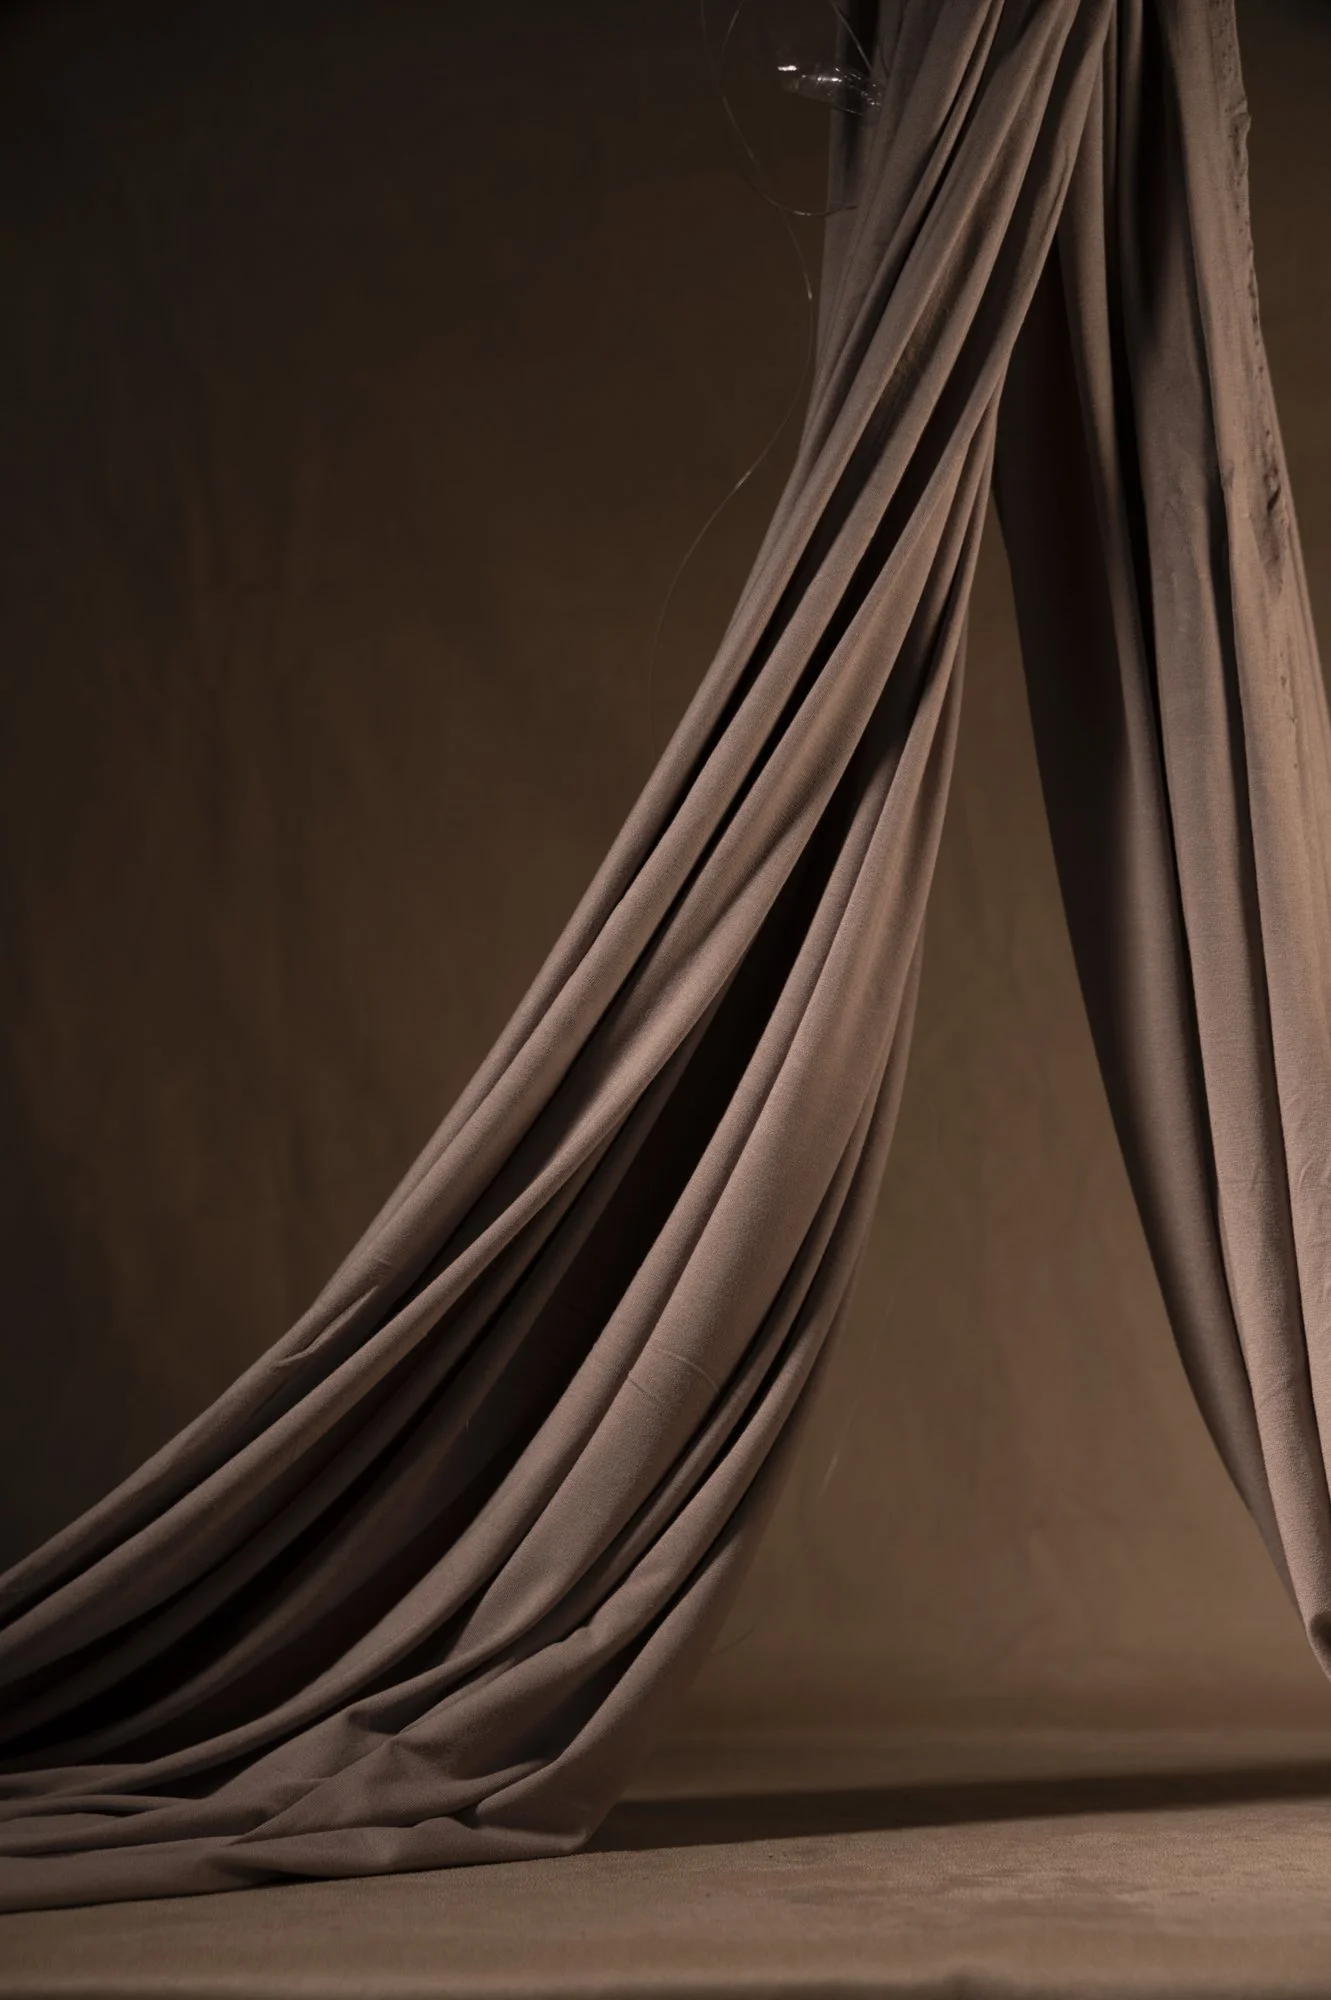
Experimented with various methods of draping the fabric across the backdrop and around the subject matter.
What didn’t work?
The lighting may need some tweaking with this shoot. By adding the fabric I have also added a cutter. The fabric blocks the light from the object a bit and has made the images quite dark. I may need to experiment with different lighting angles as well as potentially adding a snoot to illuminate the objects in a more targeted fashion.
Reflection:
What worked?
Incorporating the fabric into the still life images worked really well. It was interesting to explore how the fabric might interact with the objects and how I can shift its position and drapery between images for greater variation throughout the series.
What next?
I can see these images working to tie this series together effectively. I may be able to pair them up with a portrait each. From here I need to make a plan for ways I can transform each portrait into a still life image. With limited sessions left I will also plan out which portraits are still remaining.


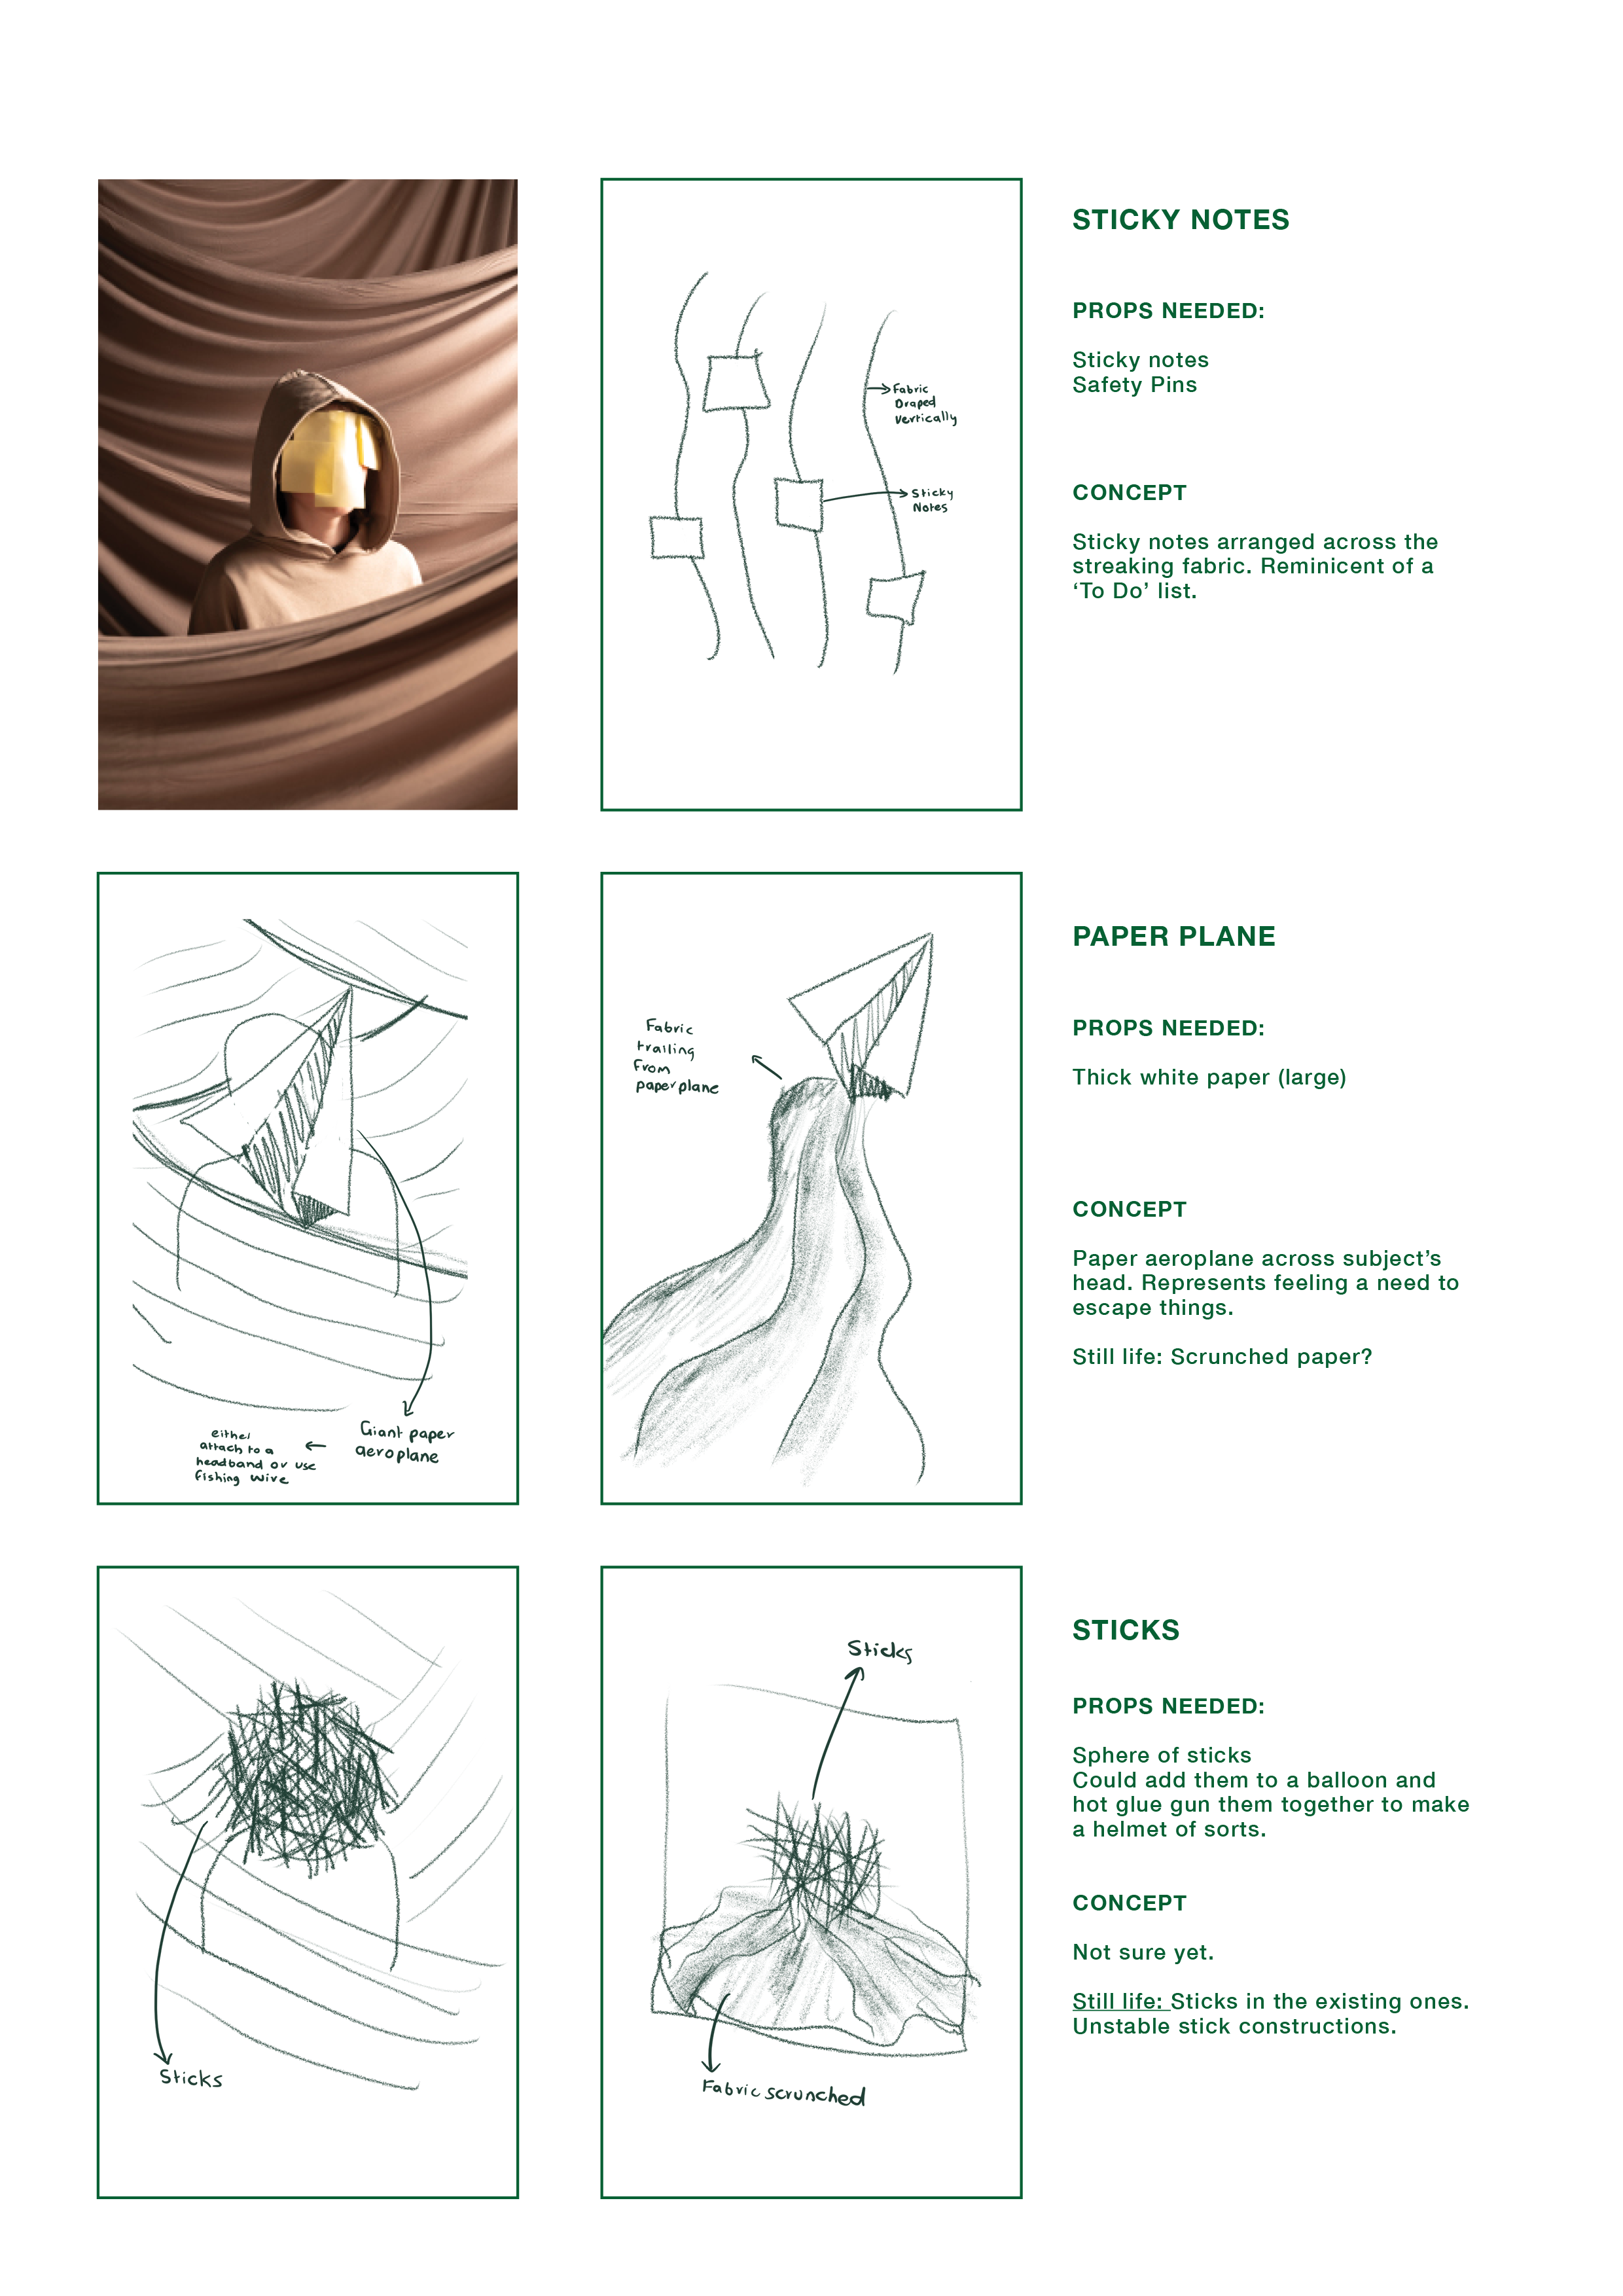
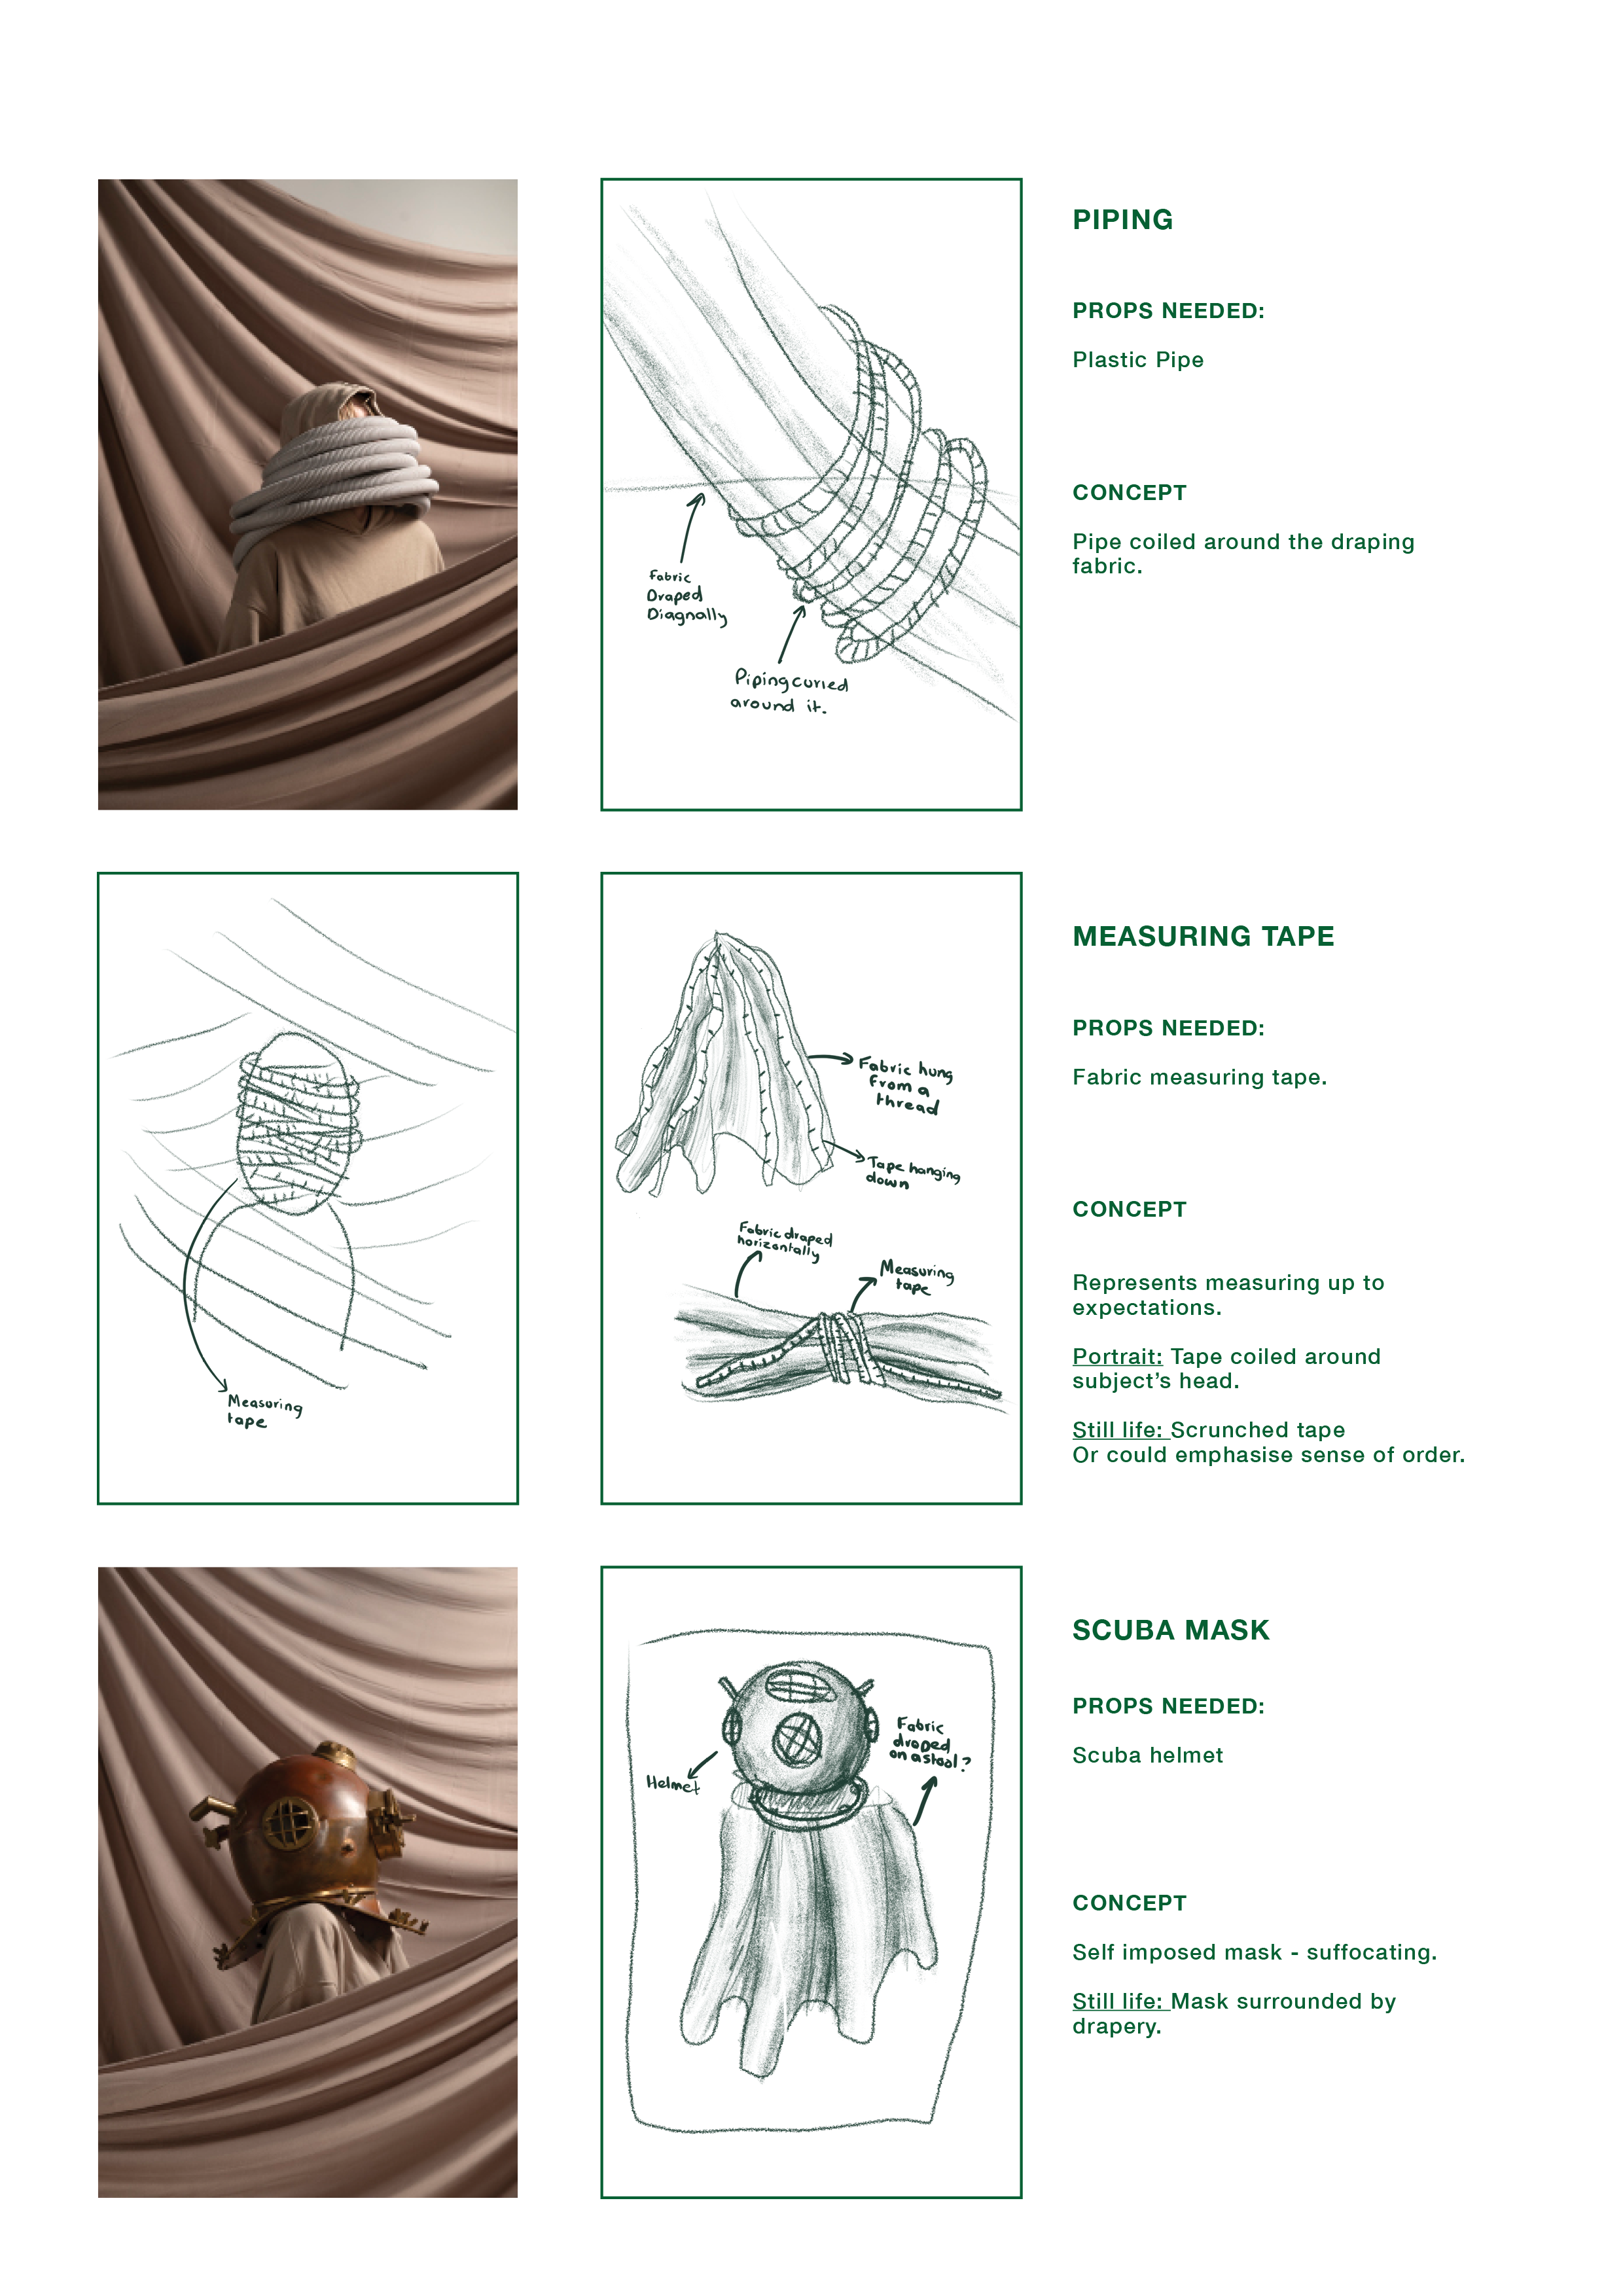
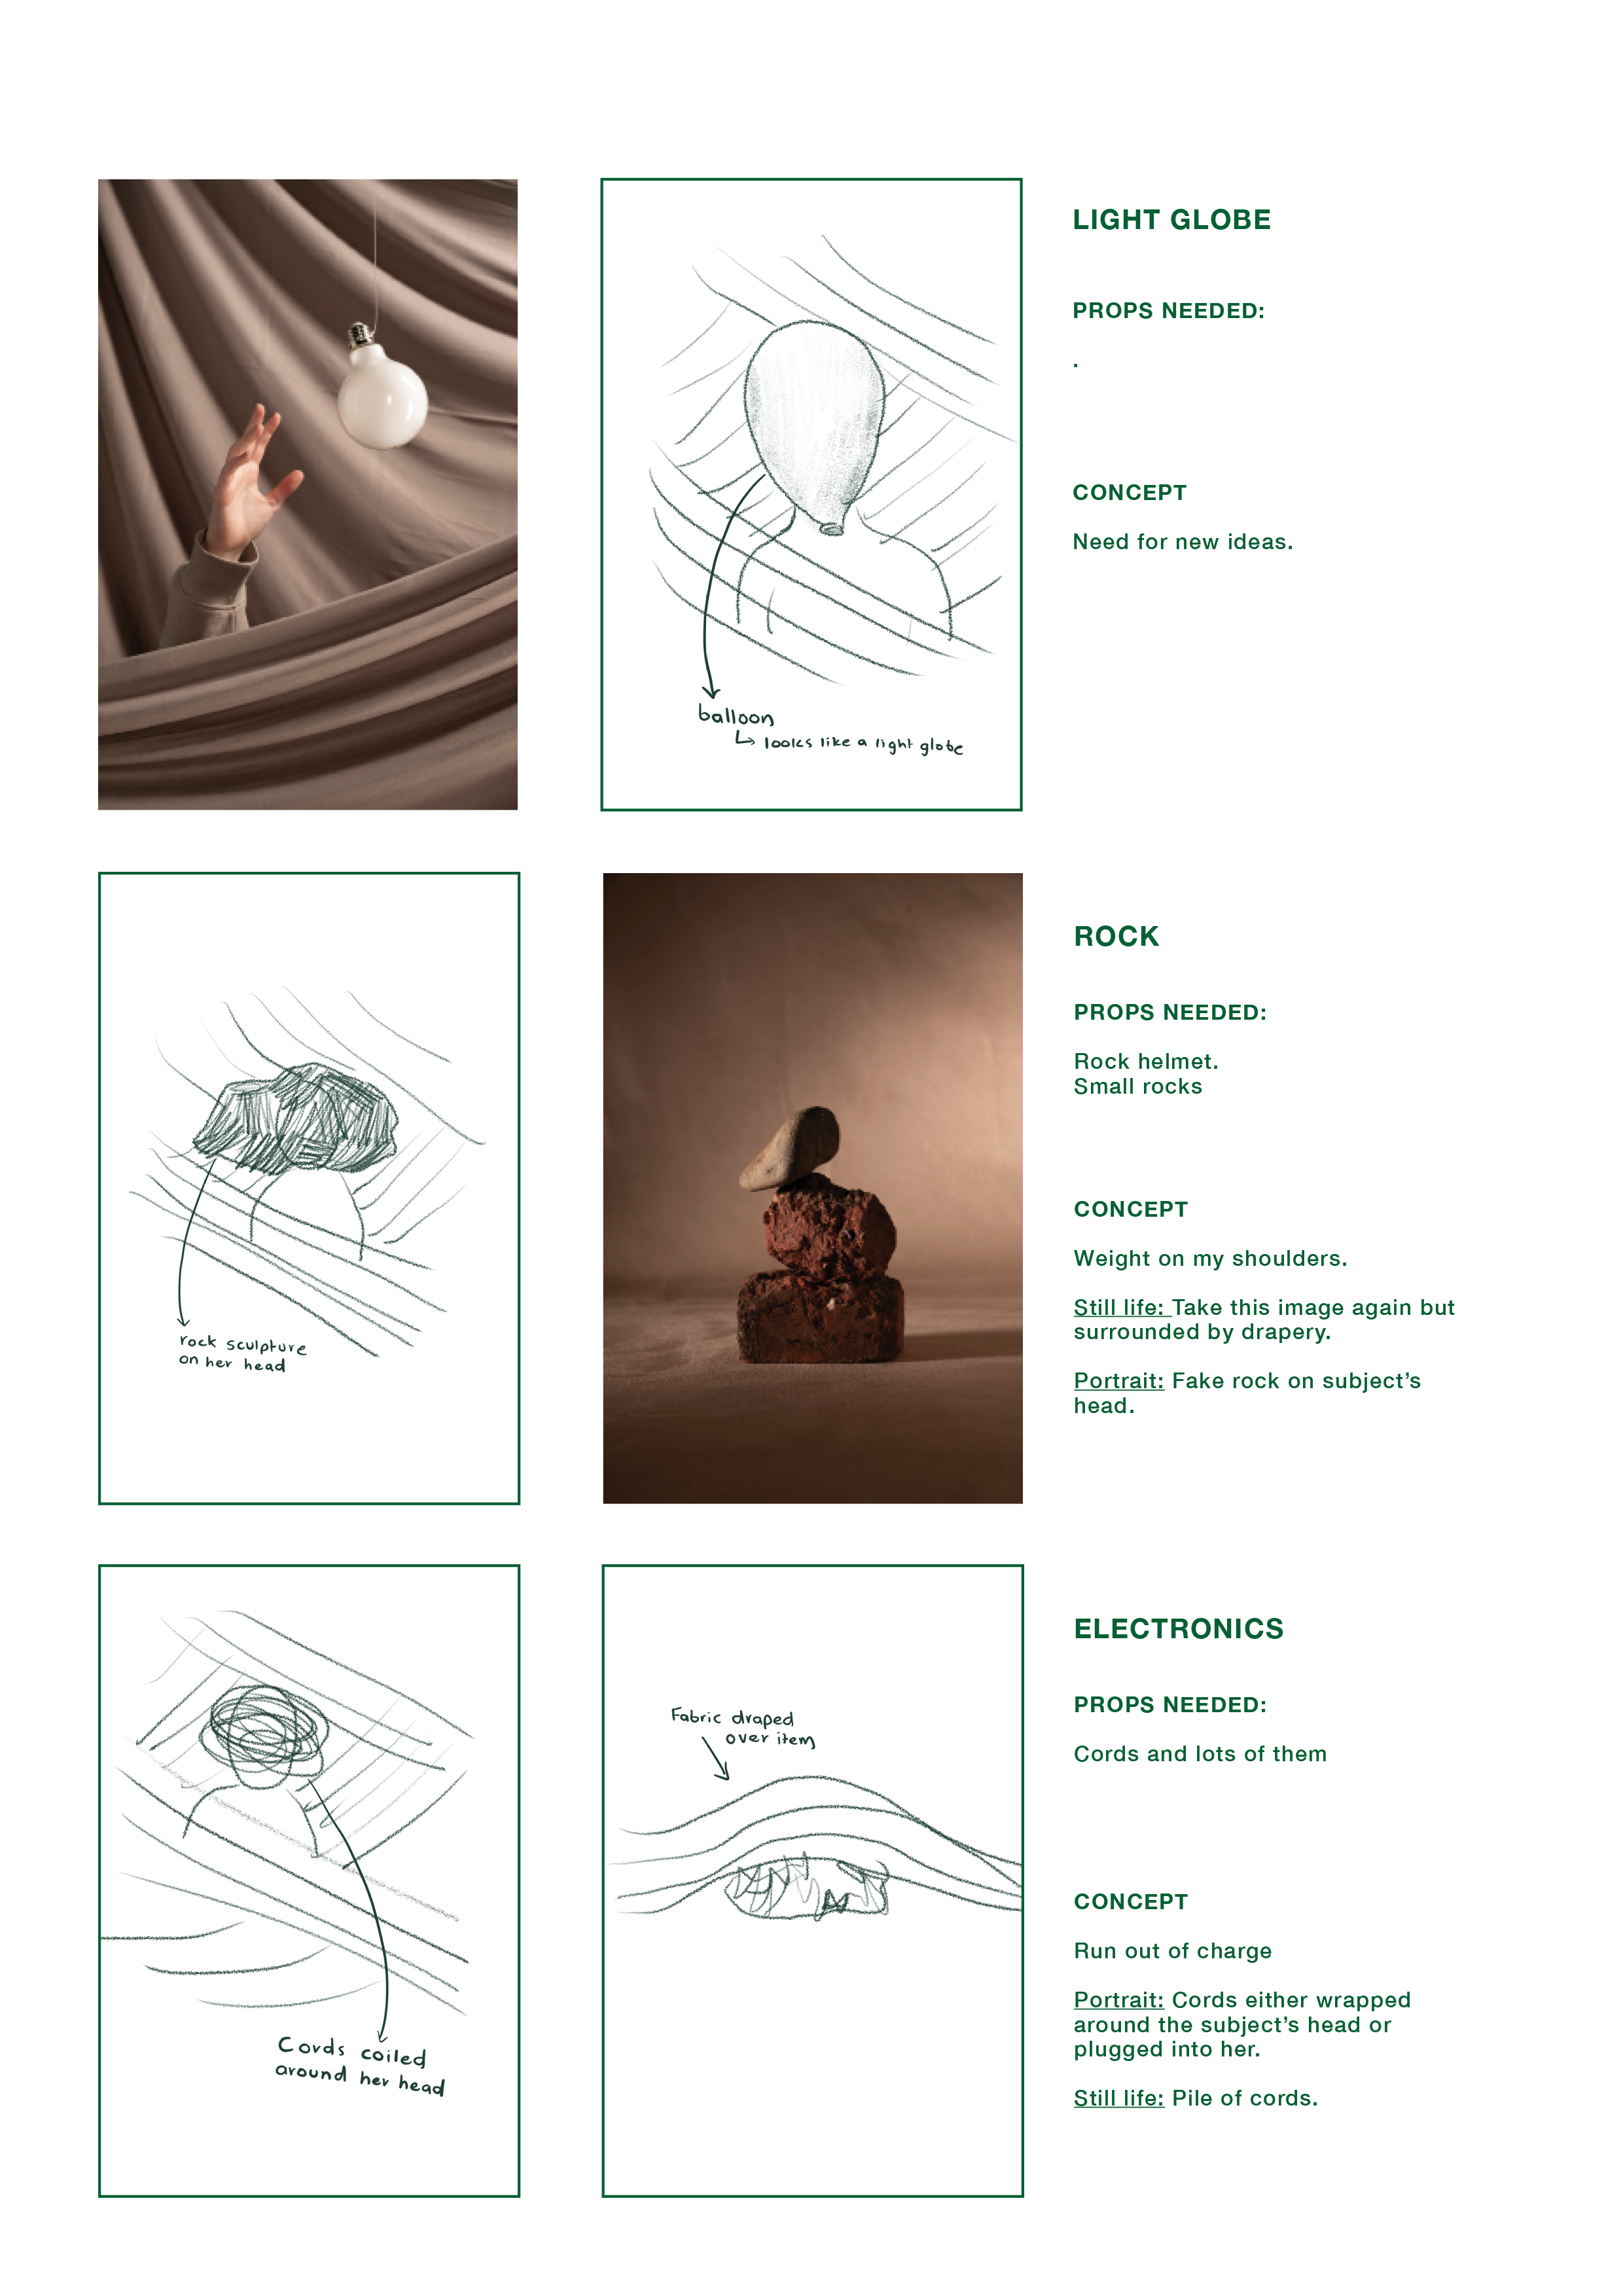
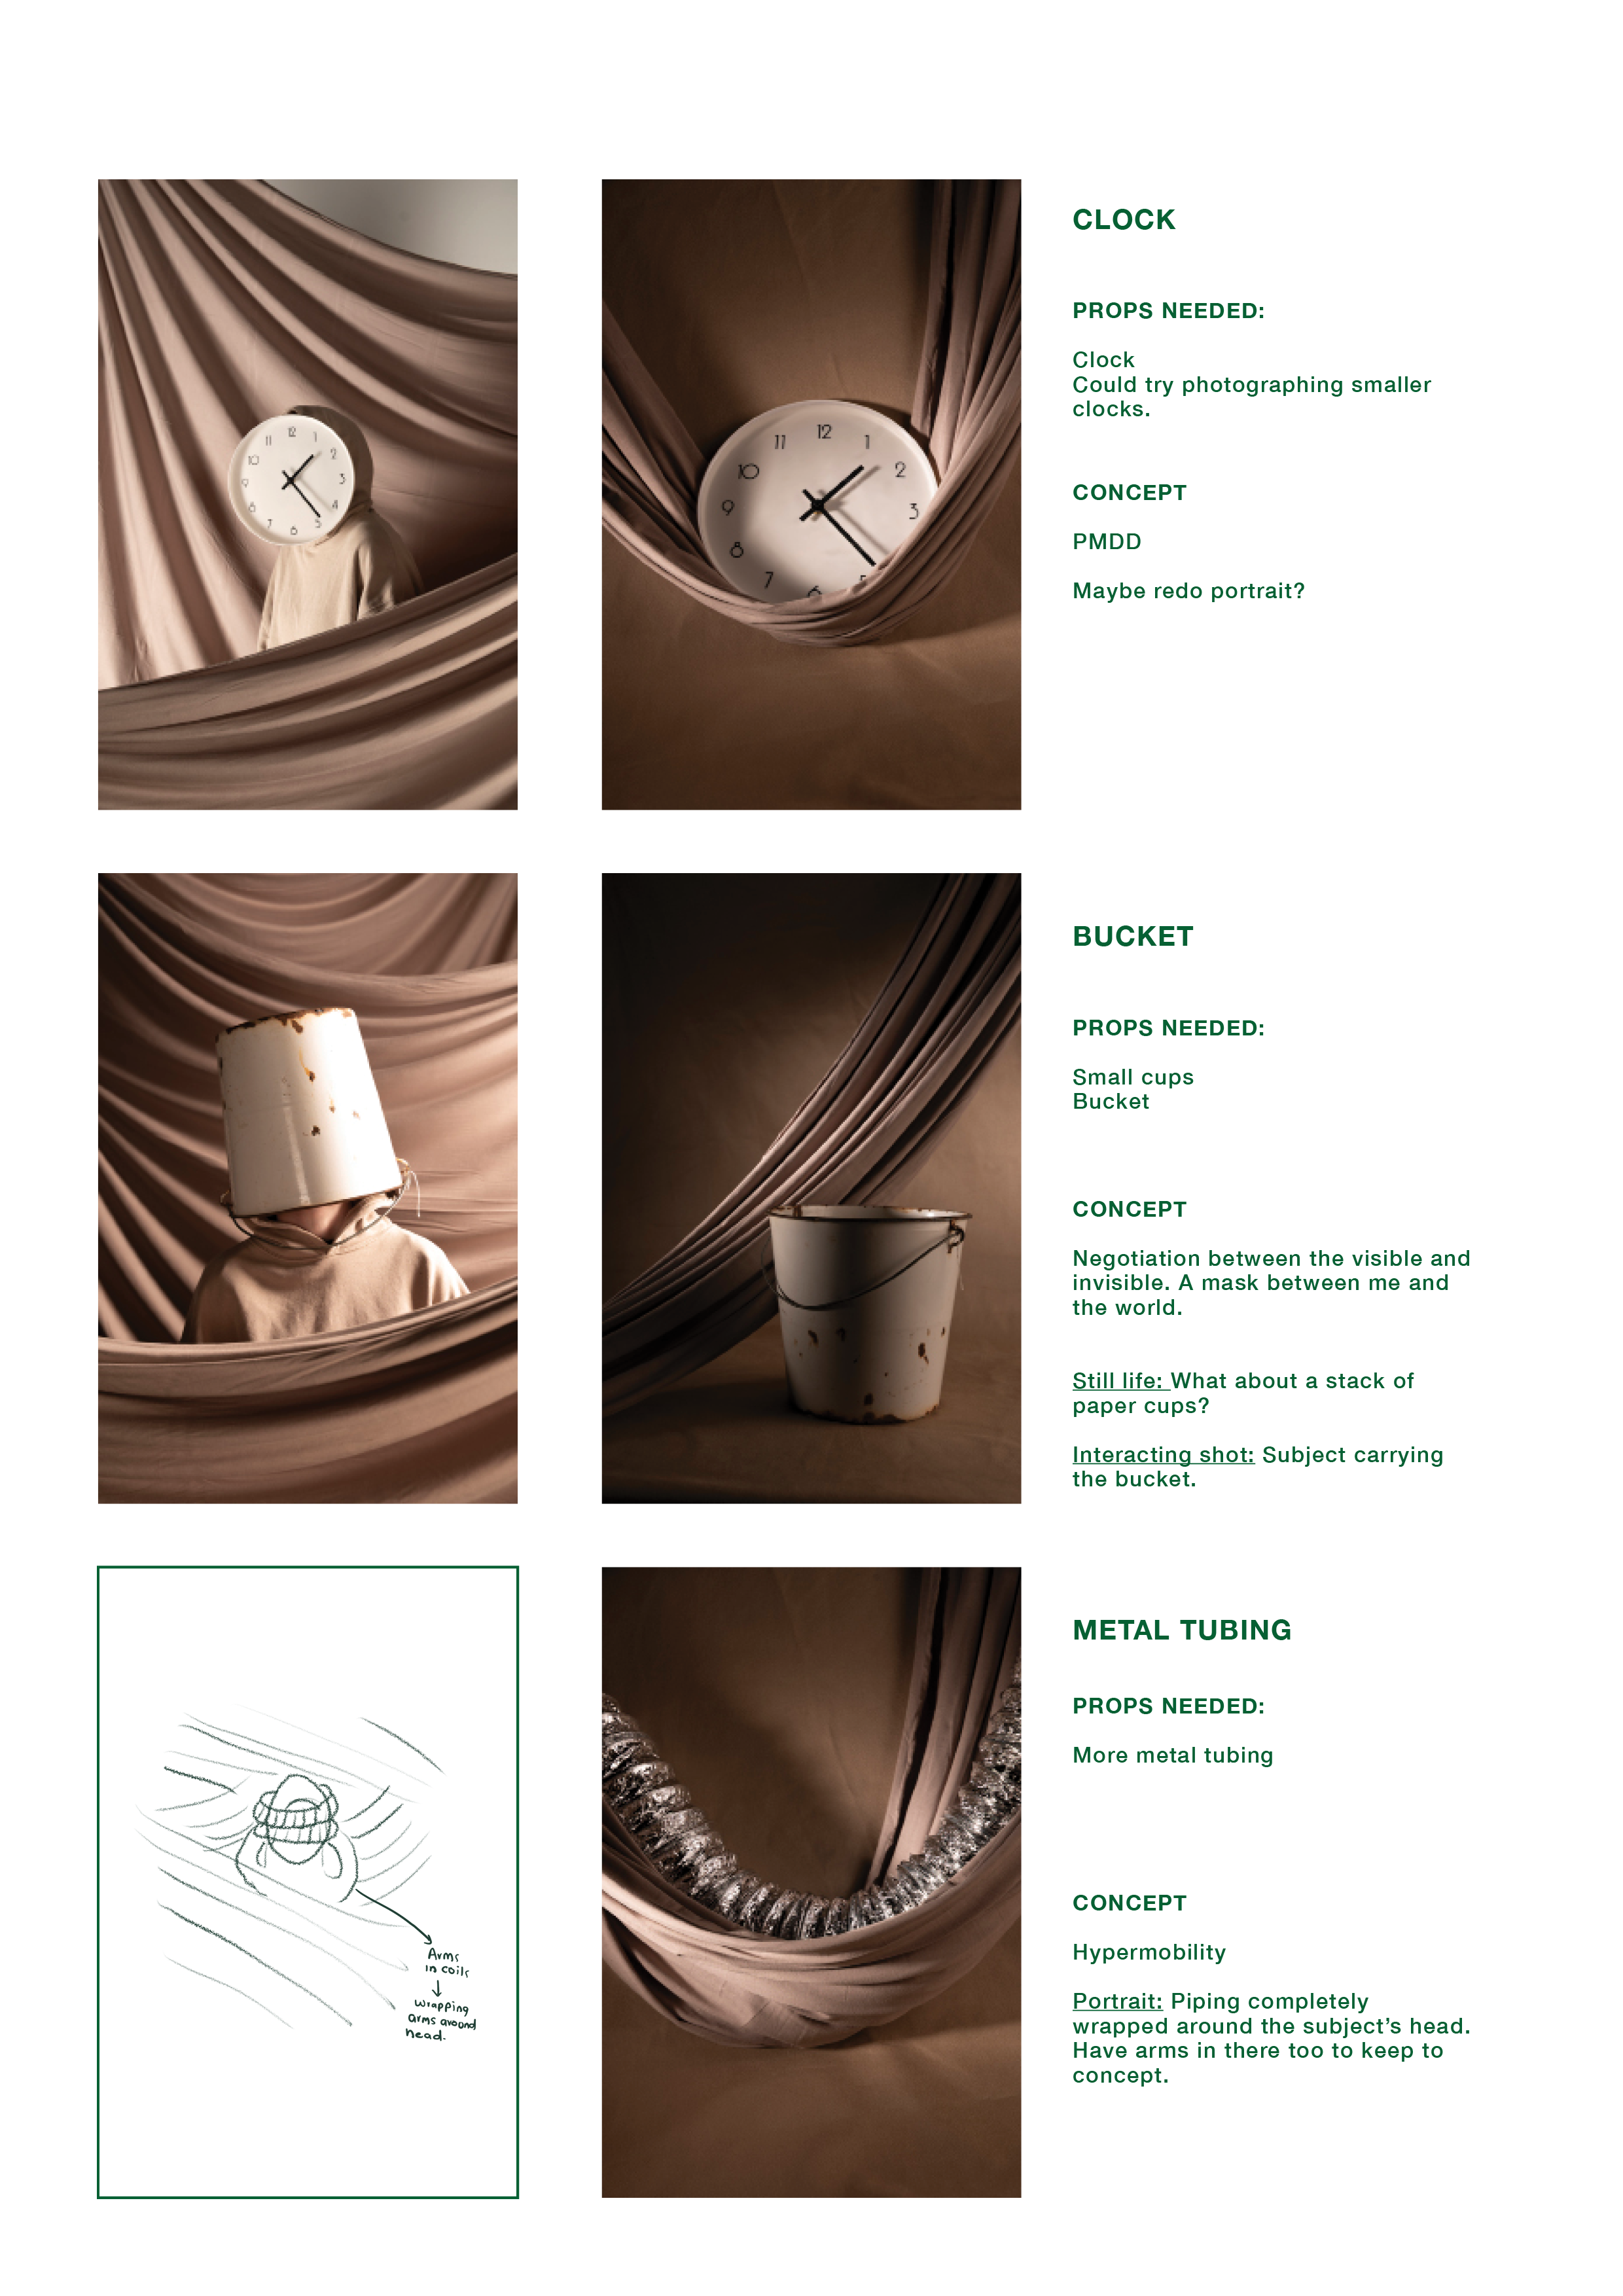
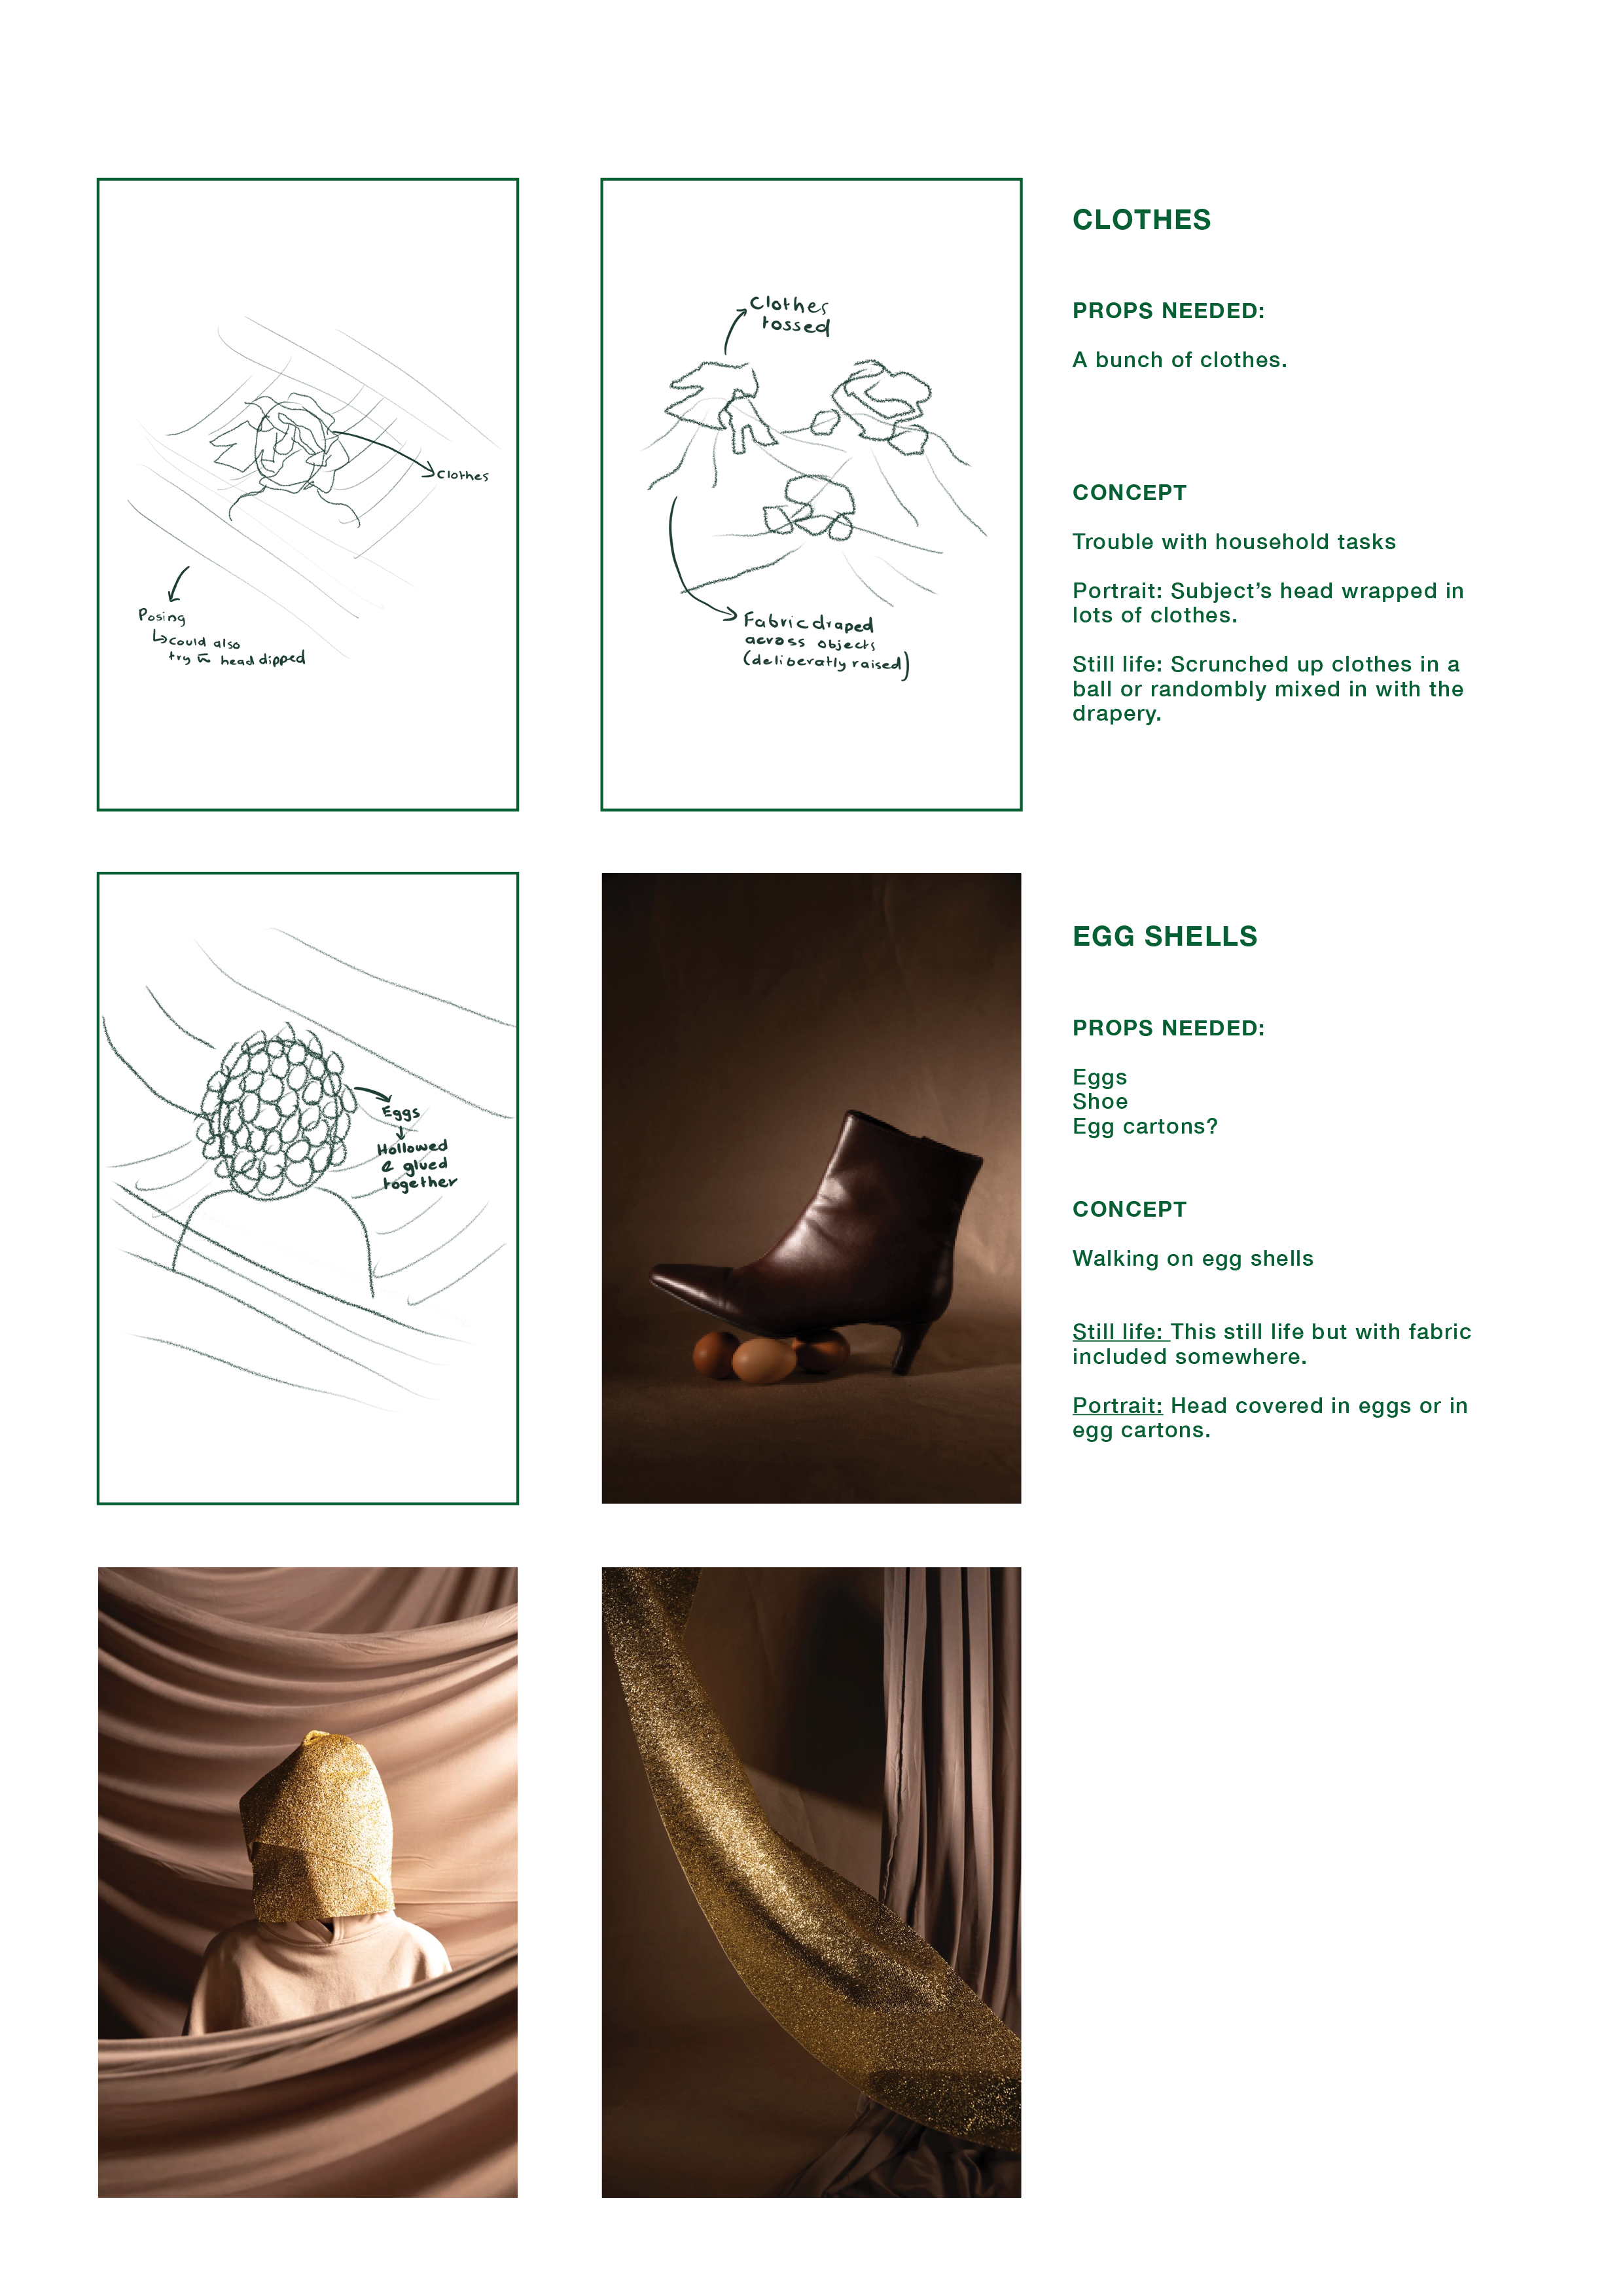
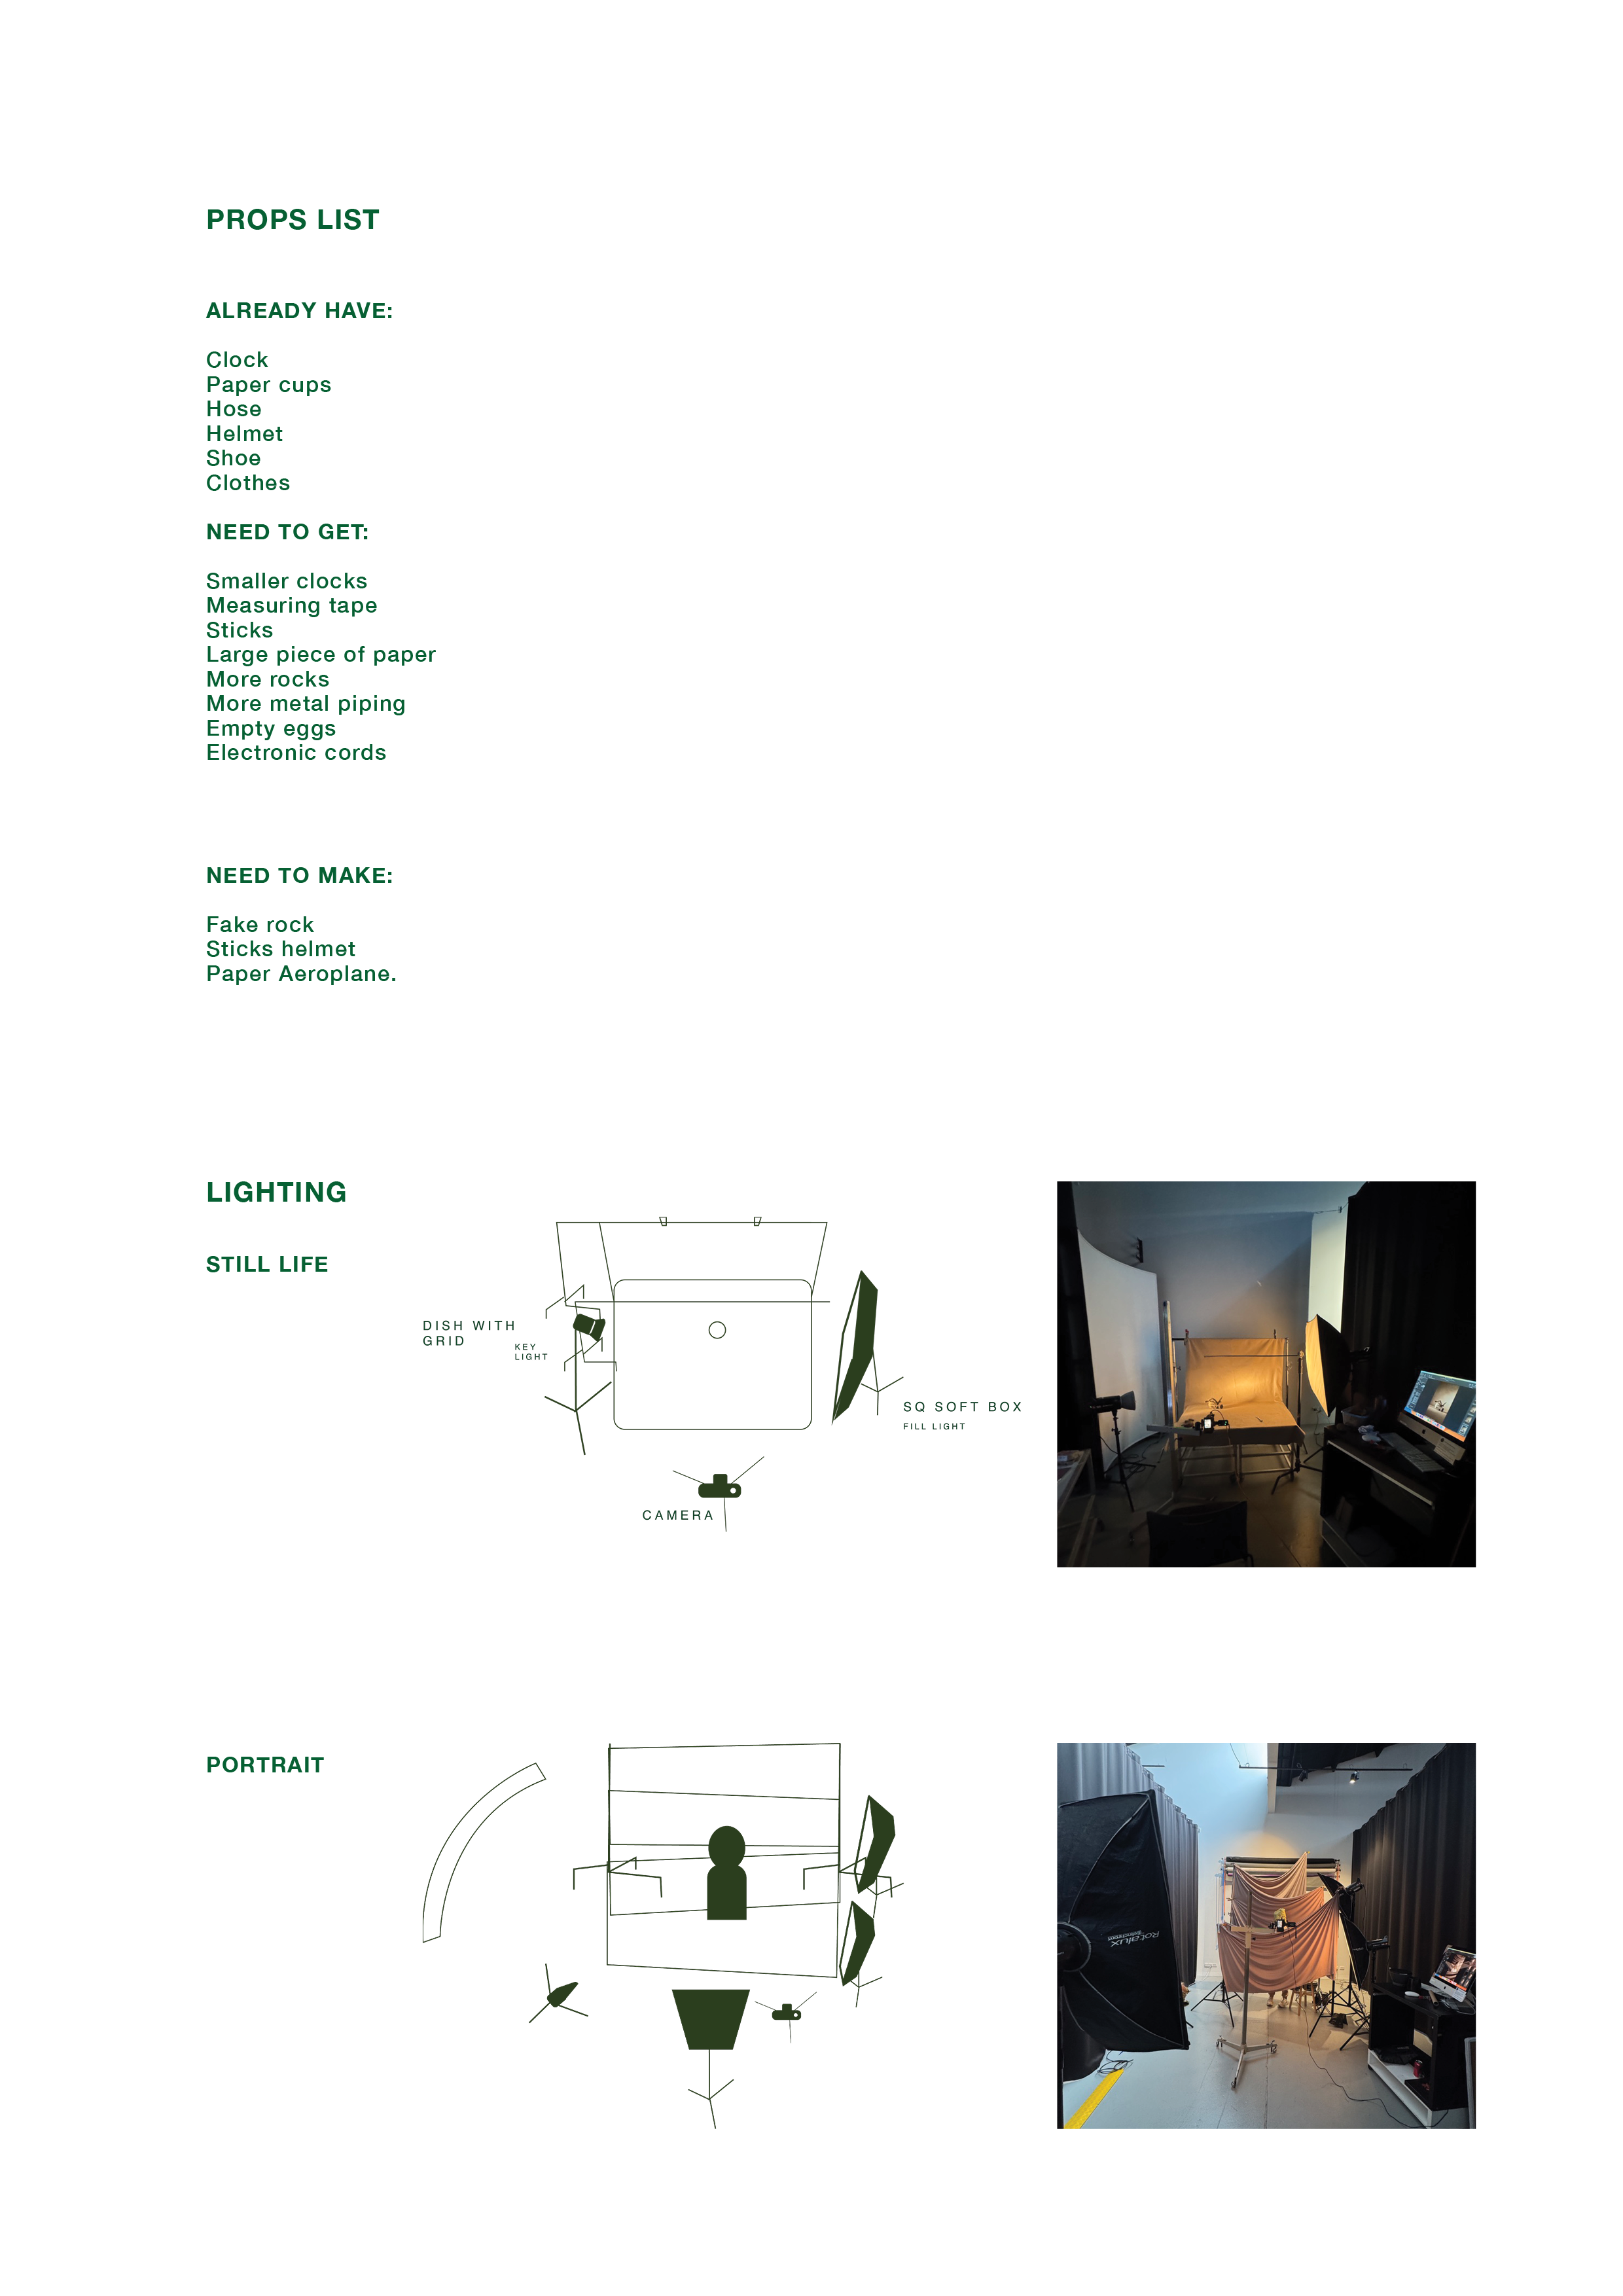
SHOT PLANNING
These shot plans outline the images I plan to capture over the coming weeks as well as the meaning and concept behind each shot. It accounts for items I need to acquire and how they will be styled.
Shoot 7
Details:
When: 19/11
Where: PSC Studio
Lighting: 2 x Elinchrom Lights
1 x Dish and grid
1 x Large Sq Soft Box
Shoot Plan:
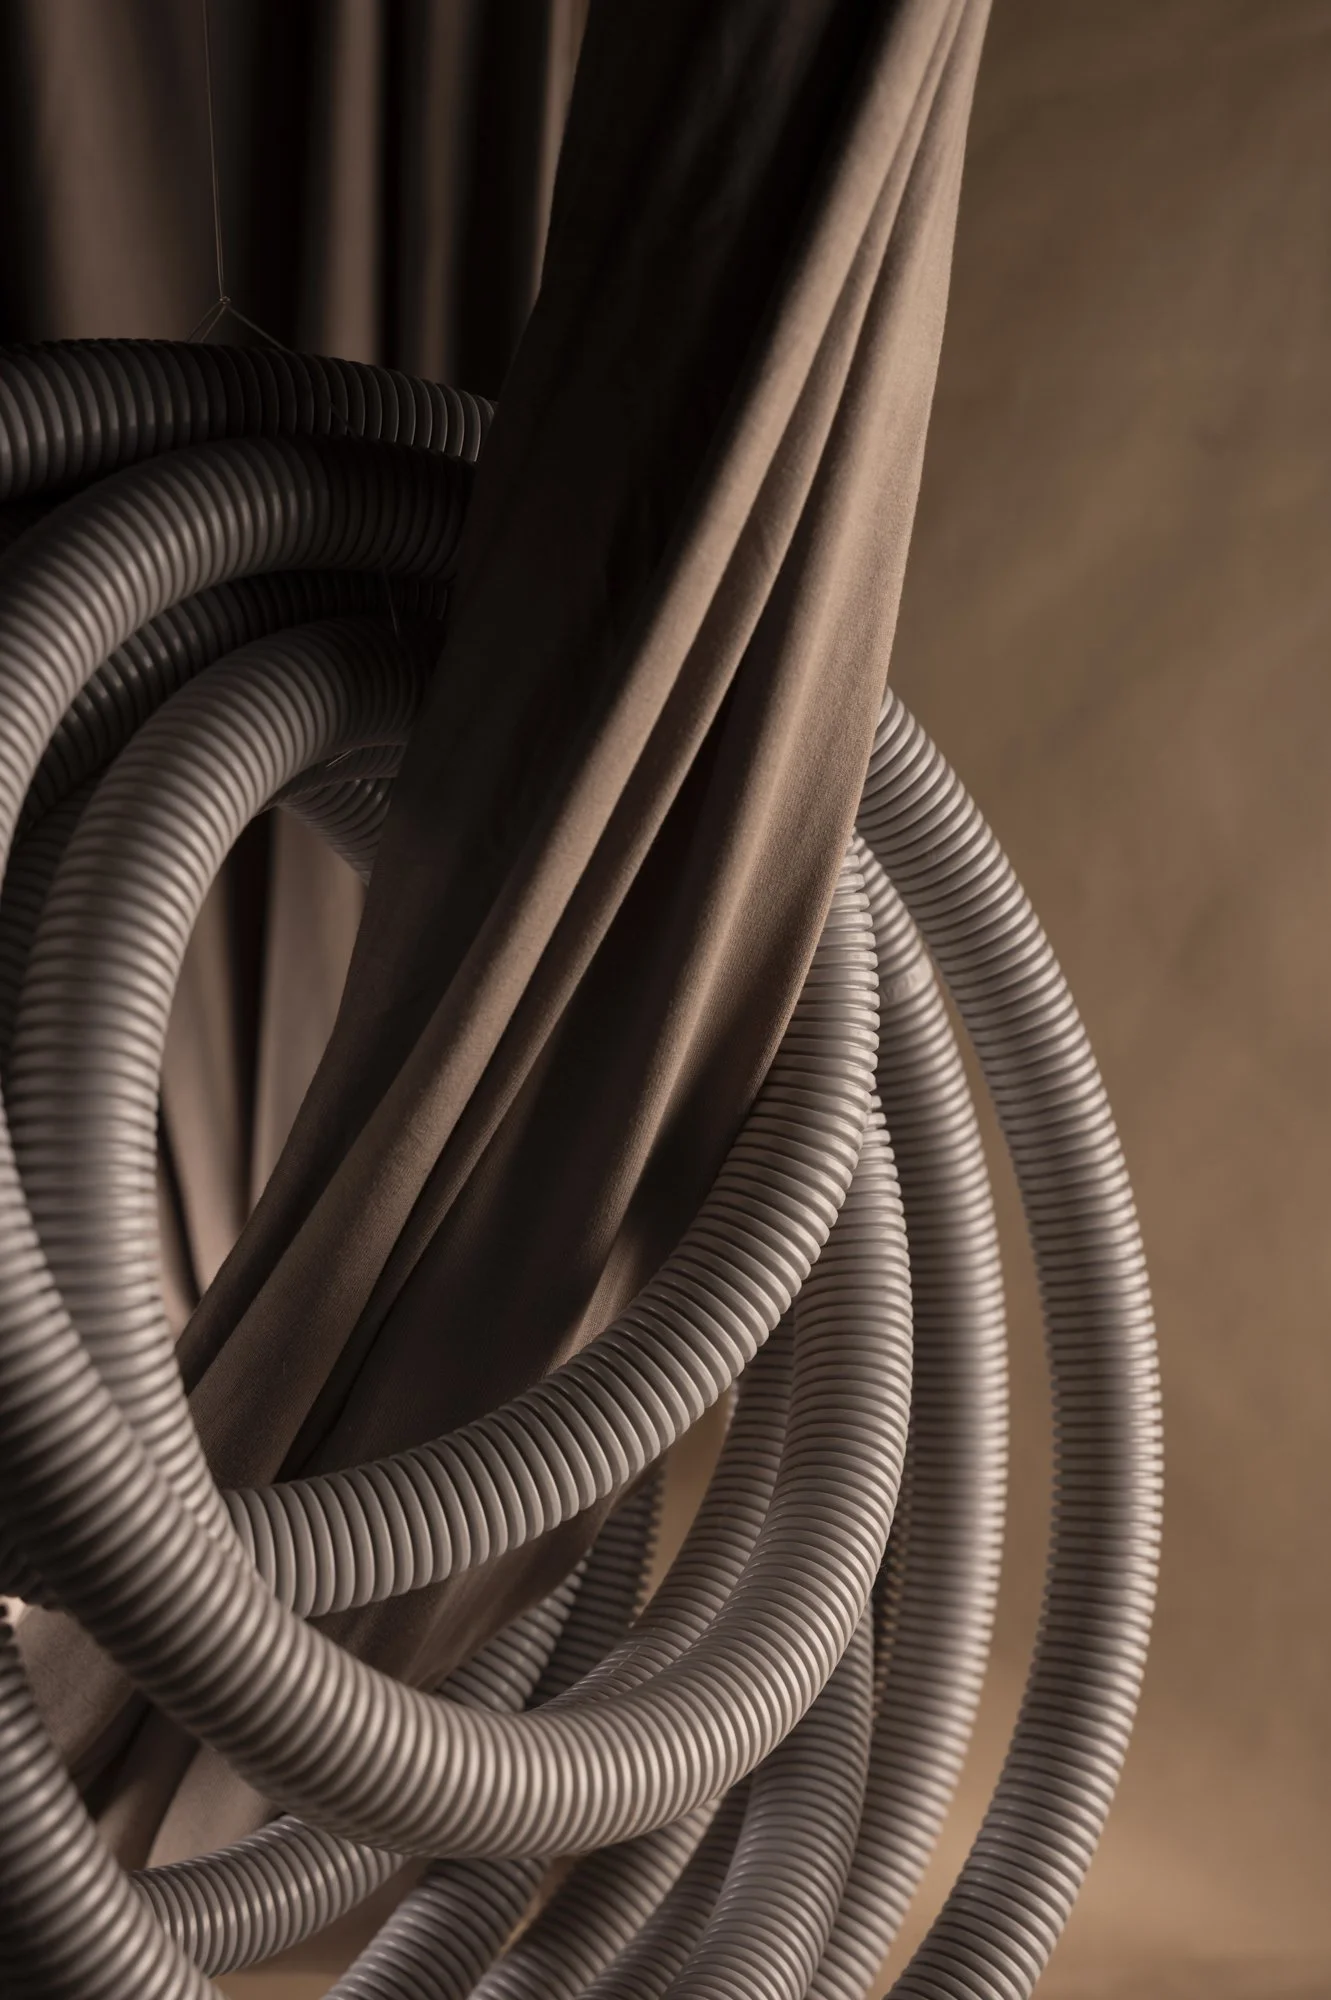
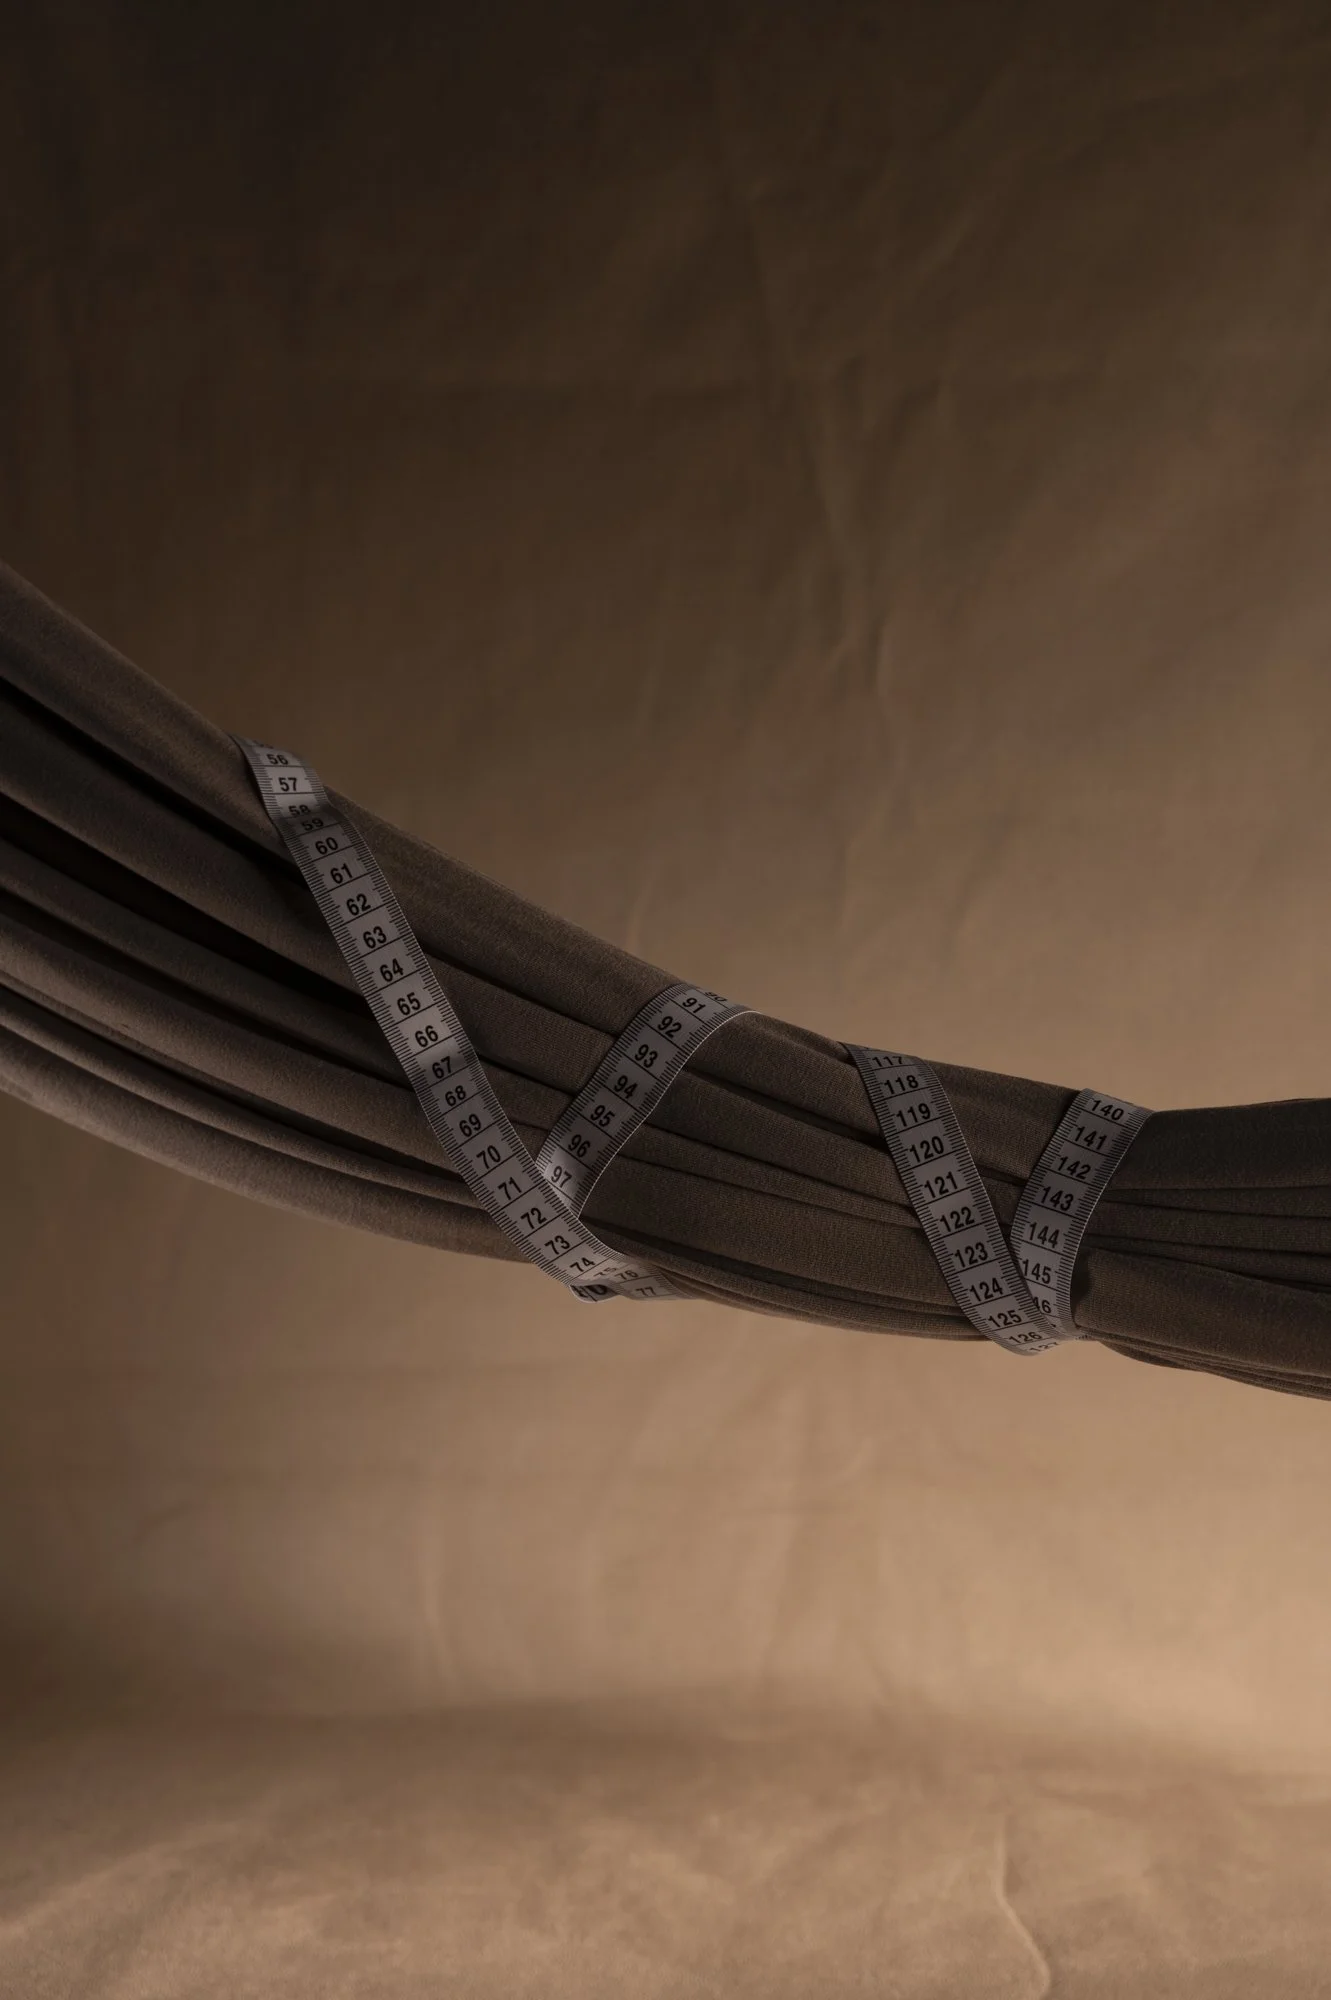
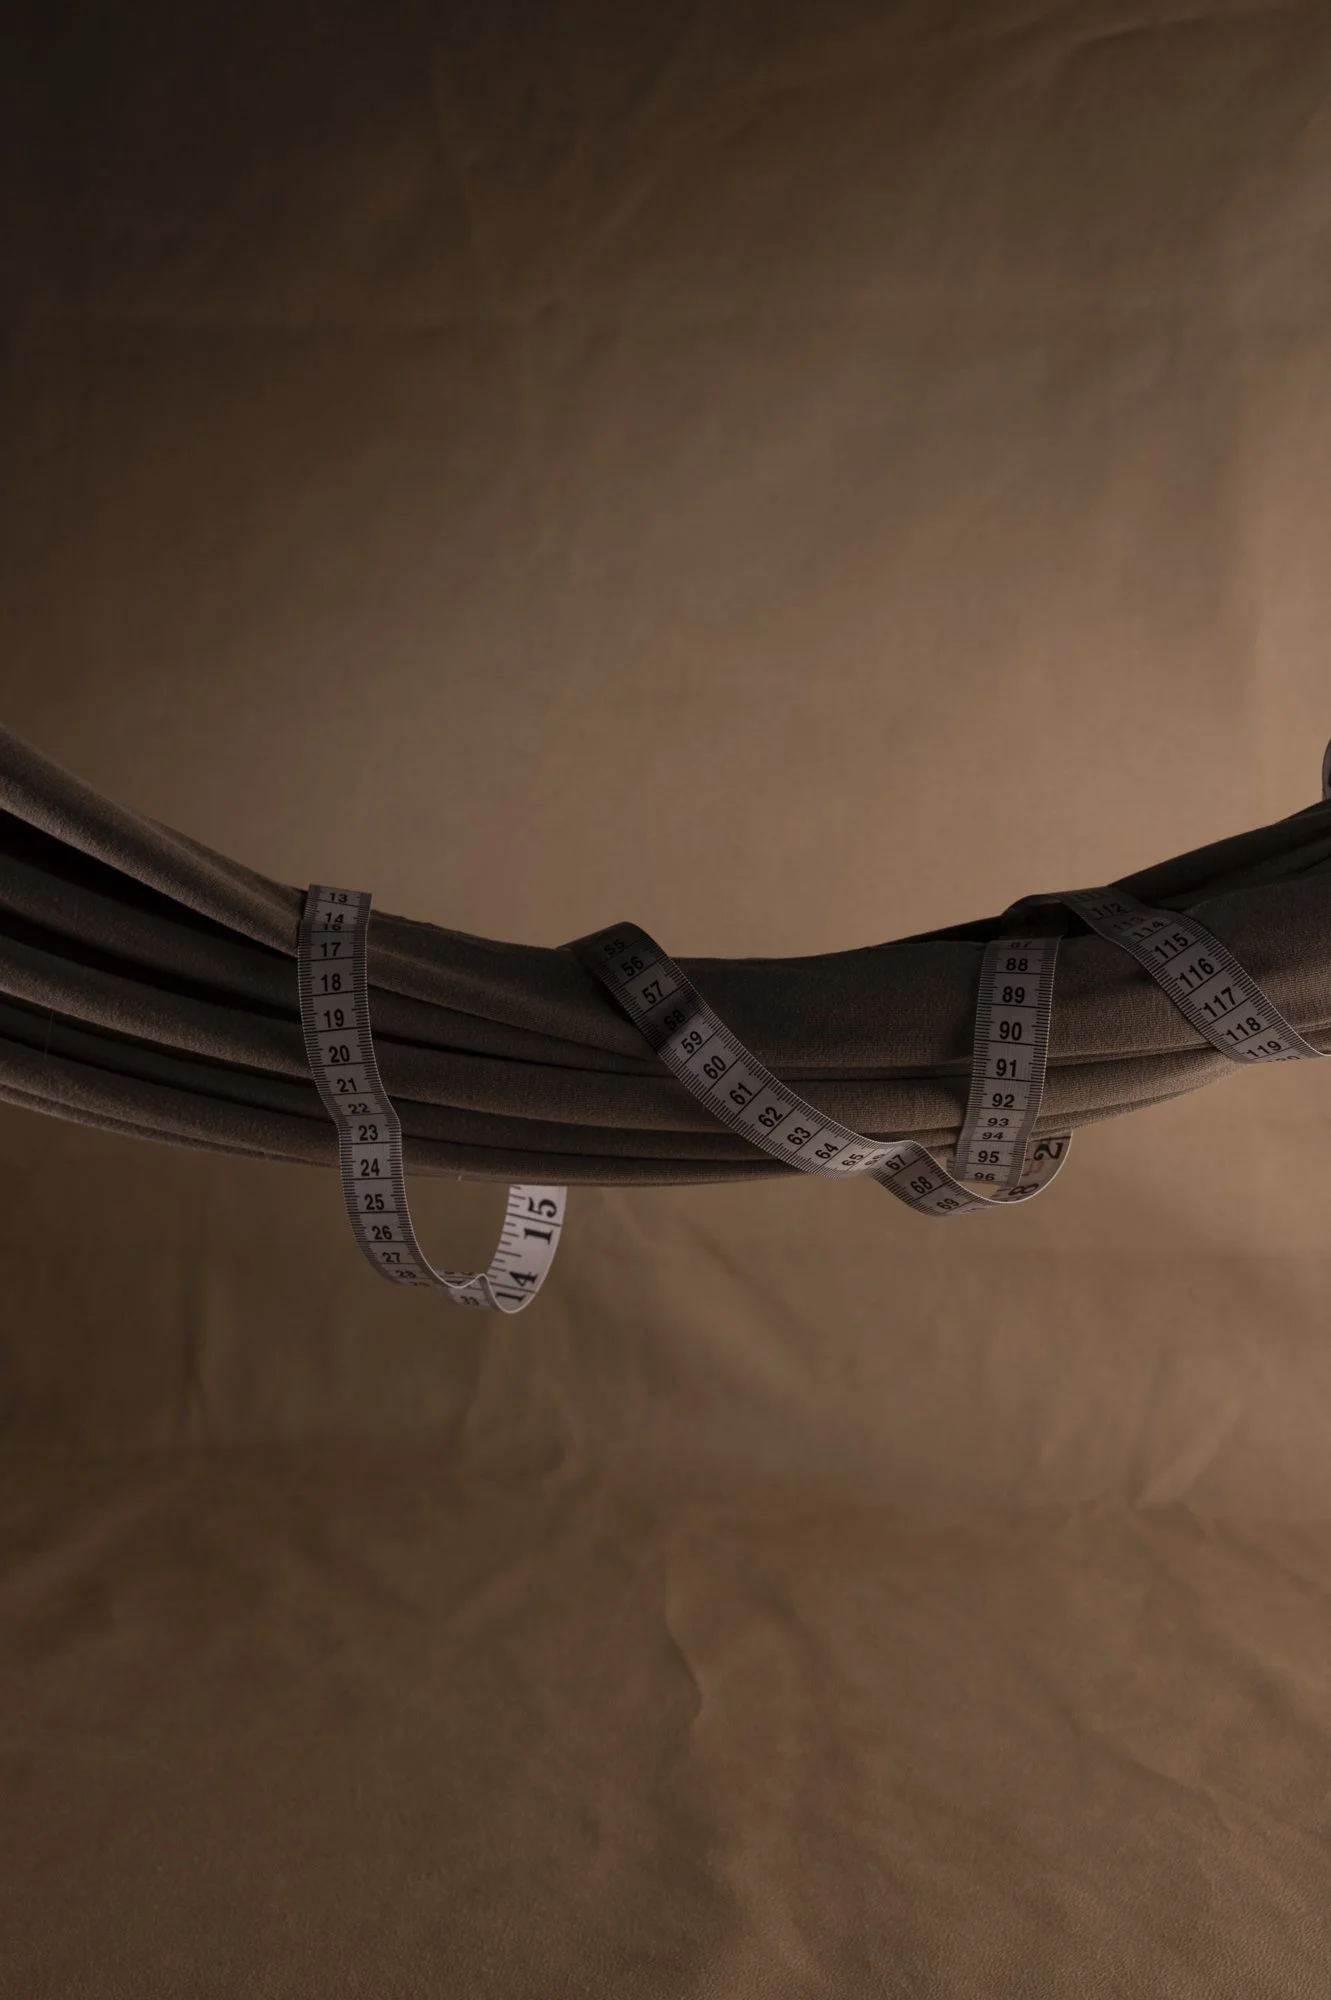
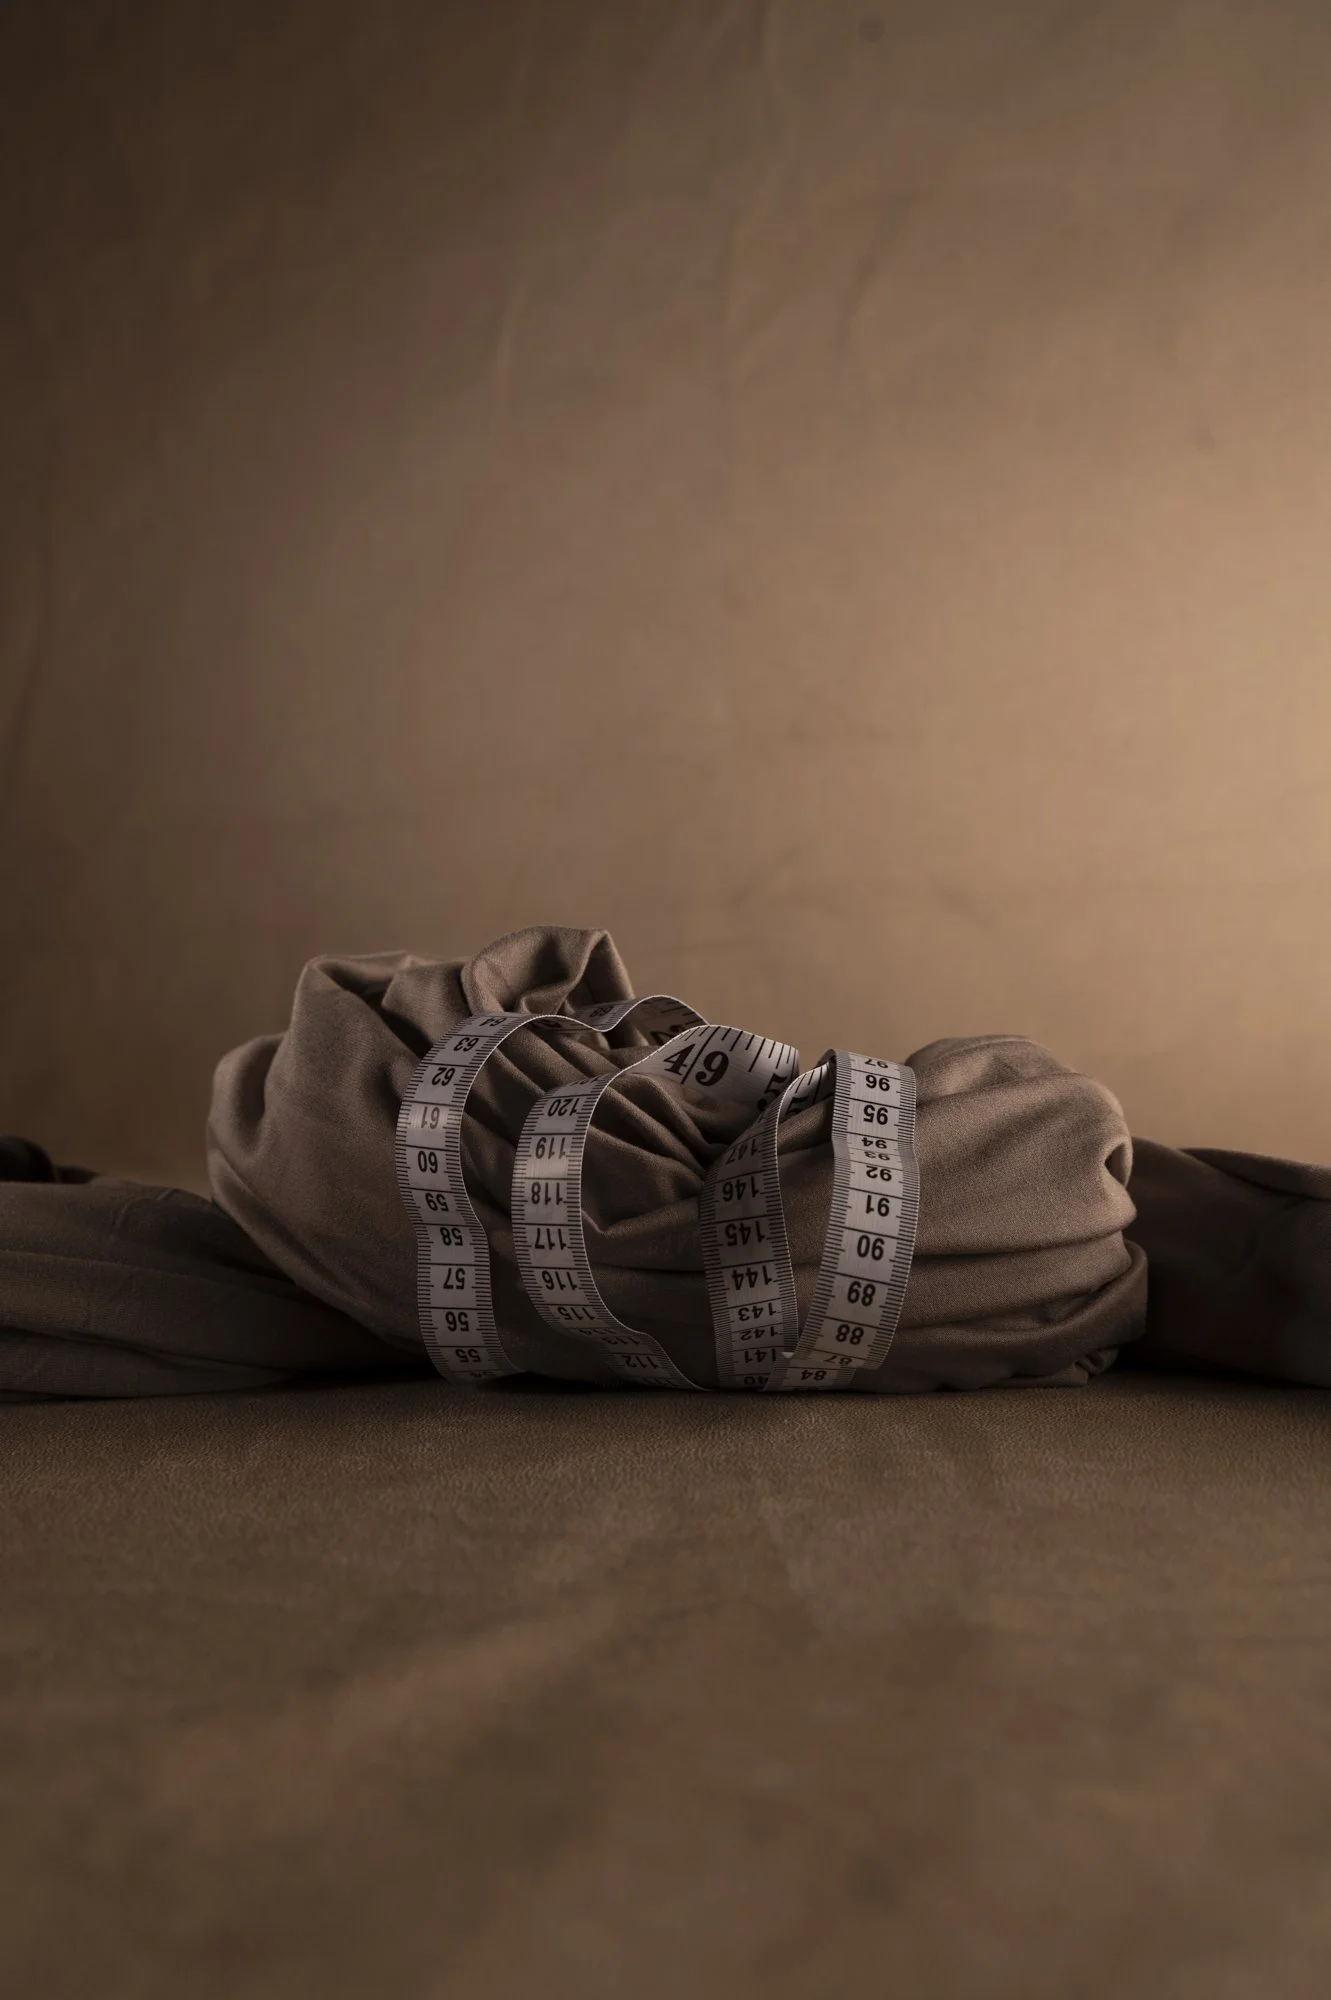
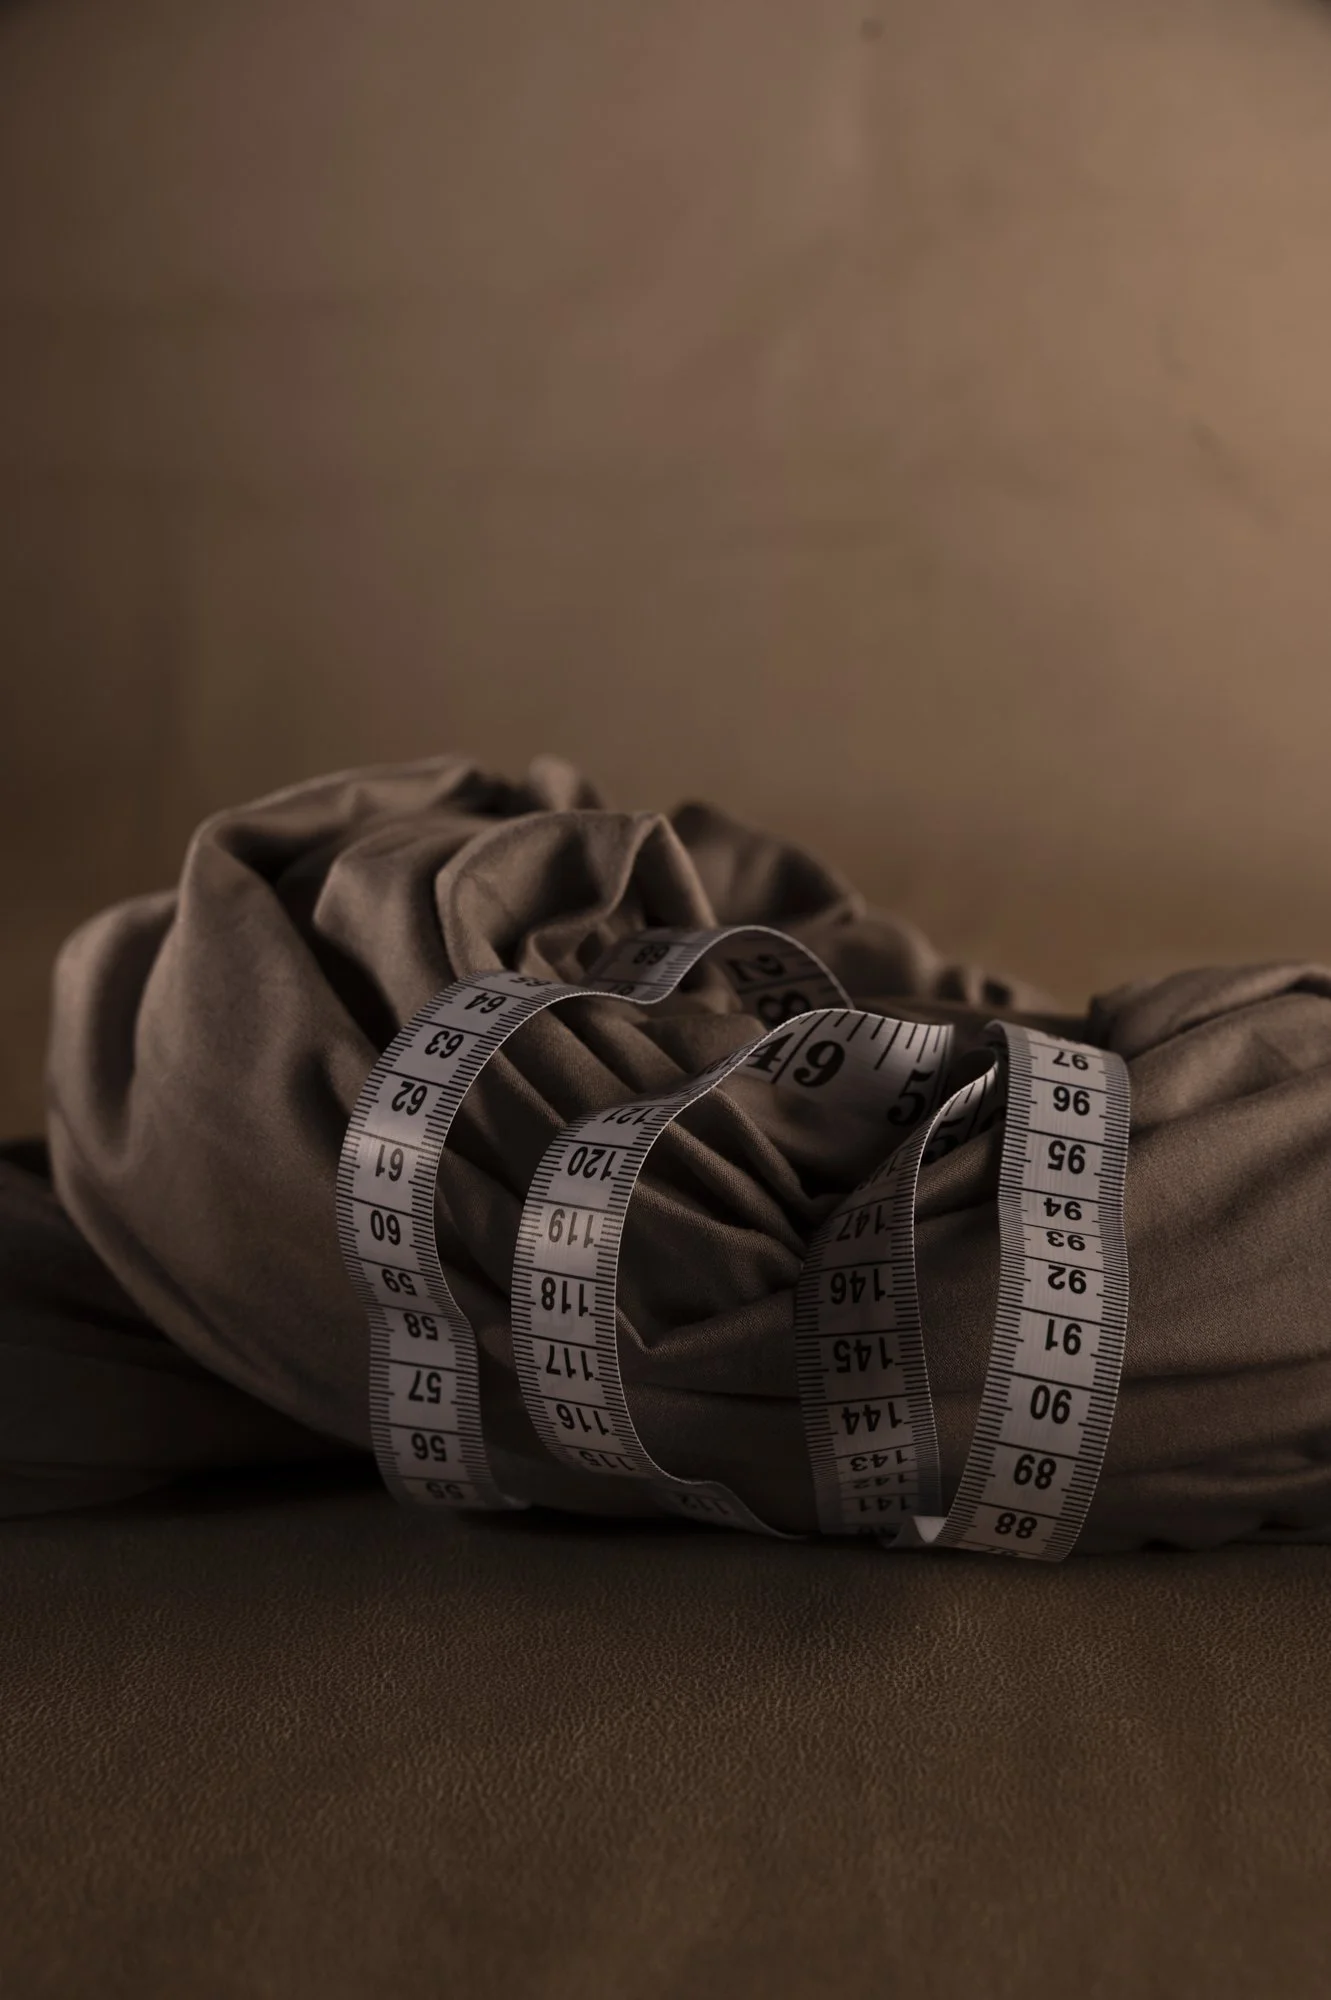
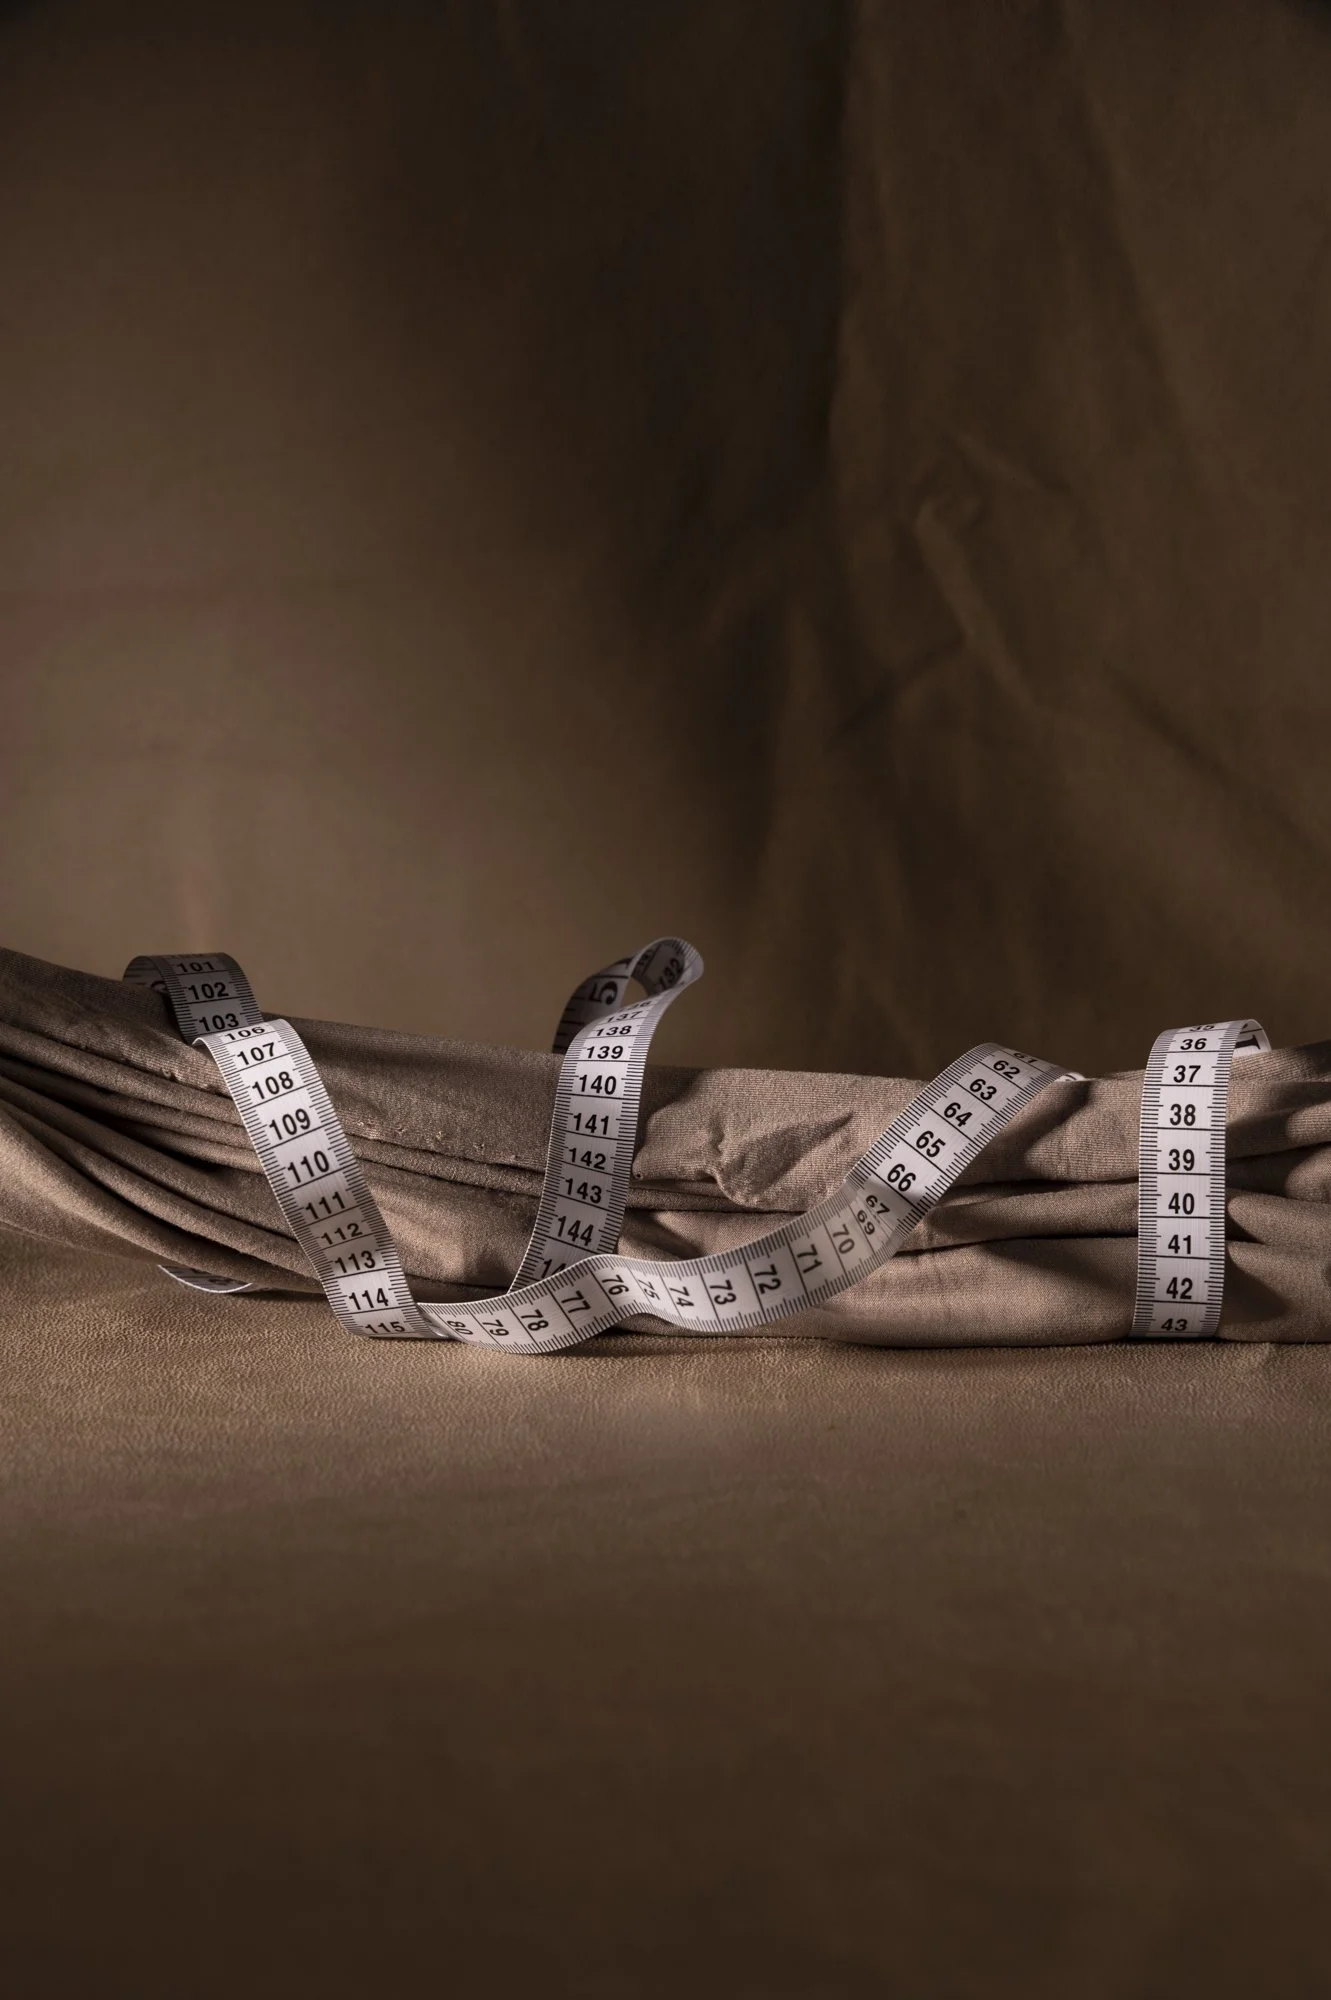
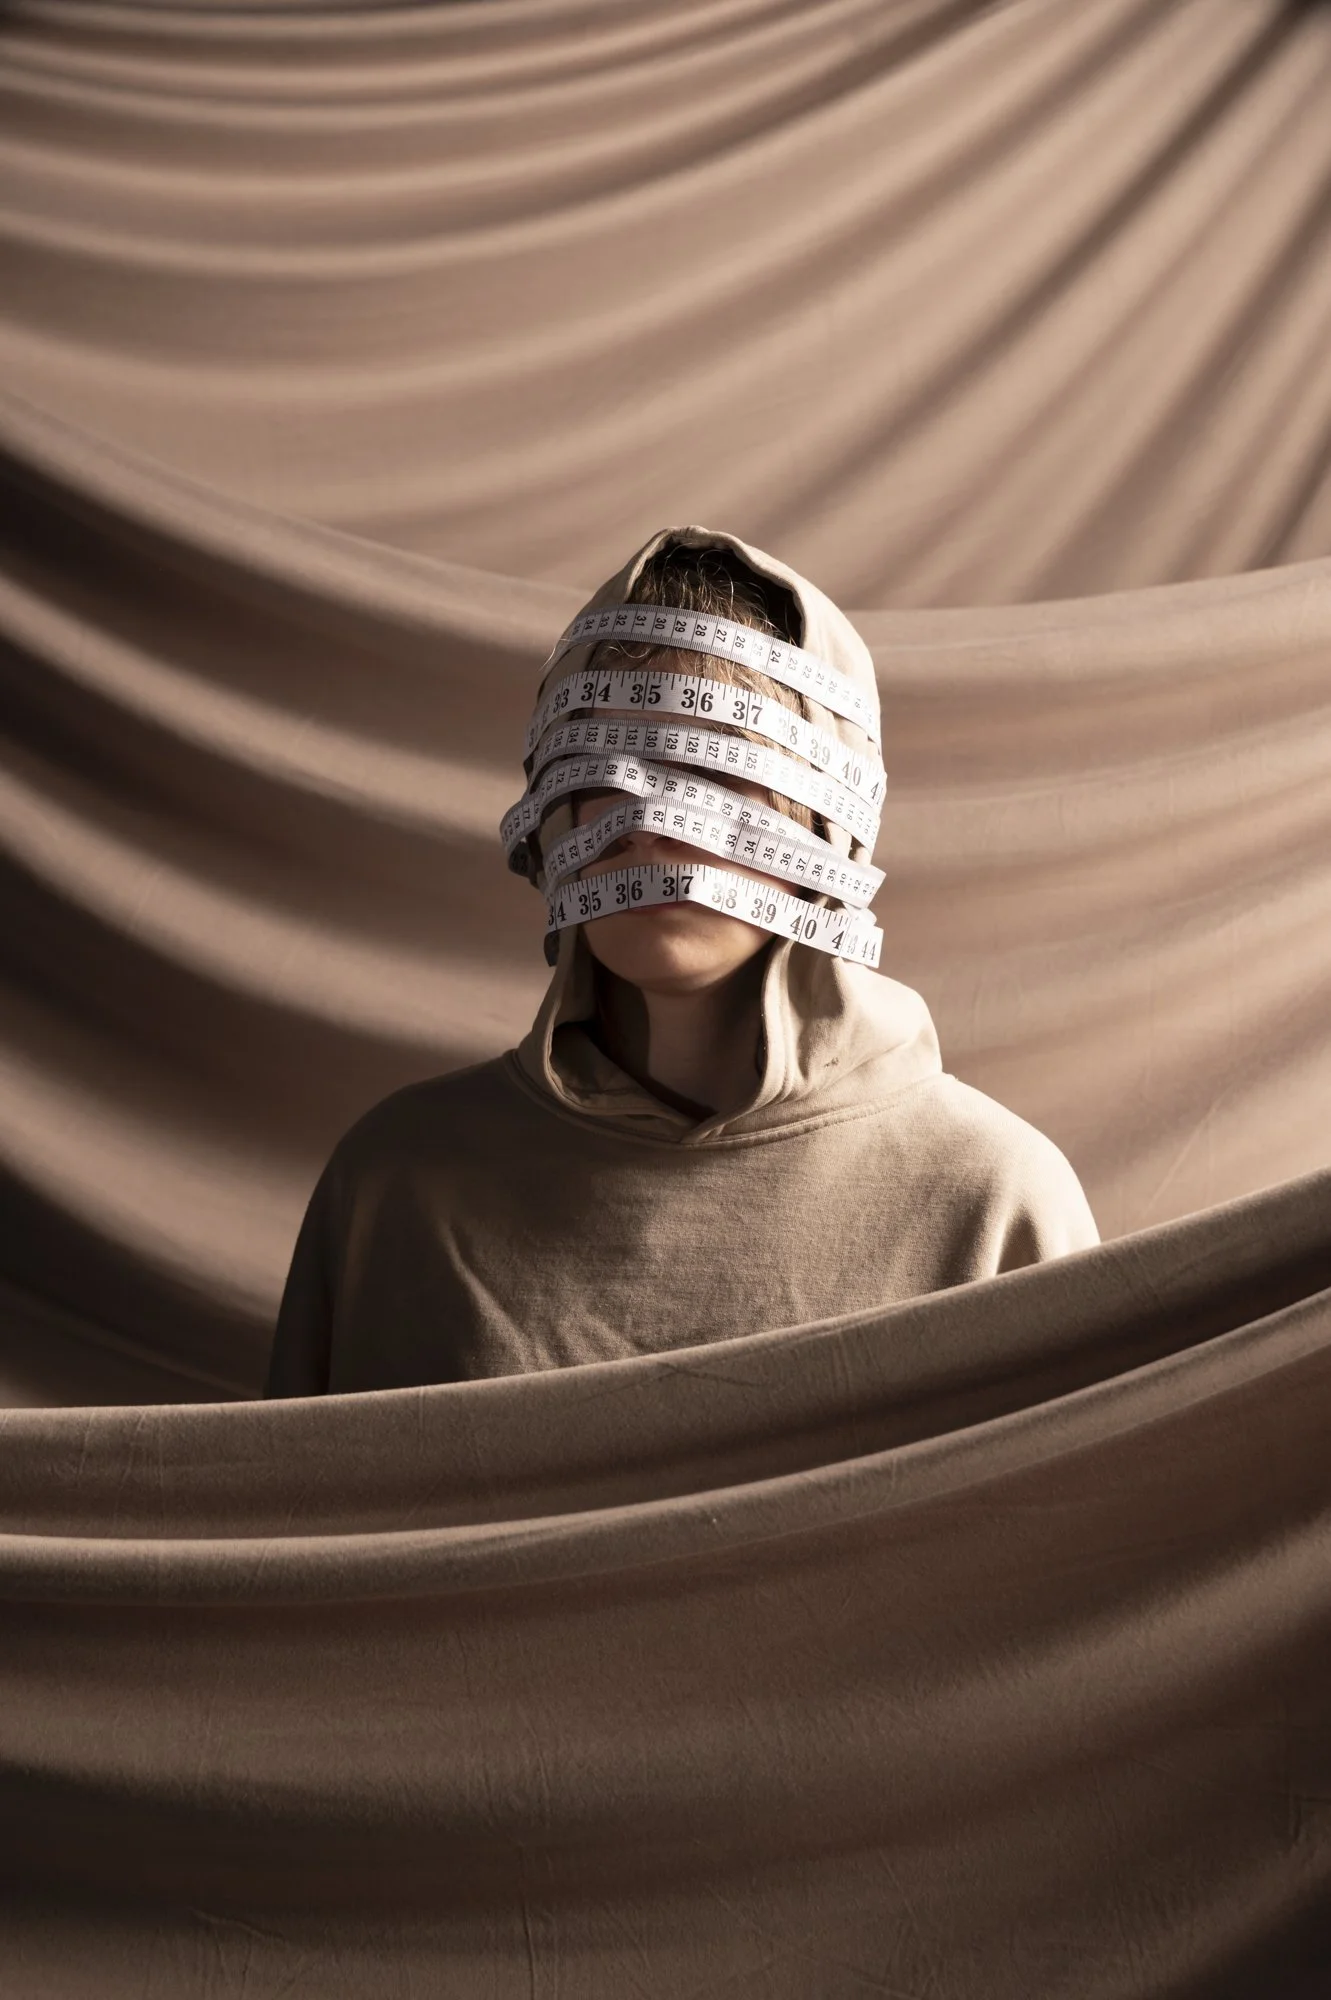
The goal for this photoshoot was to produce the still life images for the pipe and measuring tape.
Lighting plan:
Dish and grid serve as the key light. This is angled to stream across the backdrop largely. This helps seperate the subject from the background, adding depth and visual interest.
Sq soft box is used to fill both backdrop and subject.
Styling:
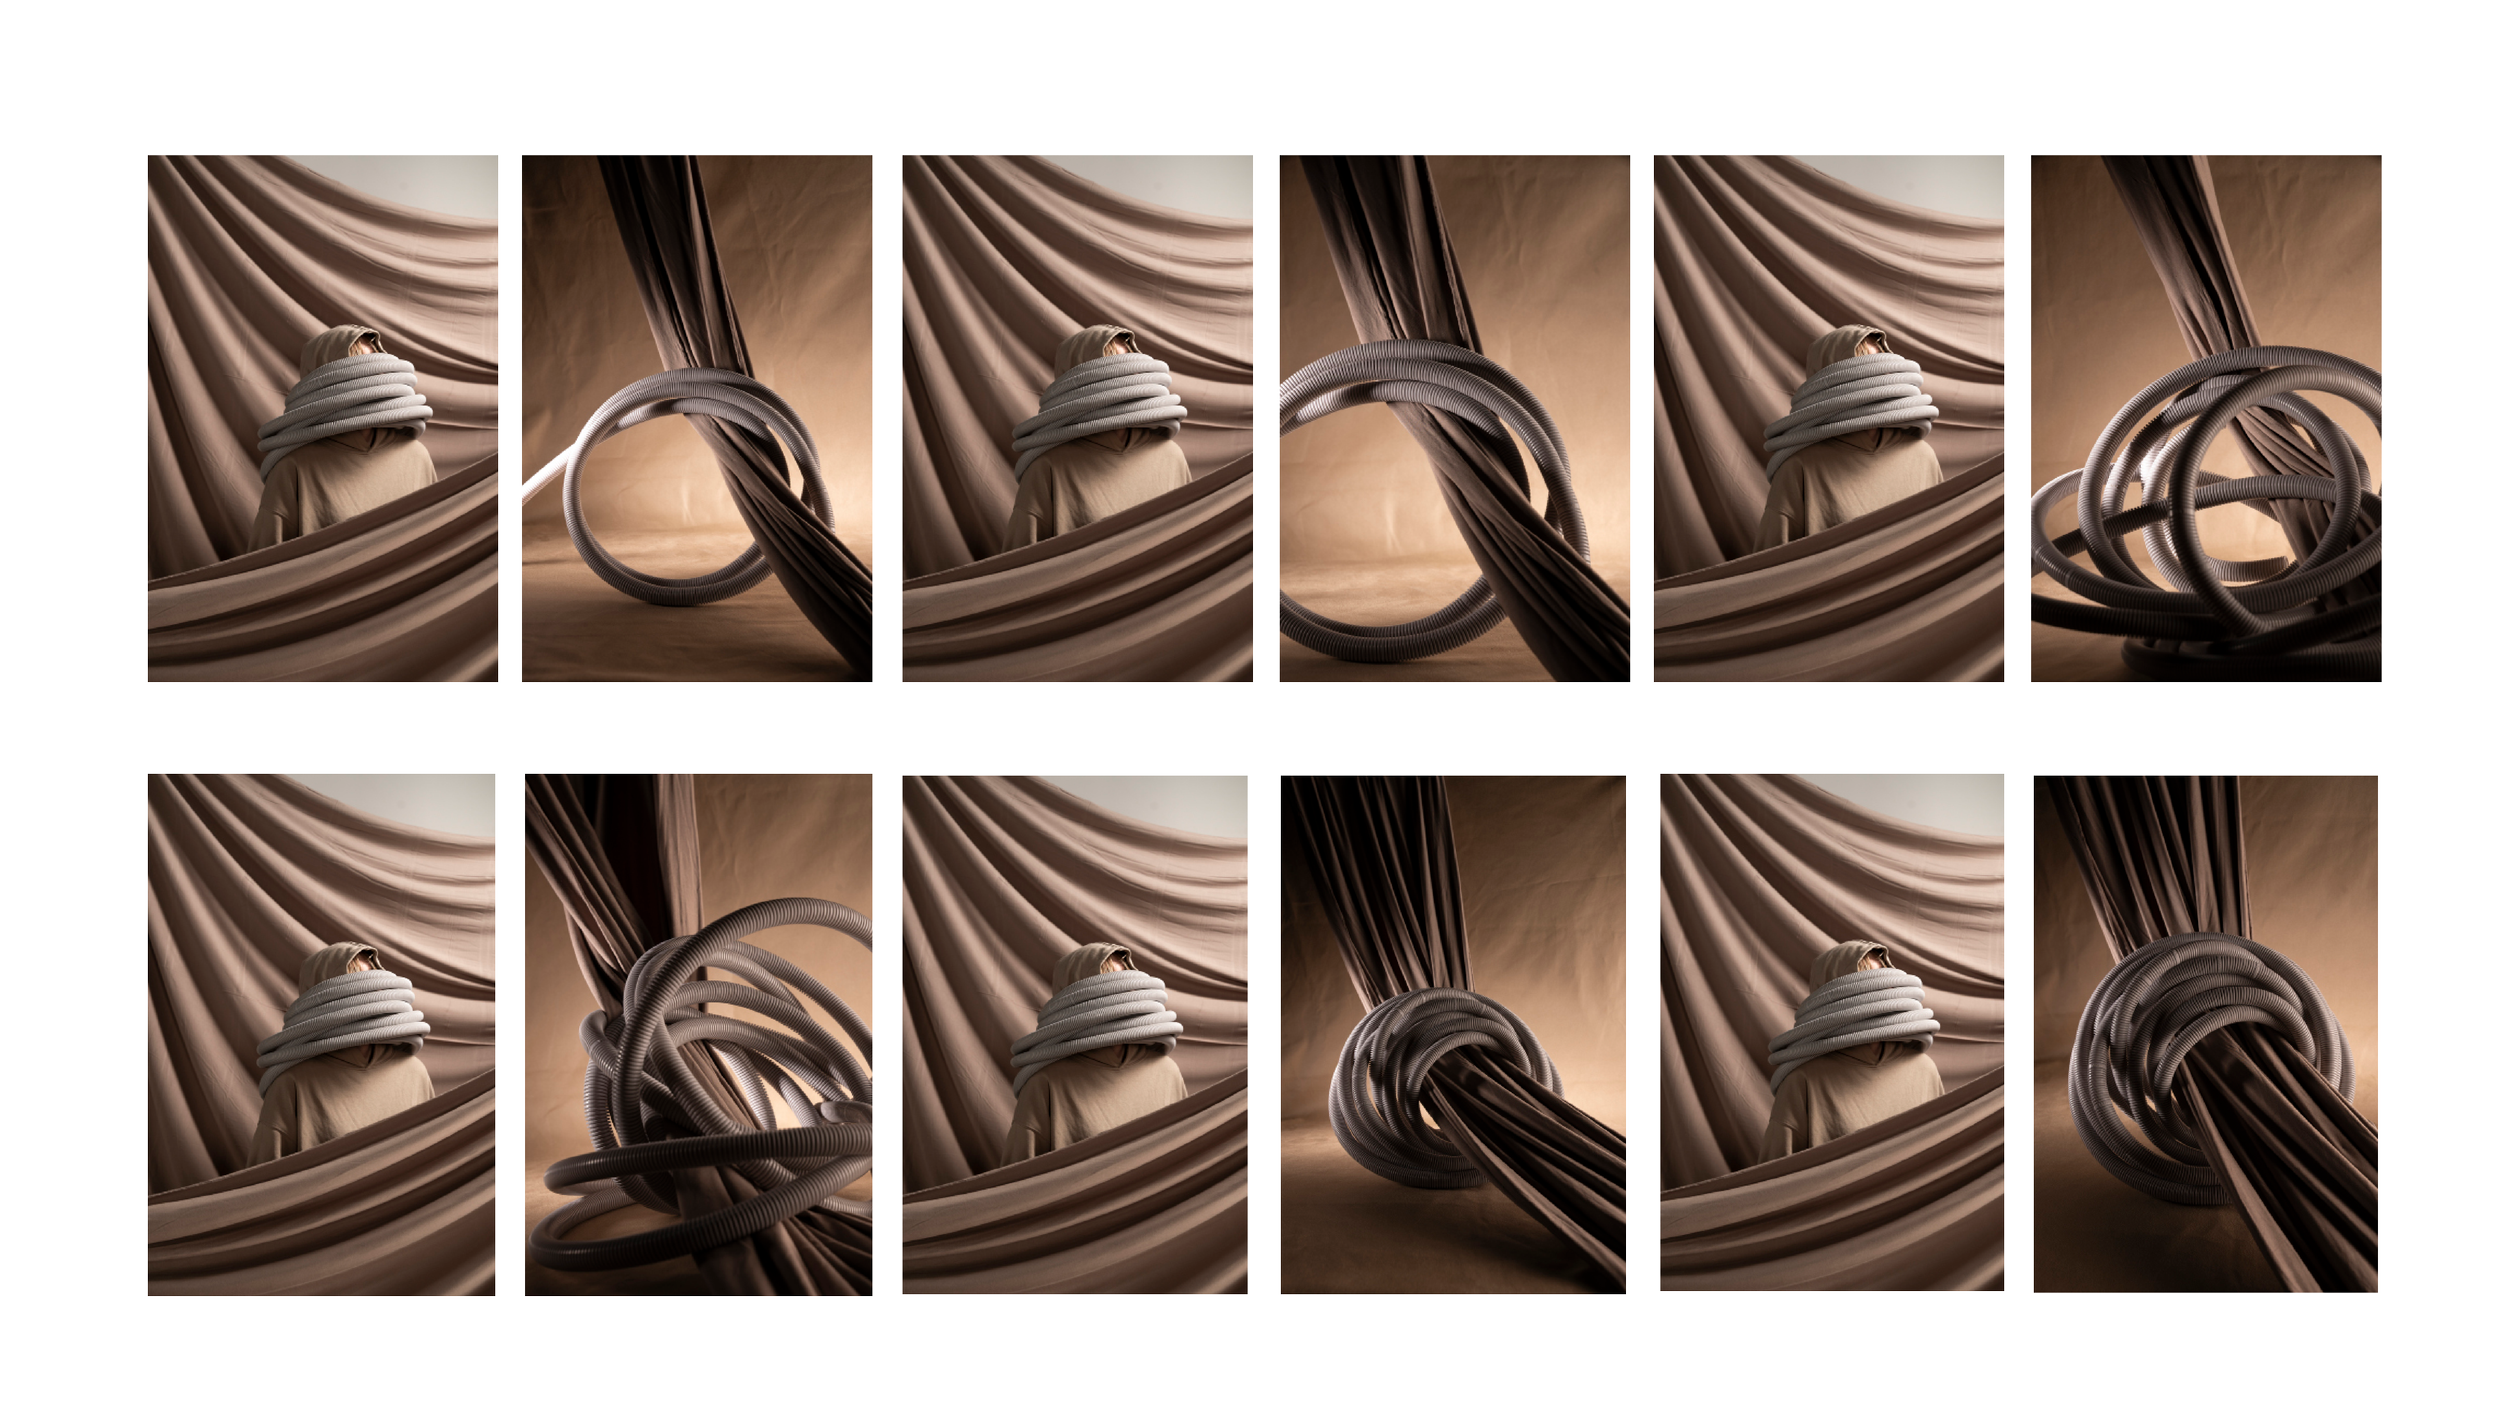
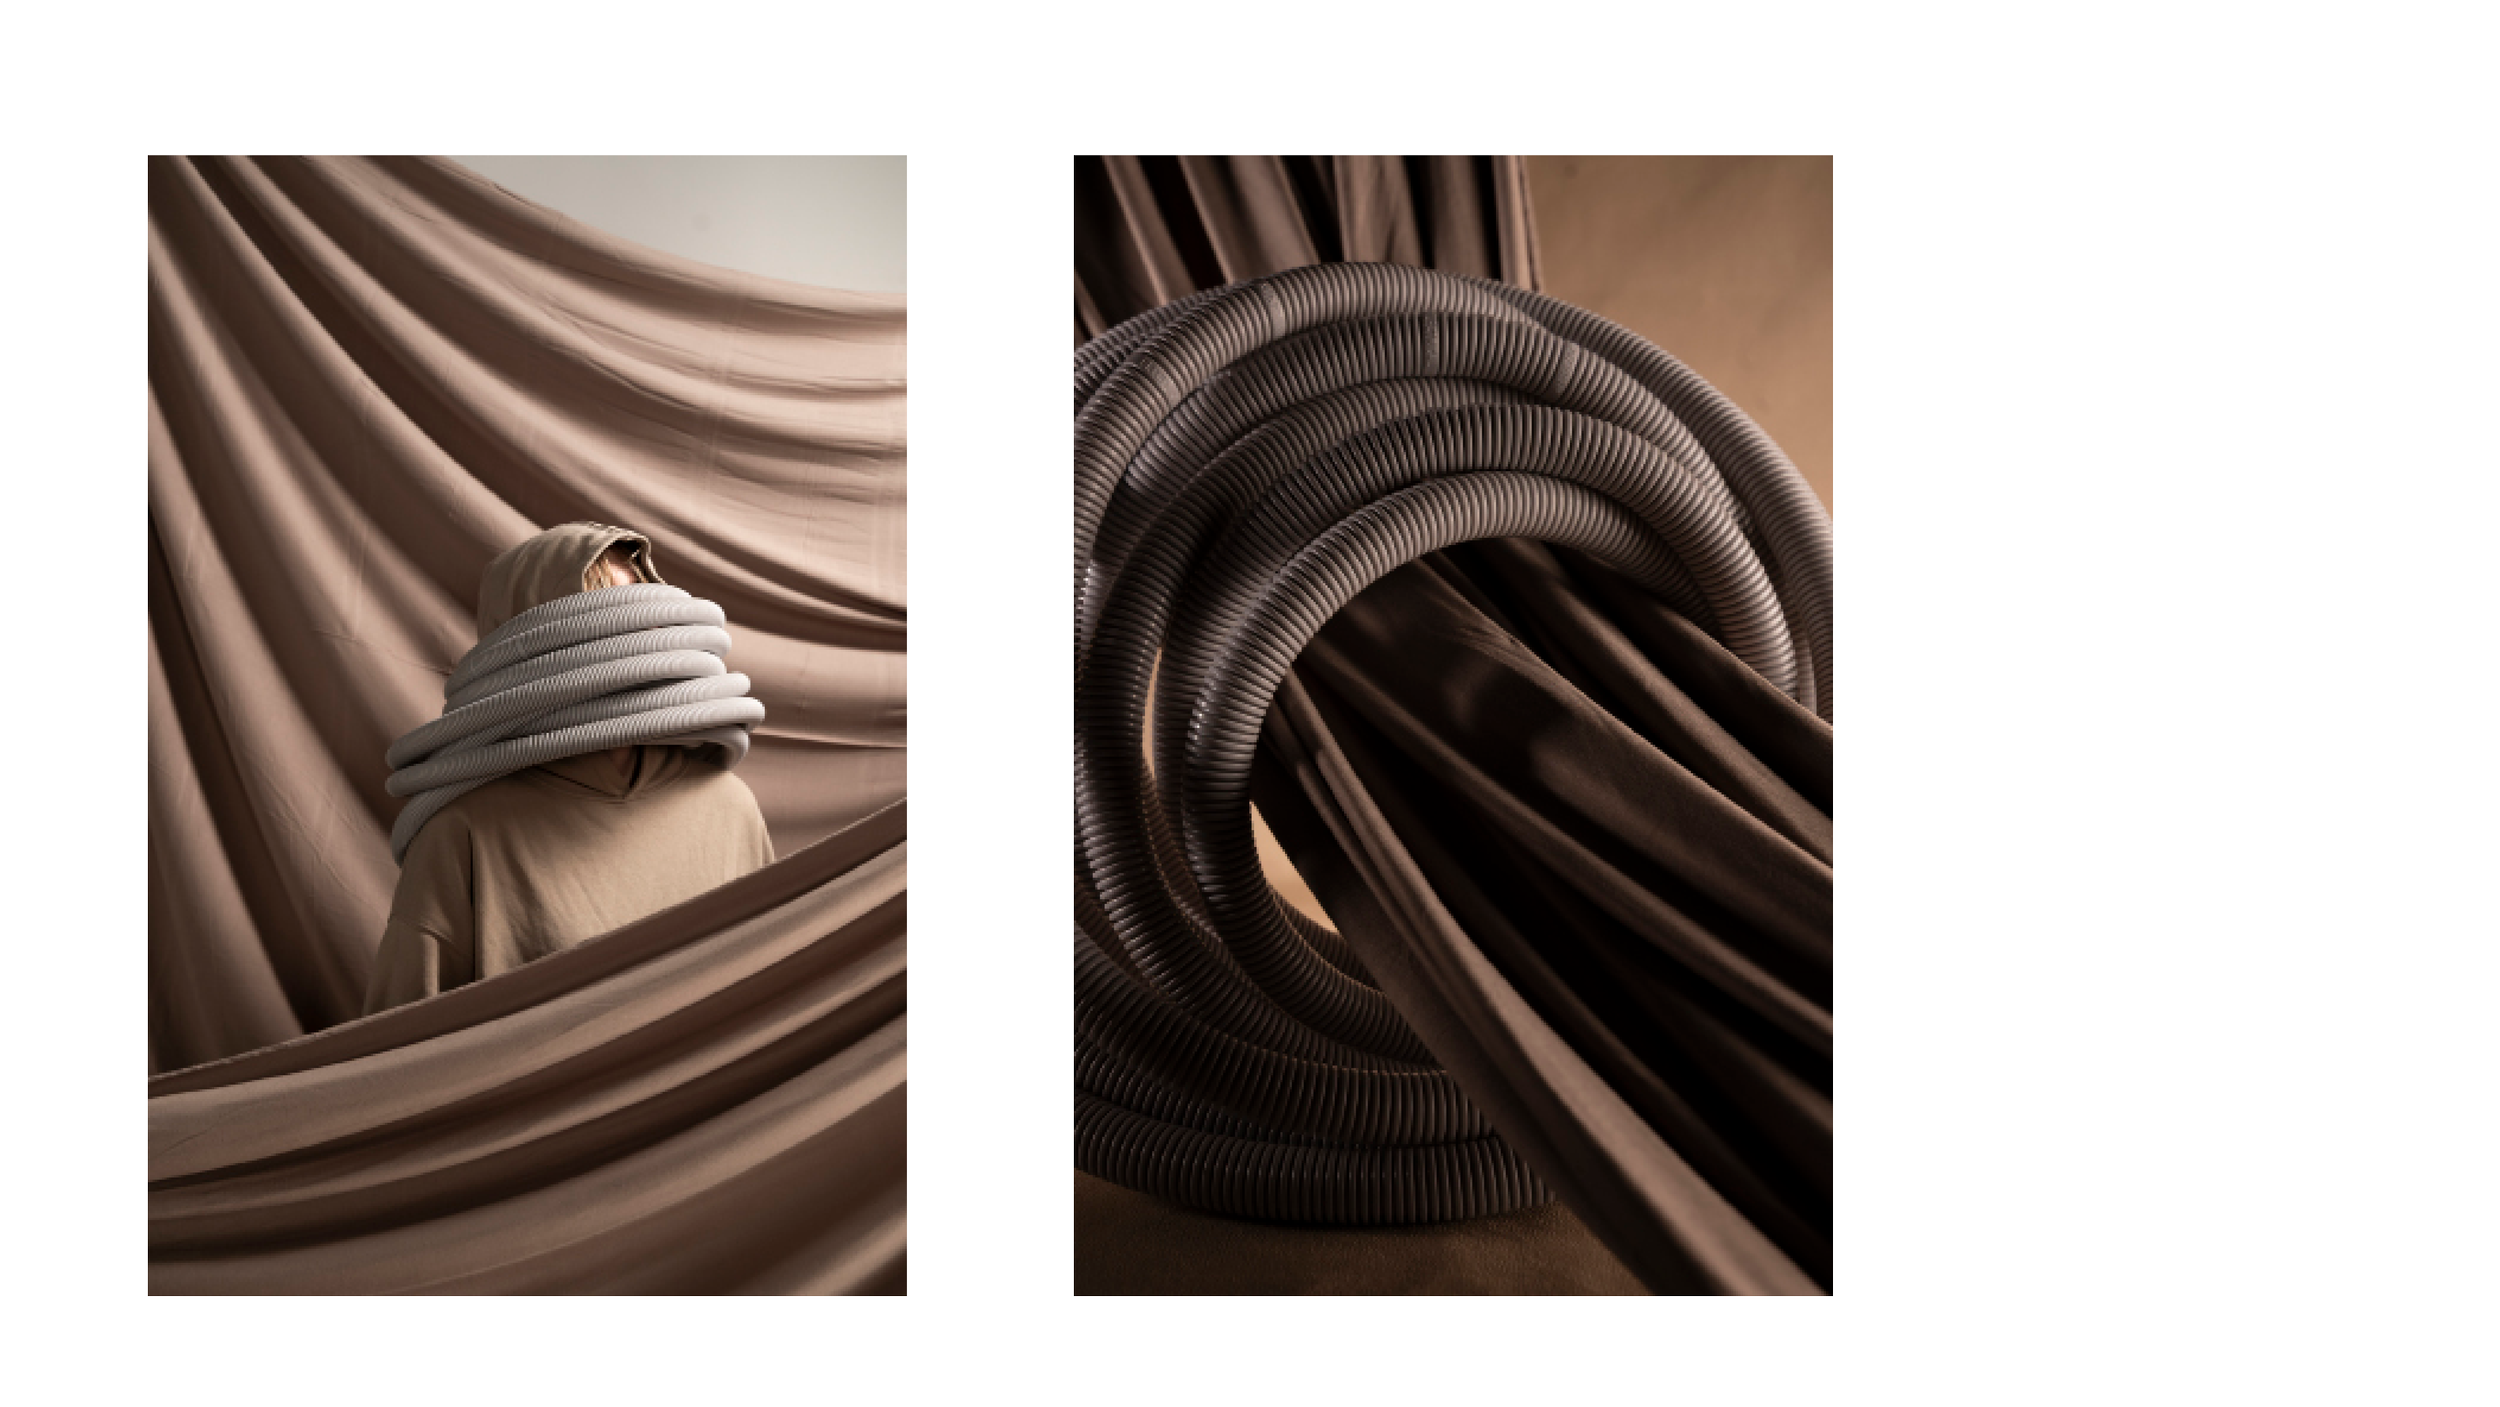
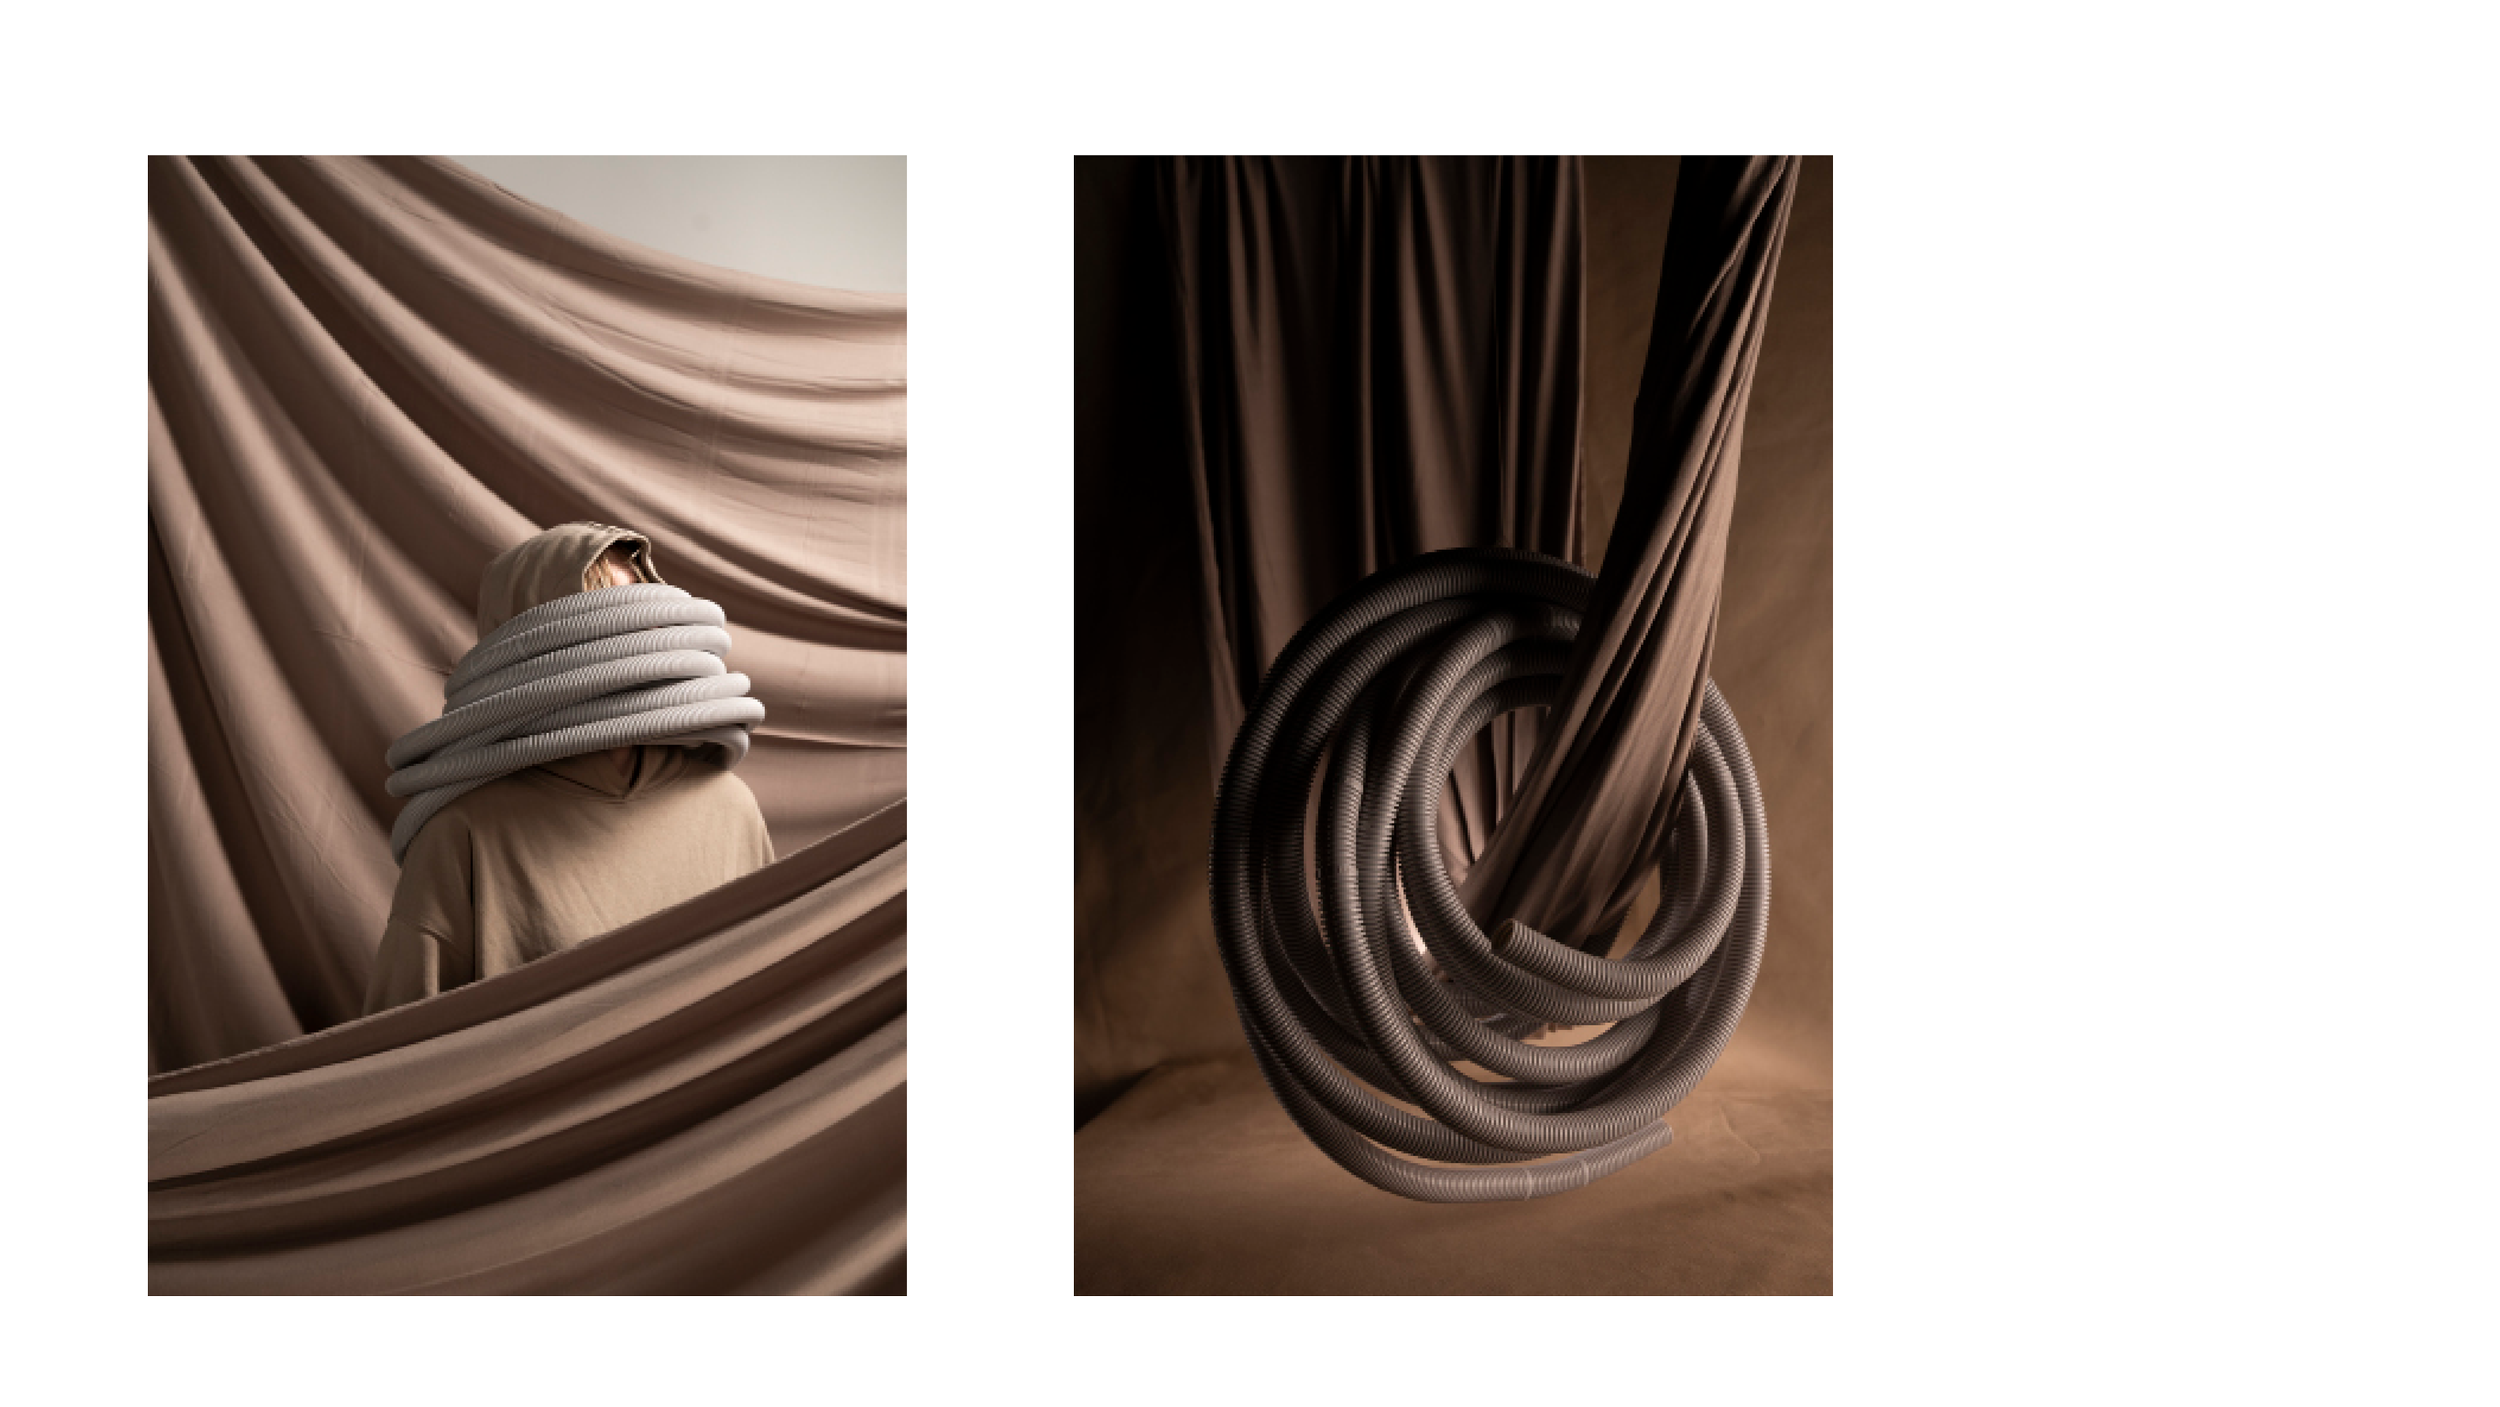
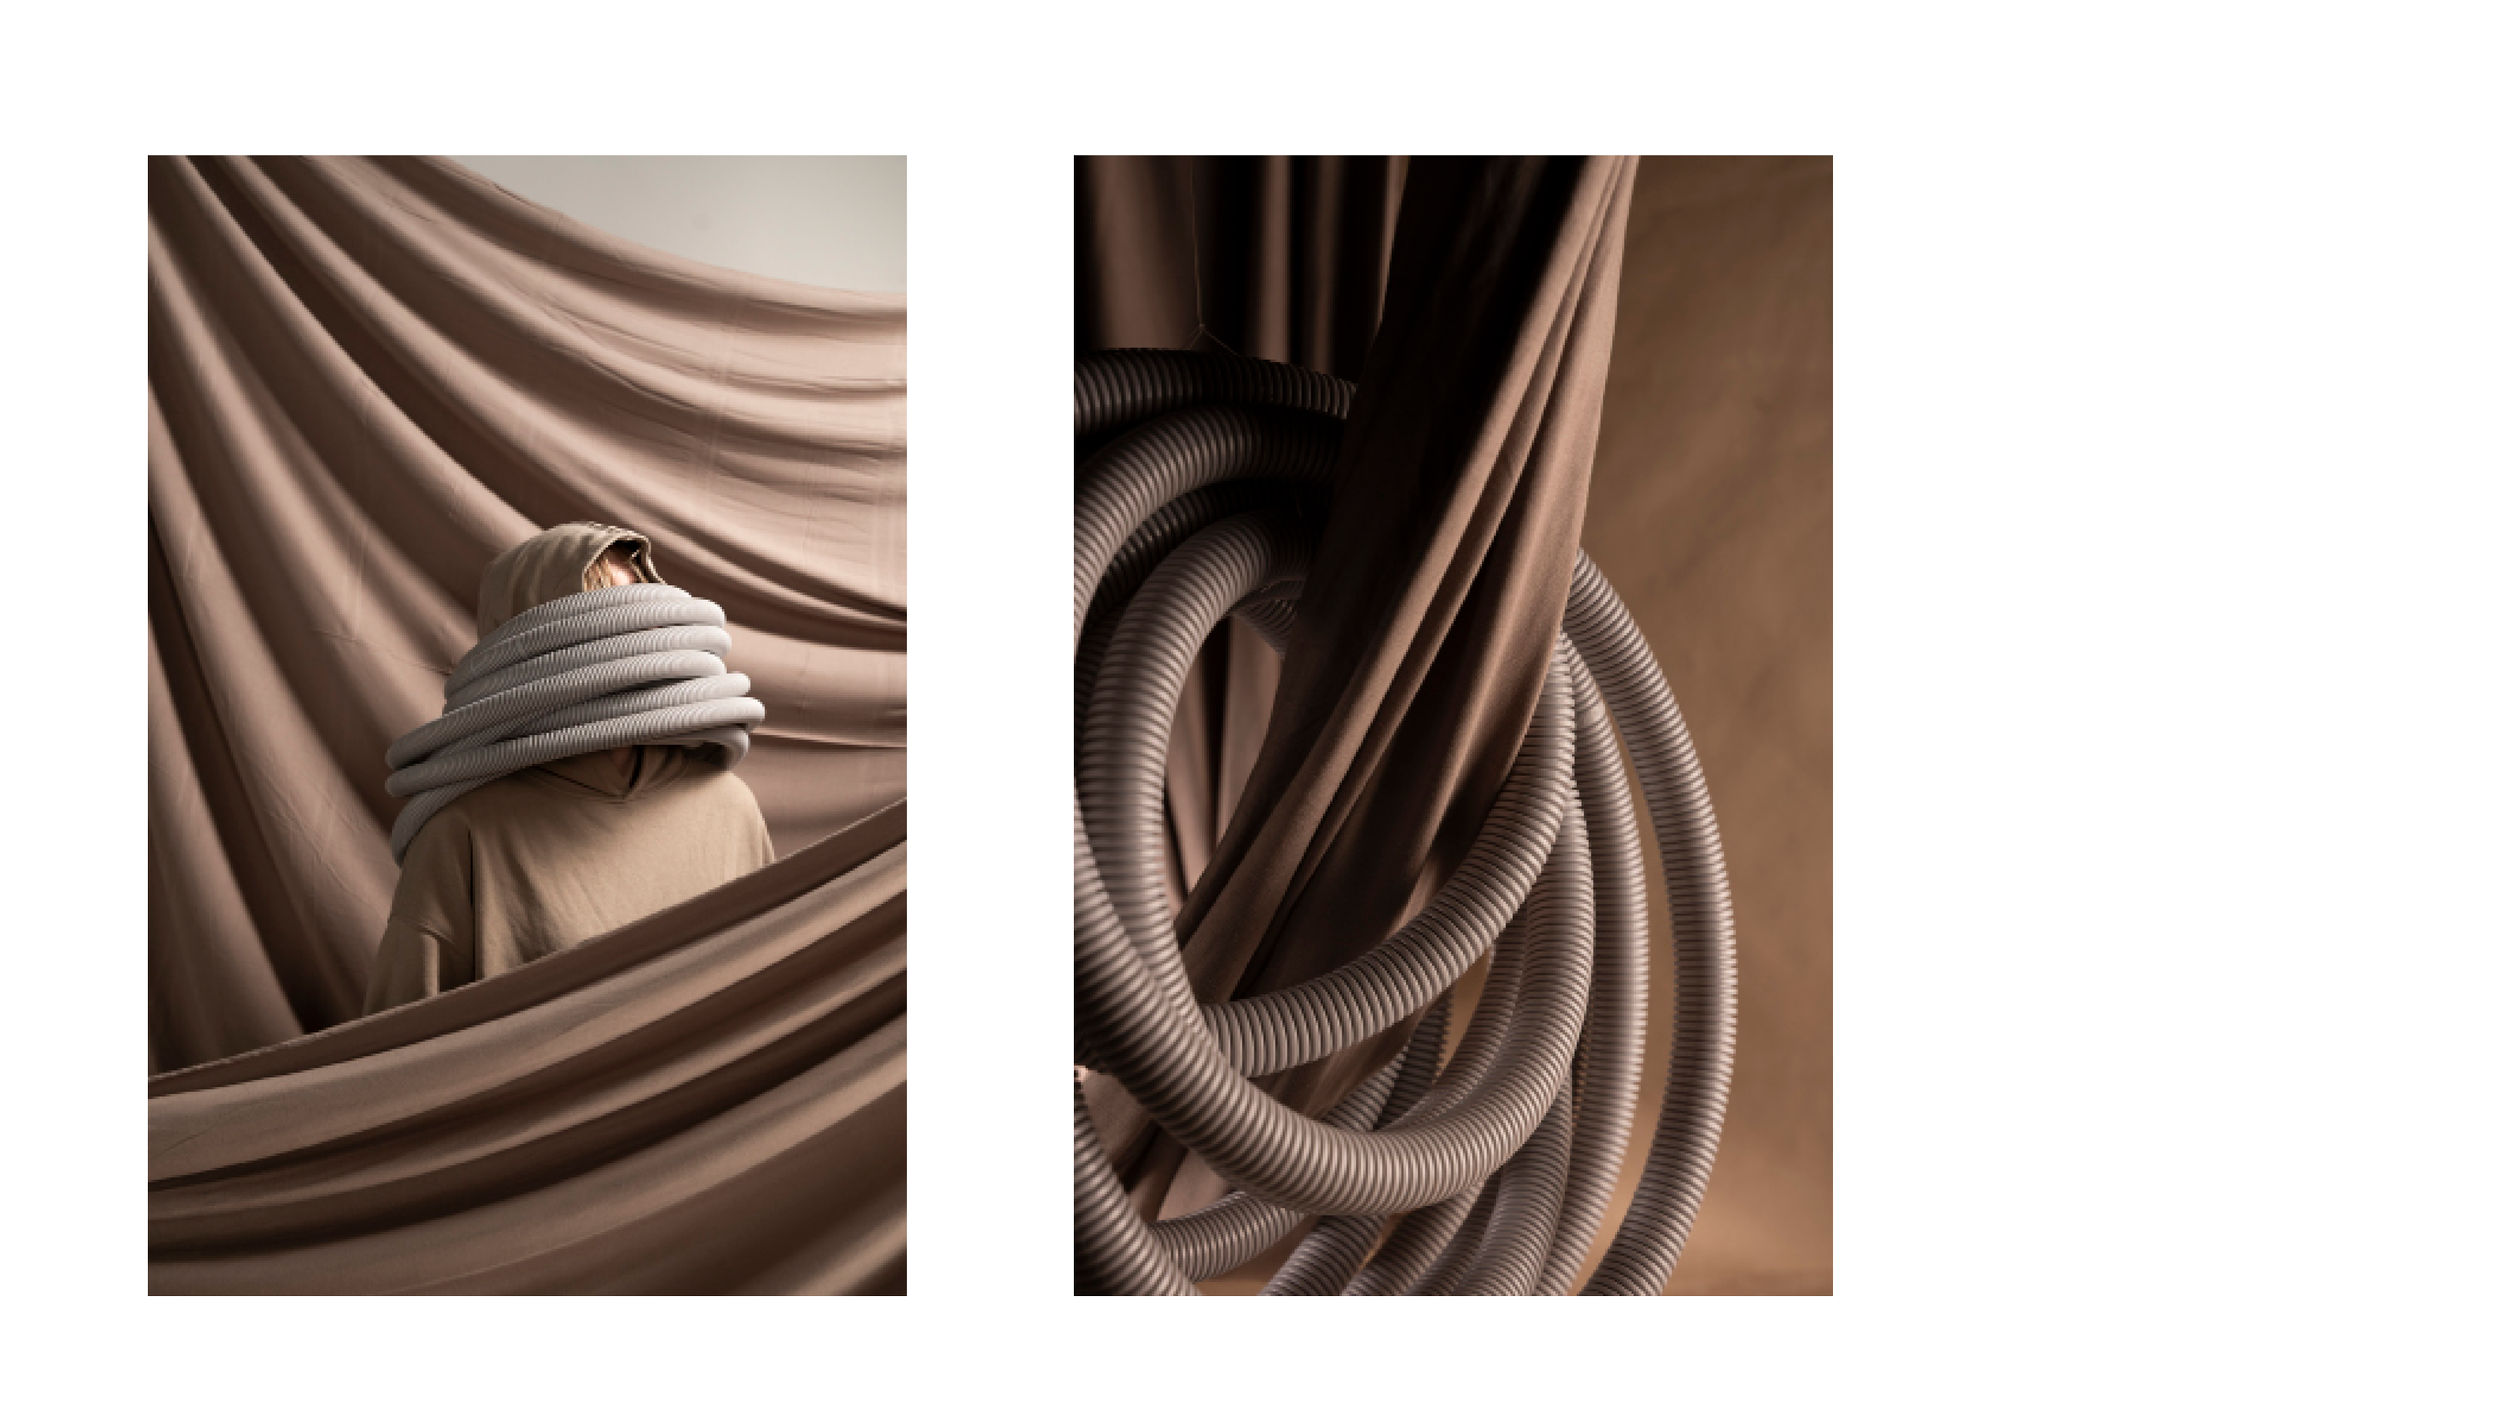
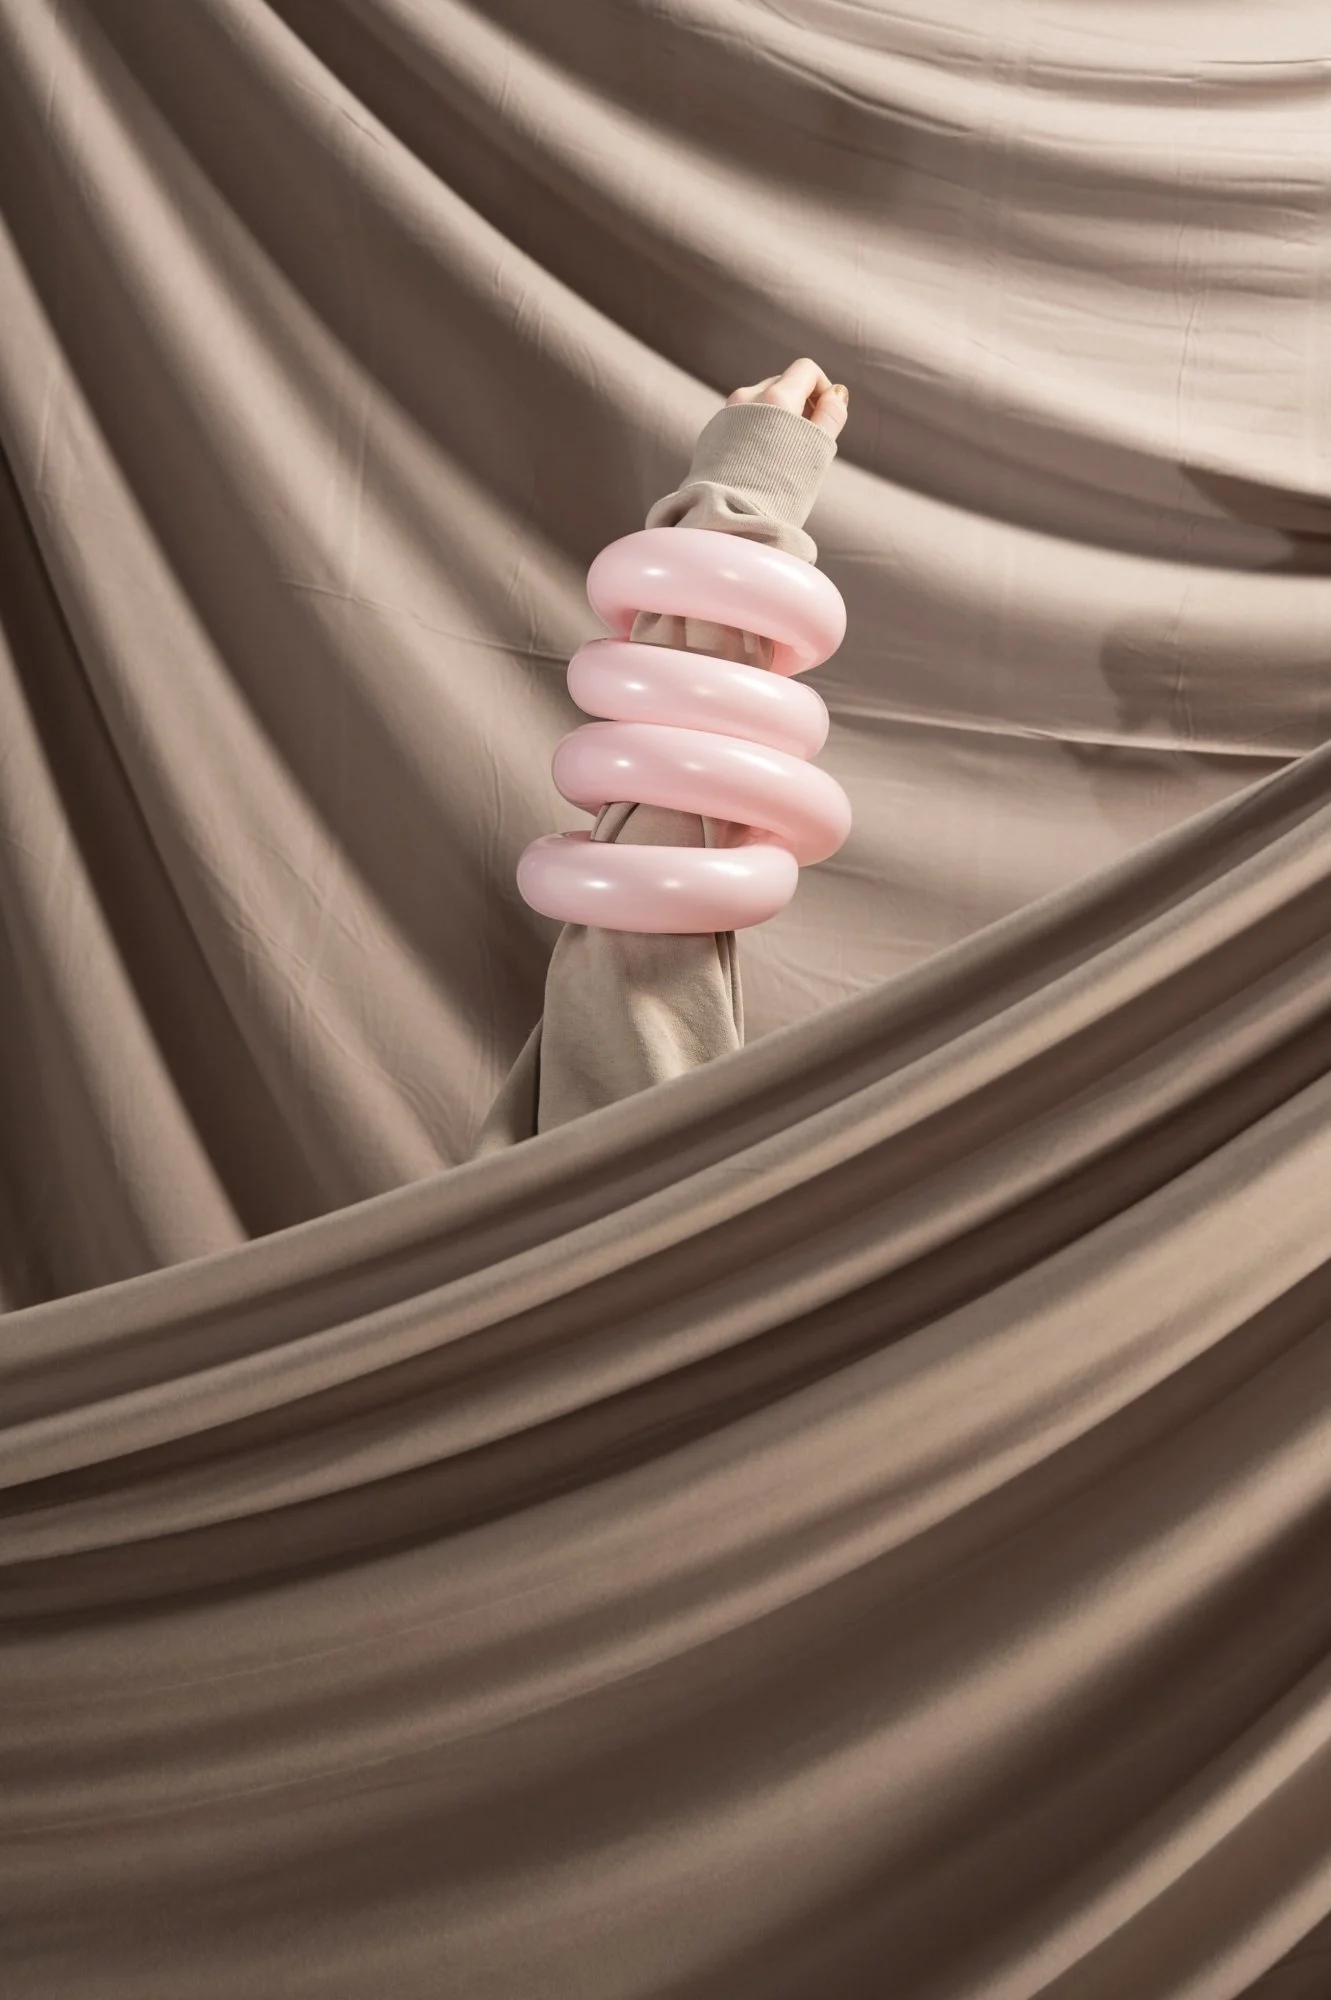
For this shoot I experimented with suspending the fabric in various ways, coiling the subject matter around it.
What didn’t work?
The measuring tape isn’t quite illuminated enough and may require some additional shooting if there is time. Some added highlights across it would be beneficial.
Reflection:
What worked?
The sense of movement achieved via the suspension of the fabric works really effectively. The flowing folds add drama and depth to the image forming a dance between the subject matter and fabric that is eye catching for viewers.
What next?
From here I will continue to experiment with the fabric drapery as well as constructing the remaining still life images.


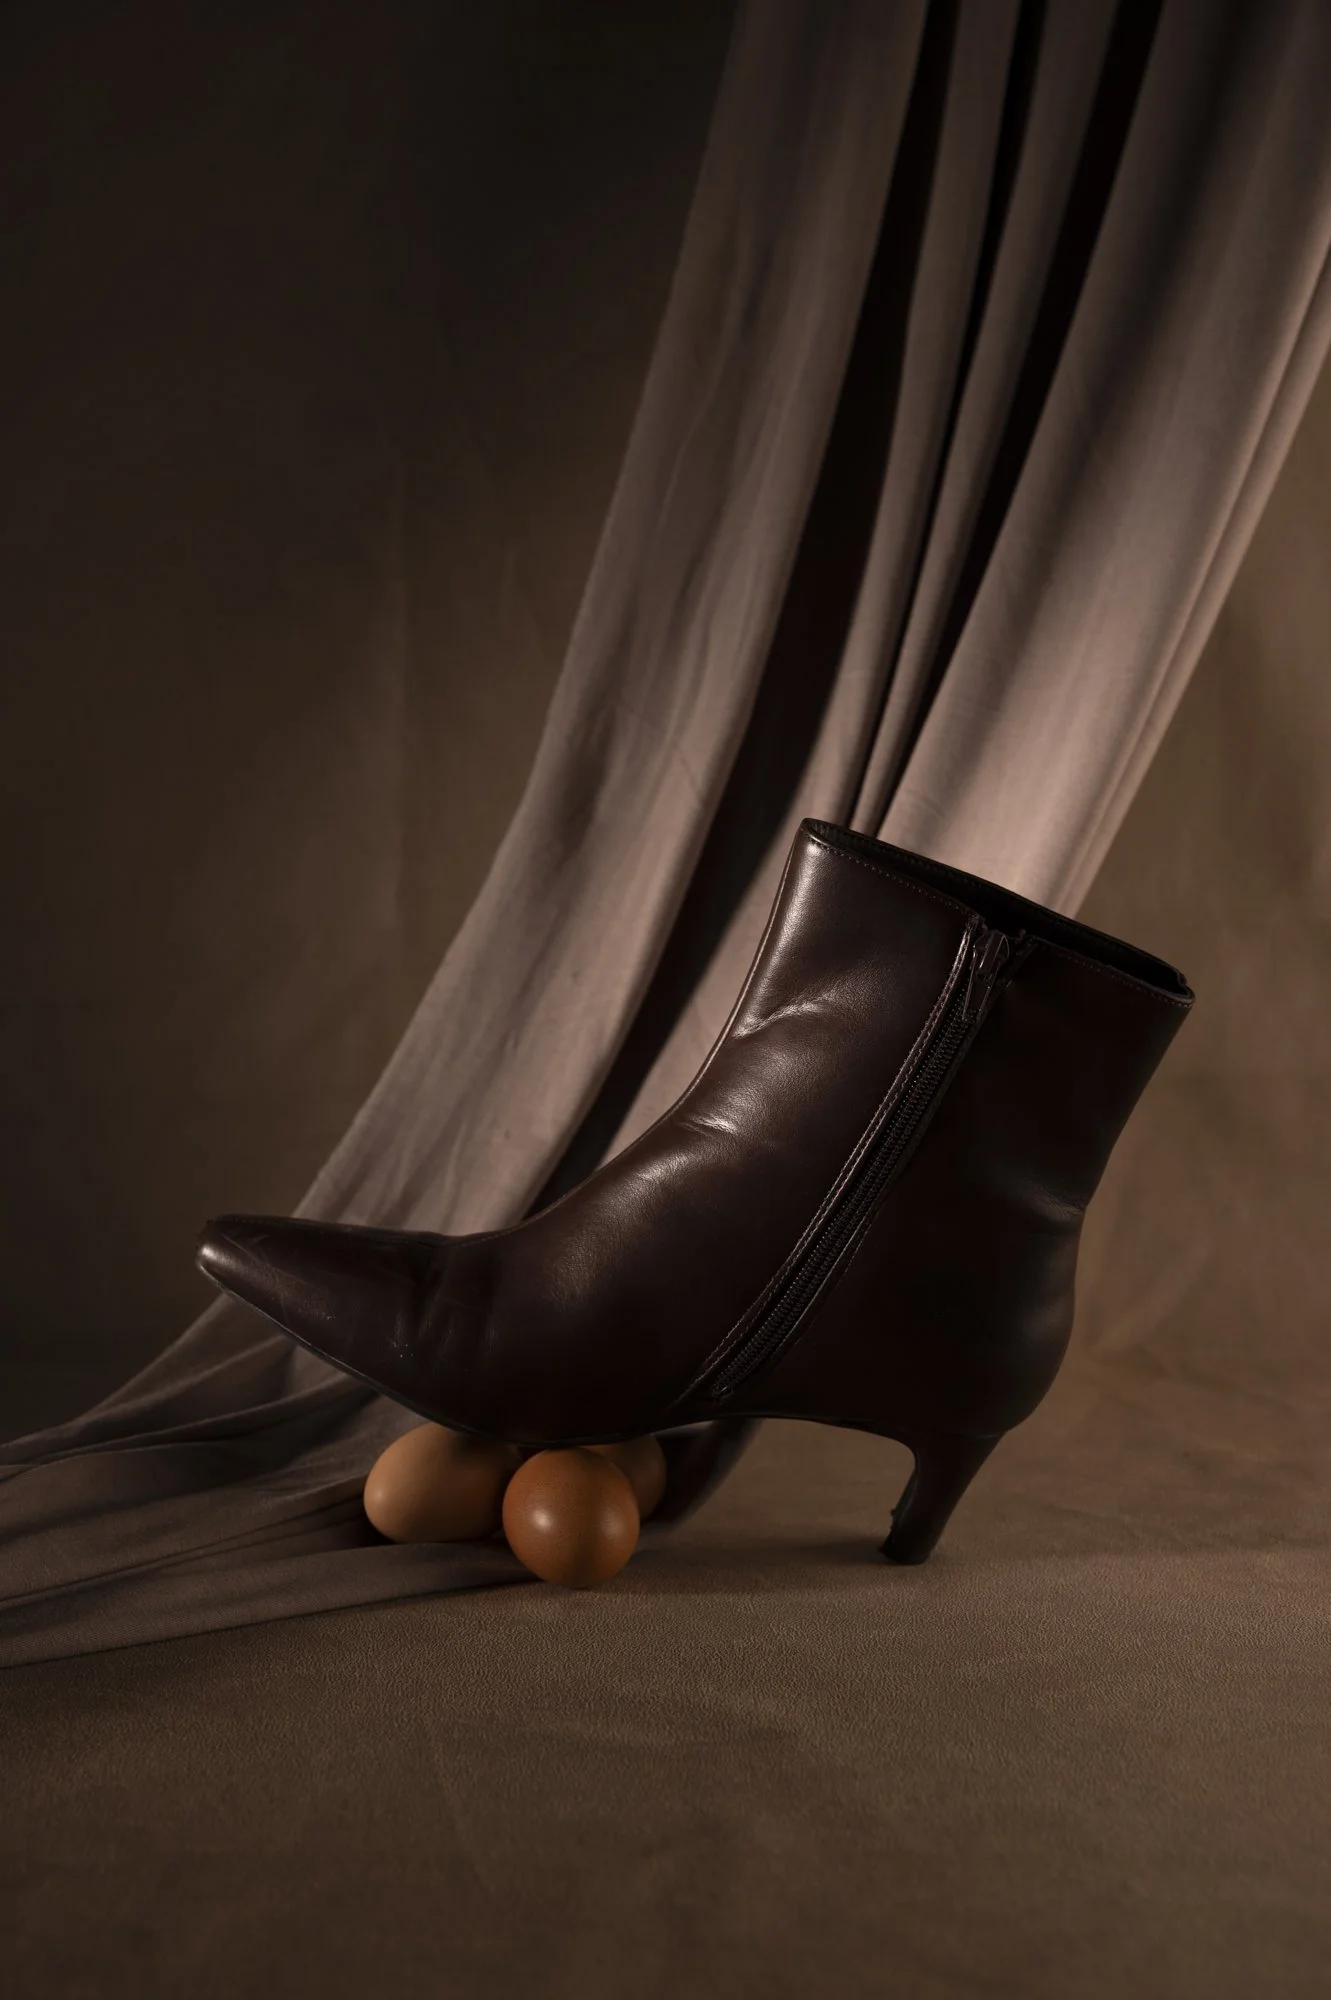
Shoot 8
Details:
When: 24/11 AM
Where: PSC Studio
Lighting: 2 x Elinchrom Lights
1 x Dish and grid
1 x Large Sq Soft Box
Shoot Plan:
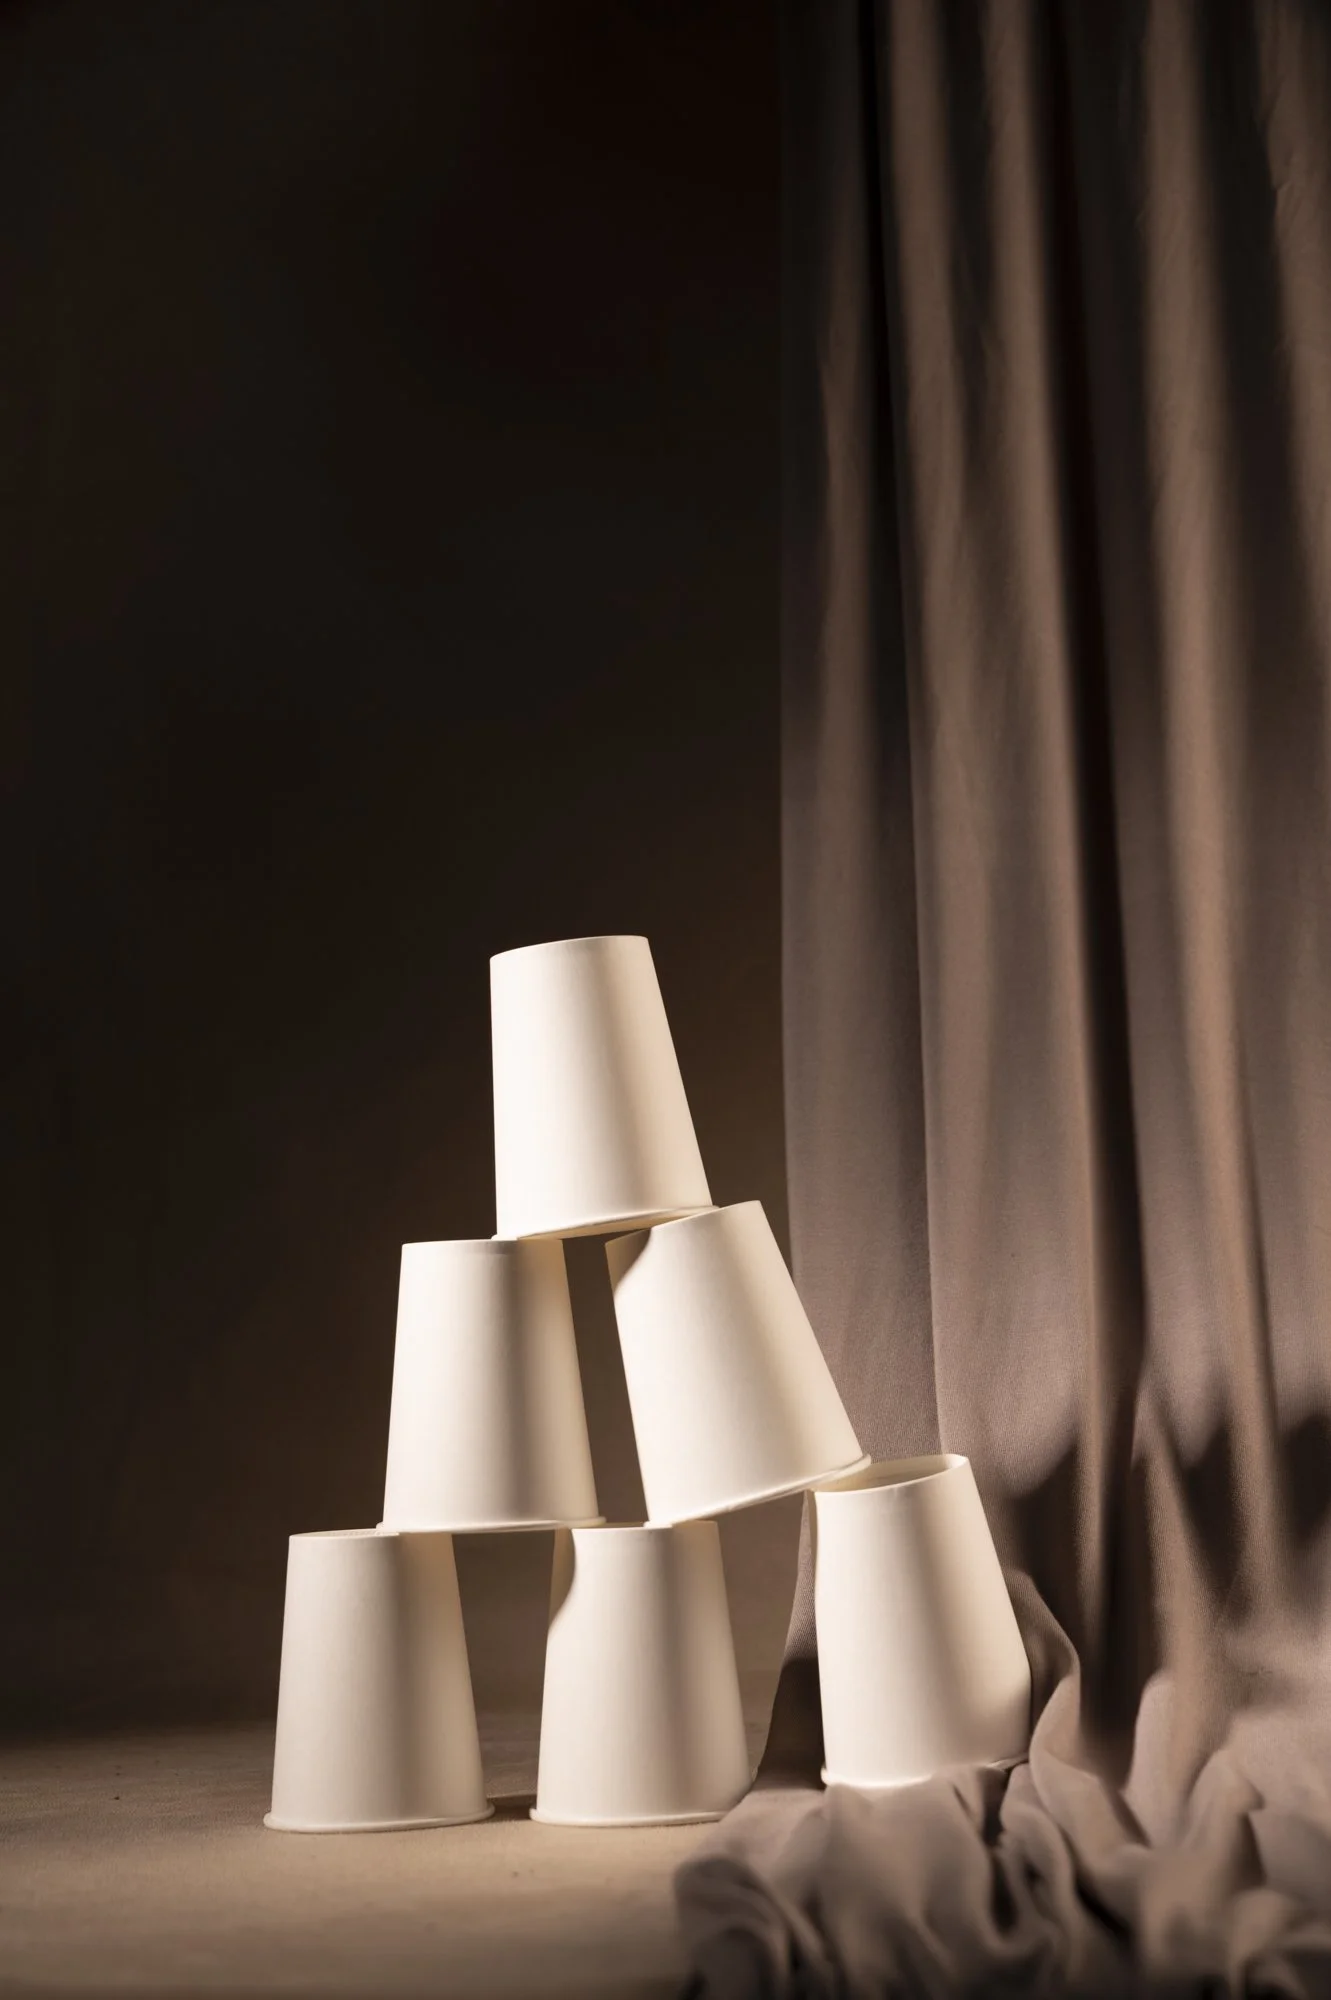
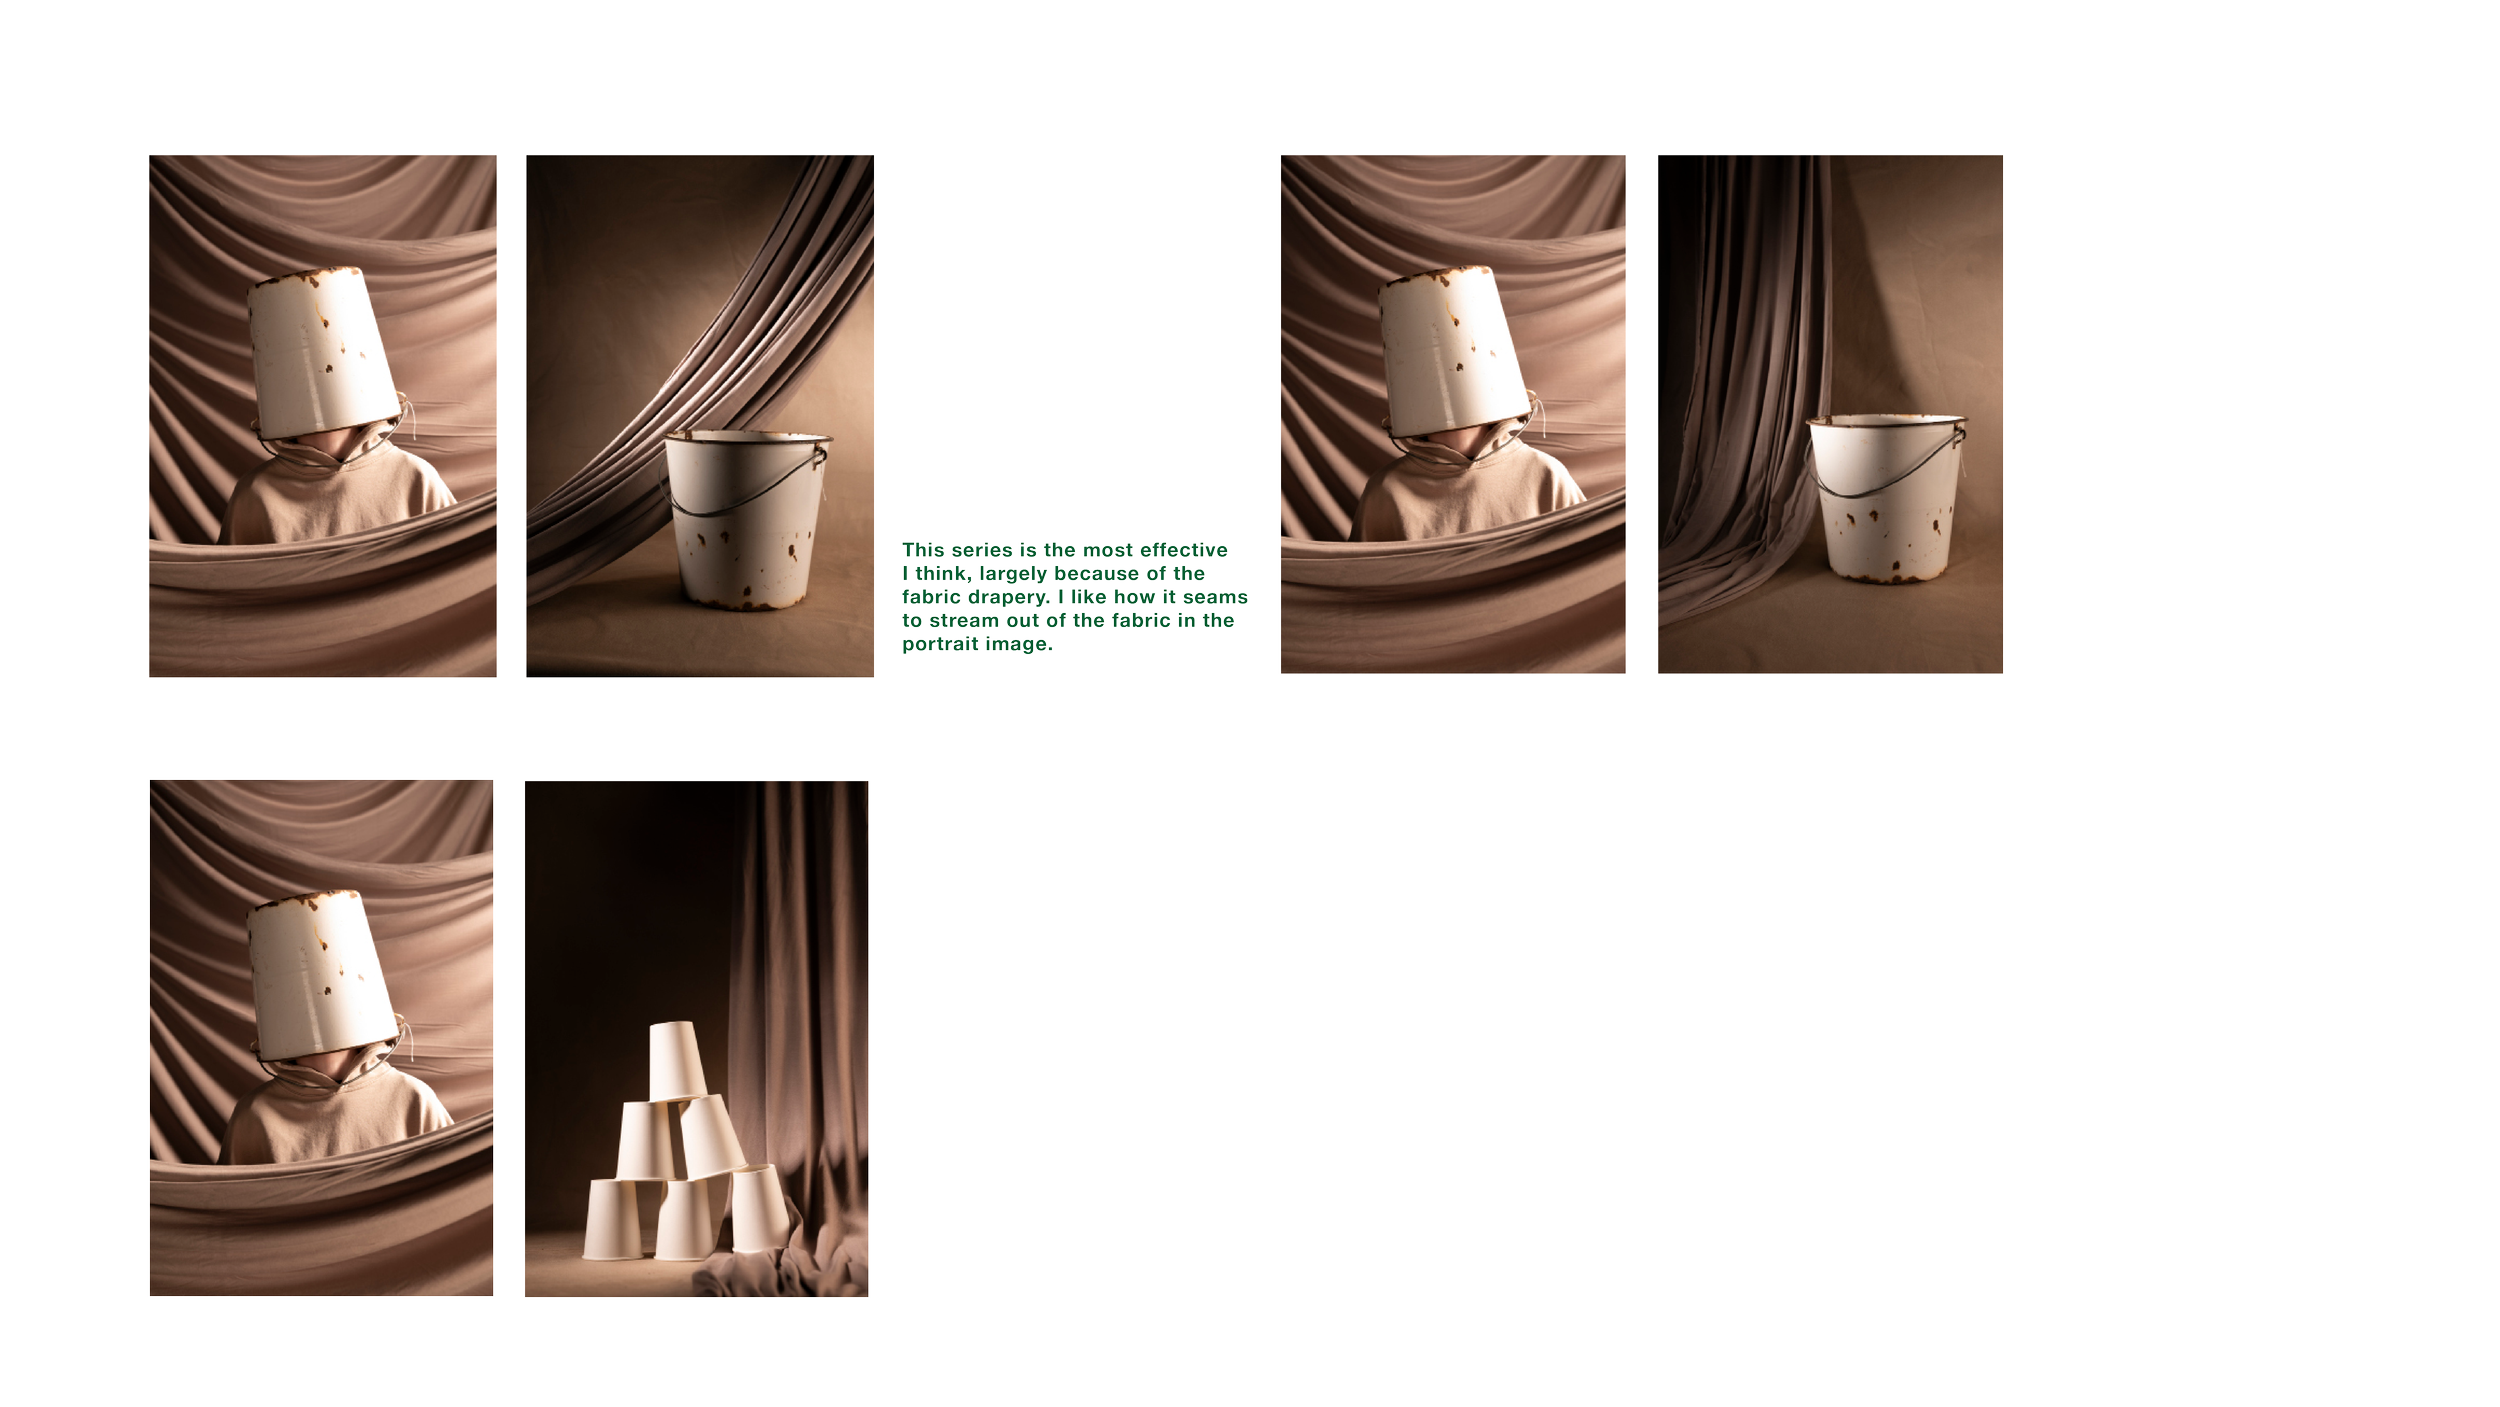
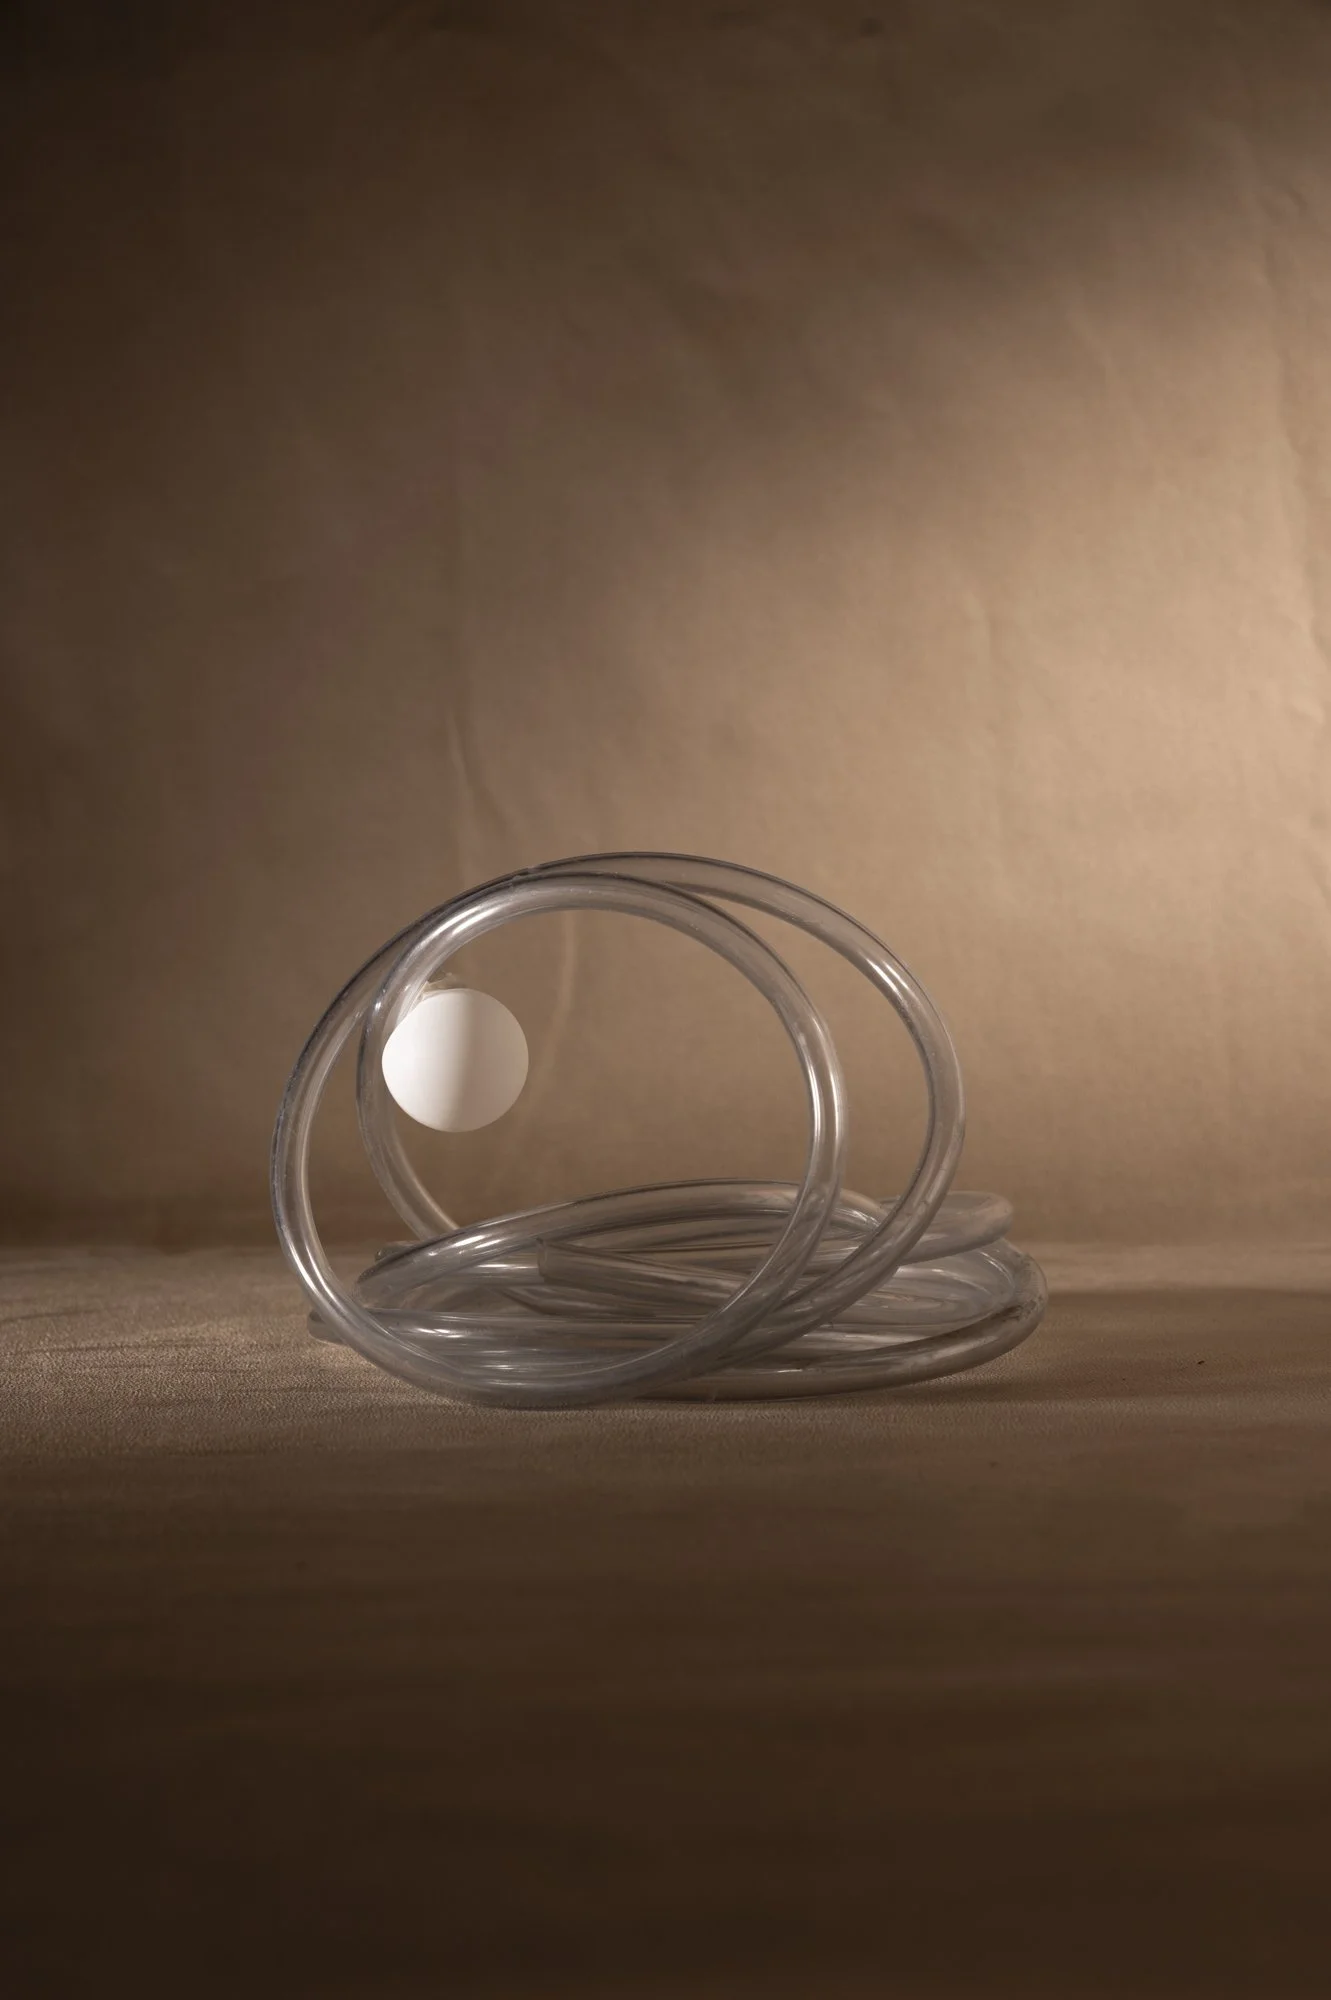
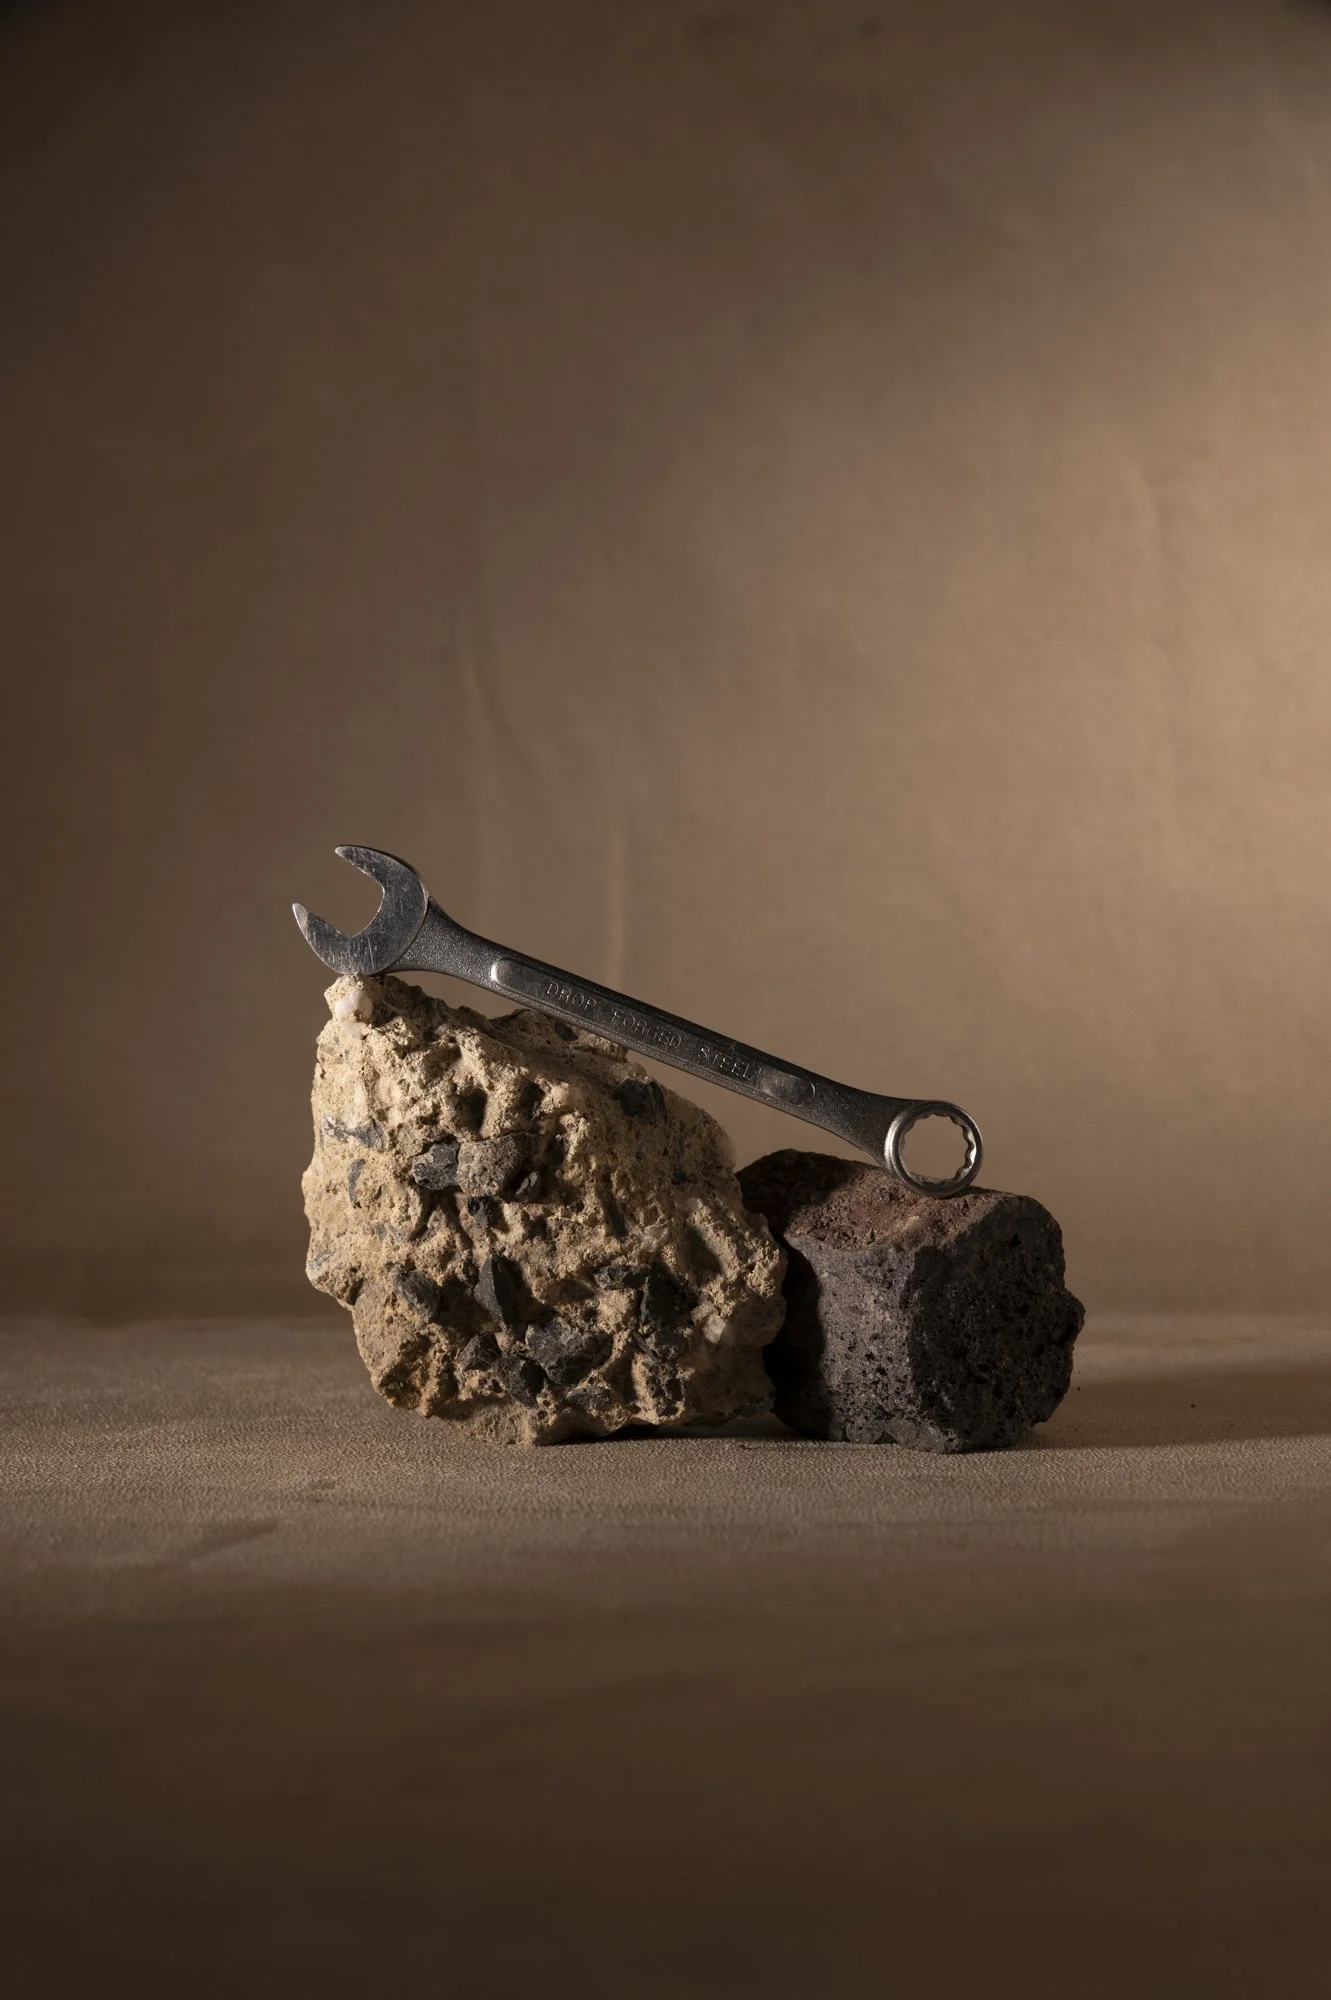
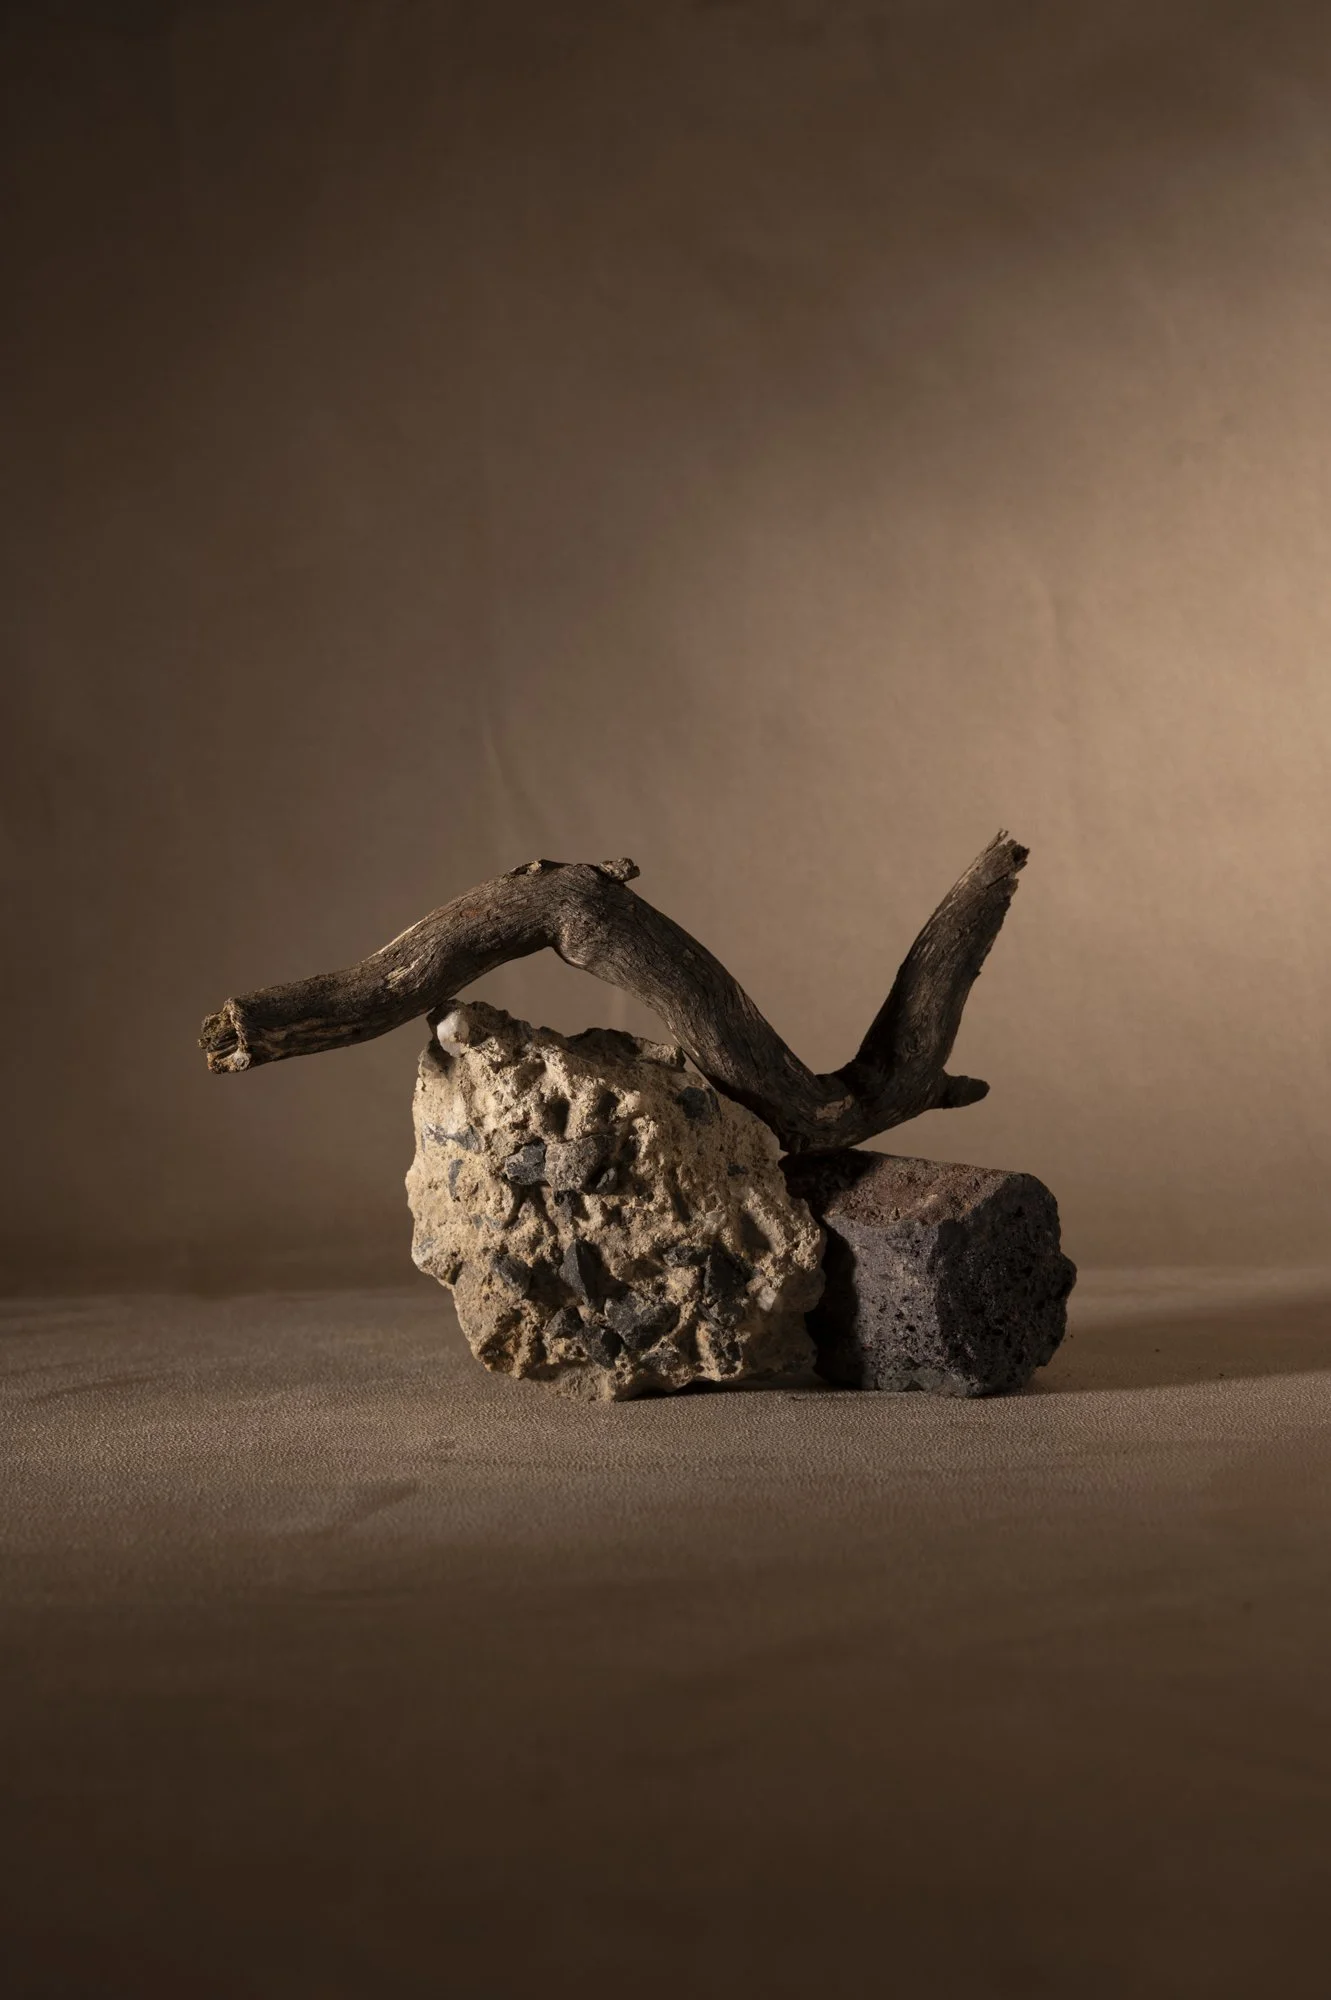
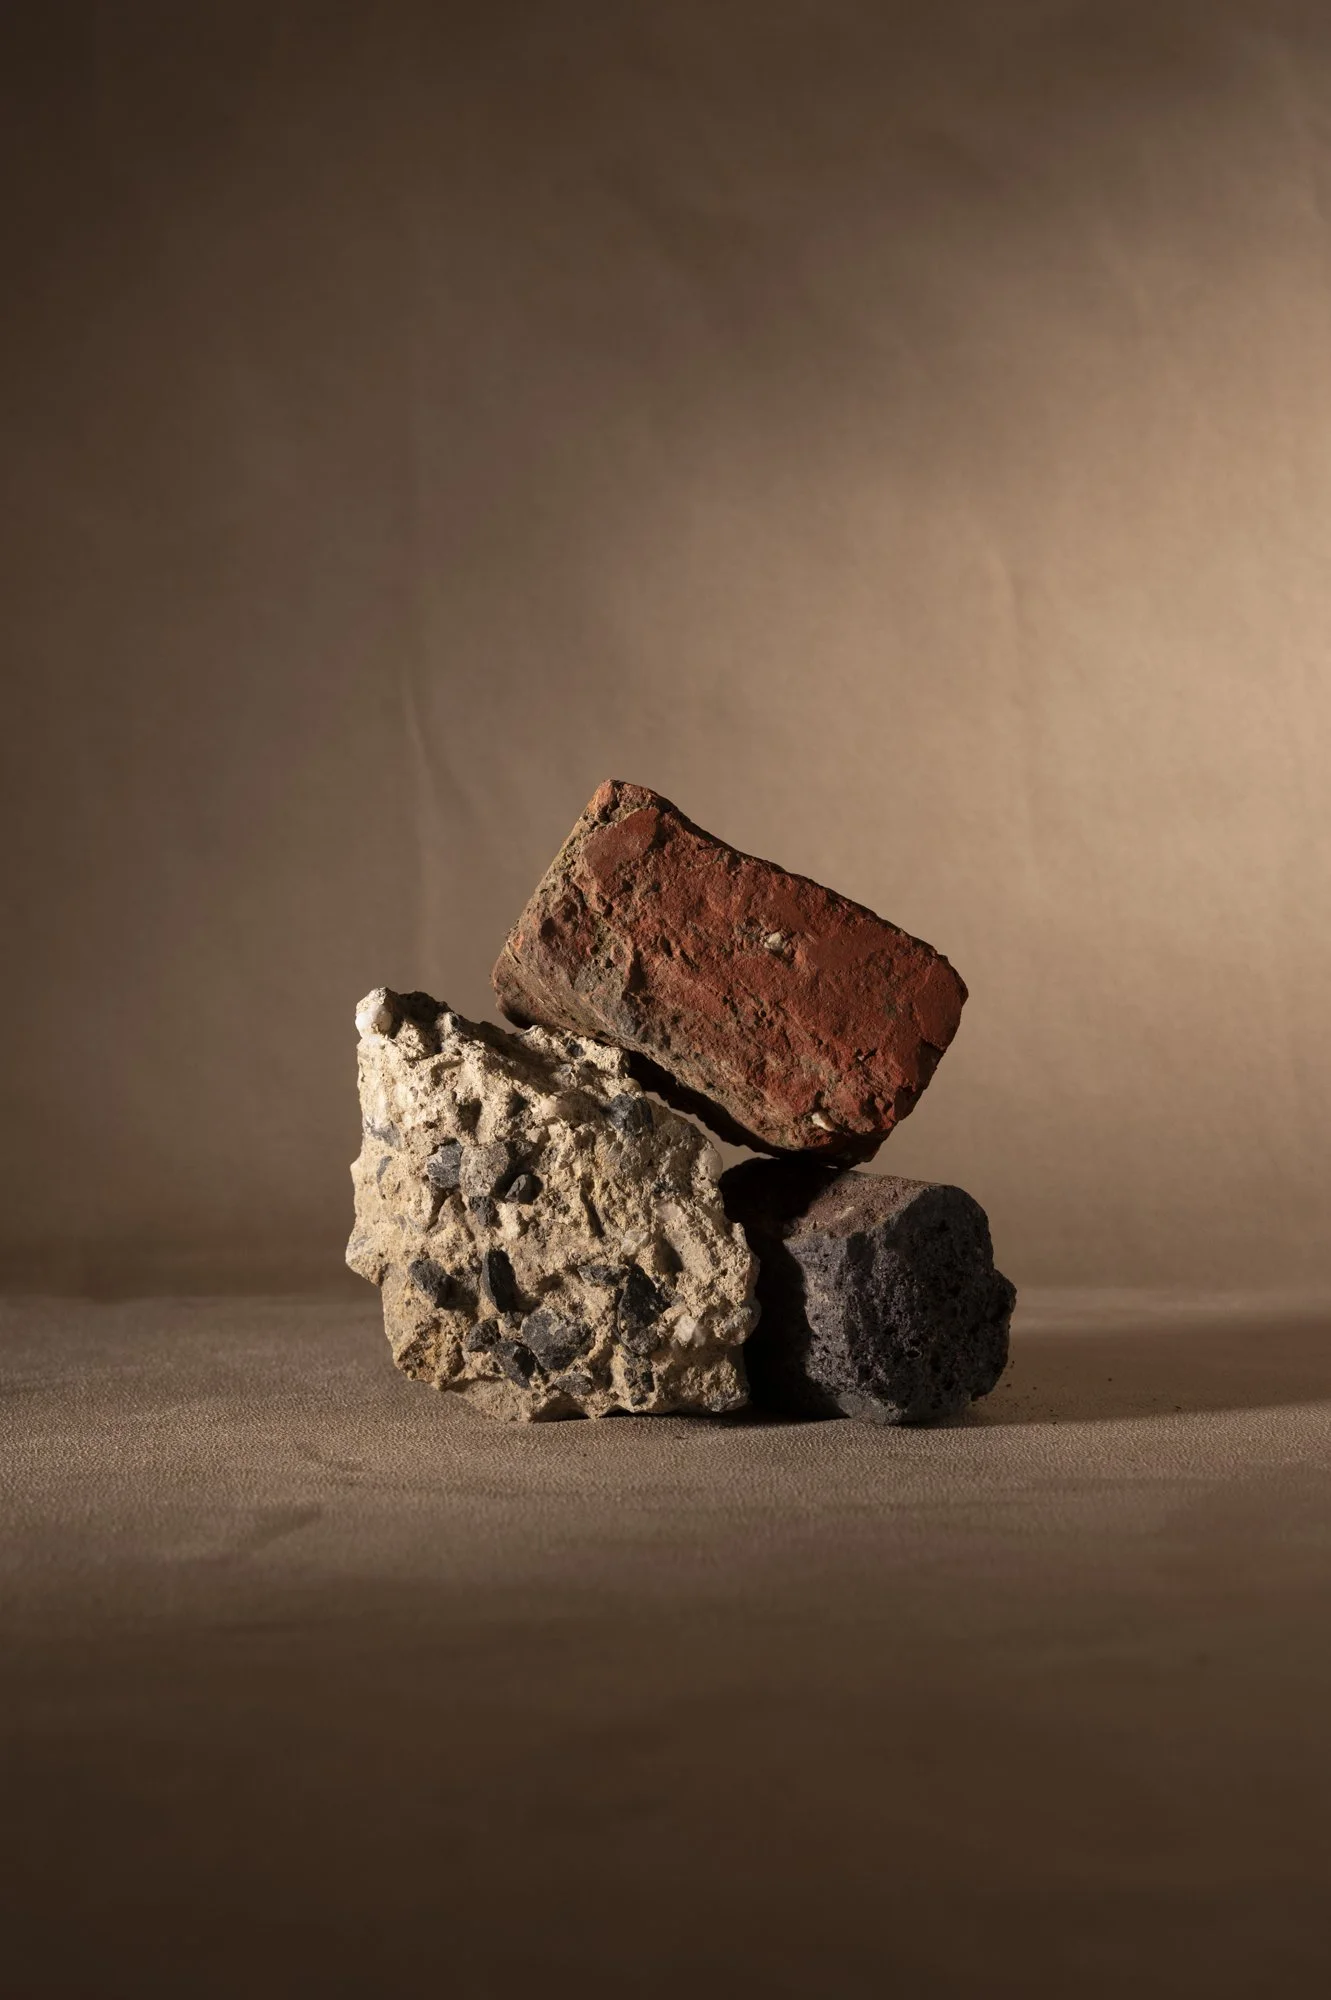
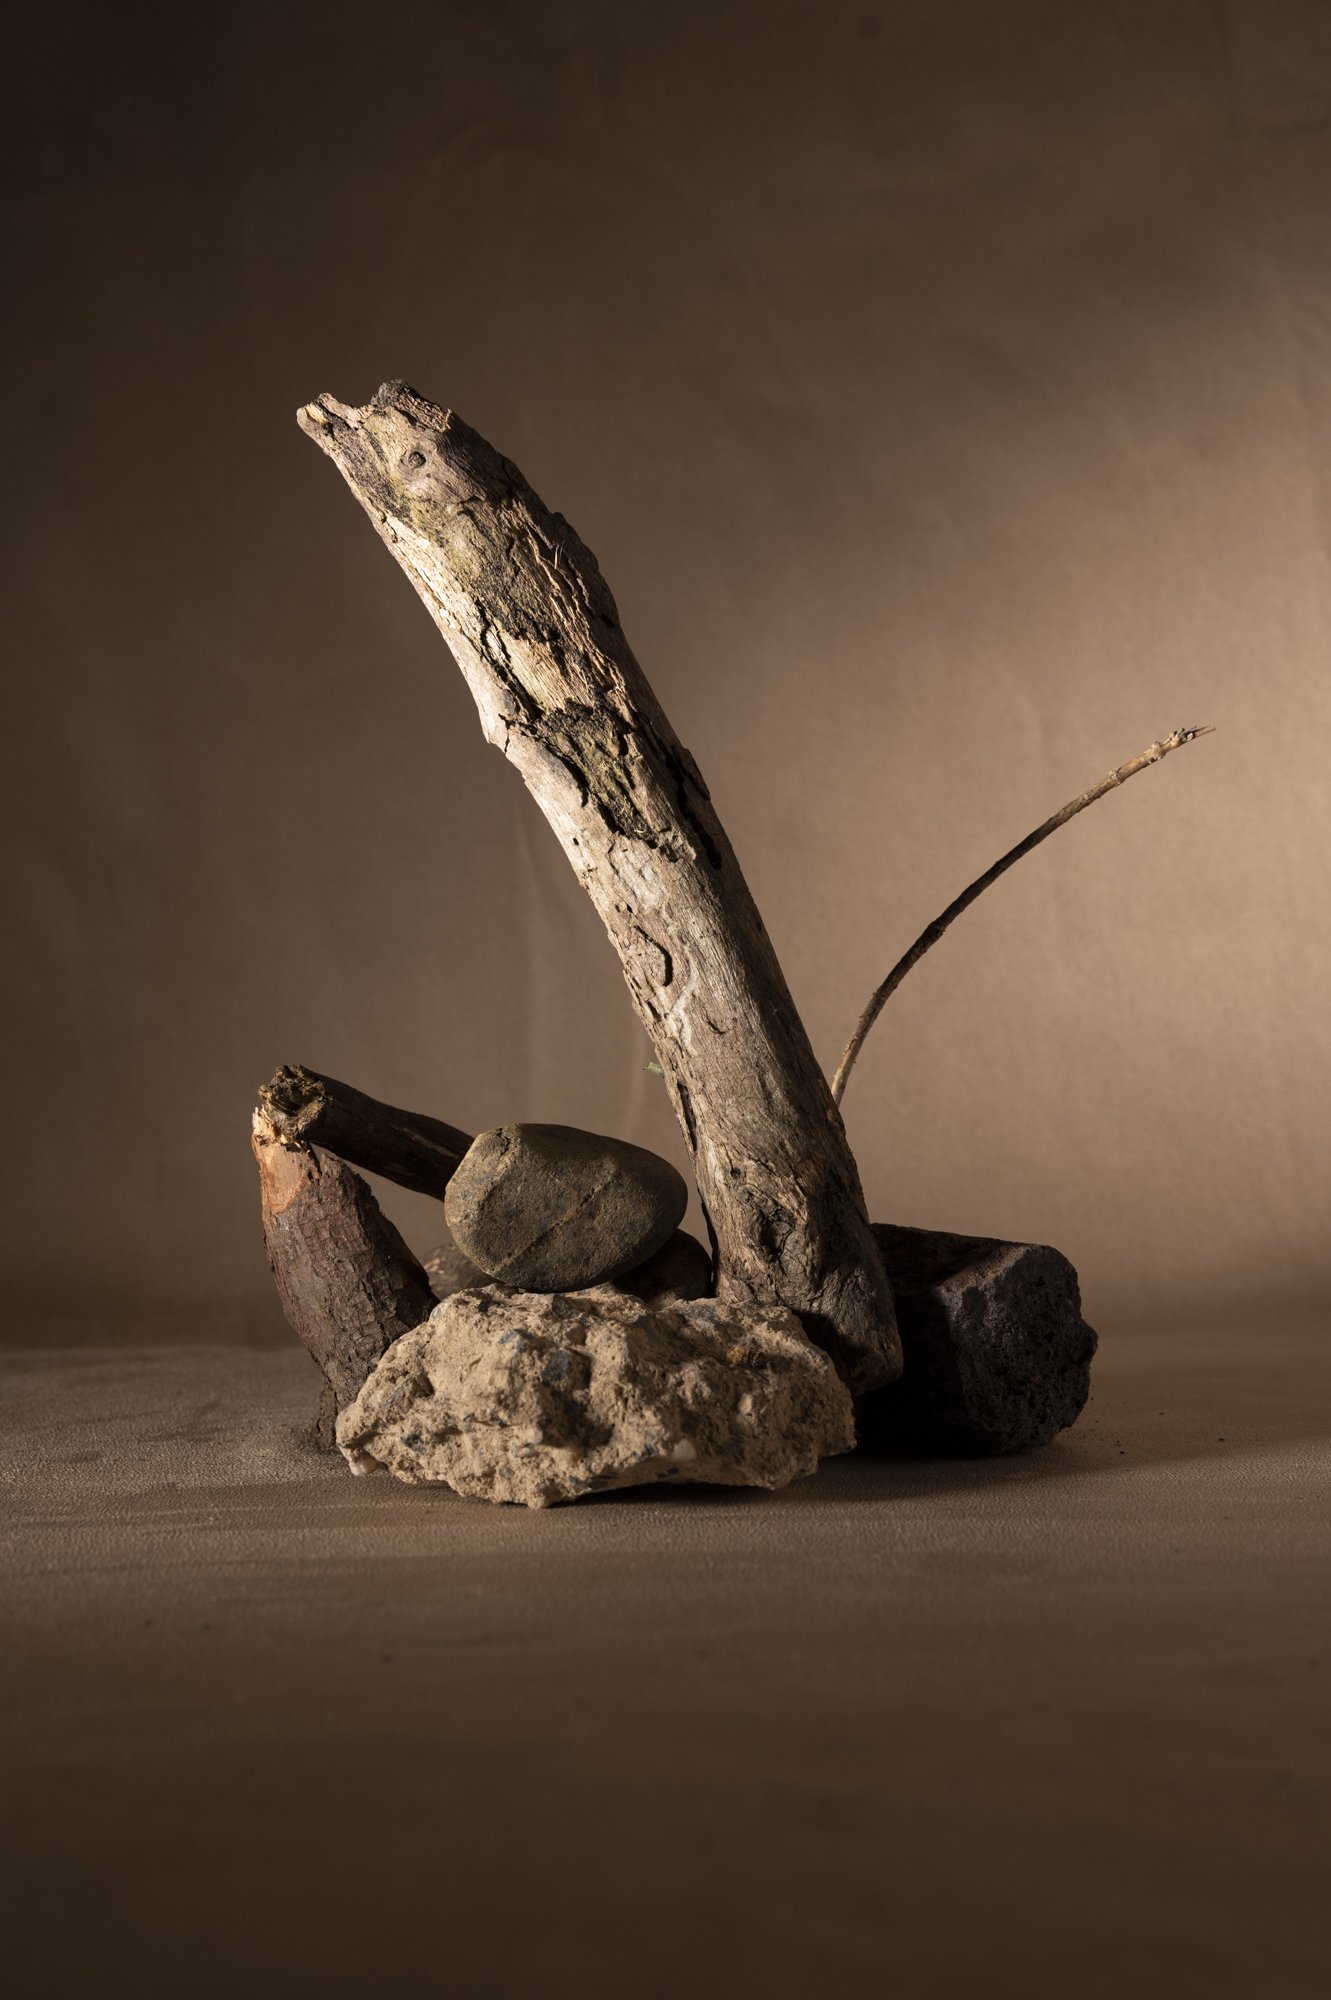
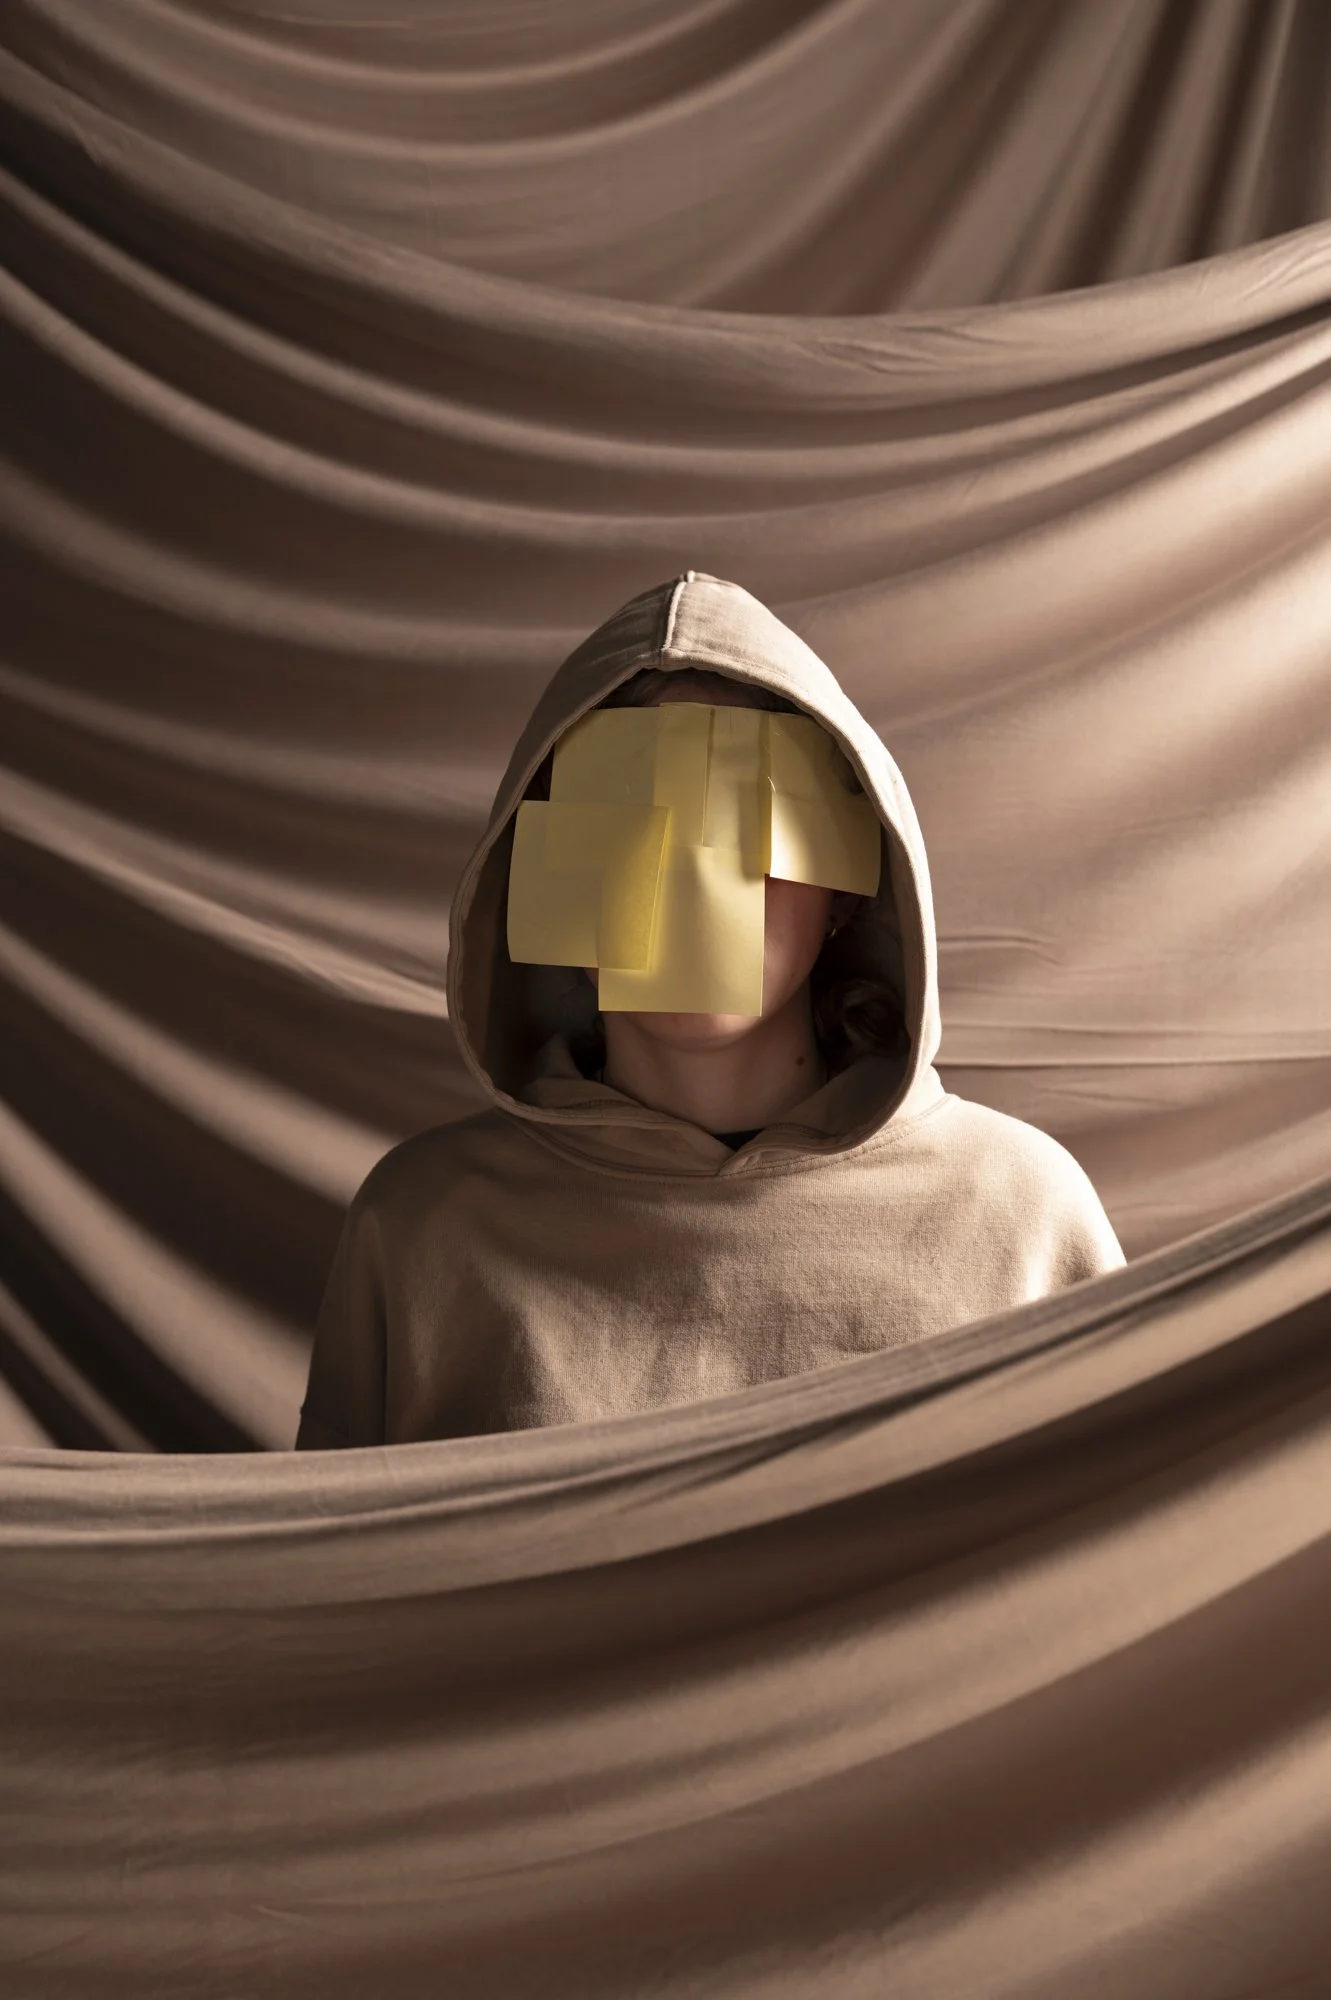
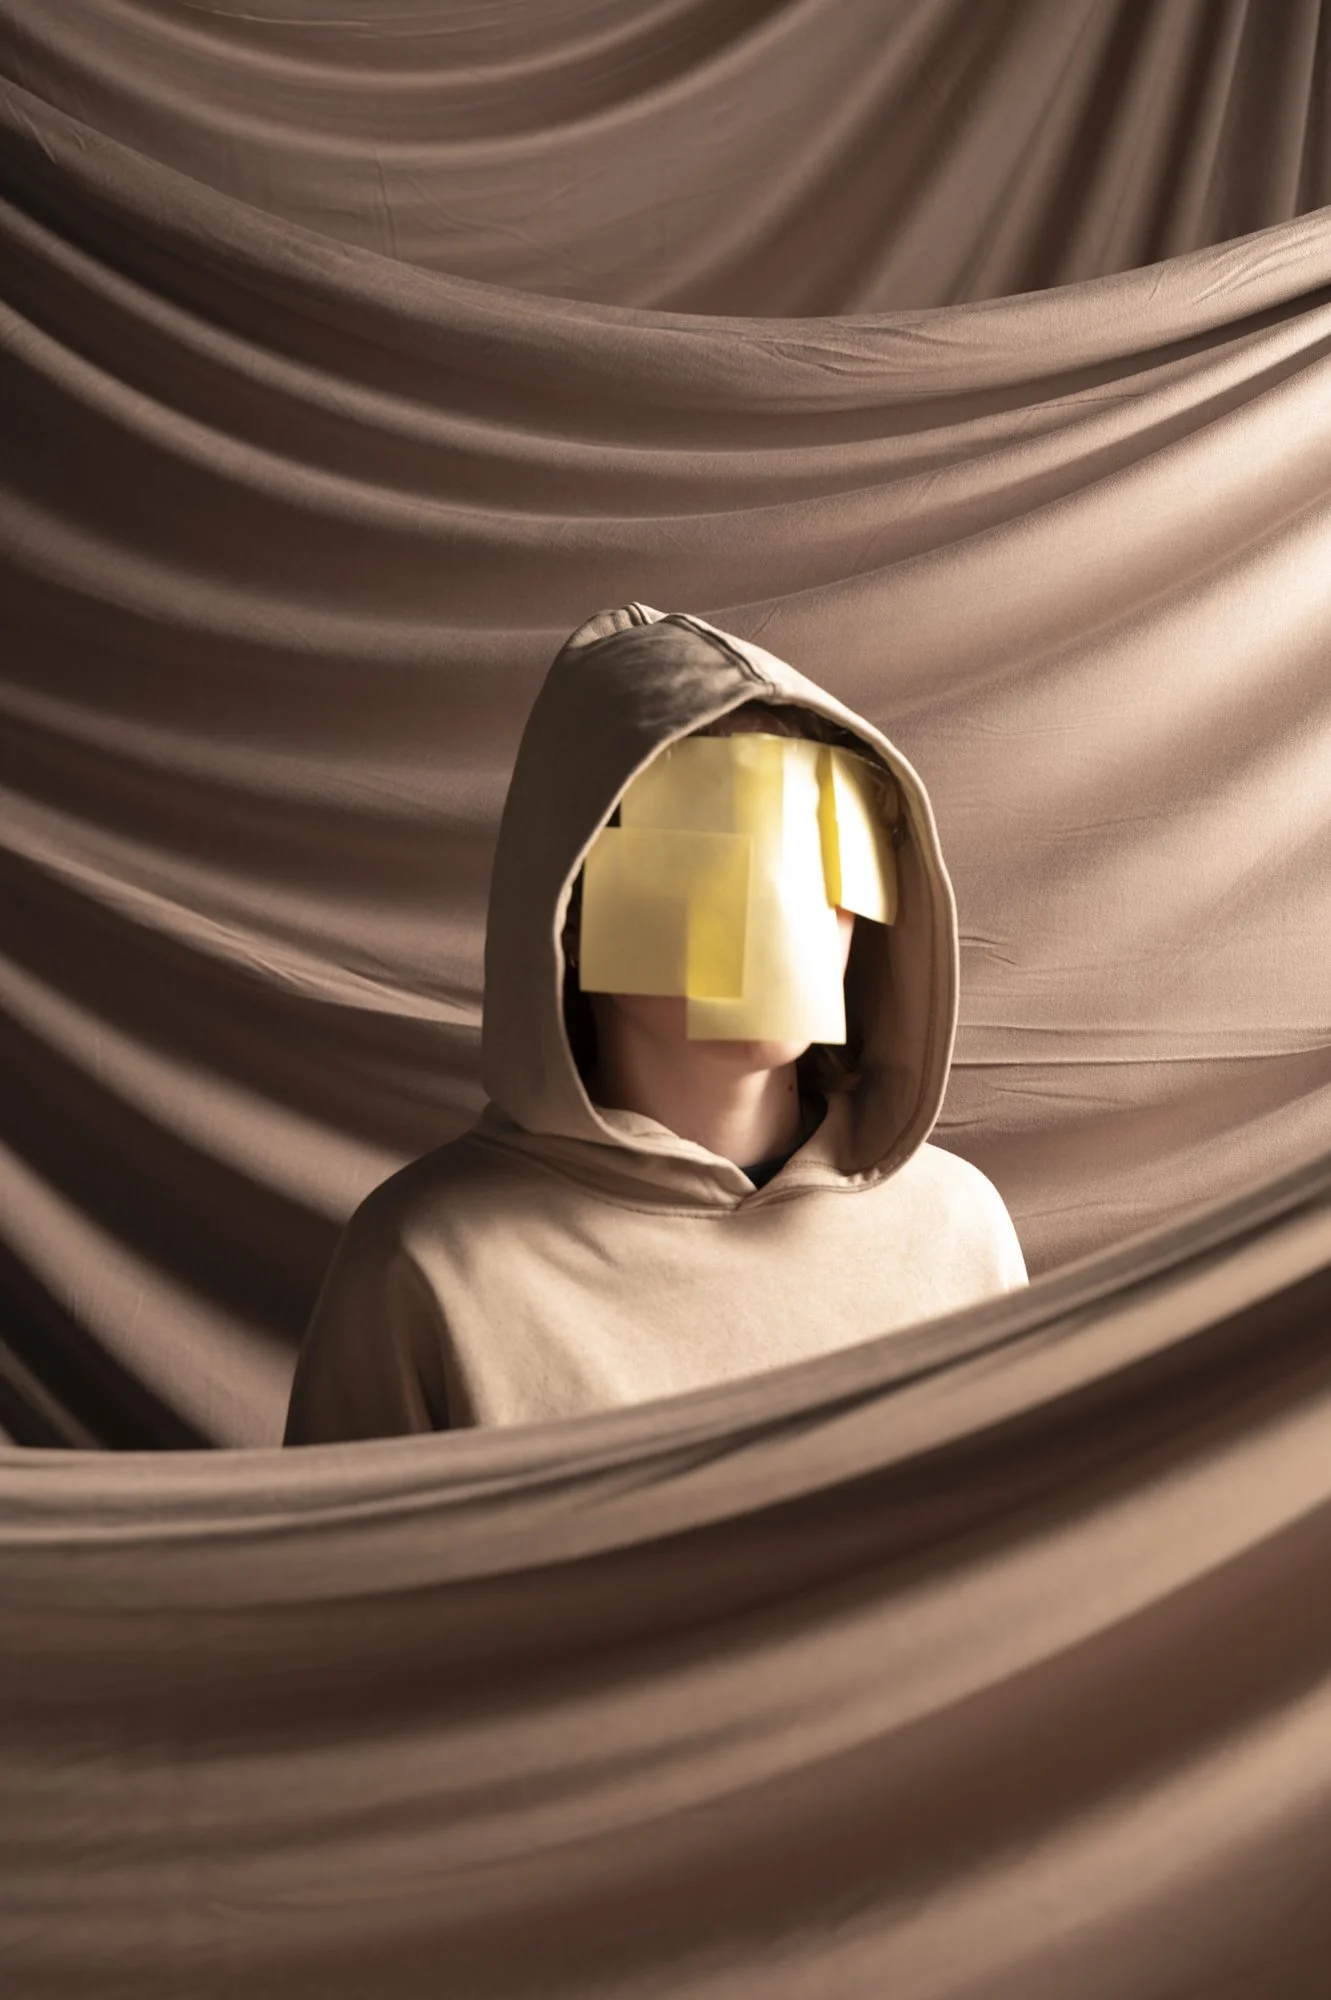
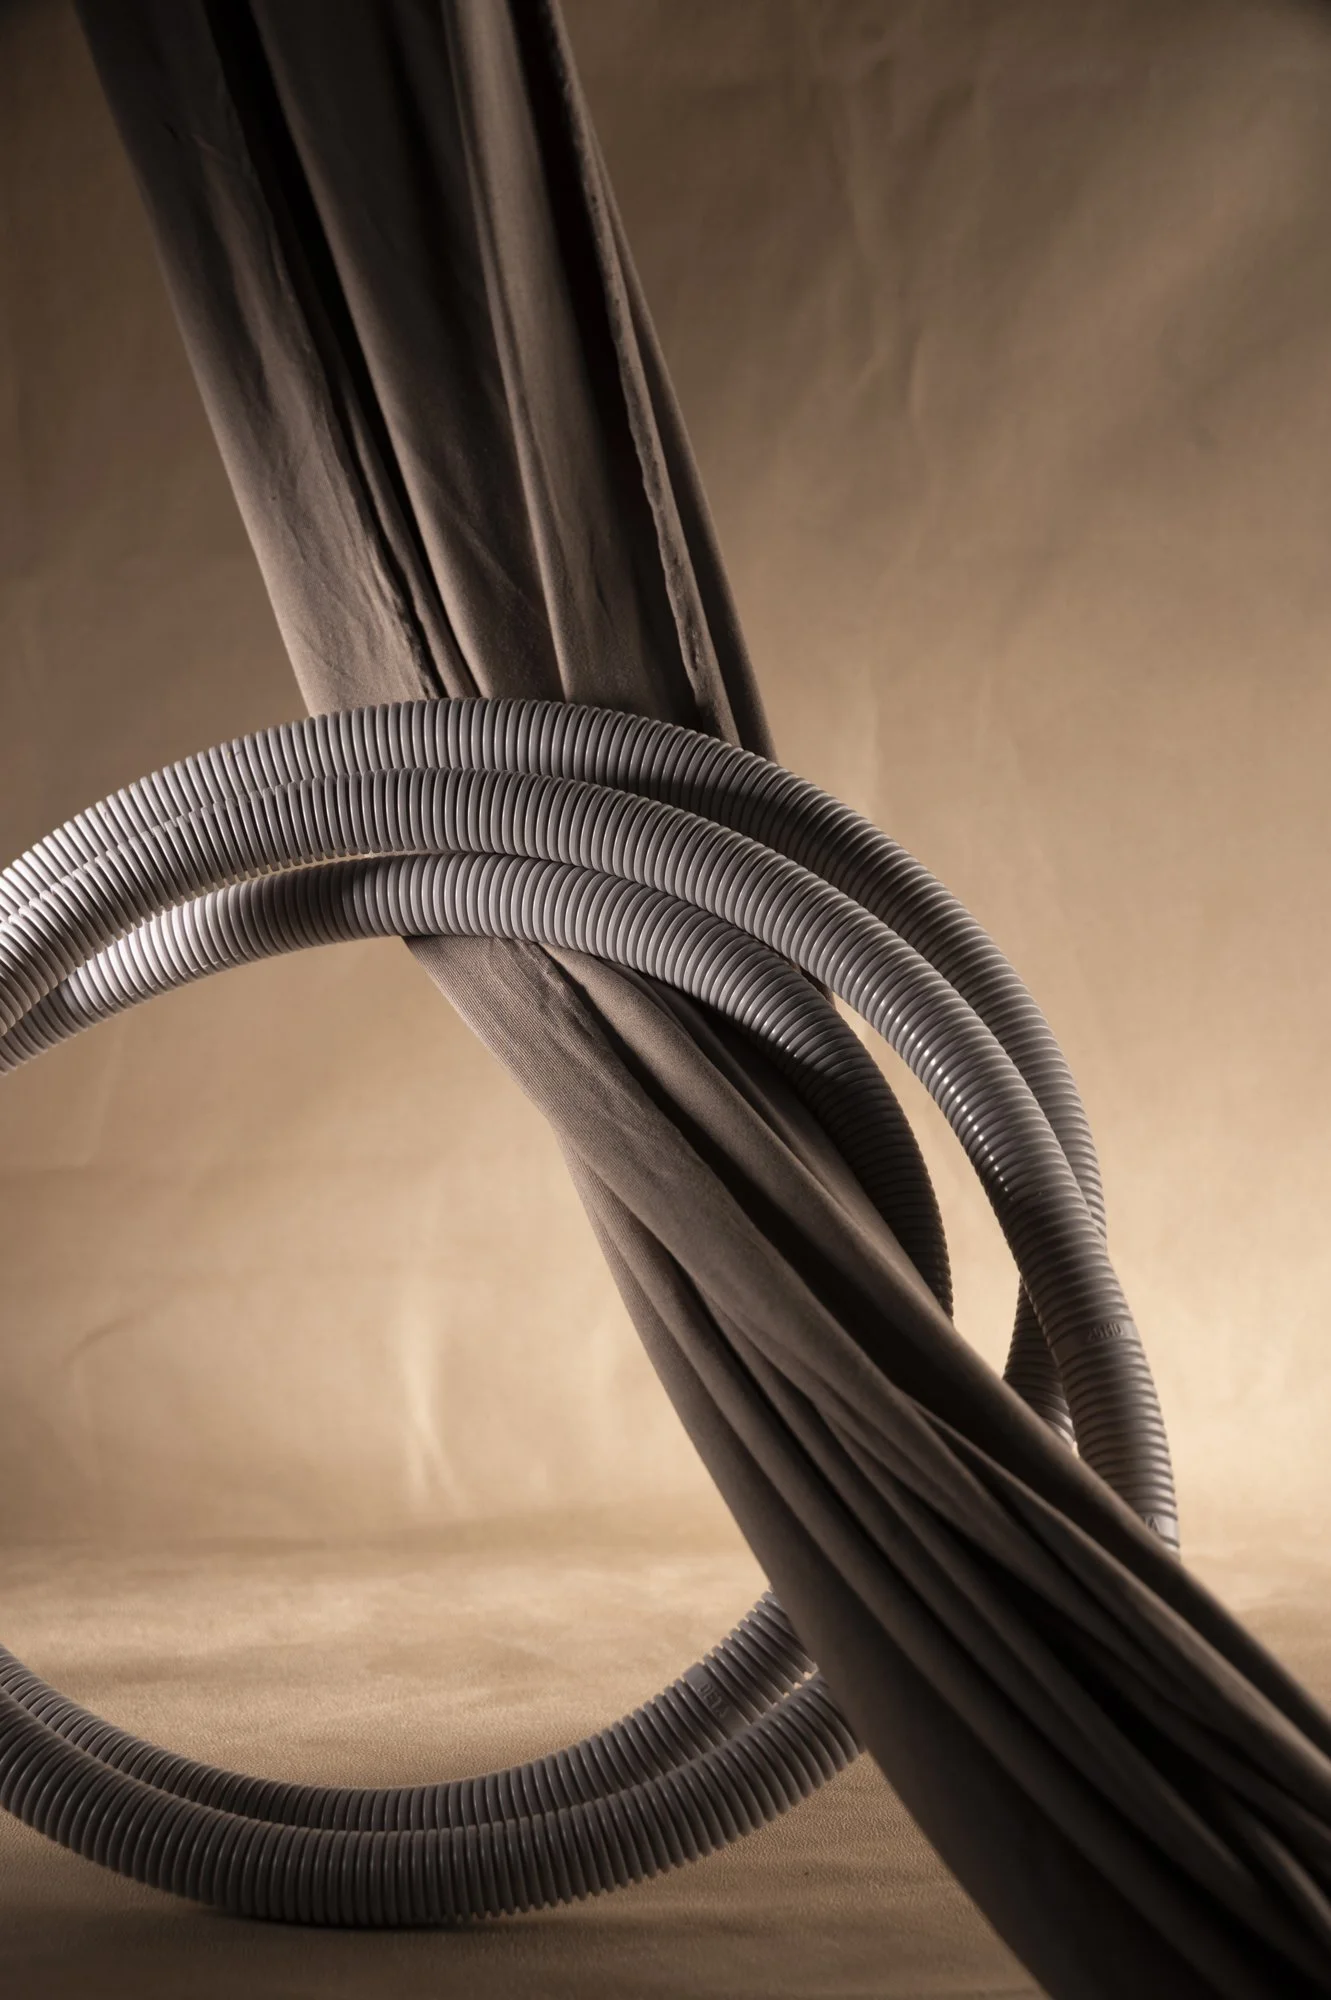
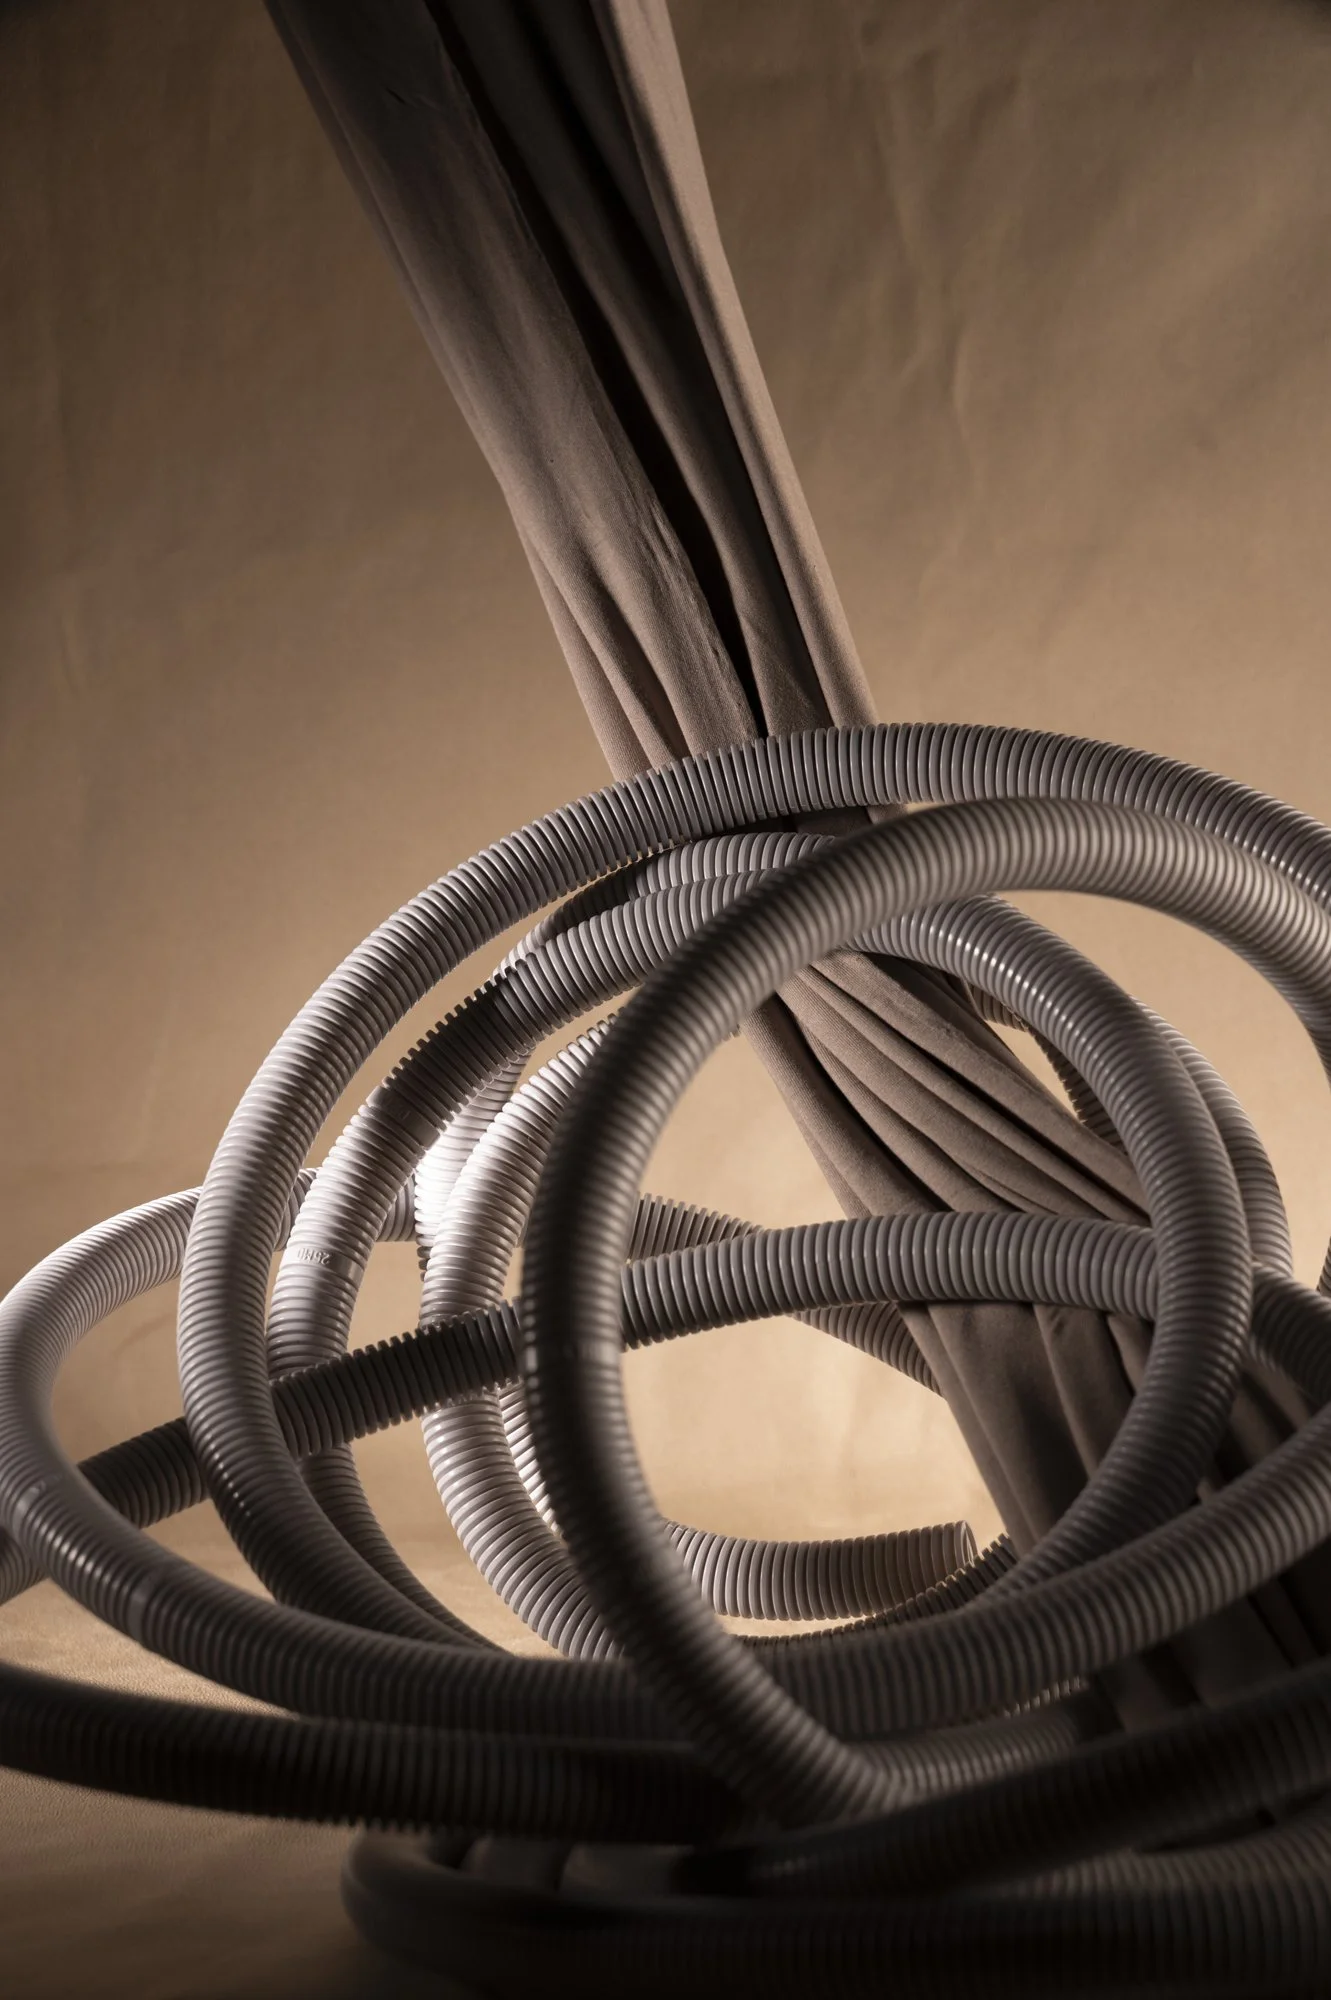
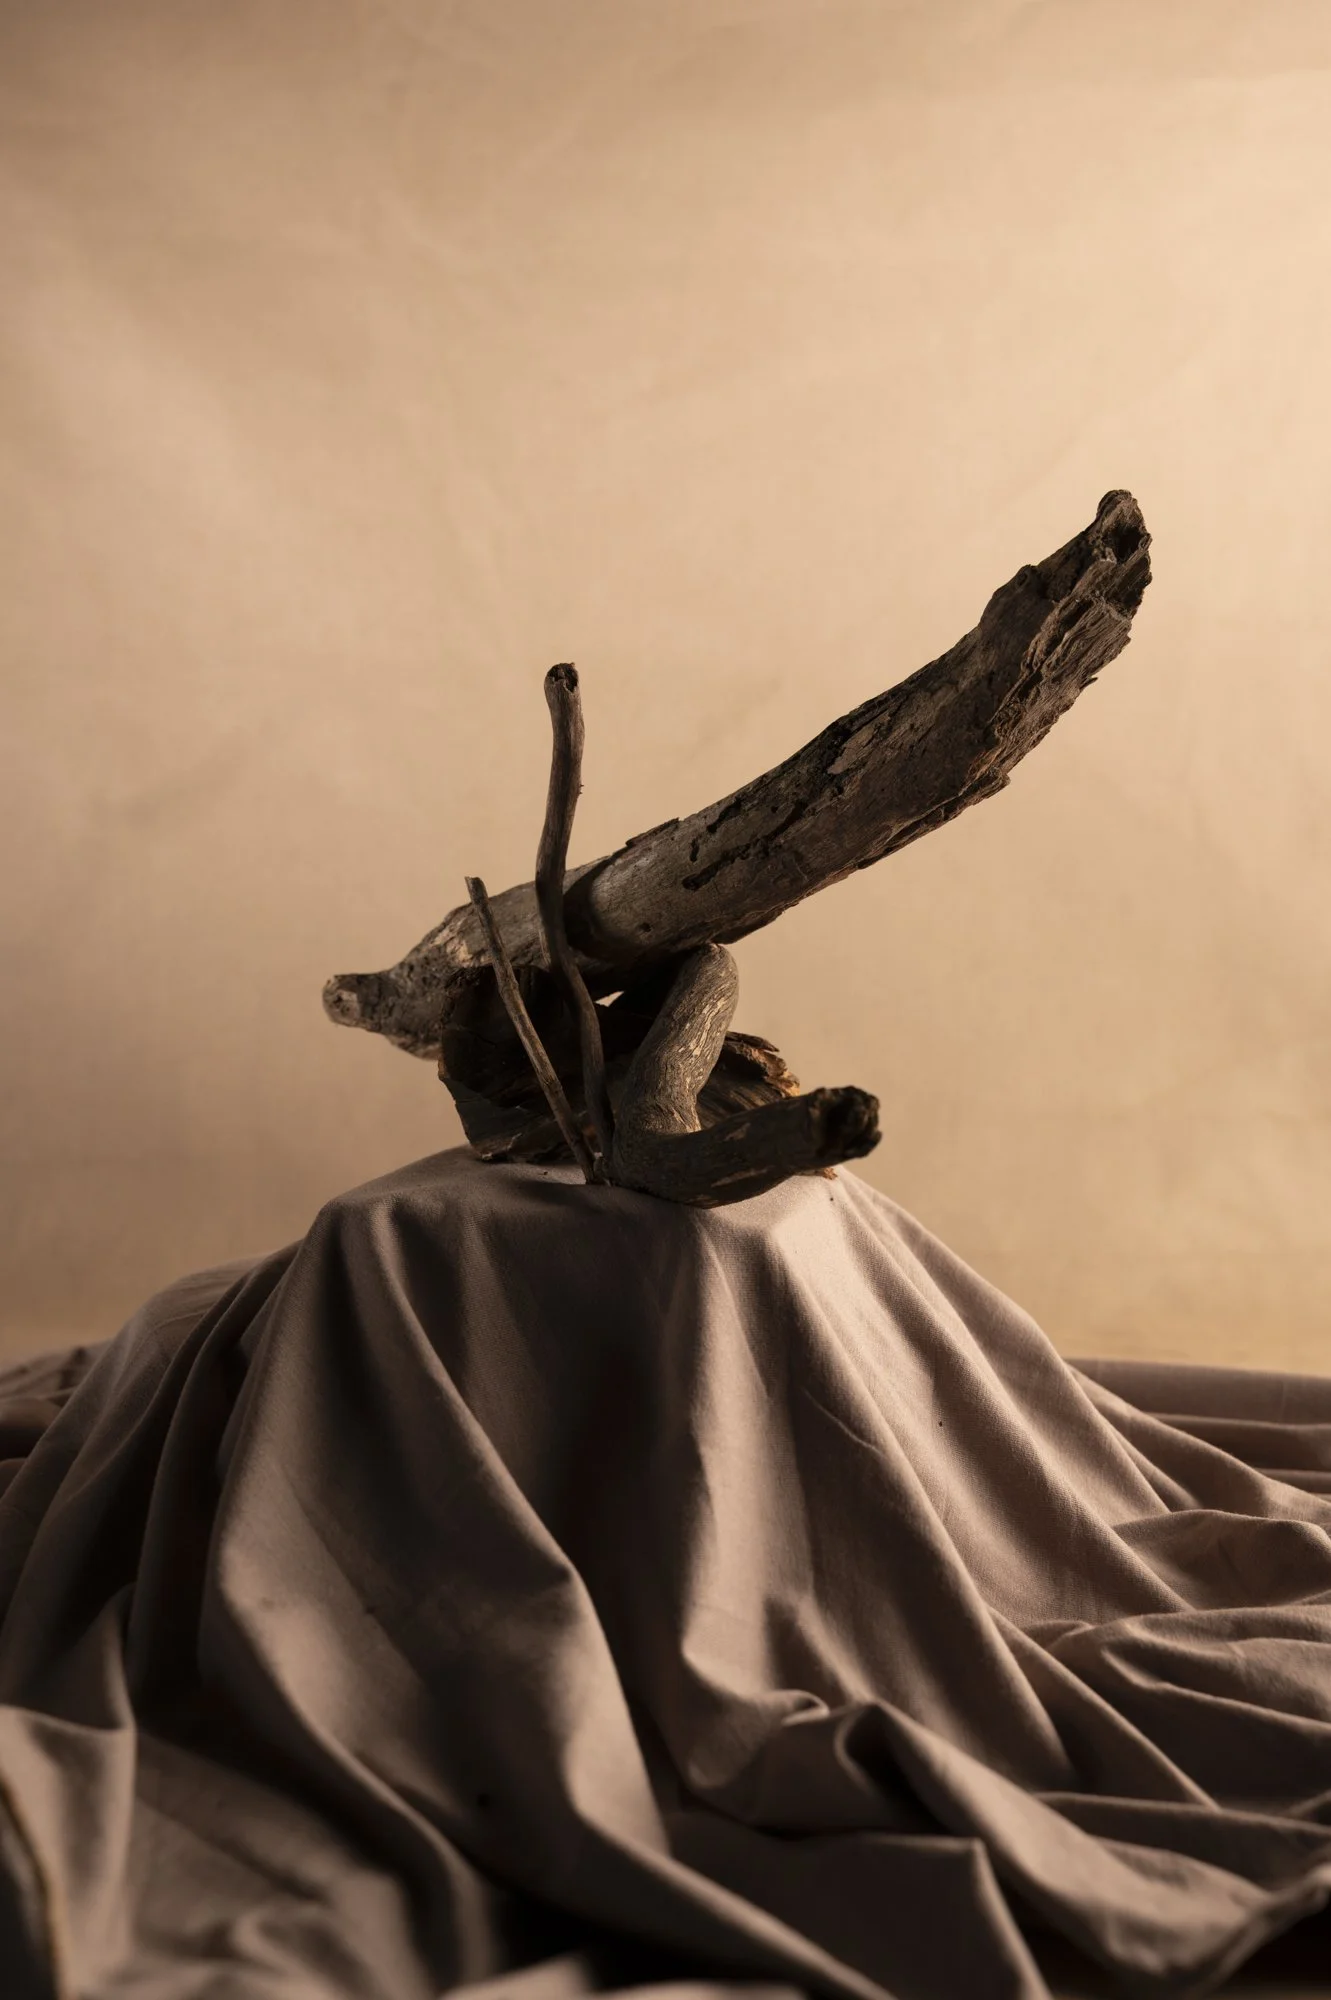
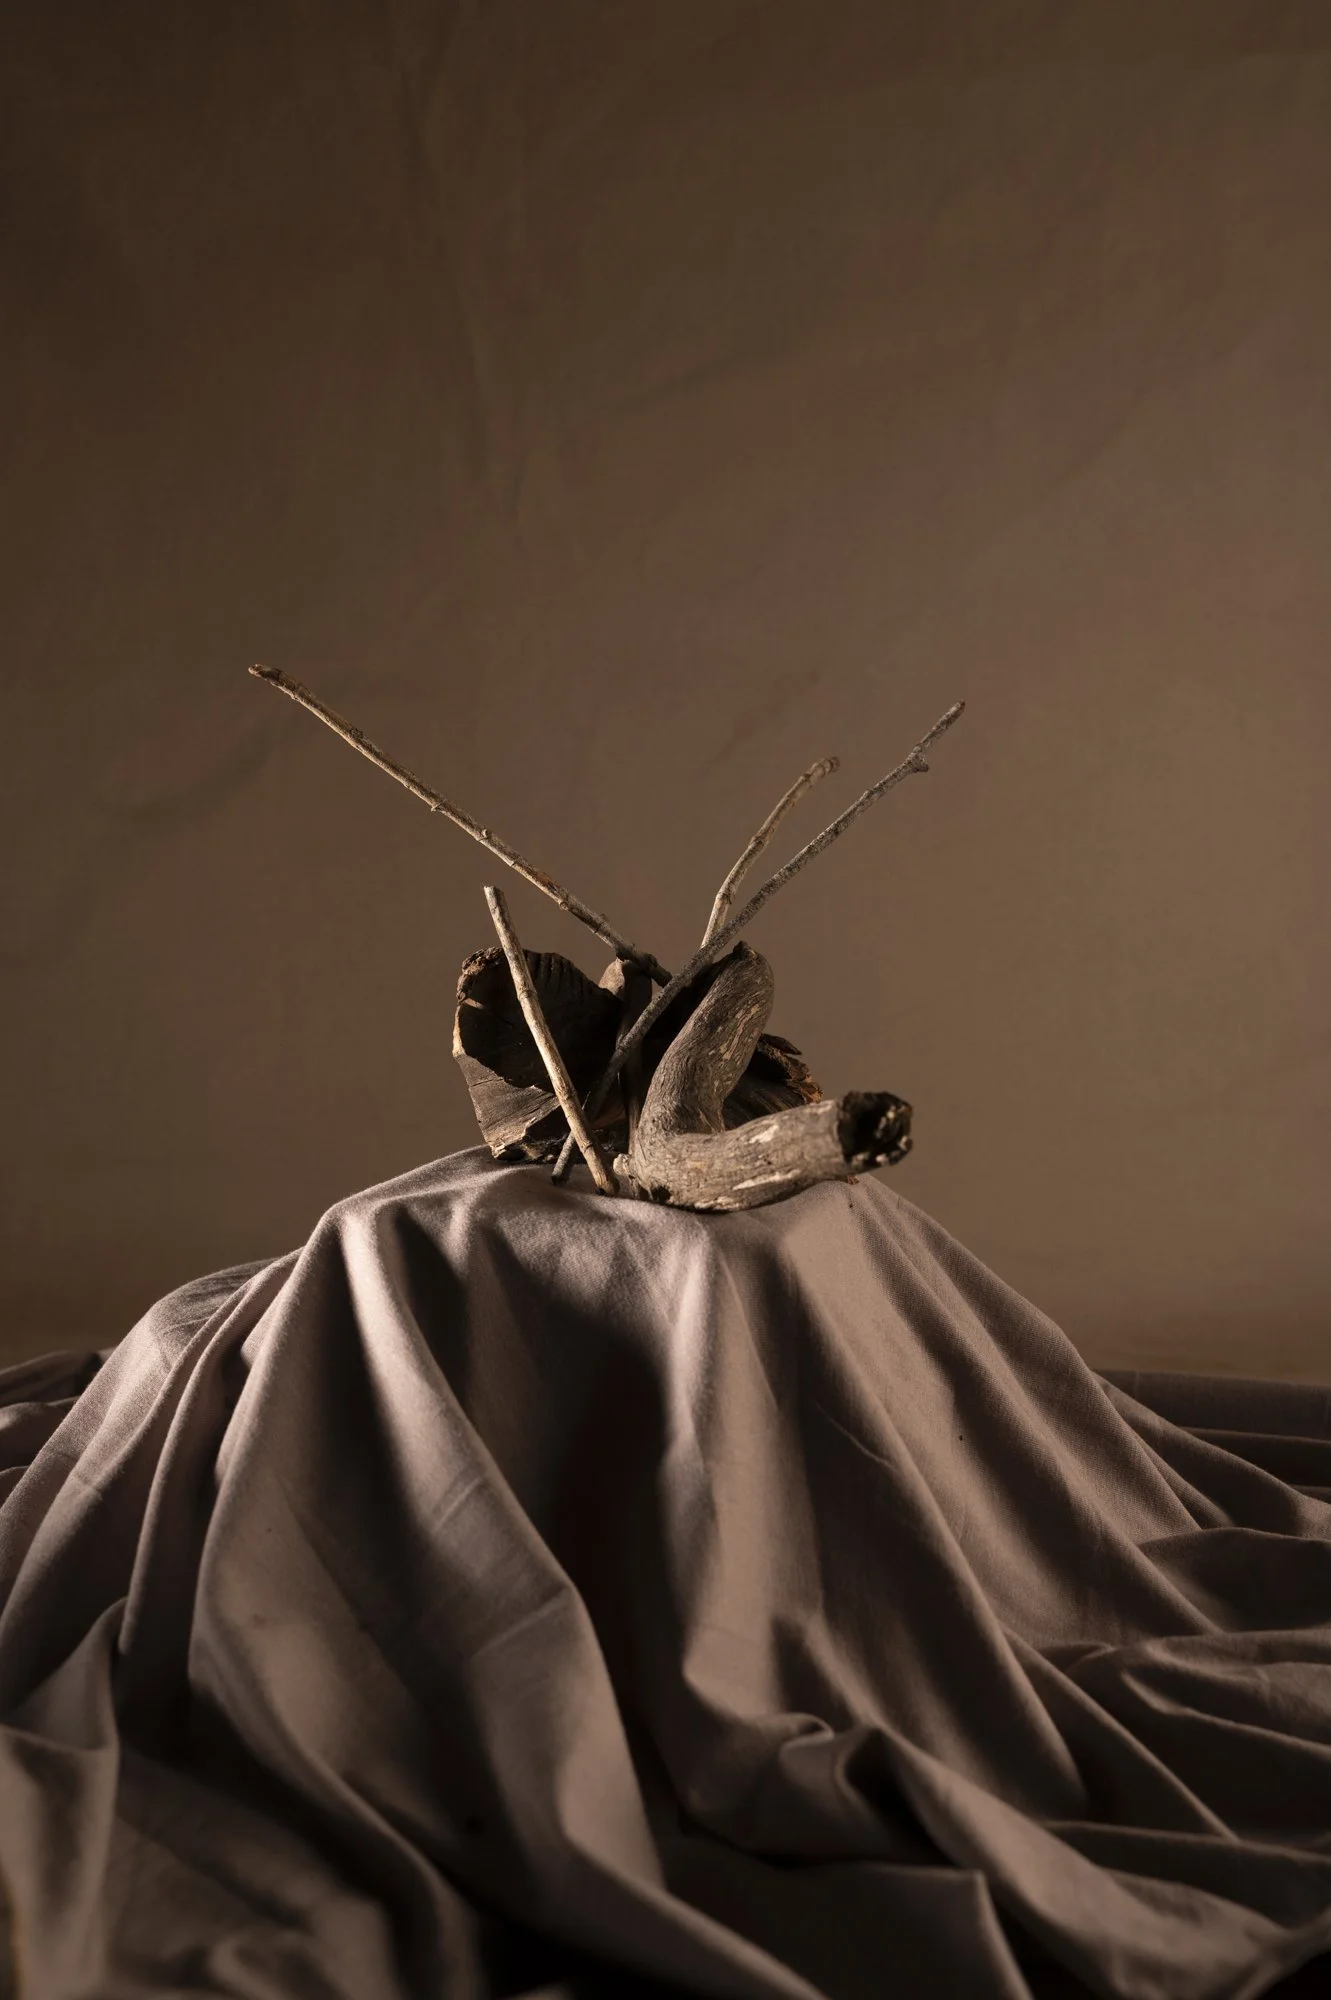
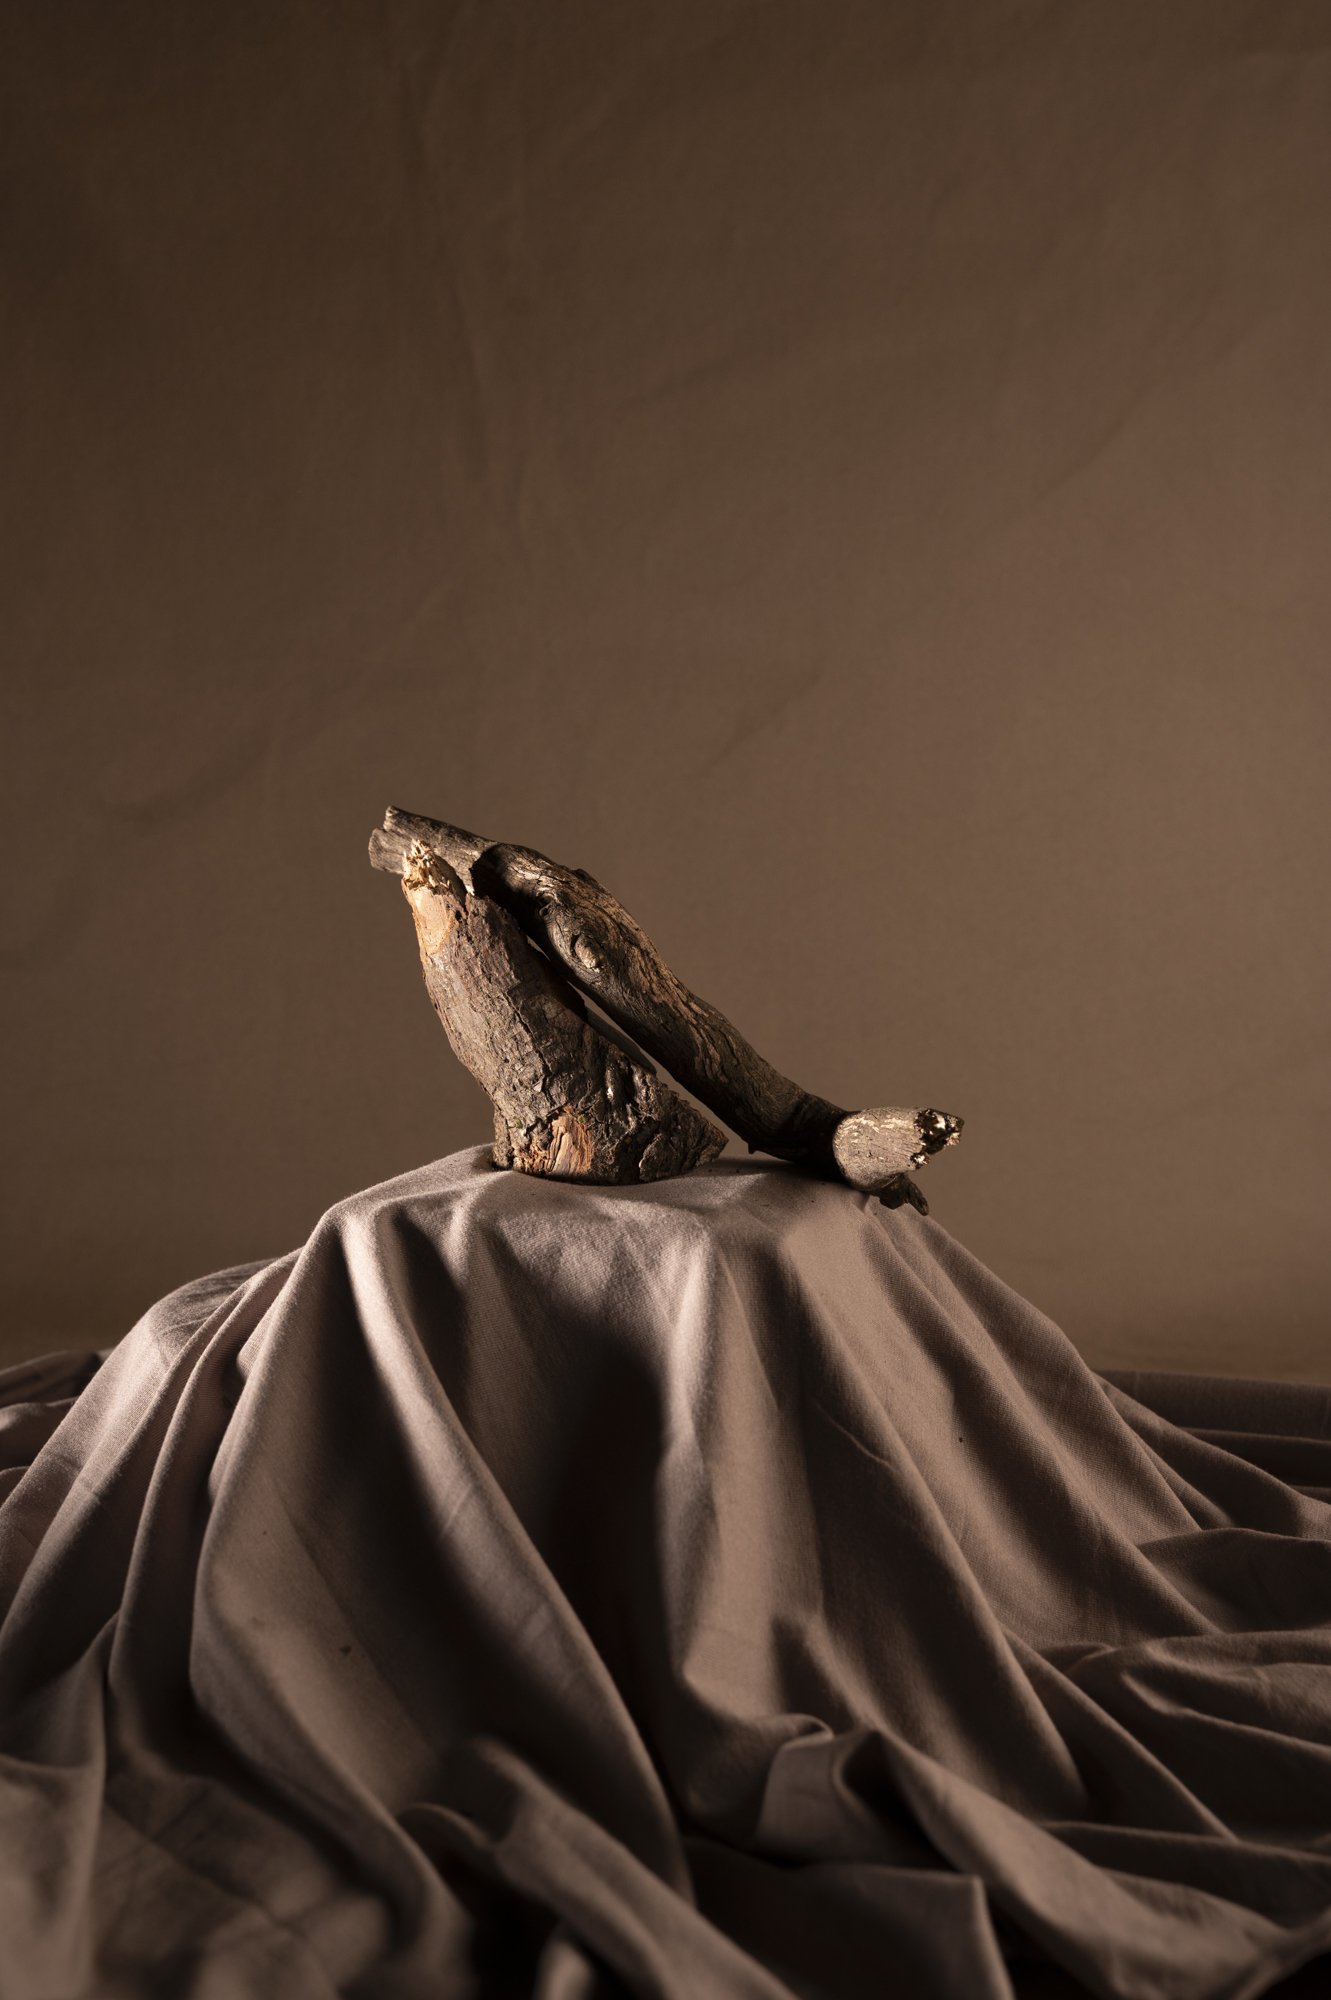
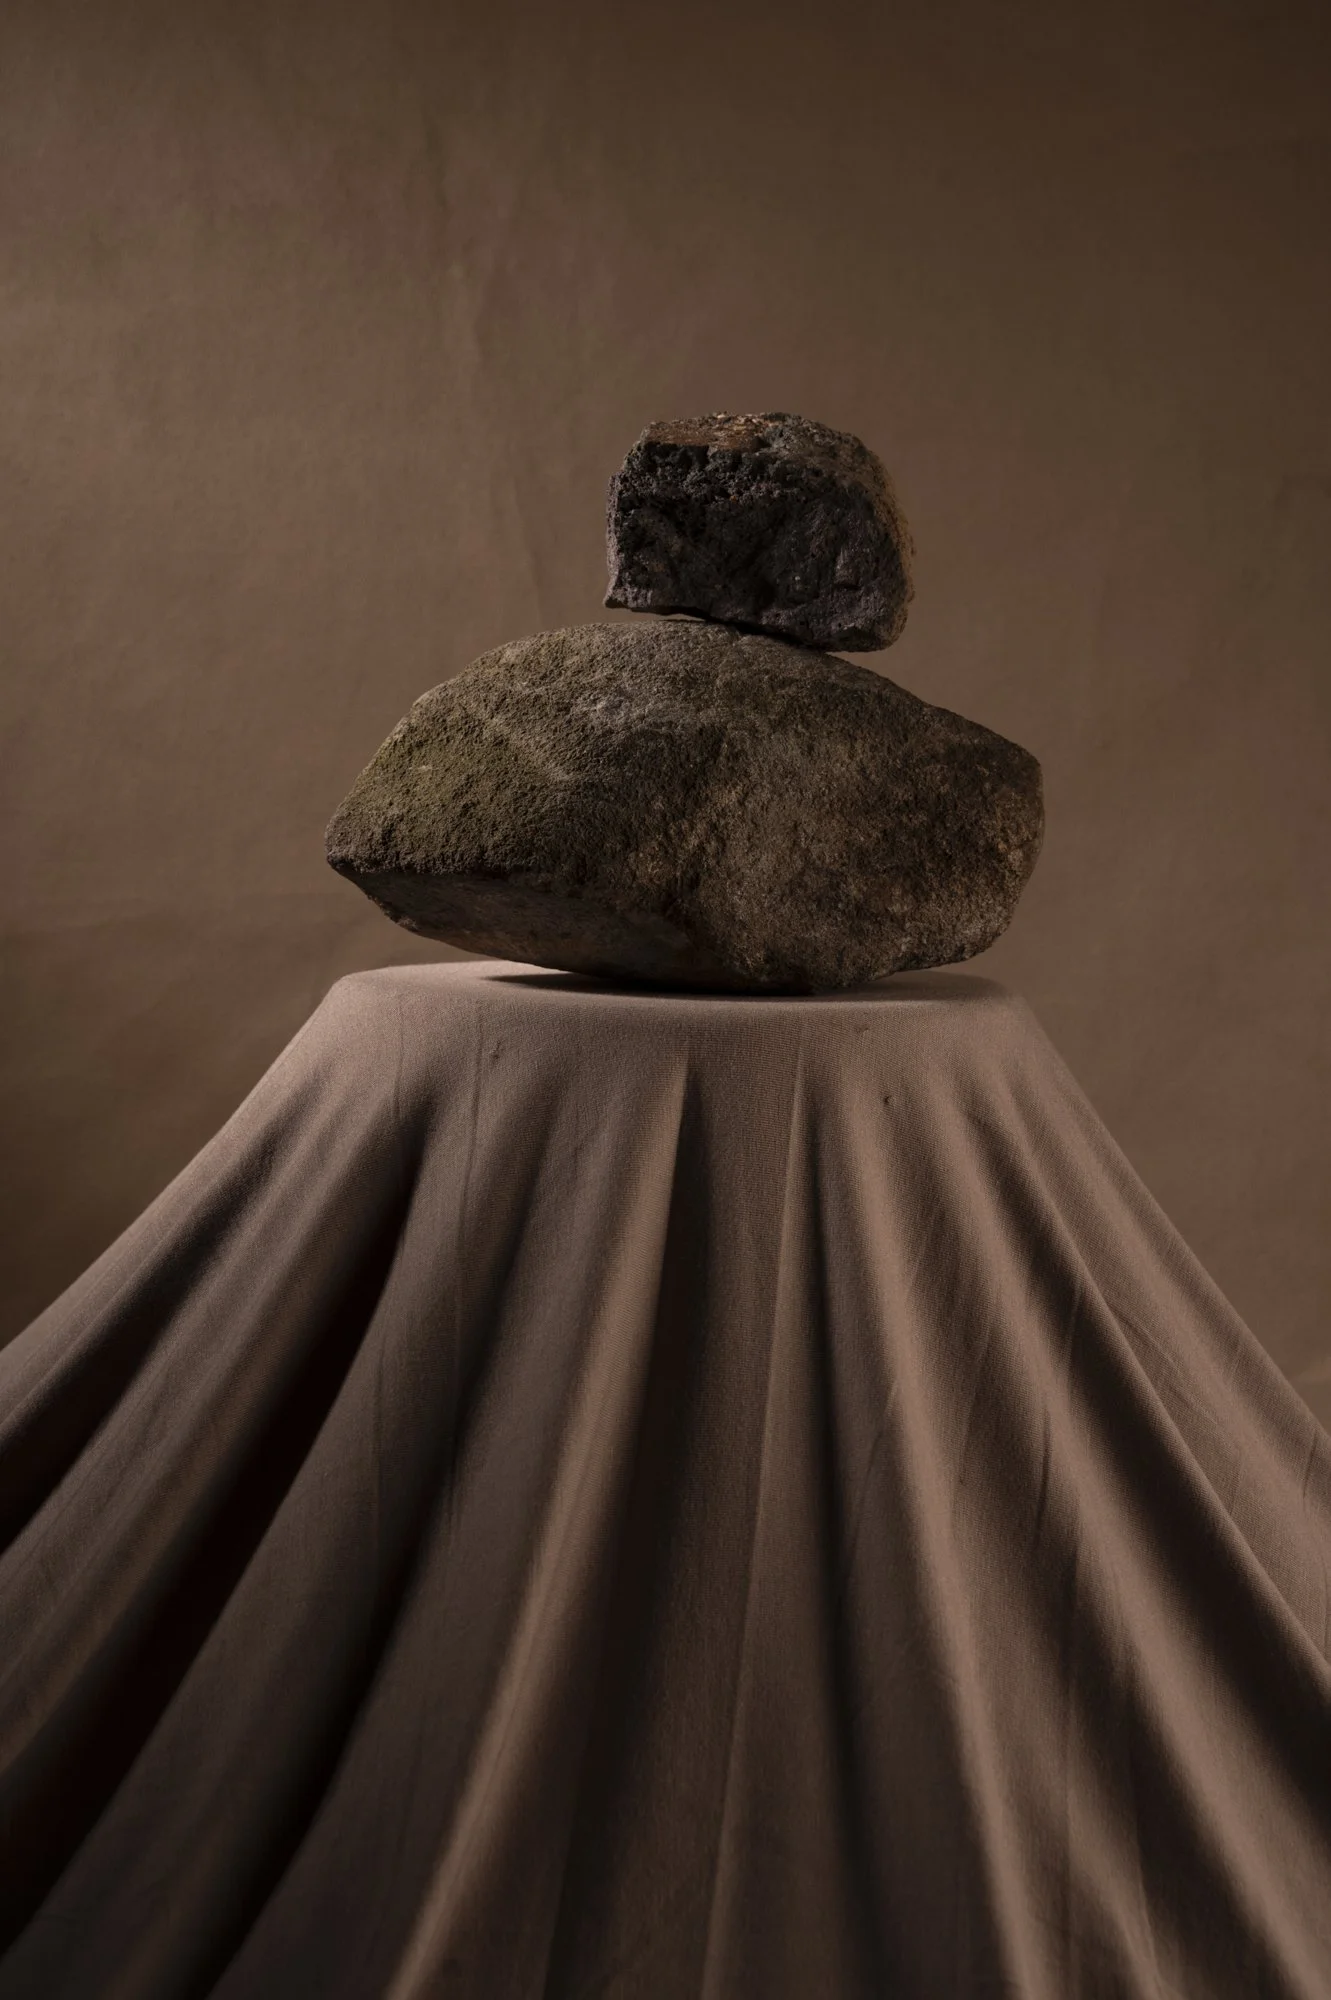
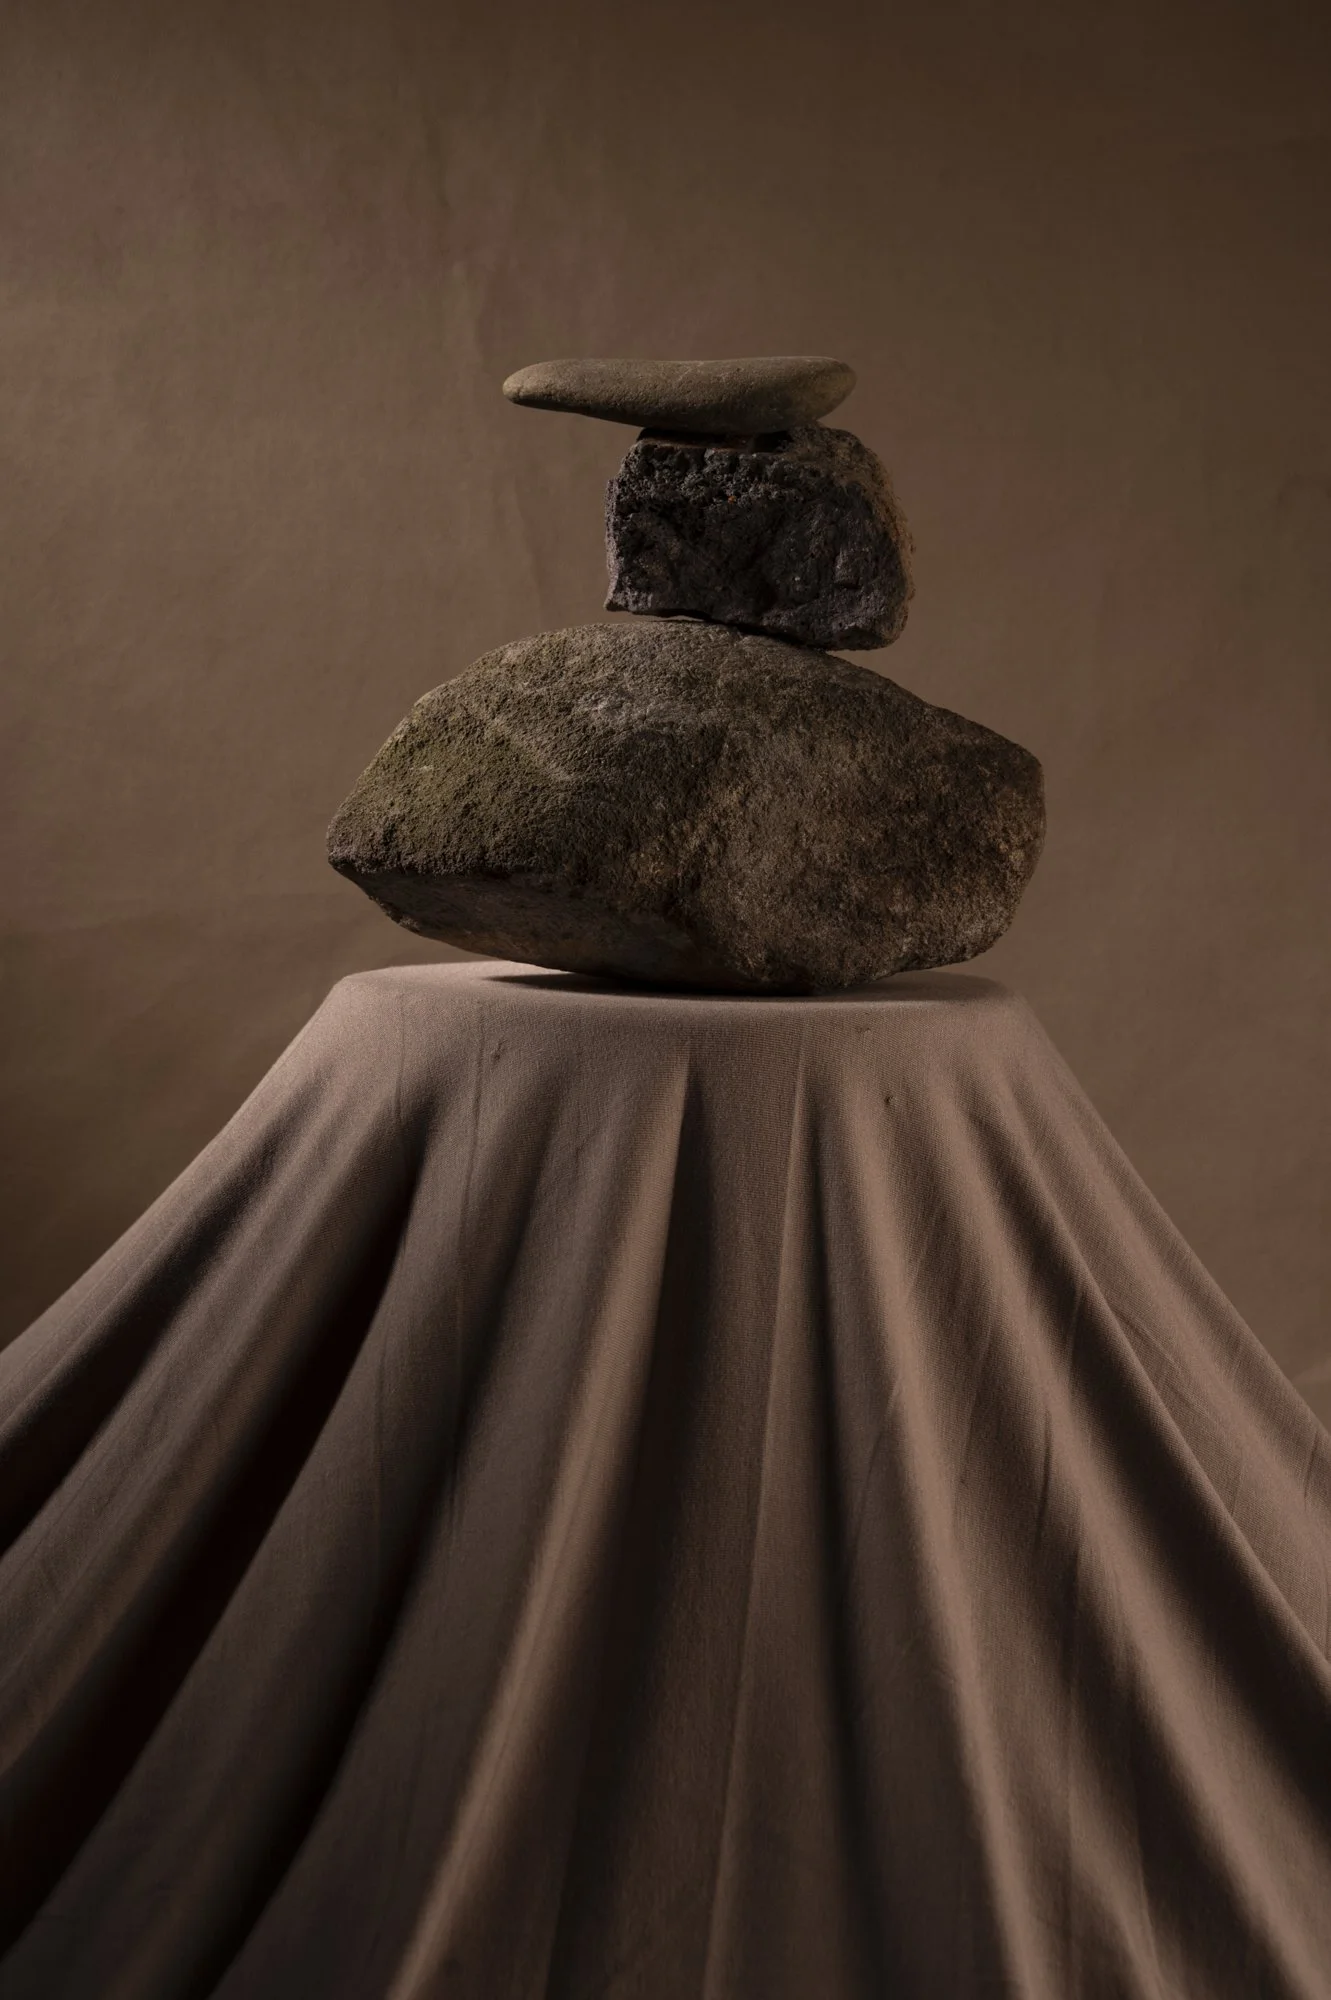
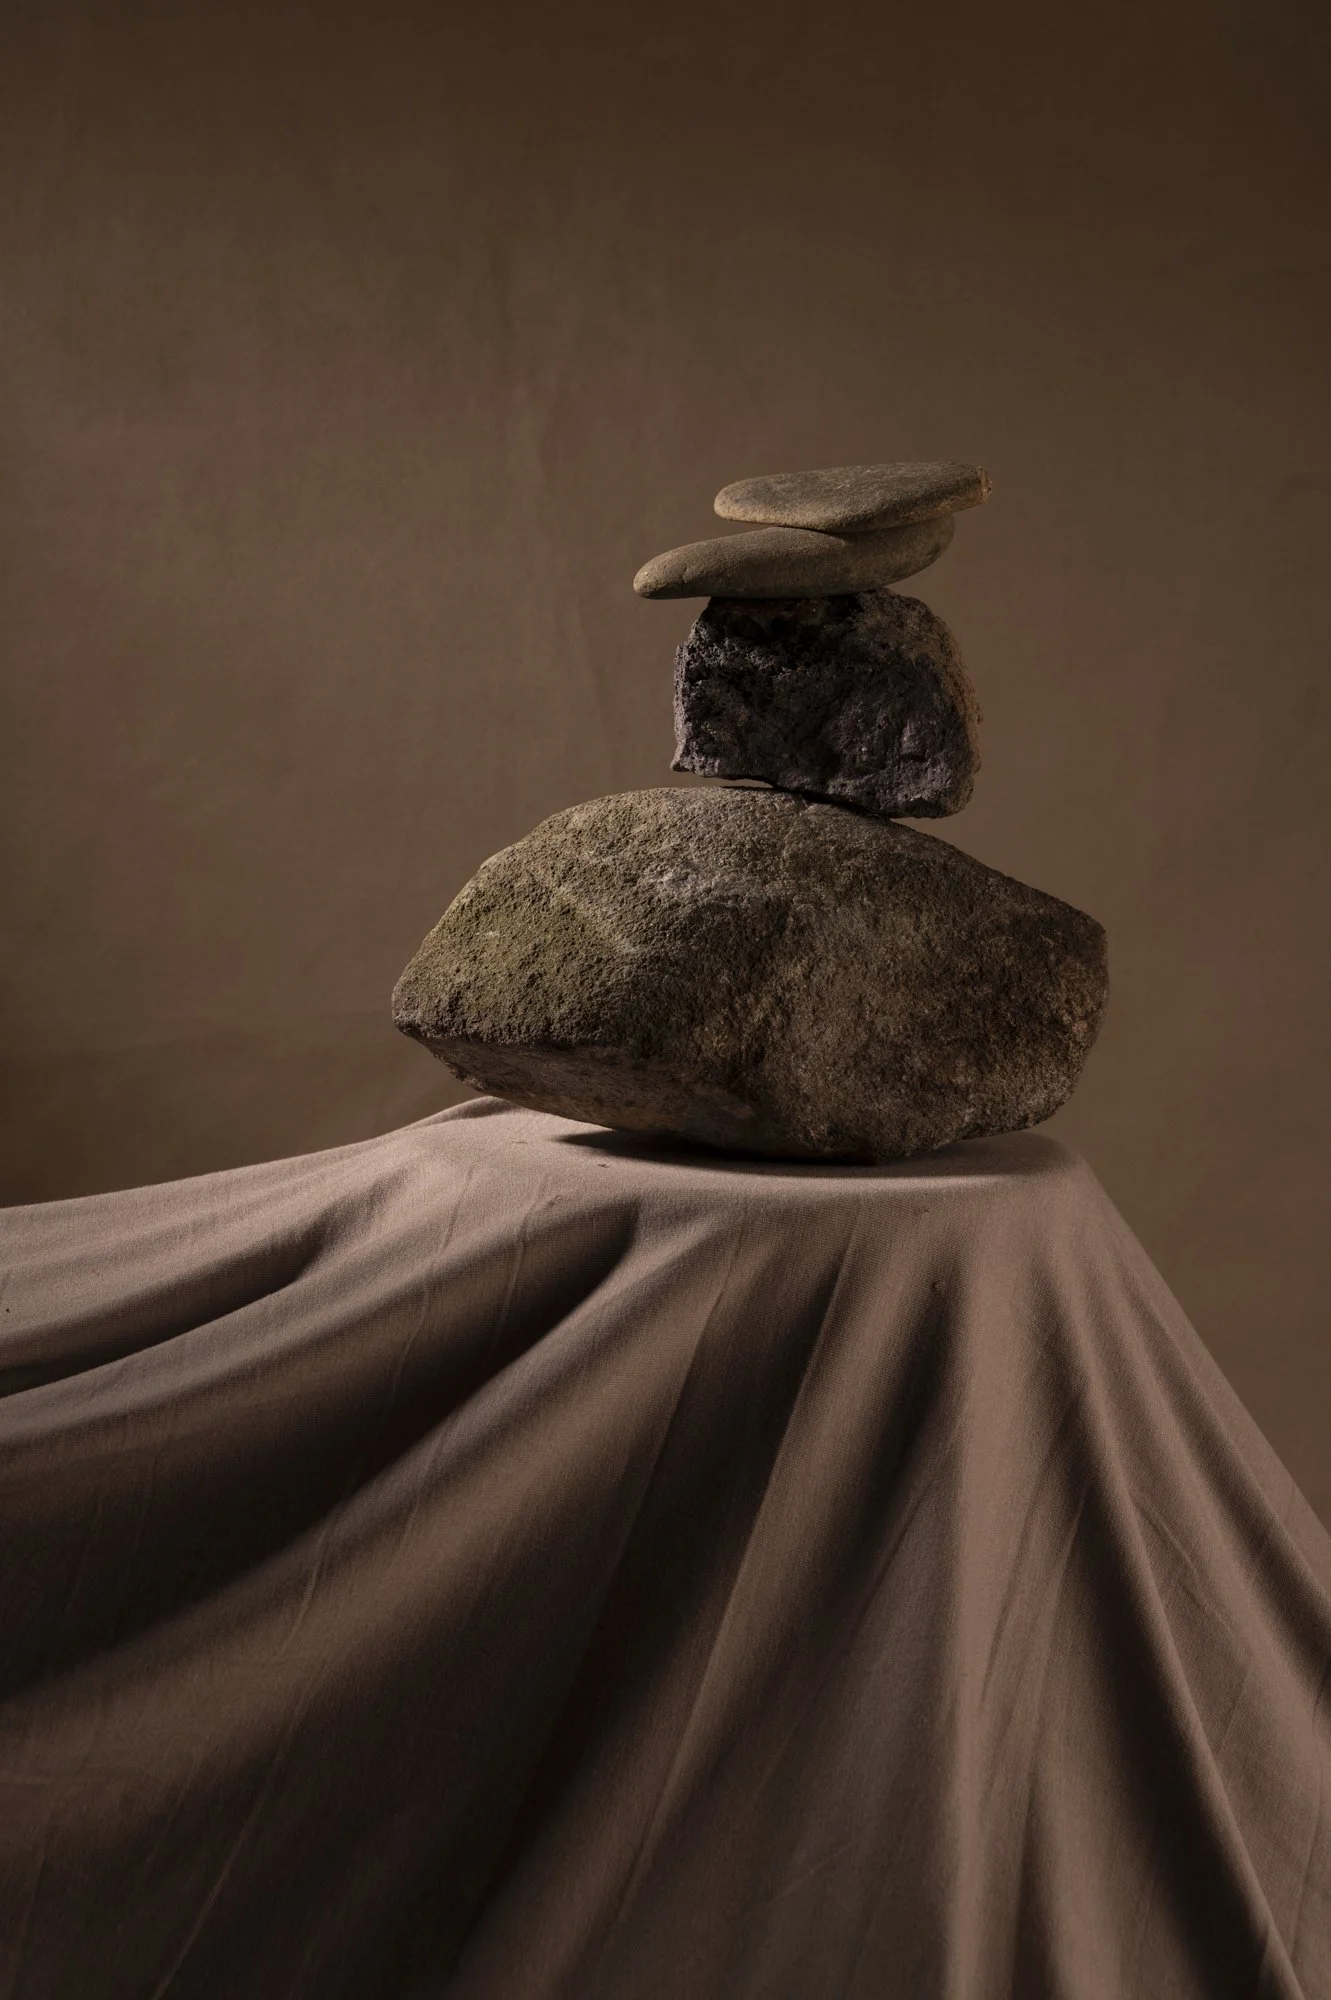
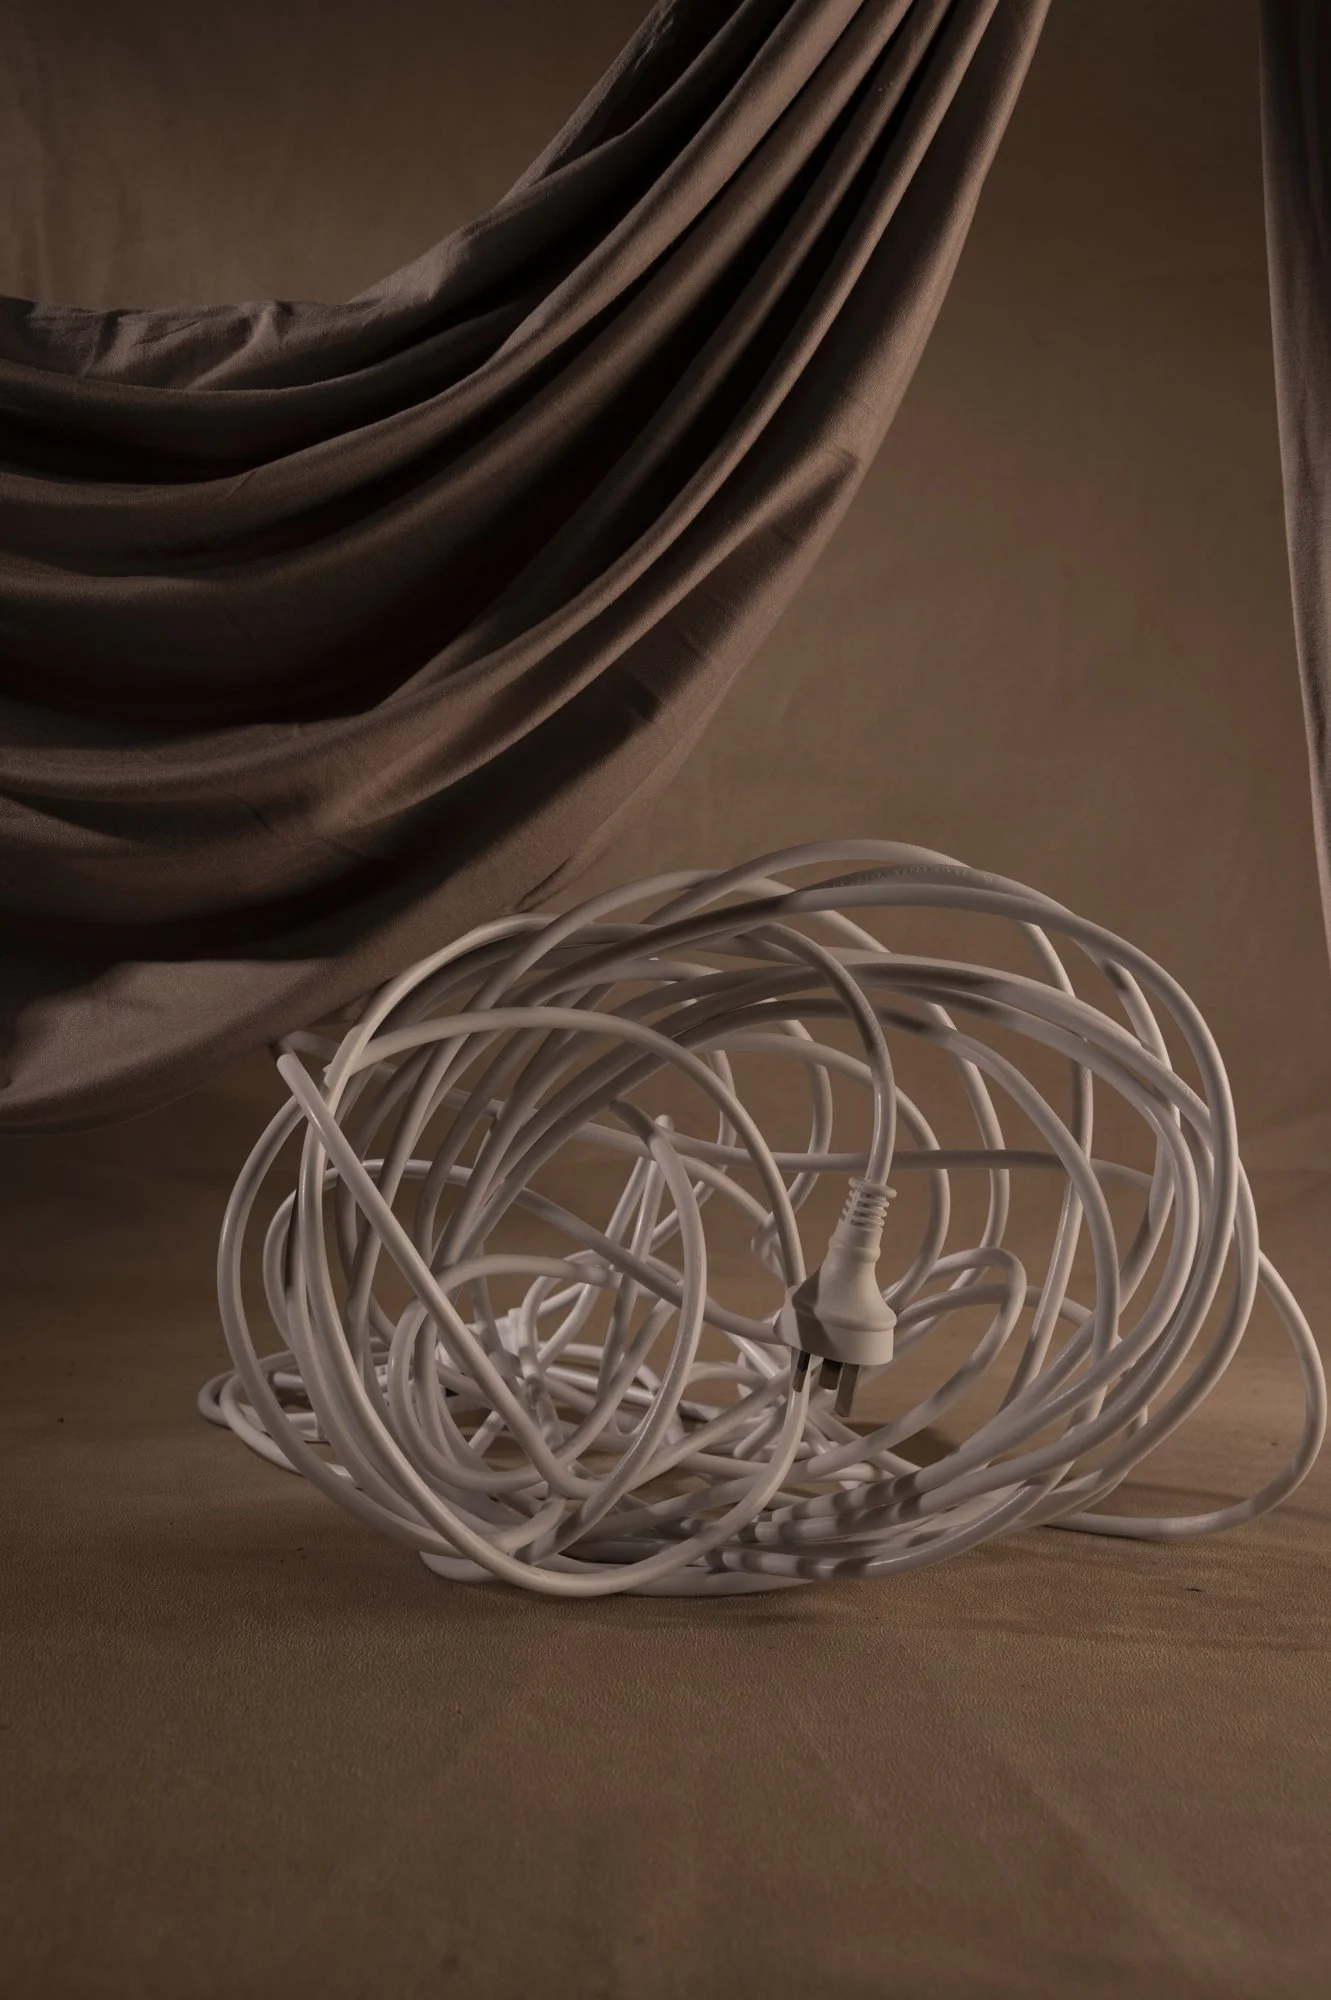
This shoot continues the exploration into fabric and form. Applying the technique to the sticks, rocks, helmet and cords.
Lighting plan:
Dish and grid serve as the key light. This is angled to stream across the backdrop largely. This helps seperate the subject from the background, adding depth and visual interest.
Sq soft box is used to fill both backdrop and subject.
Styling:
In this shoot I experimented with ways to drape the fabric across various objects to create different pedestals of sorts for my subject matter to stand upon.
What didn’t work?
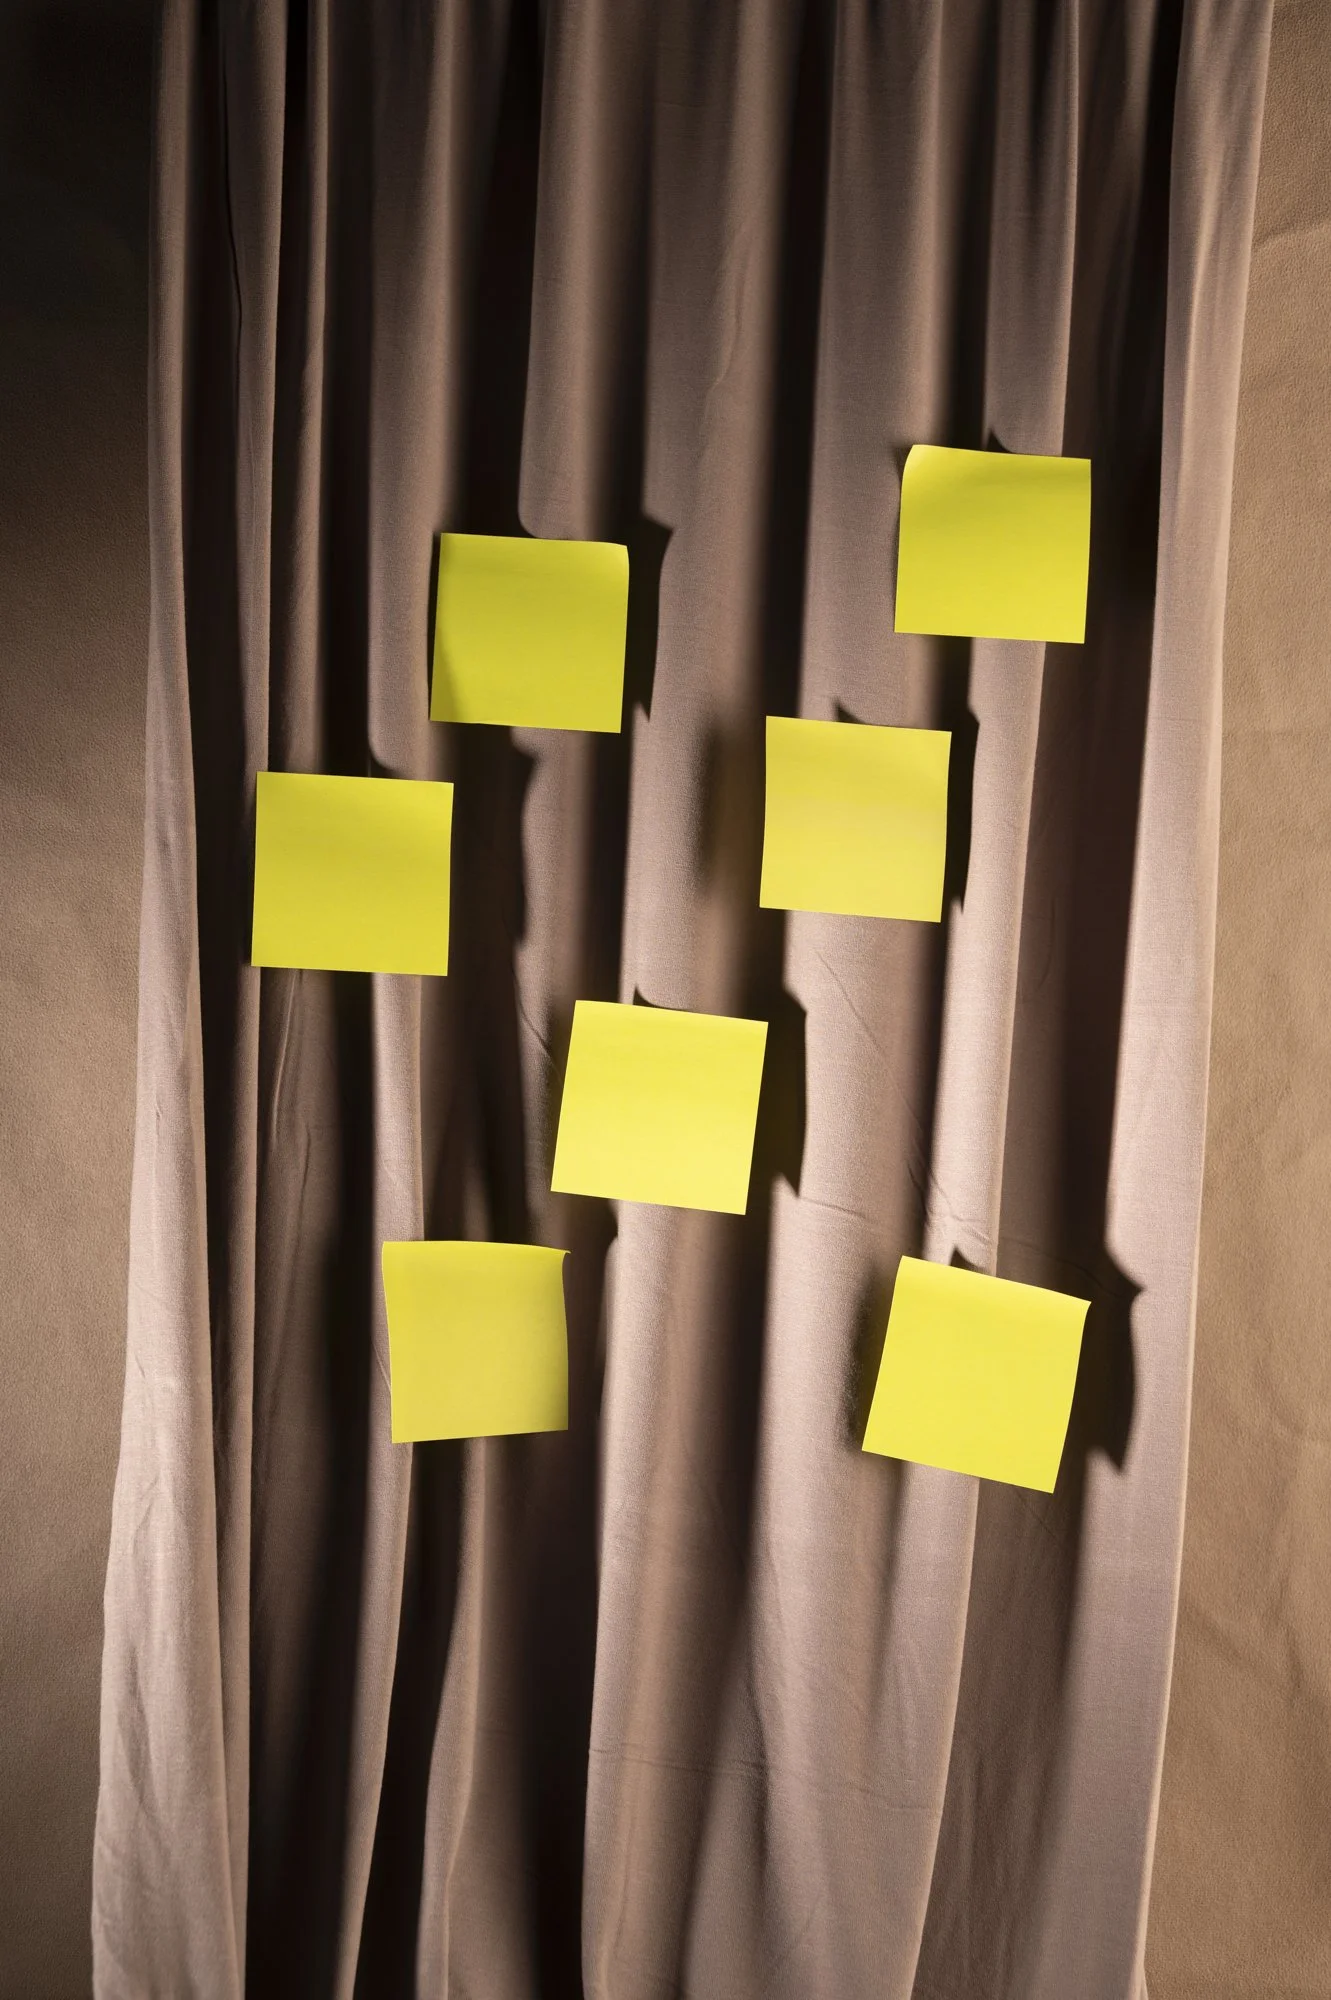
The sticky notes are very bright in colour. I may be able to fix this in post but the colour is quite jarring.
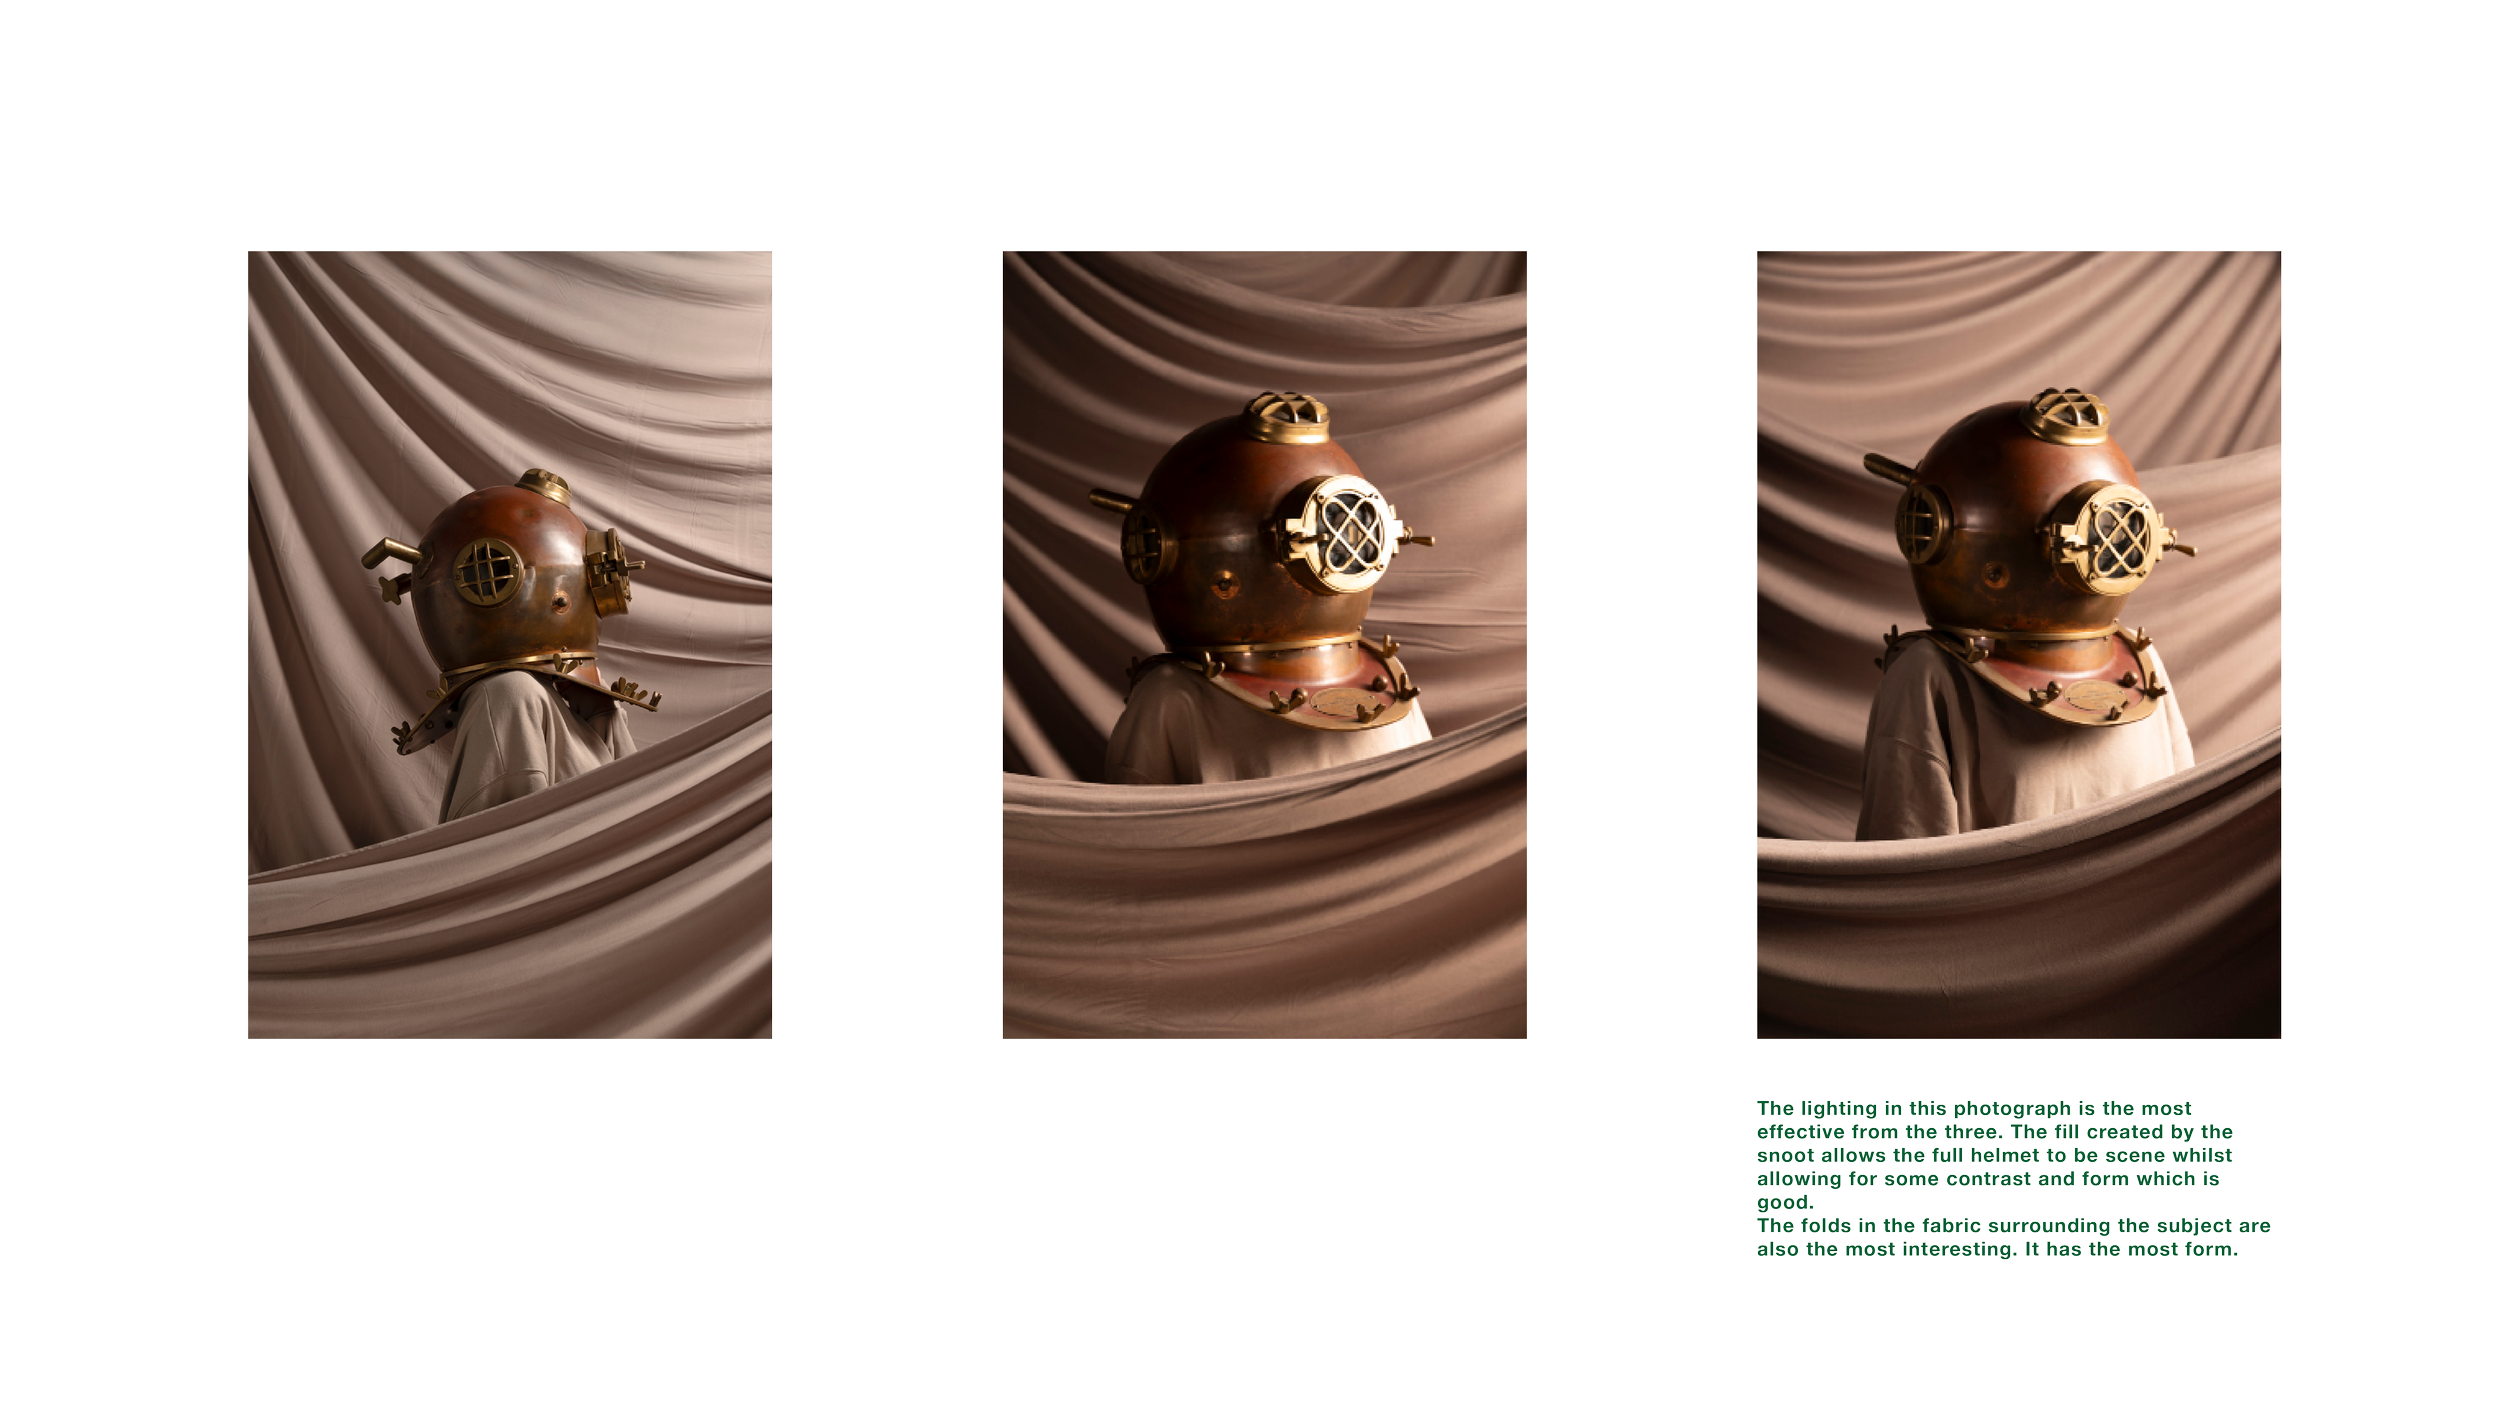
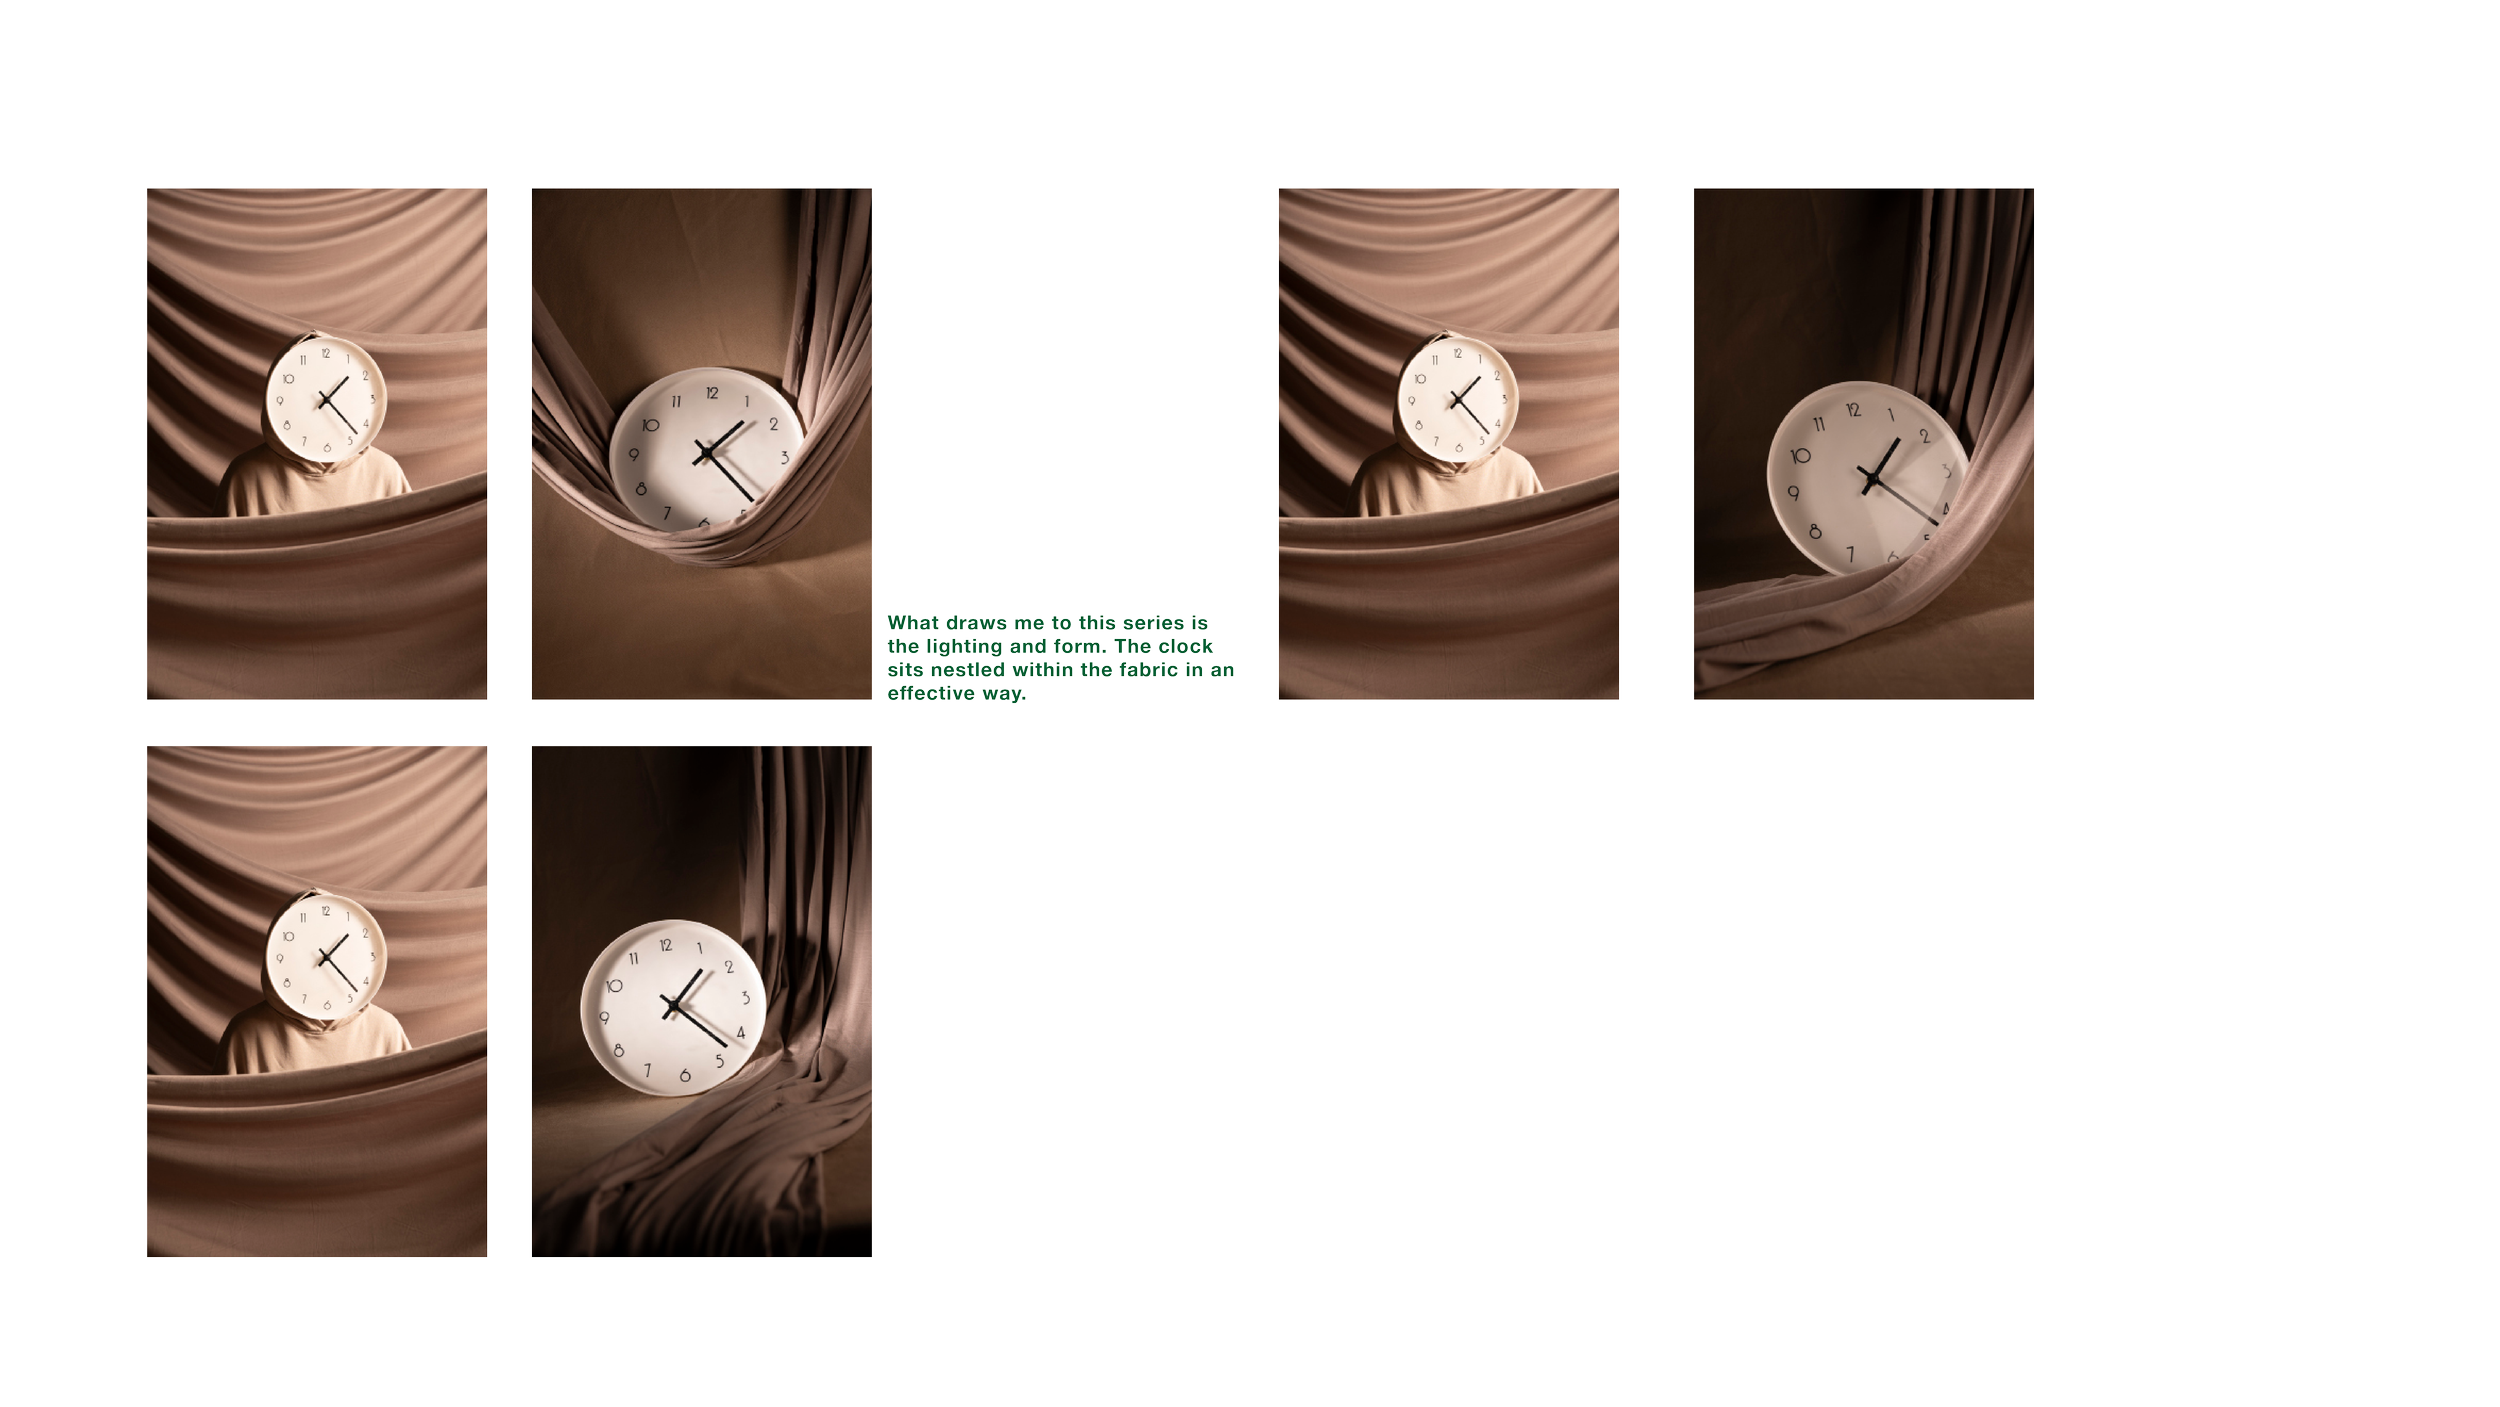
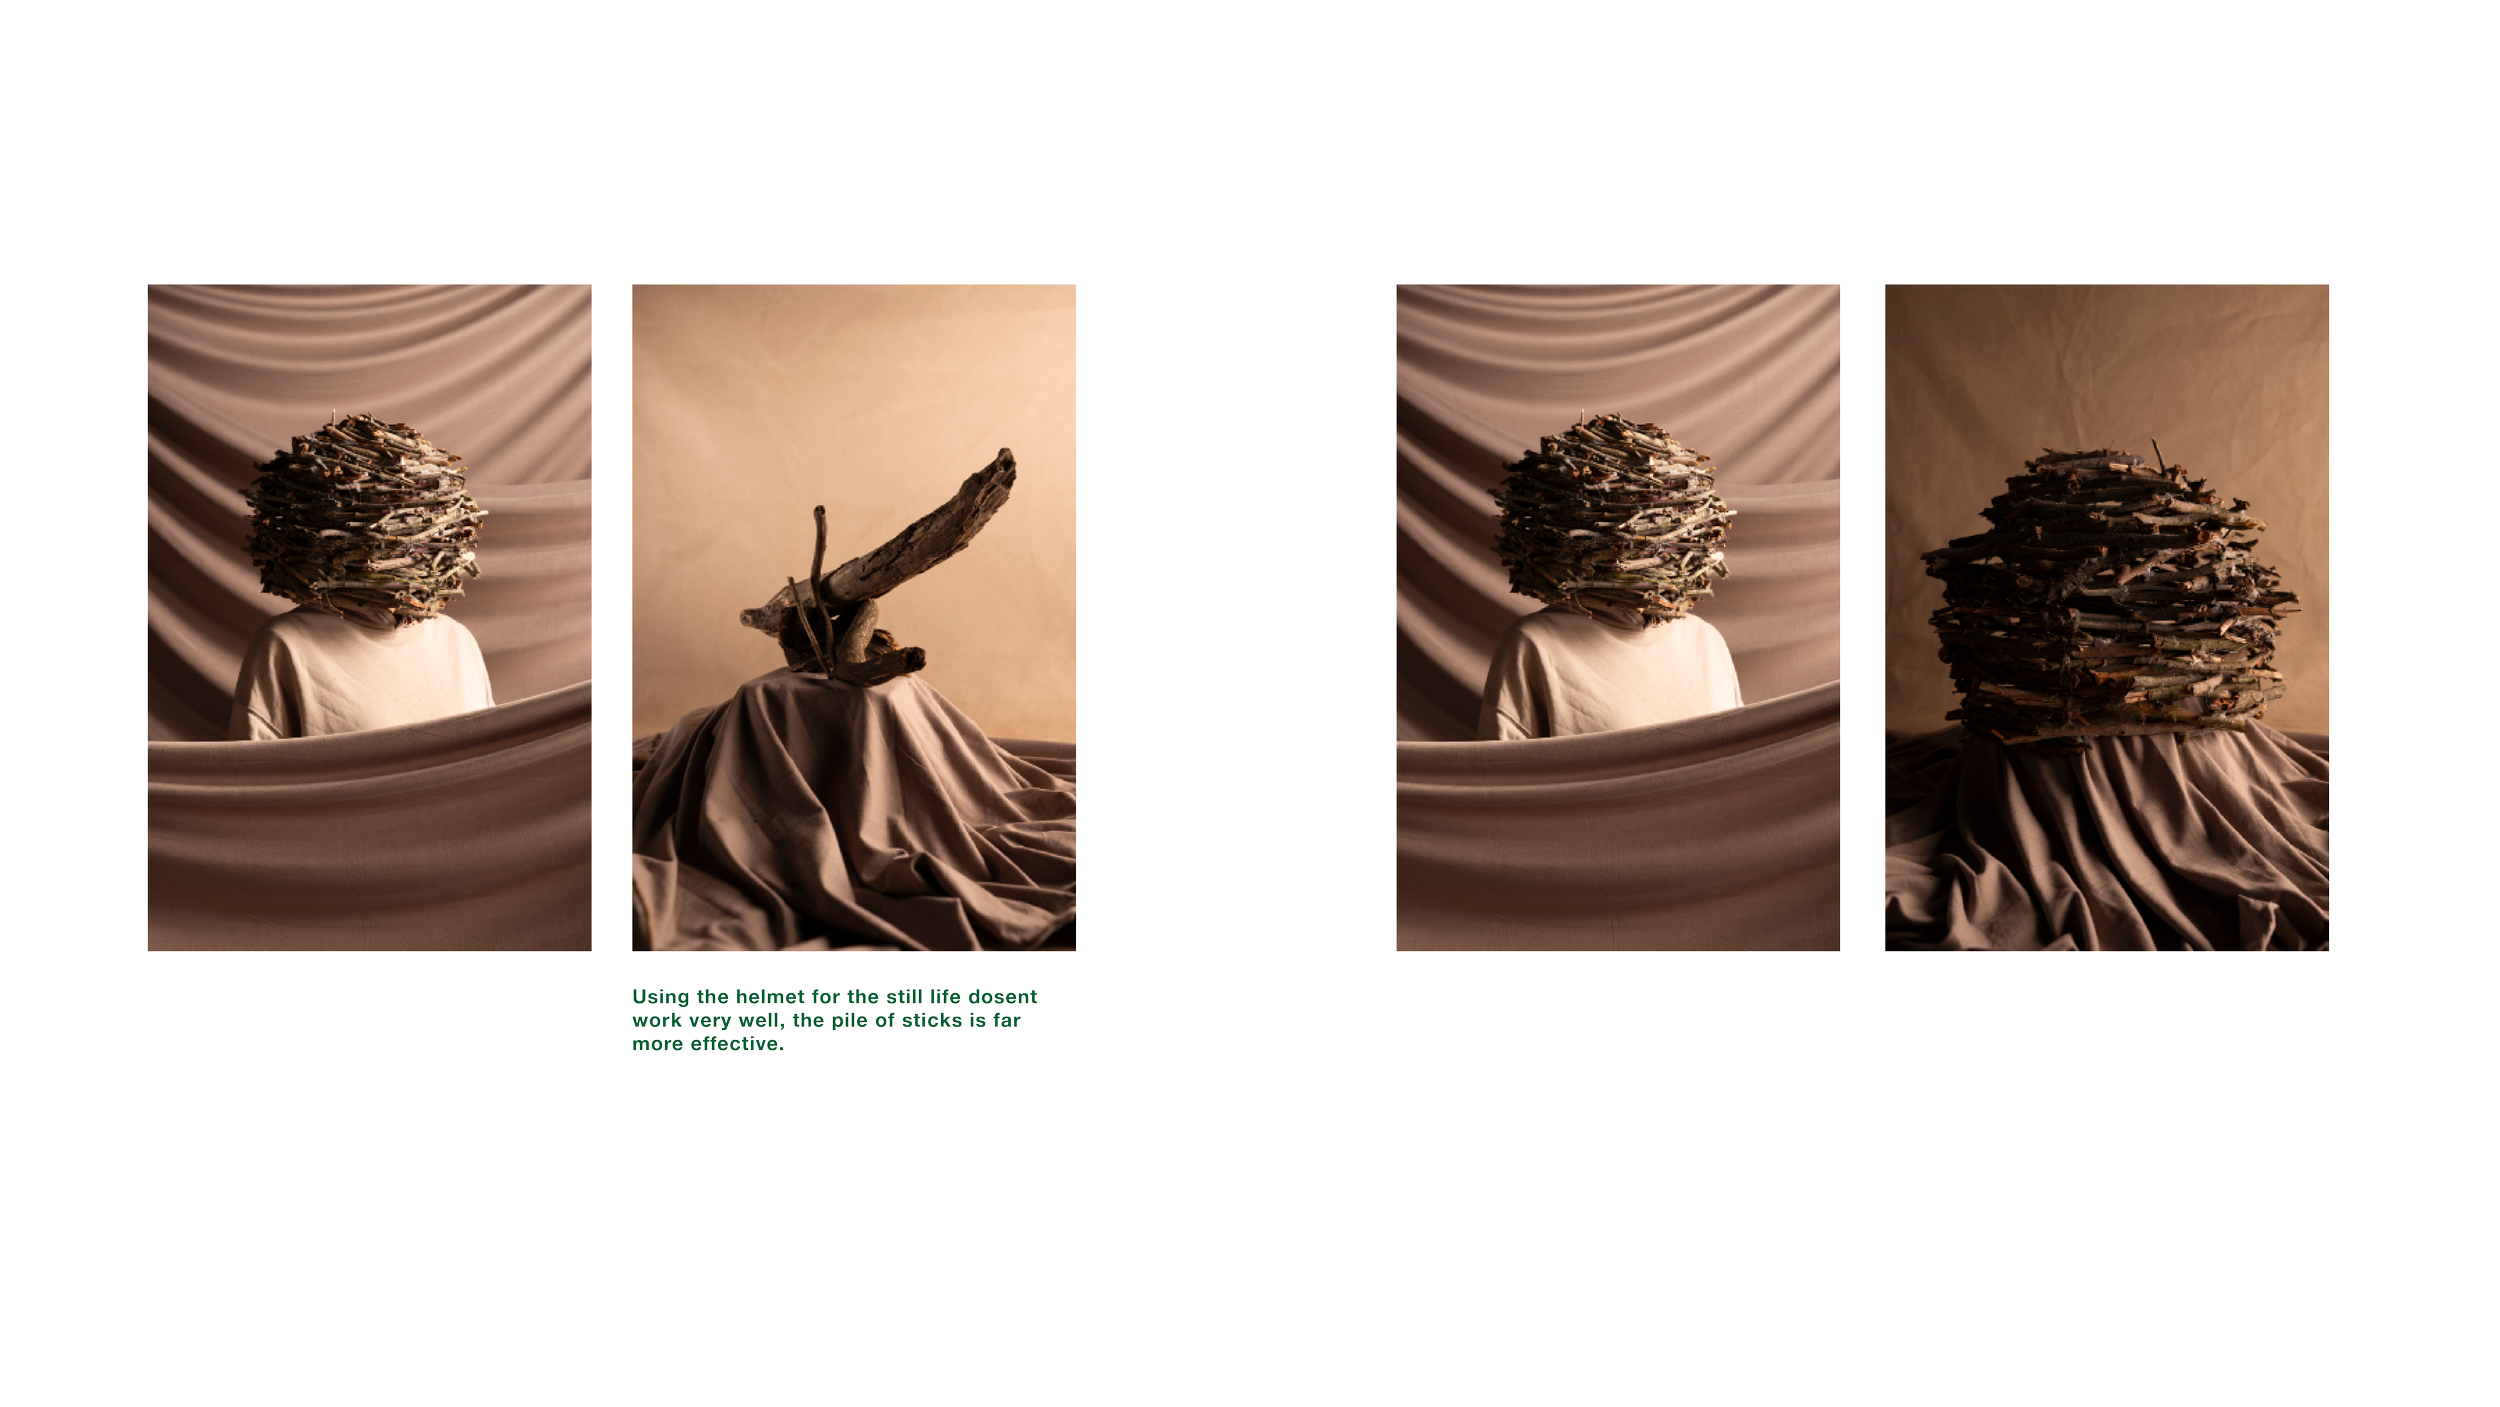
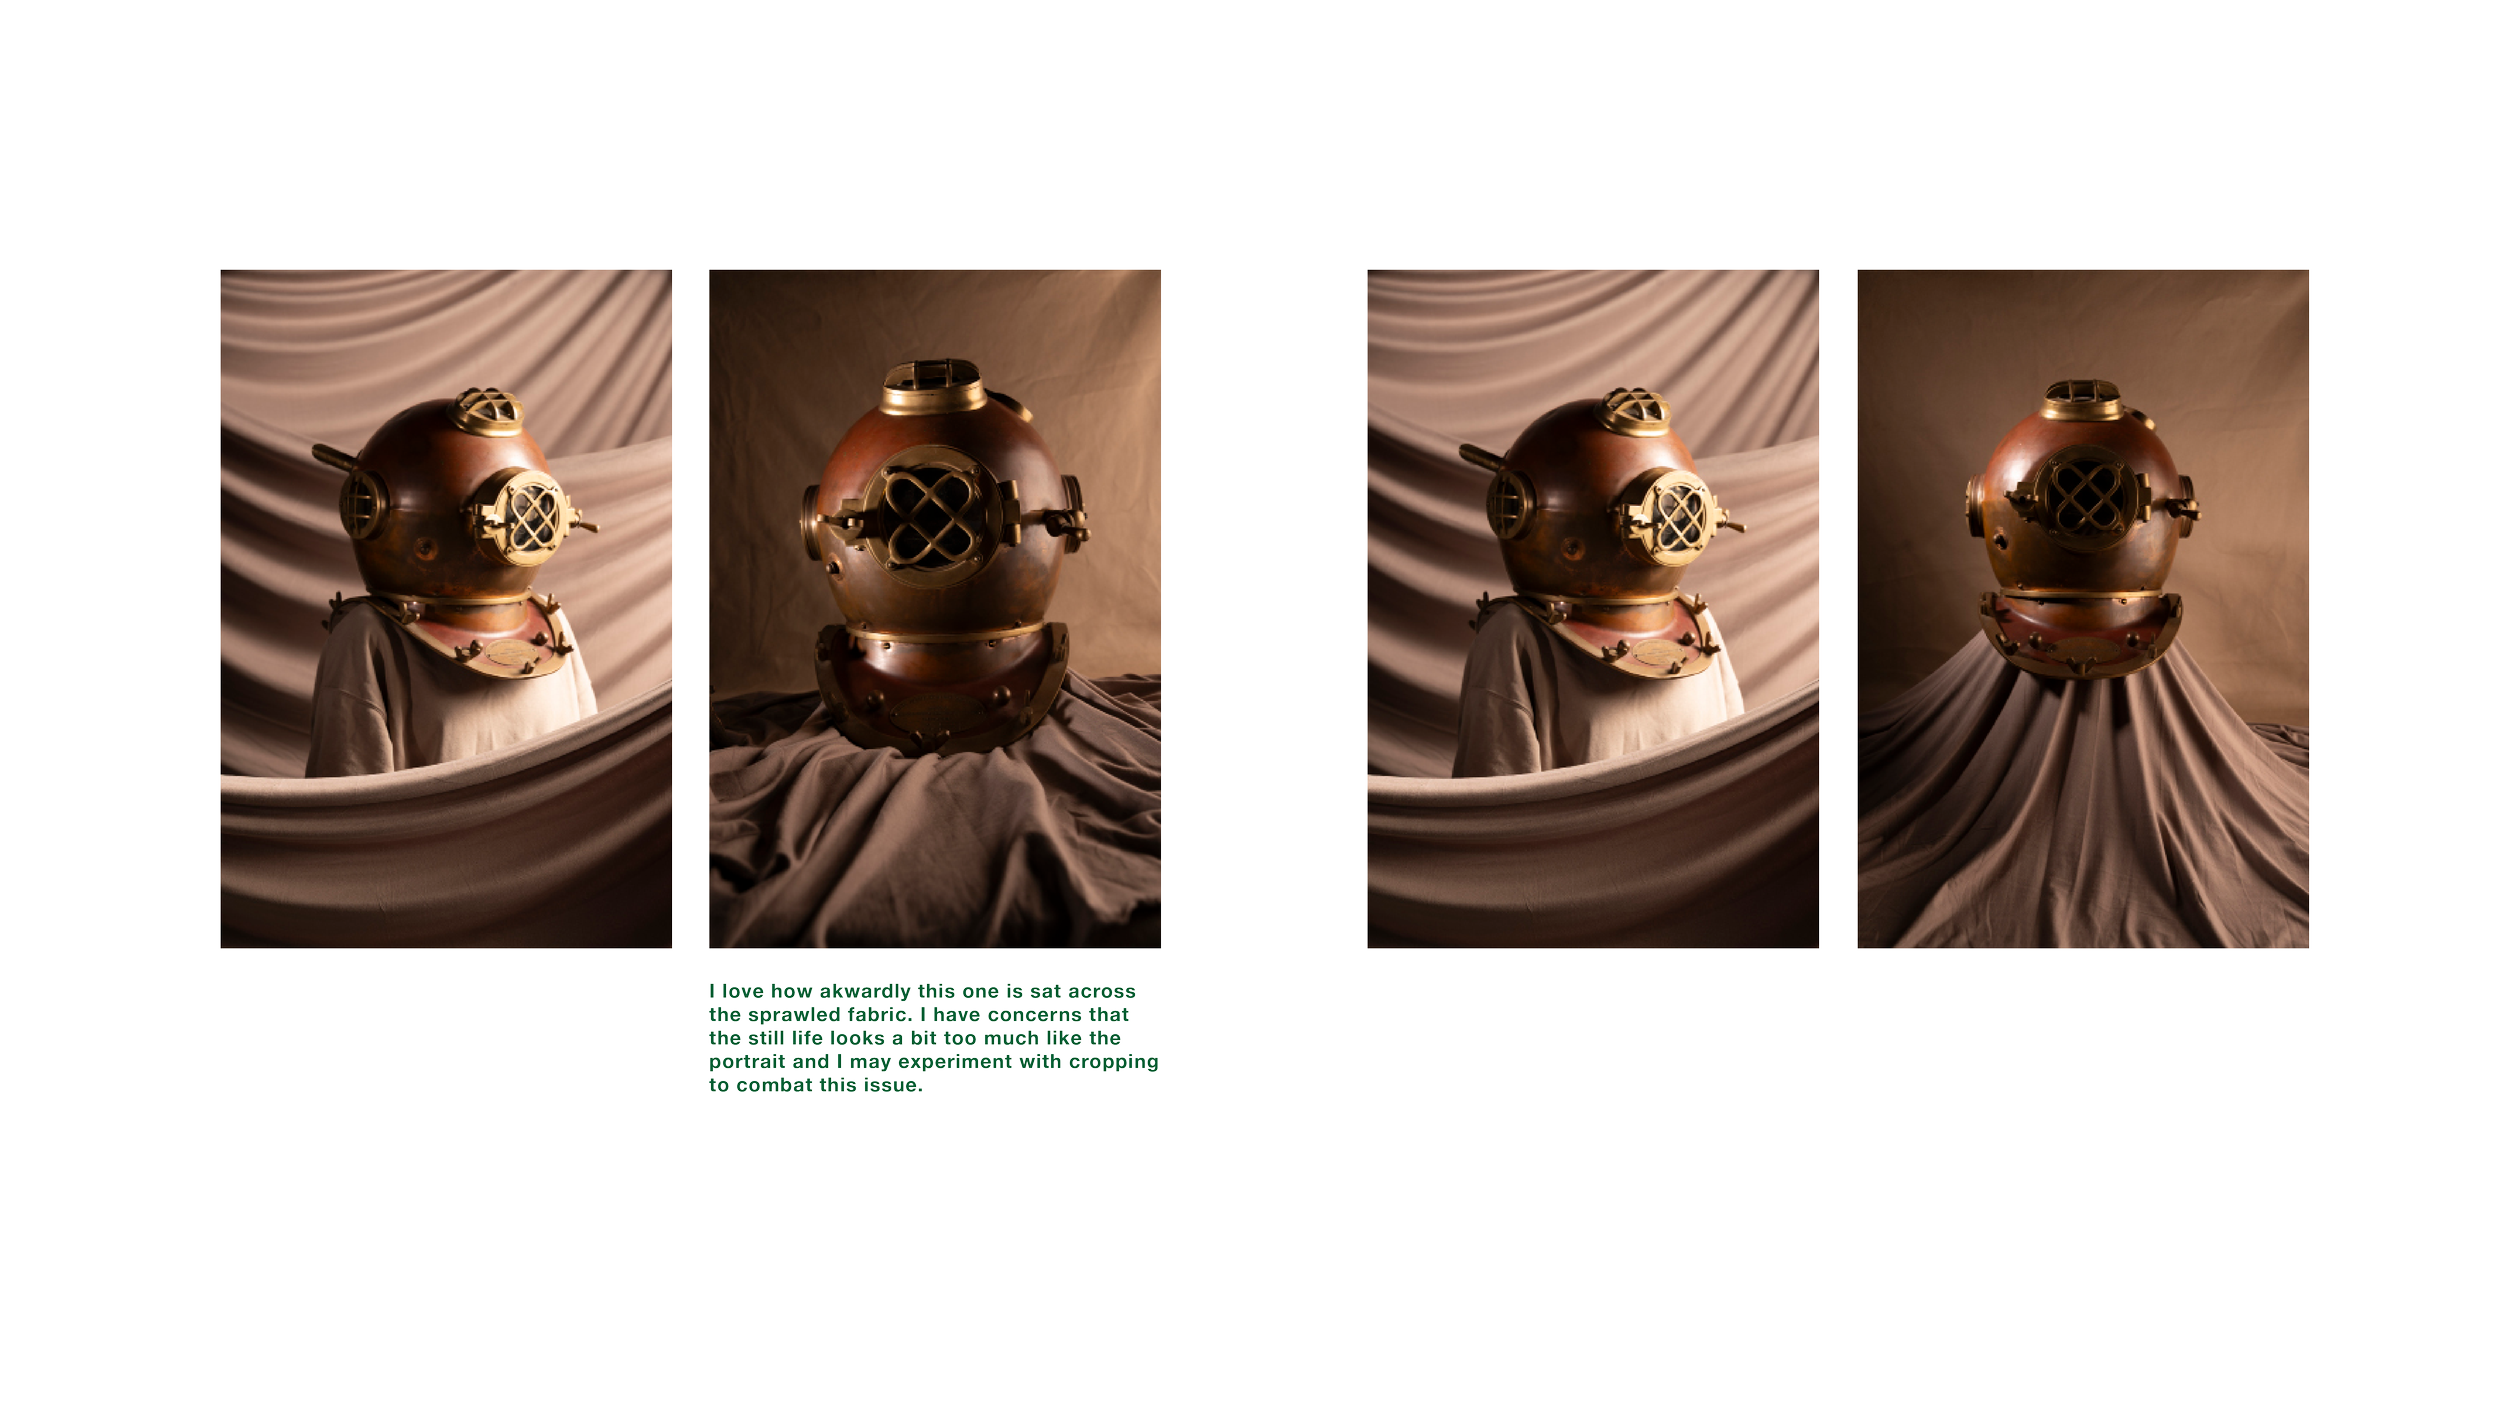
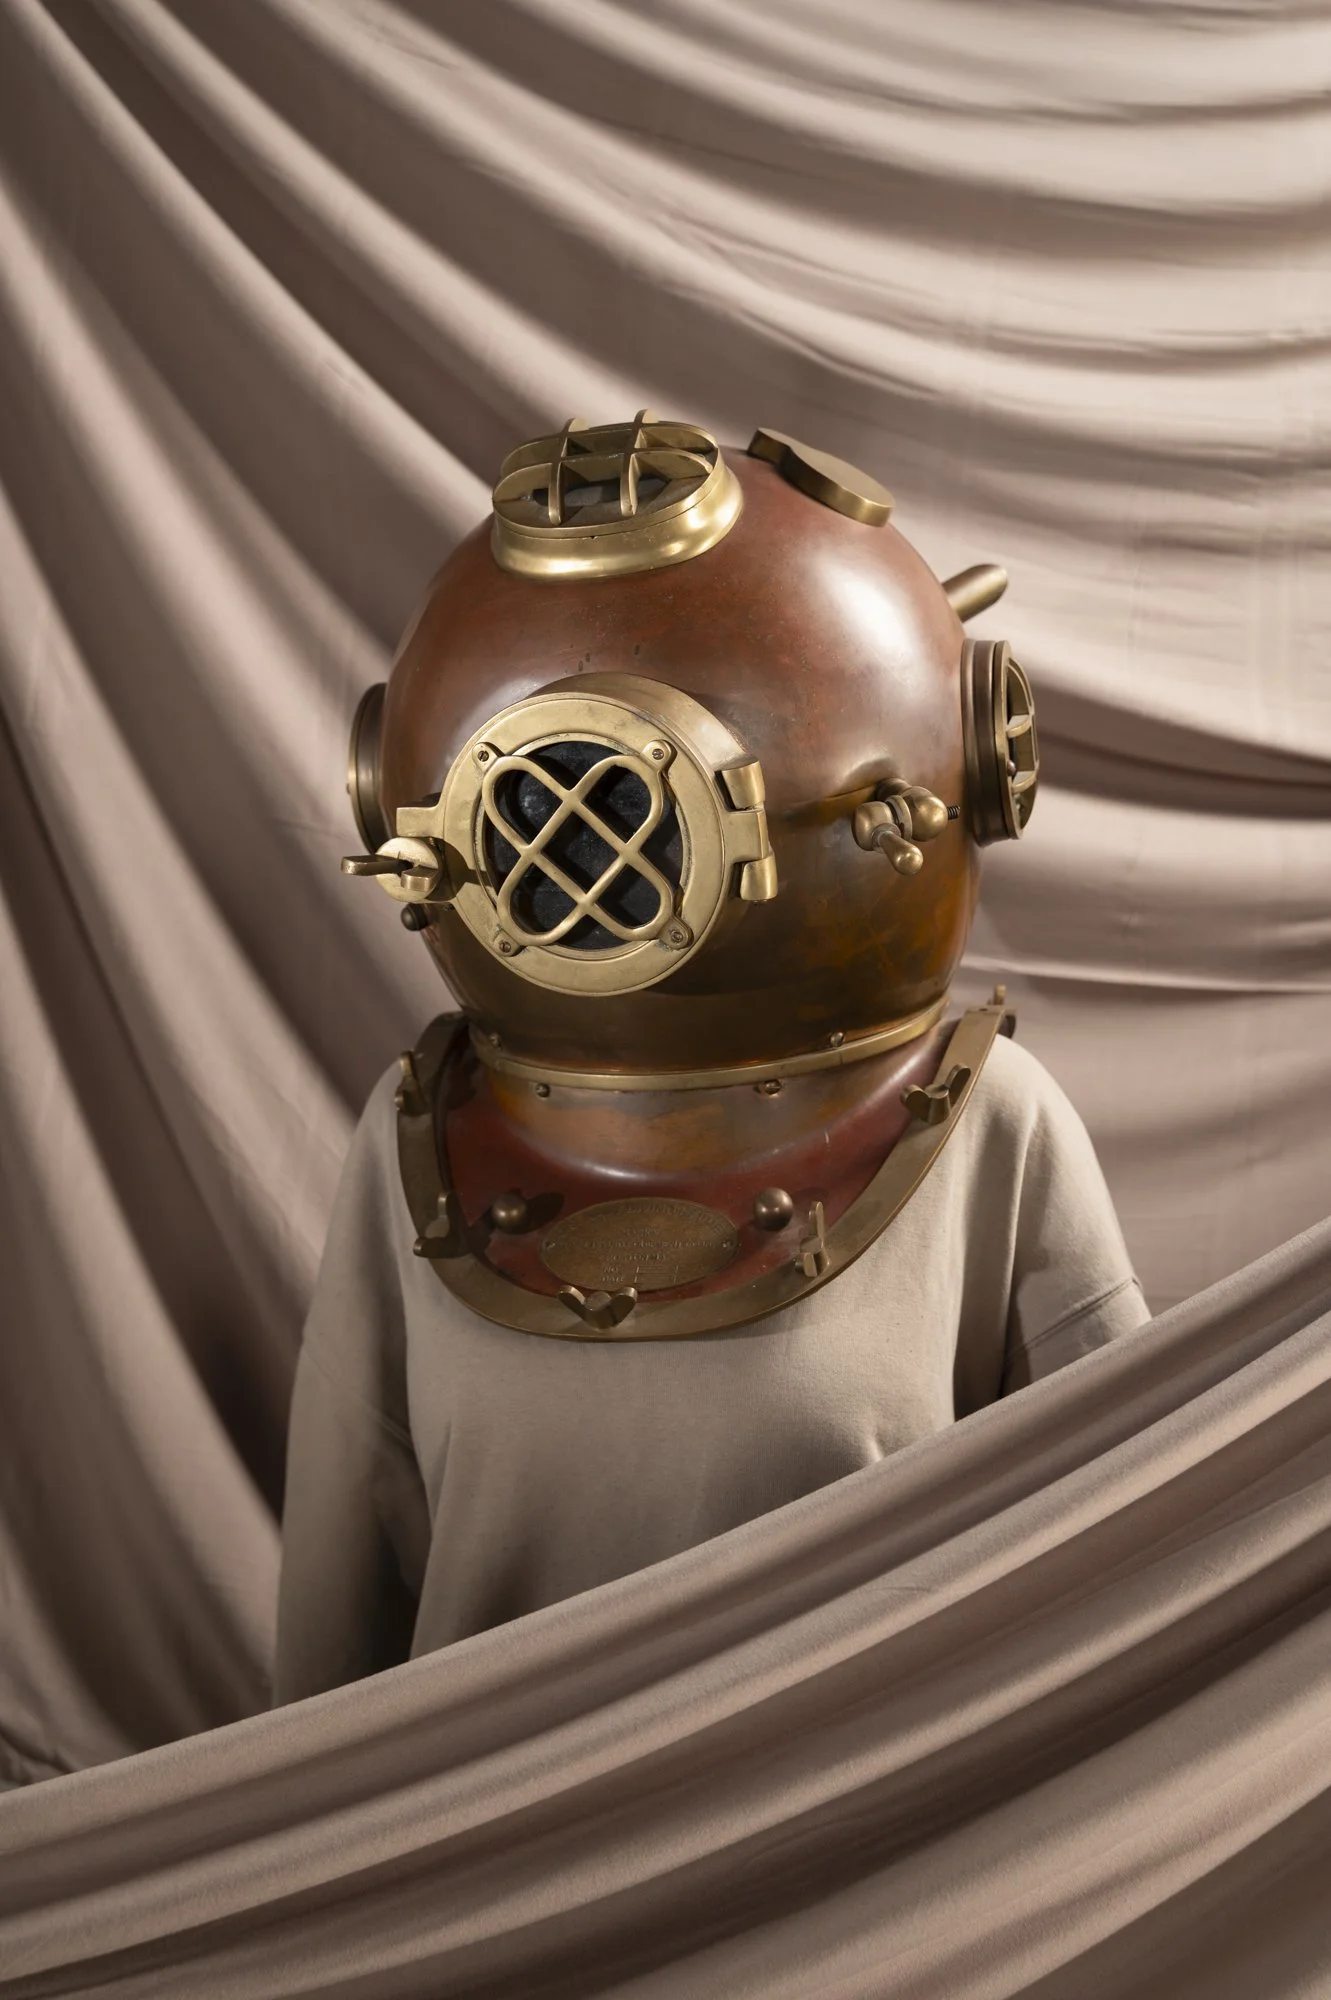
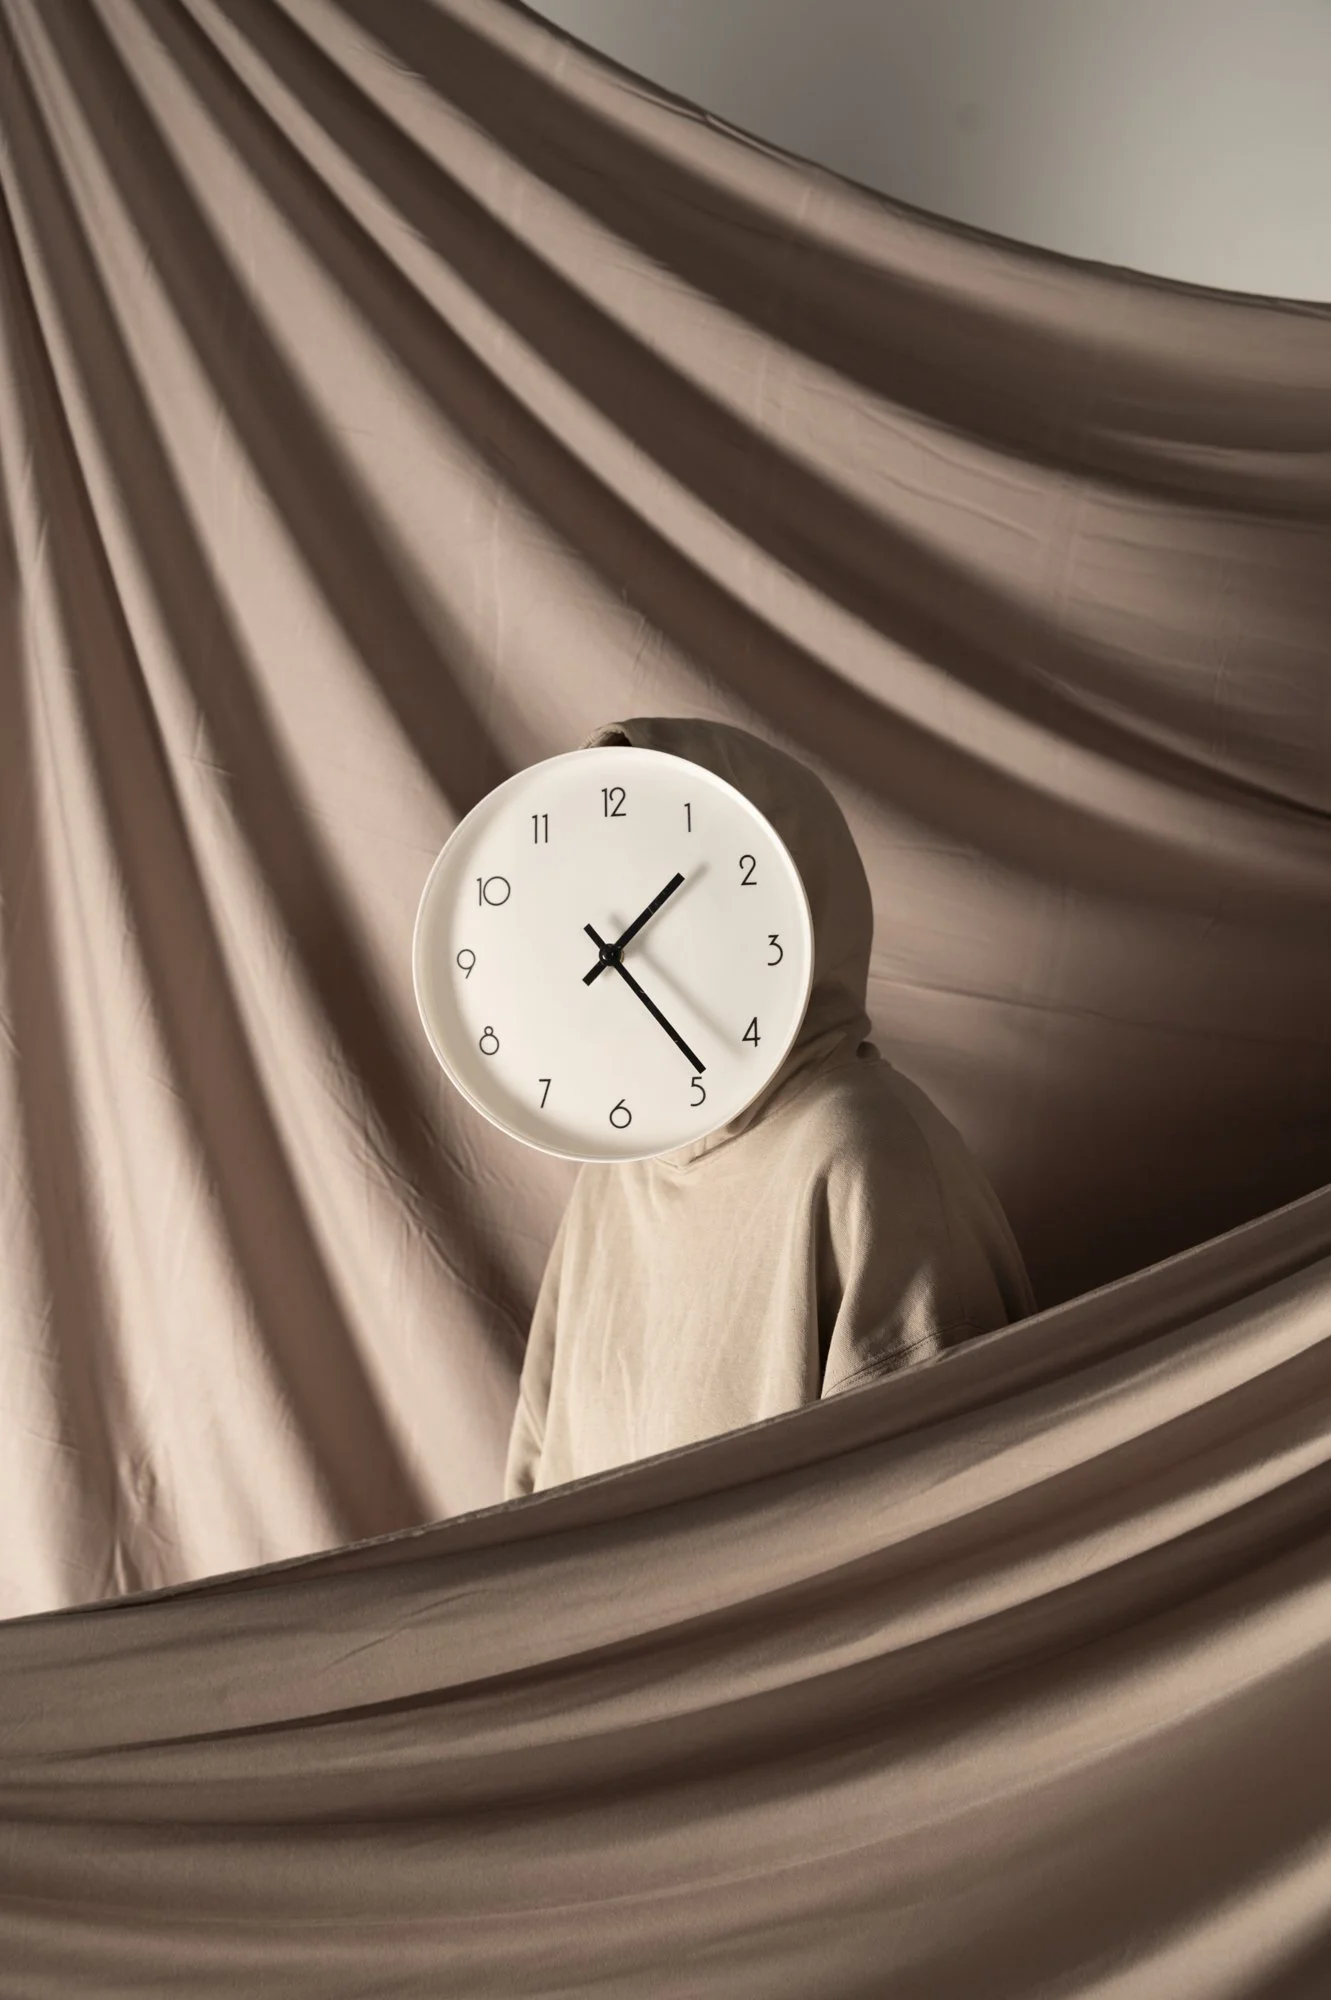
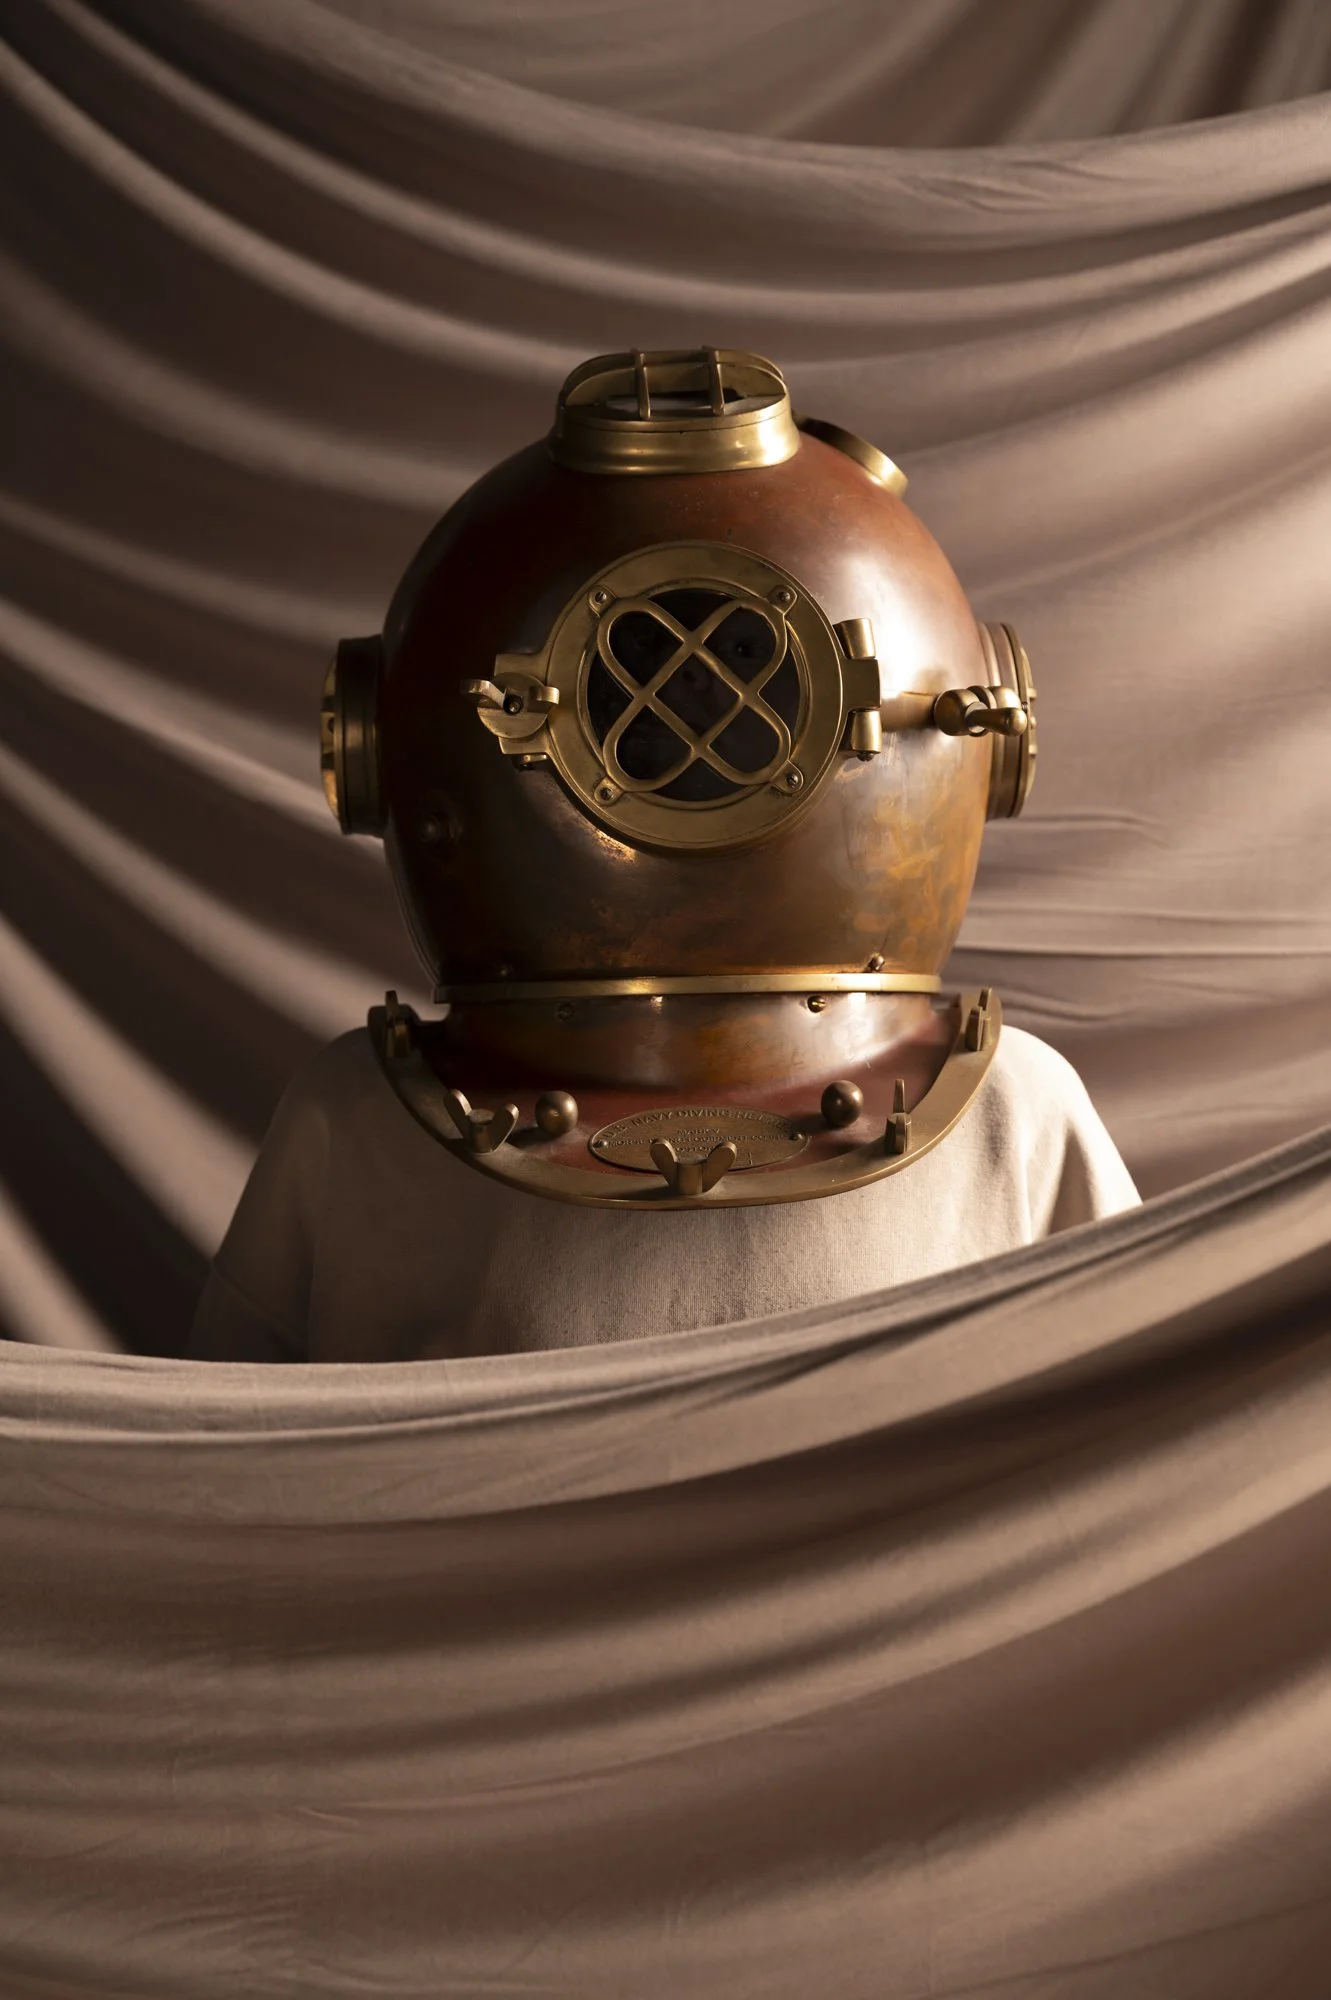
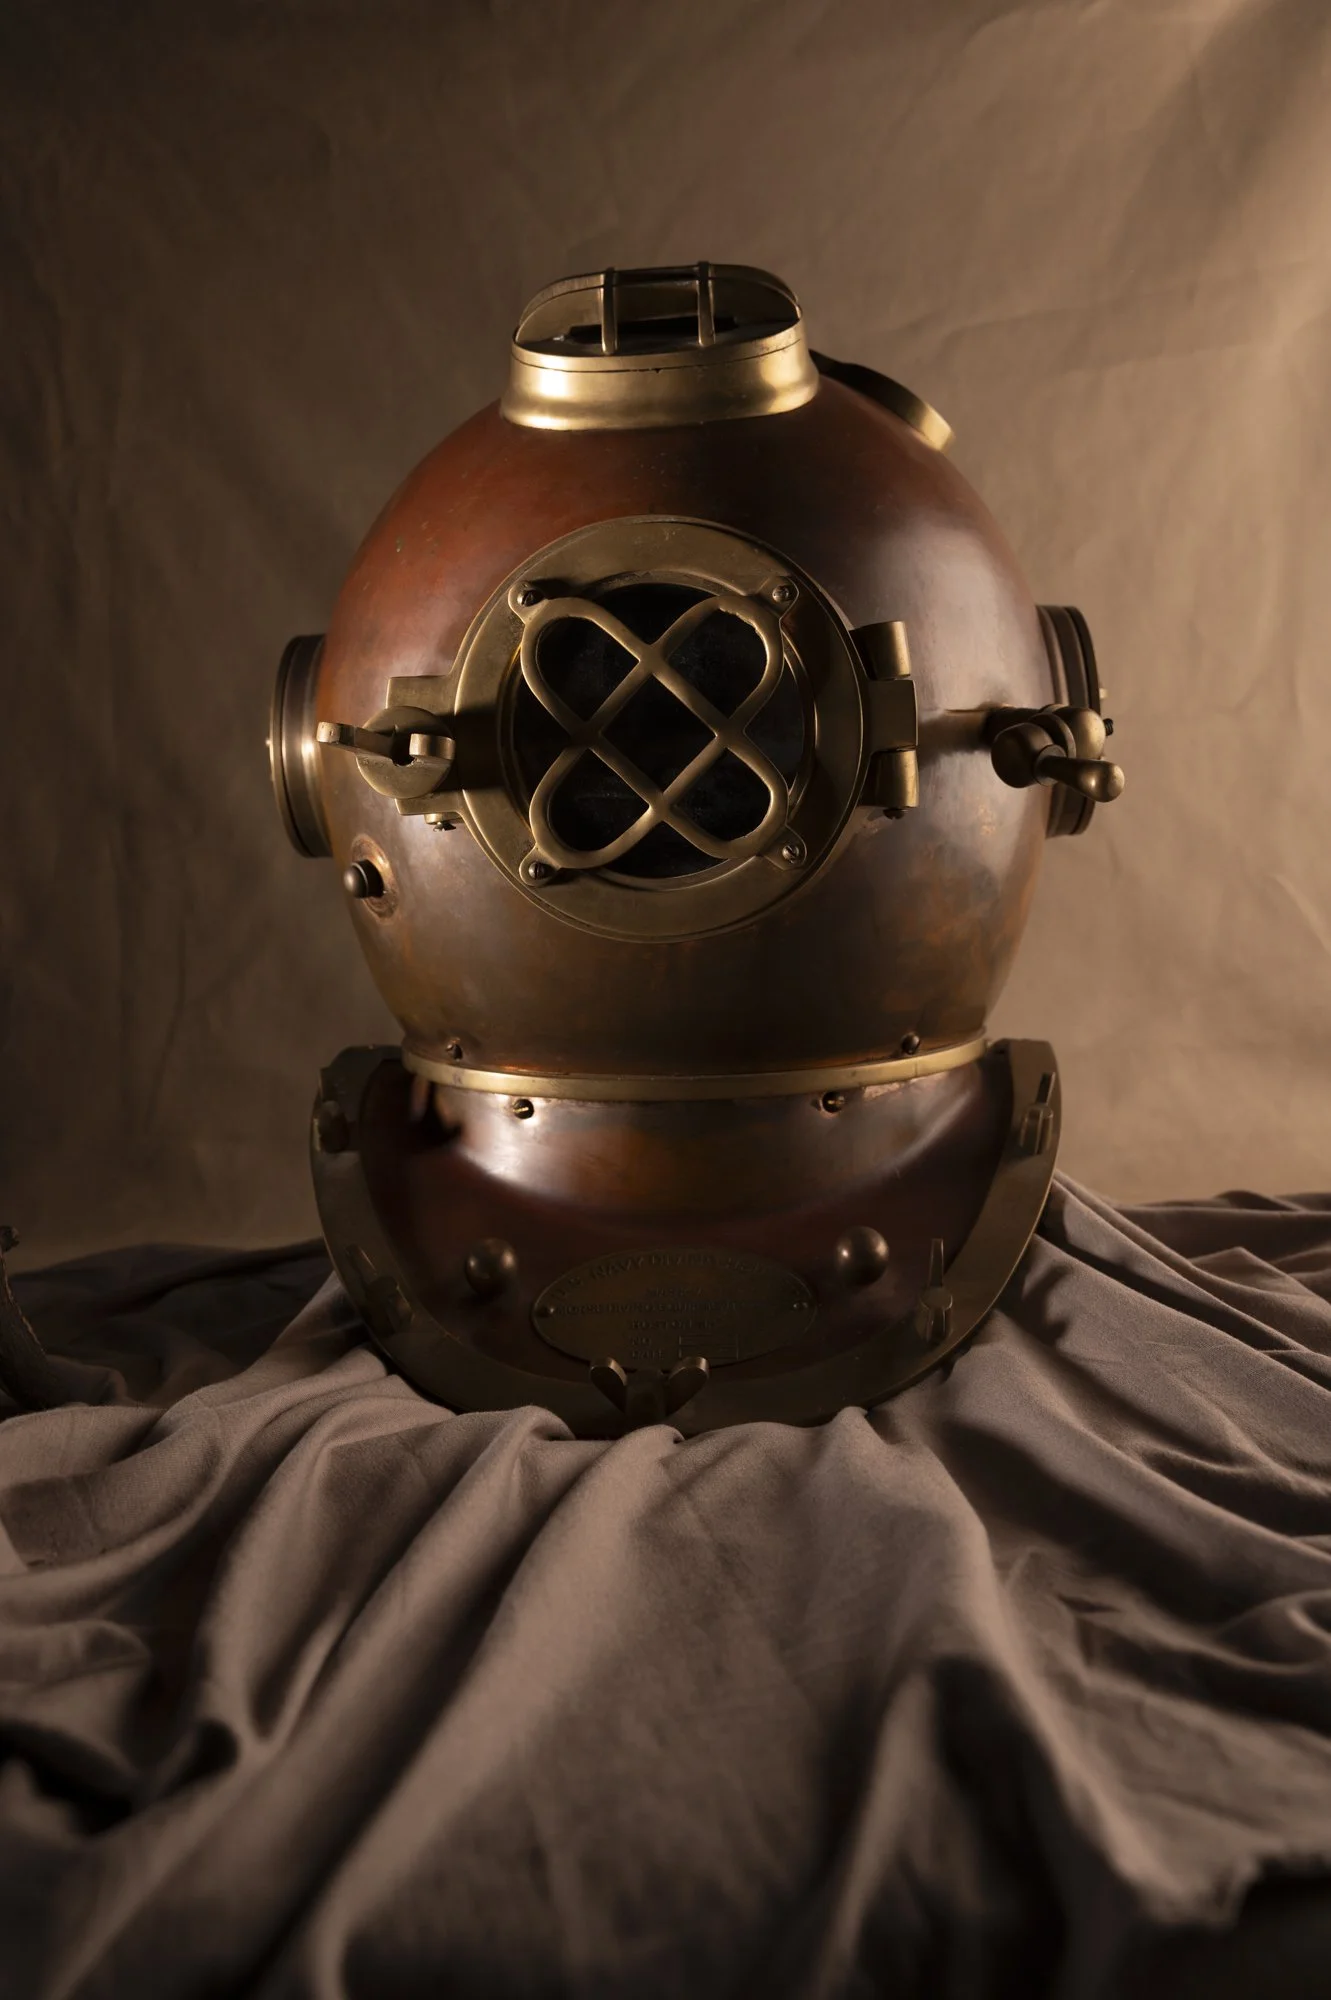
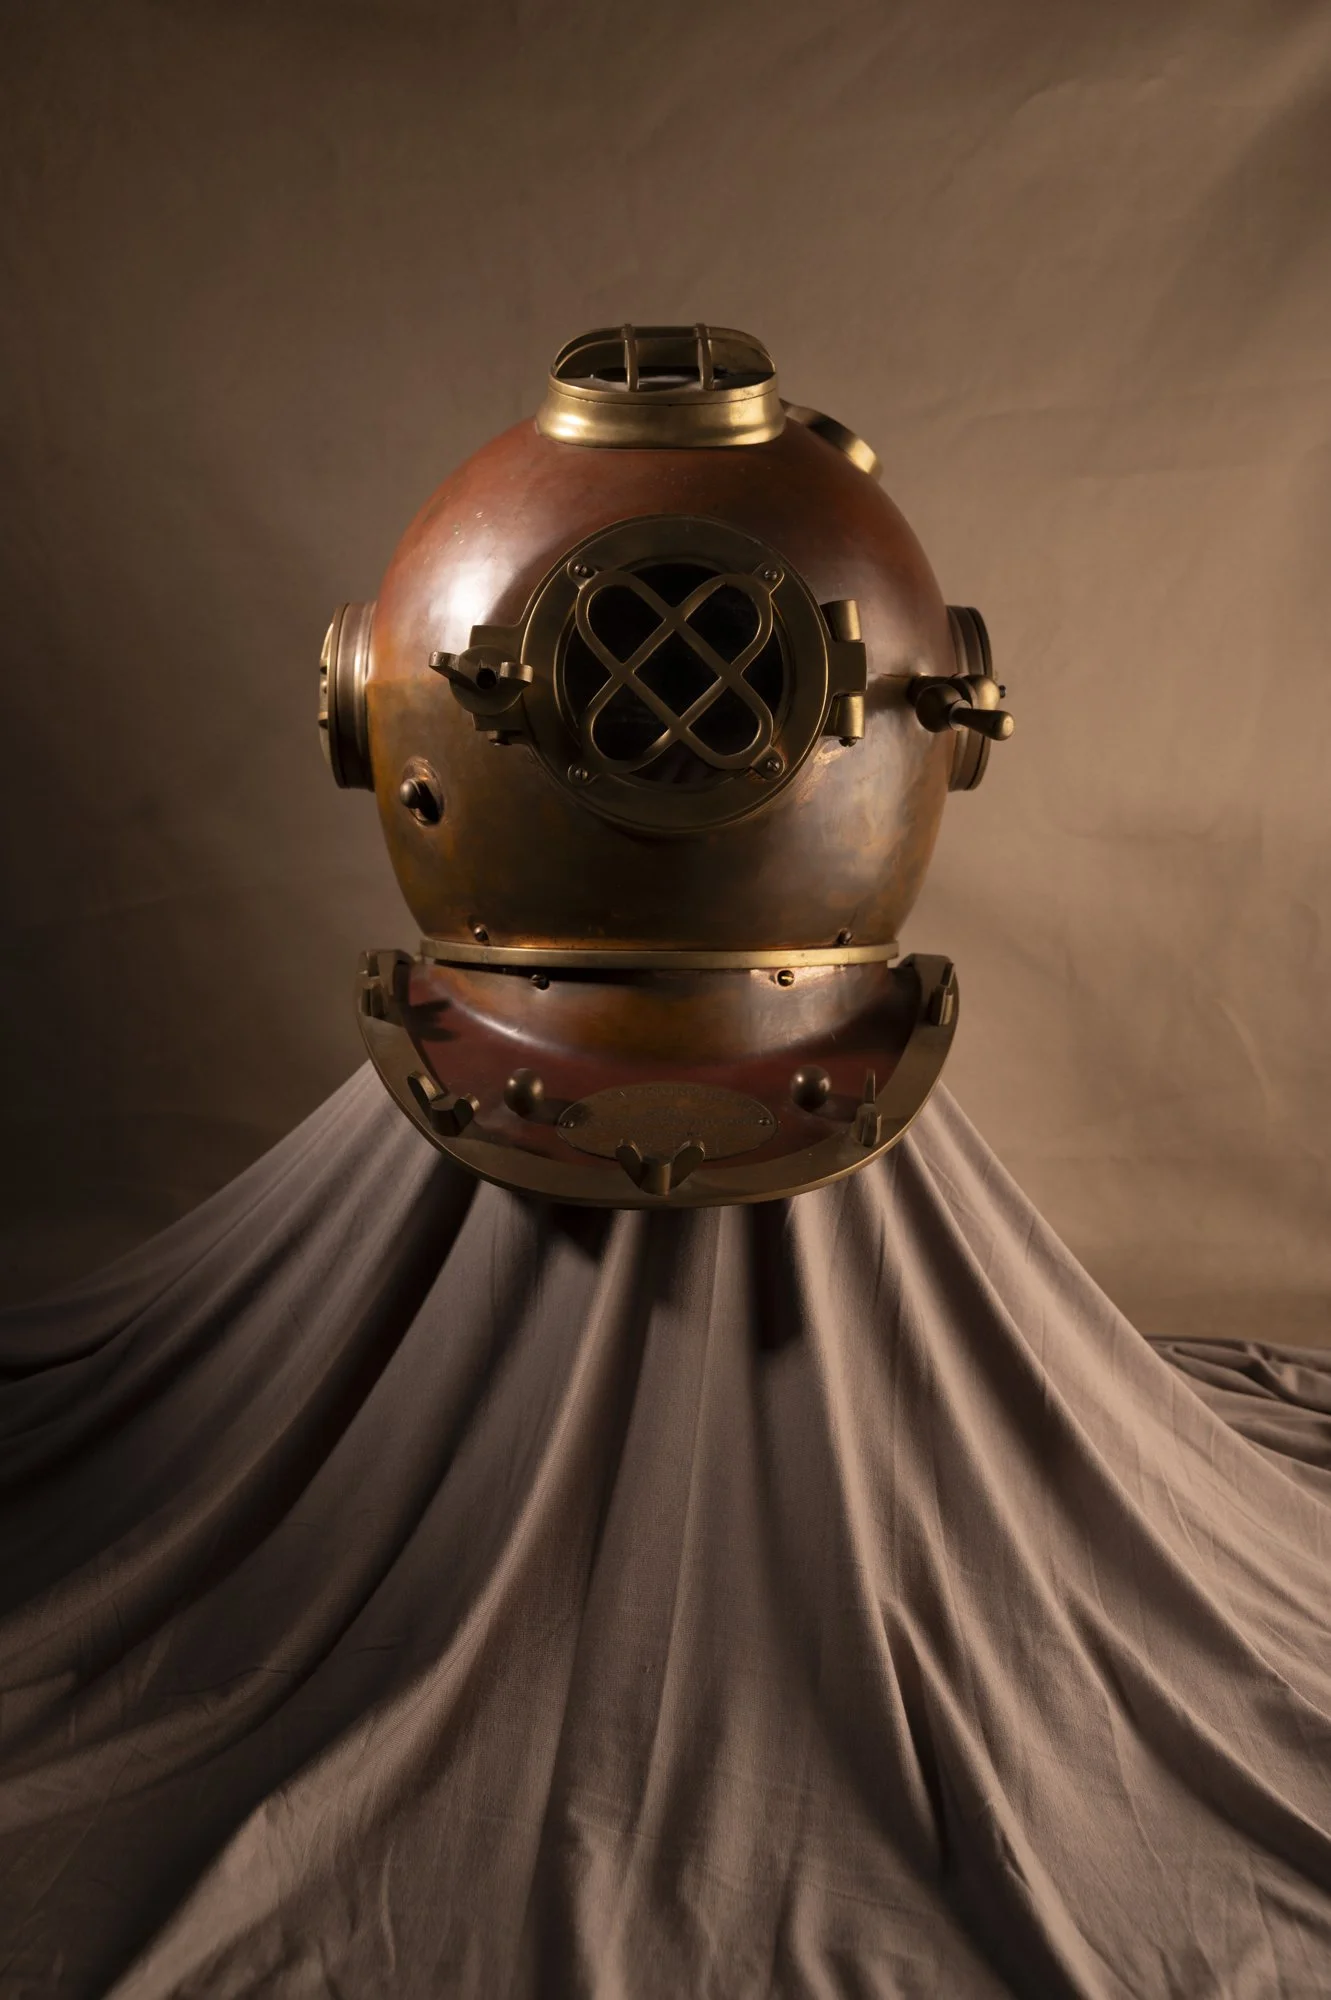
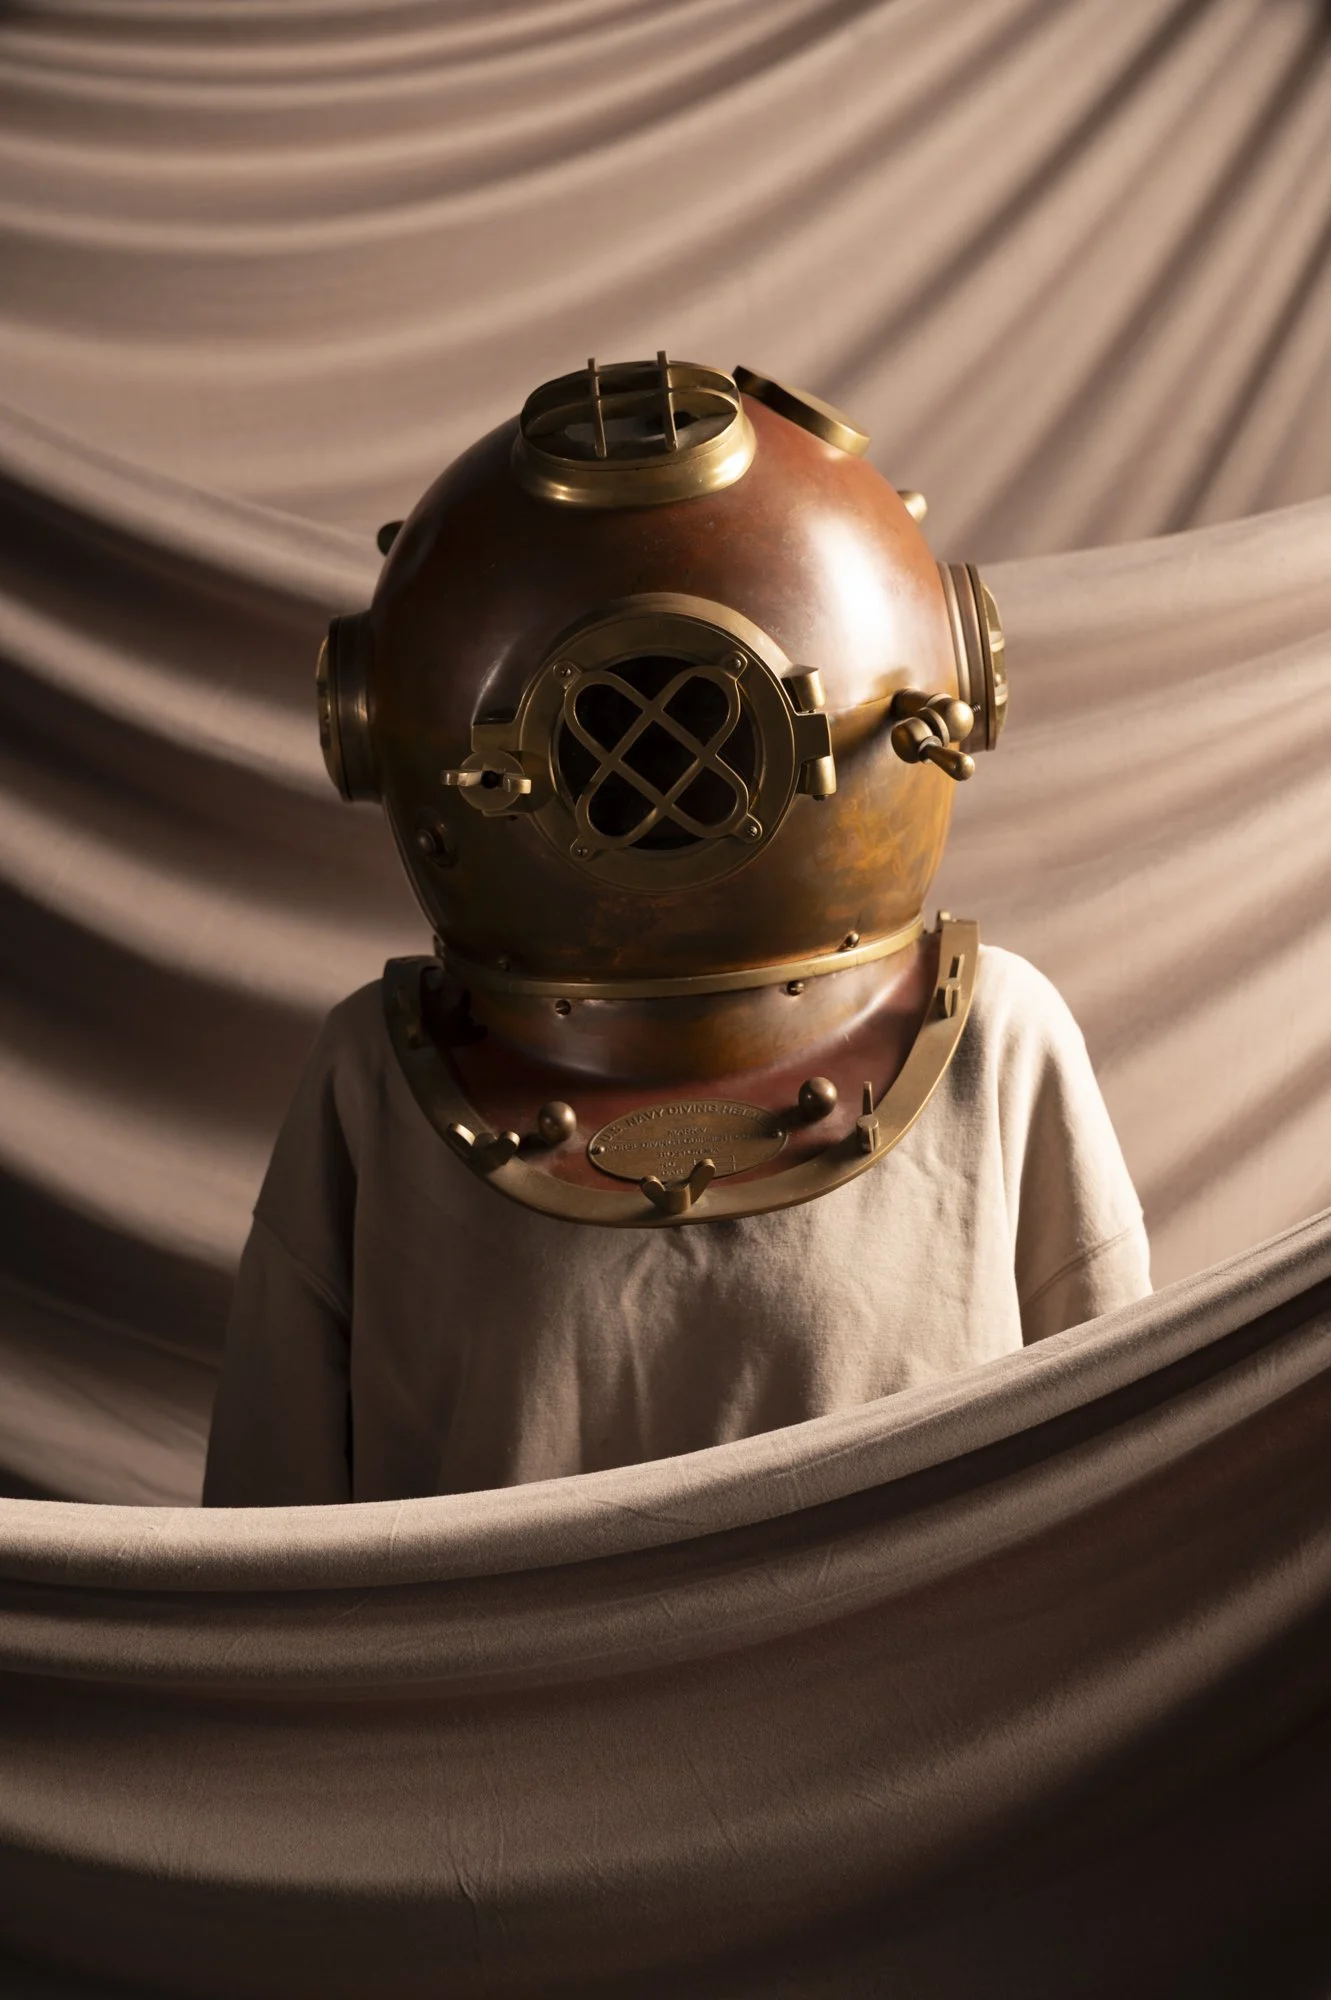
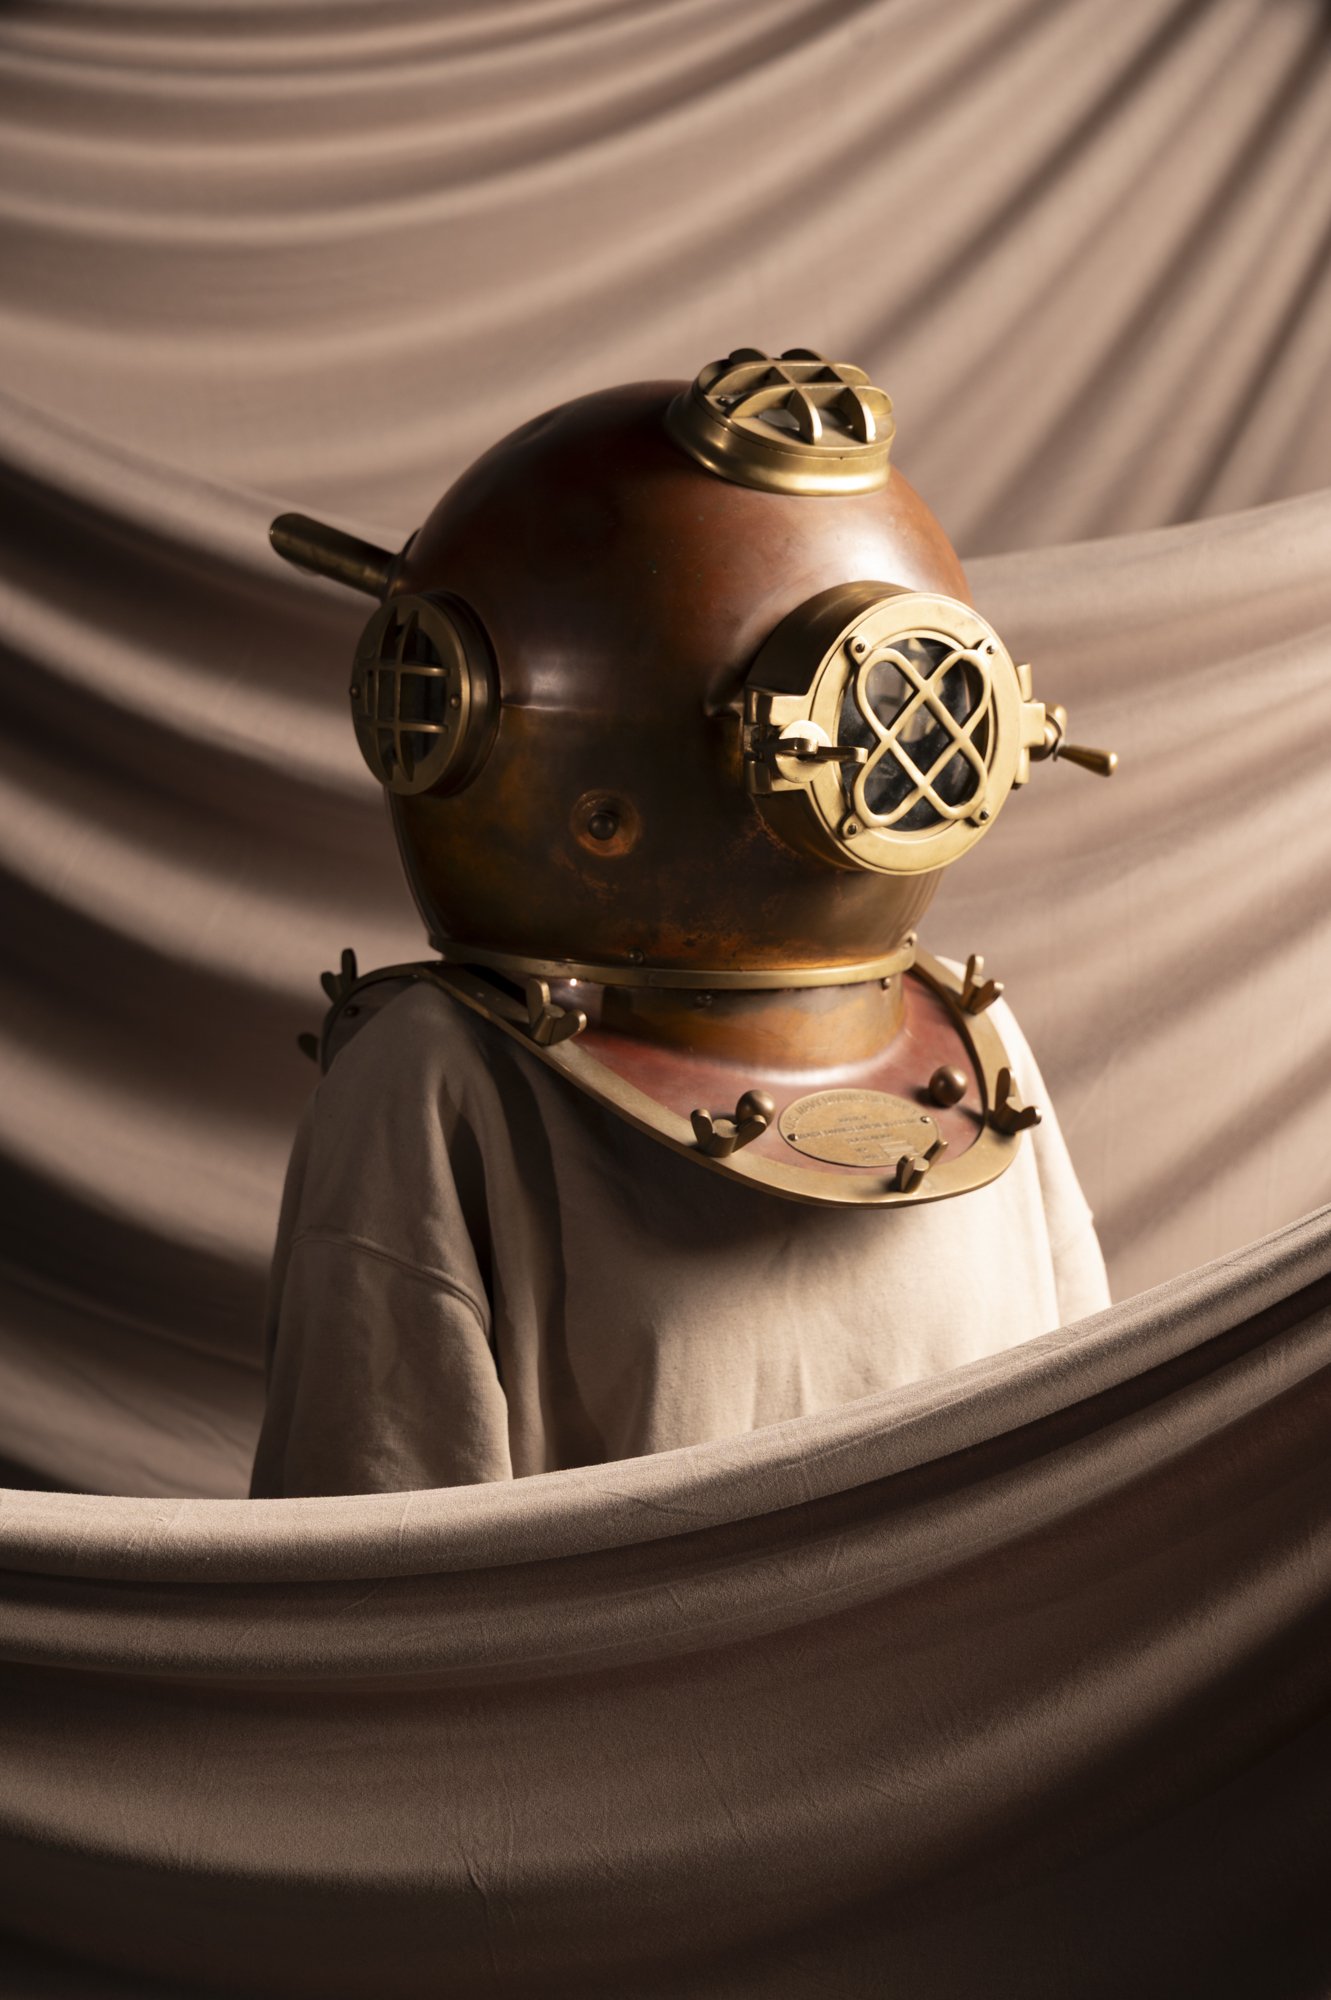
I am not a fan of the helmet images. It is not enough of a variation from the portrait image. I may reshoot this if there is time. The background lighting in the first set of stick images is too bright and the image overall is a bit lacking. I may reshoot this one as well.
Reflection:
What worked?
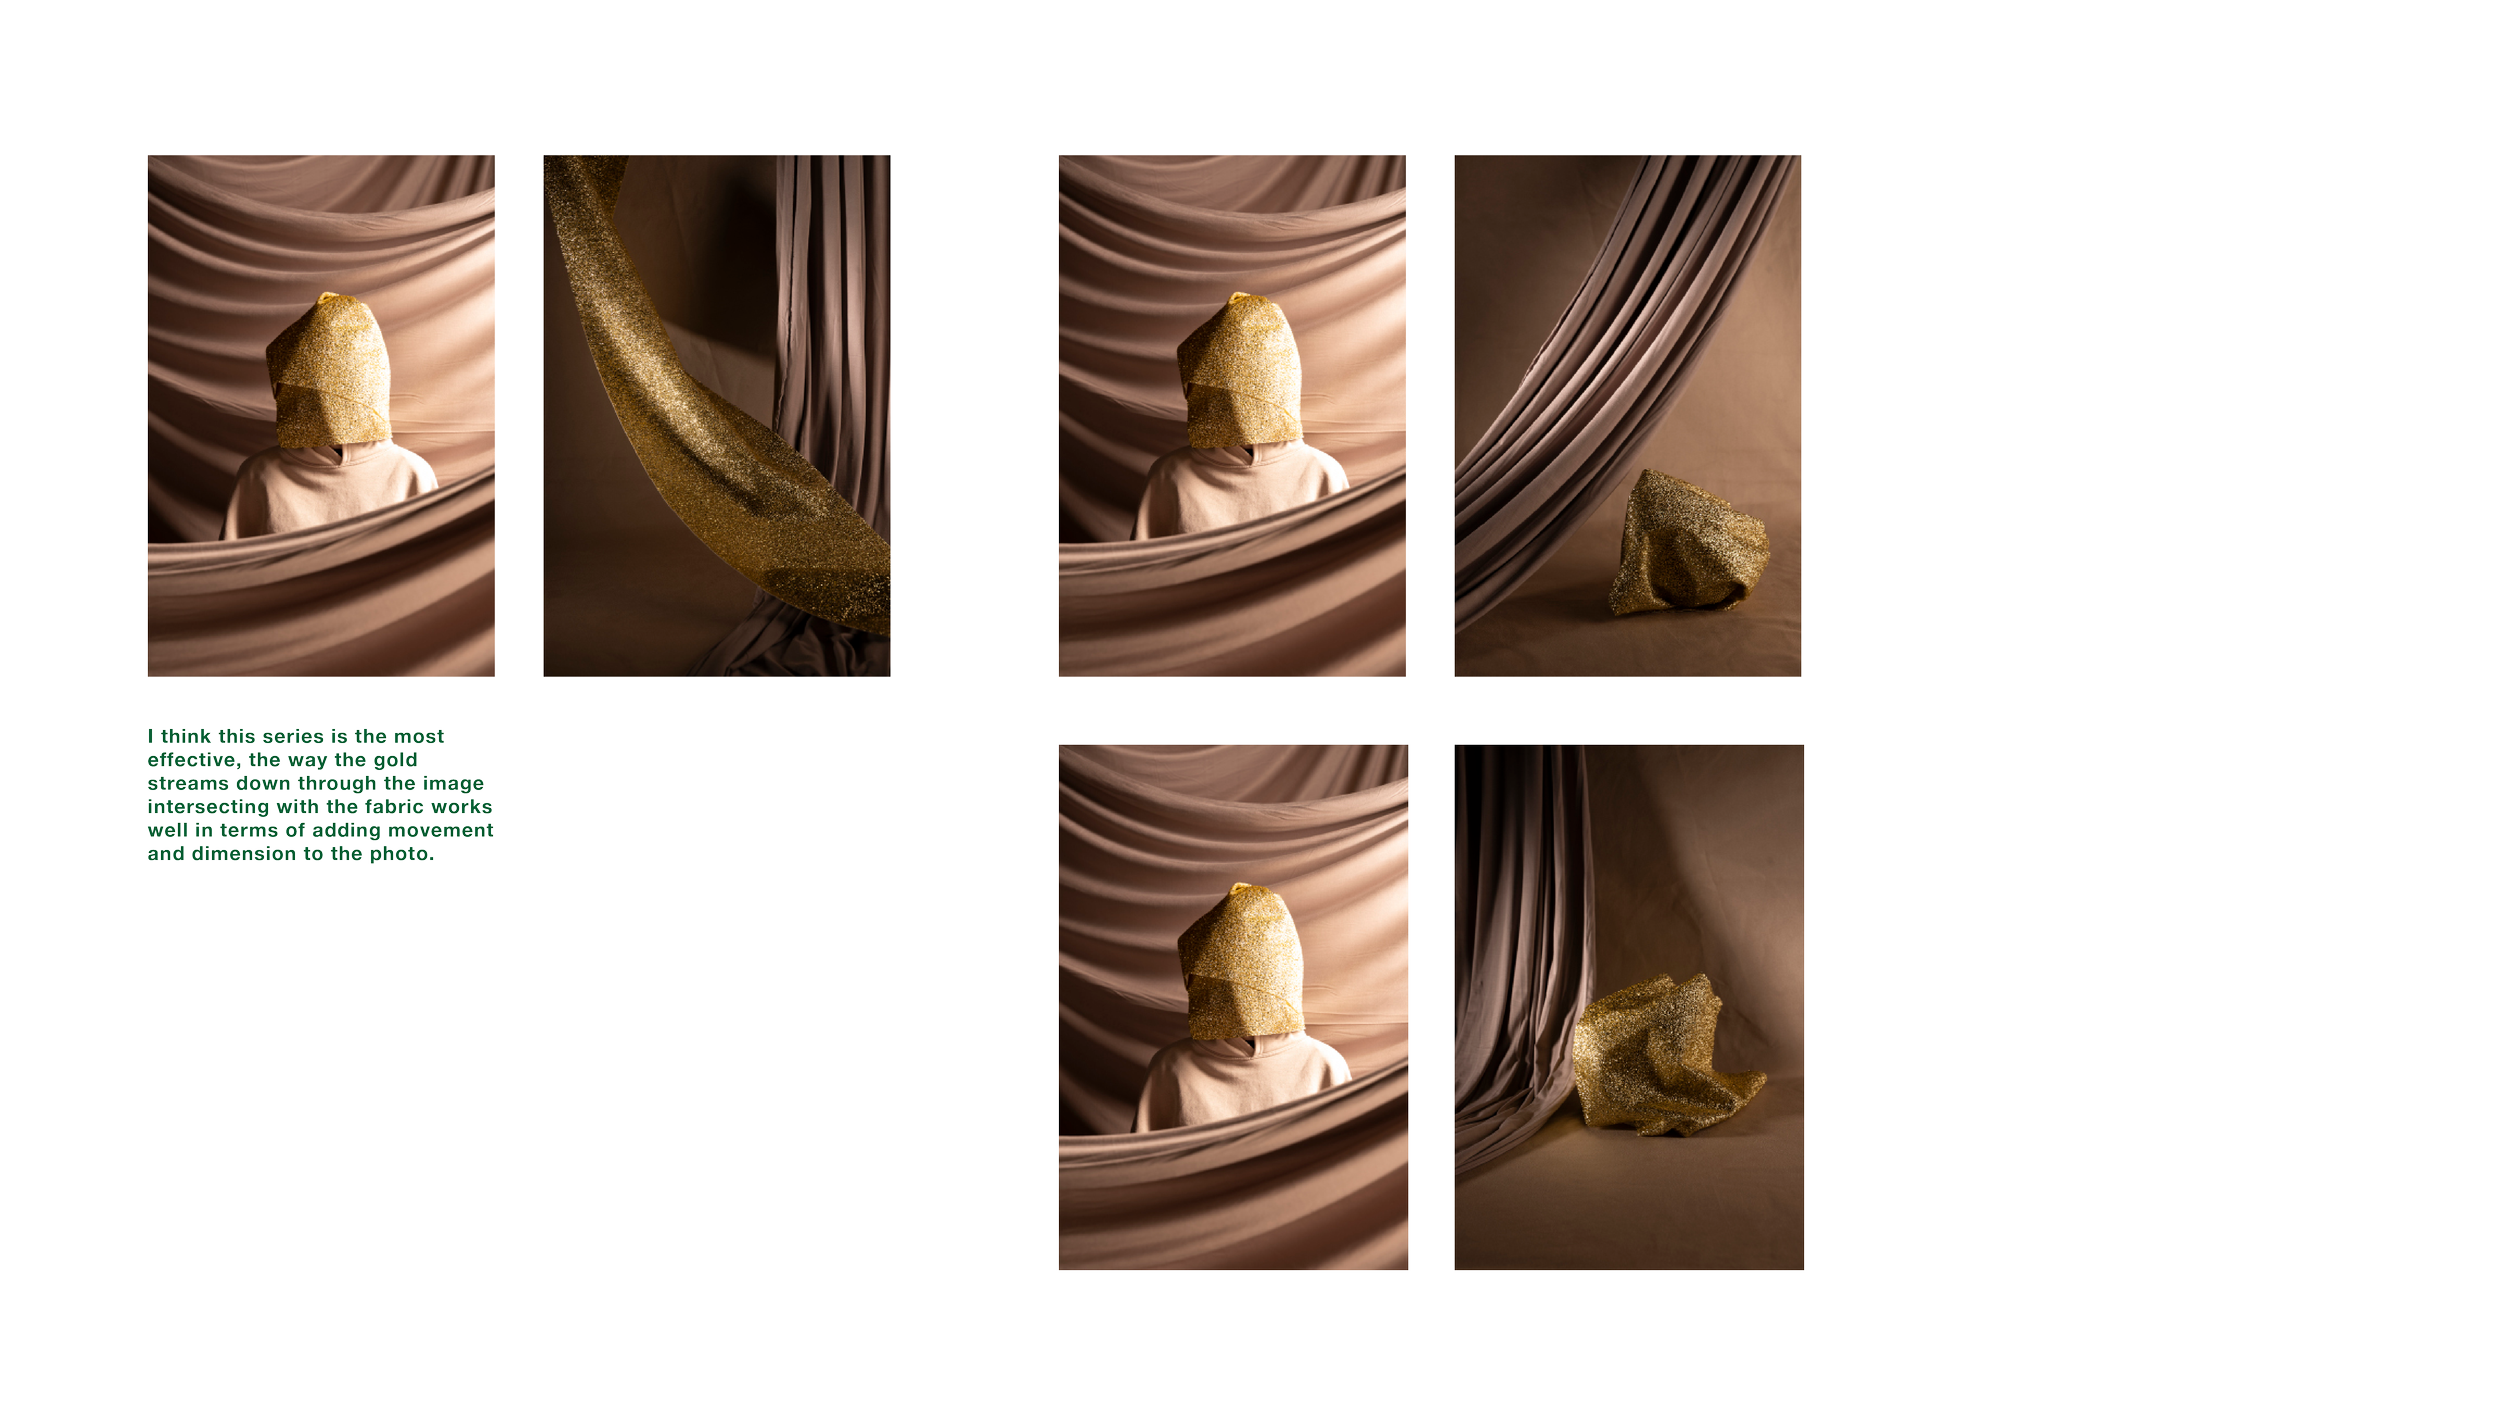
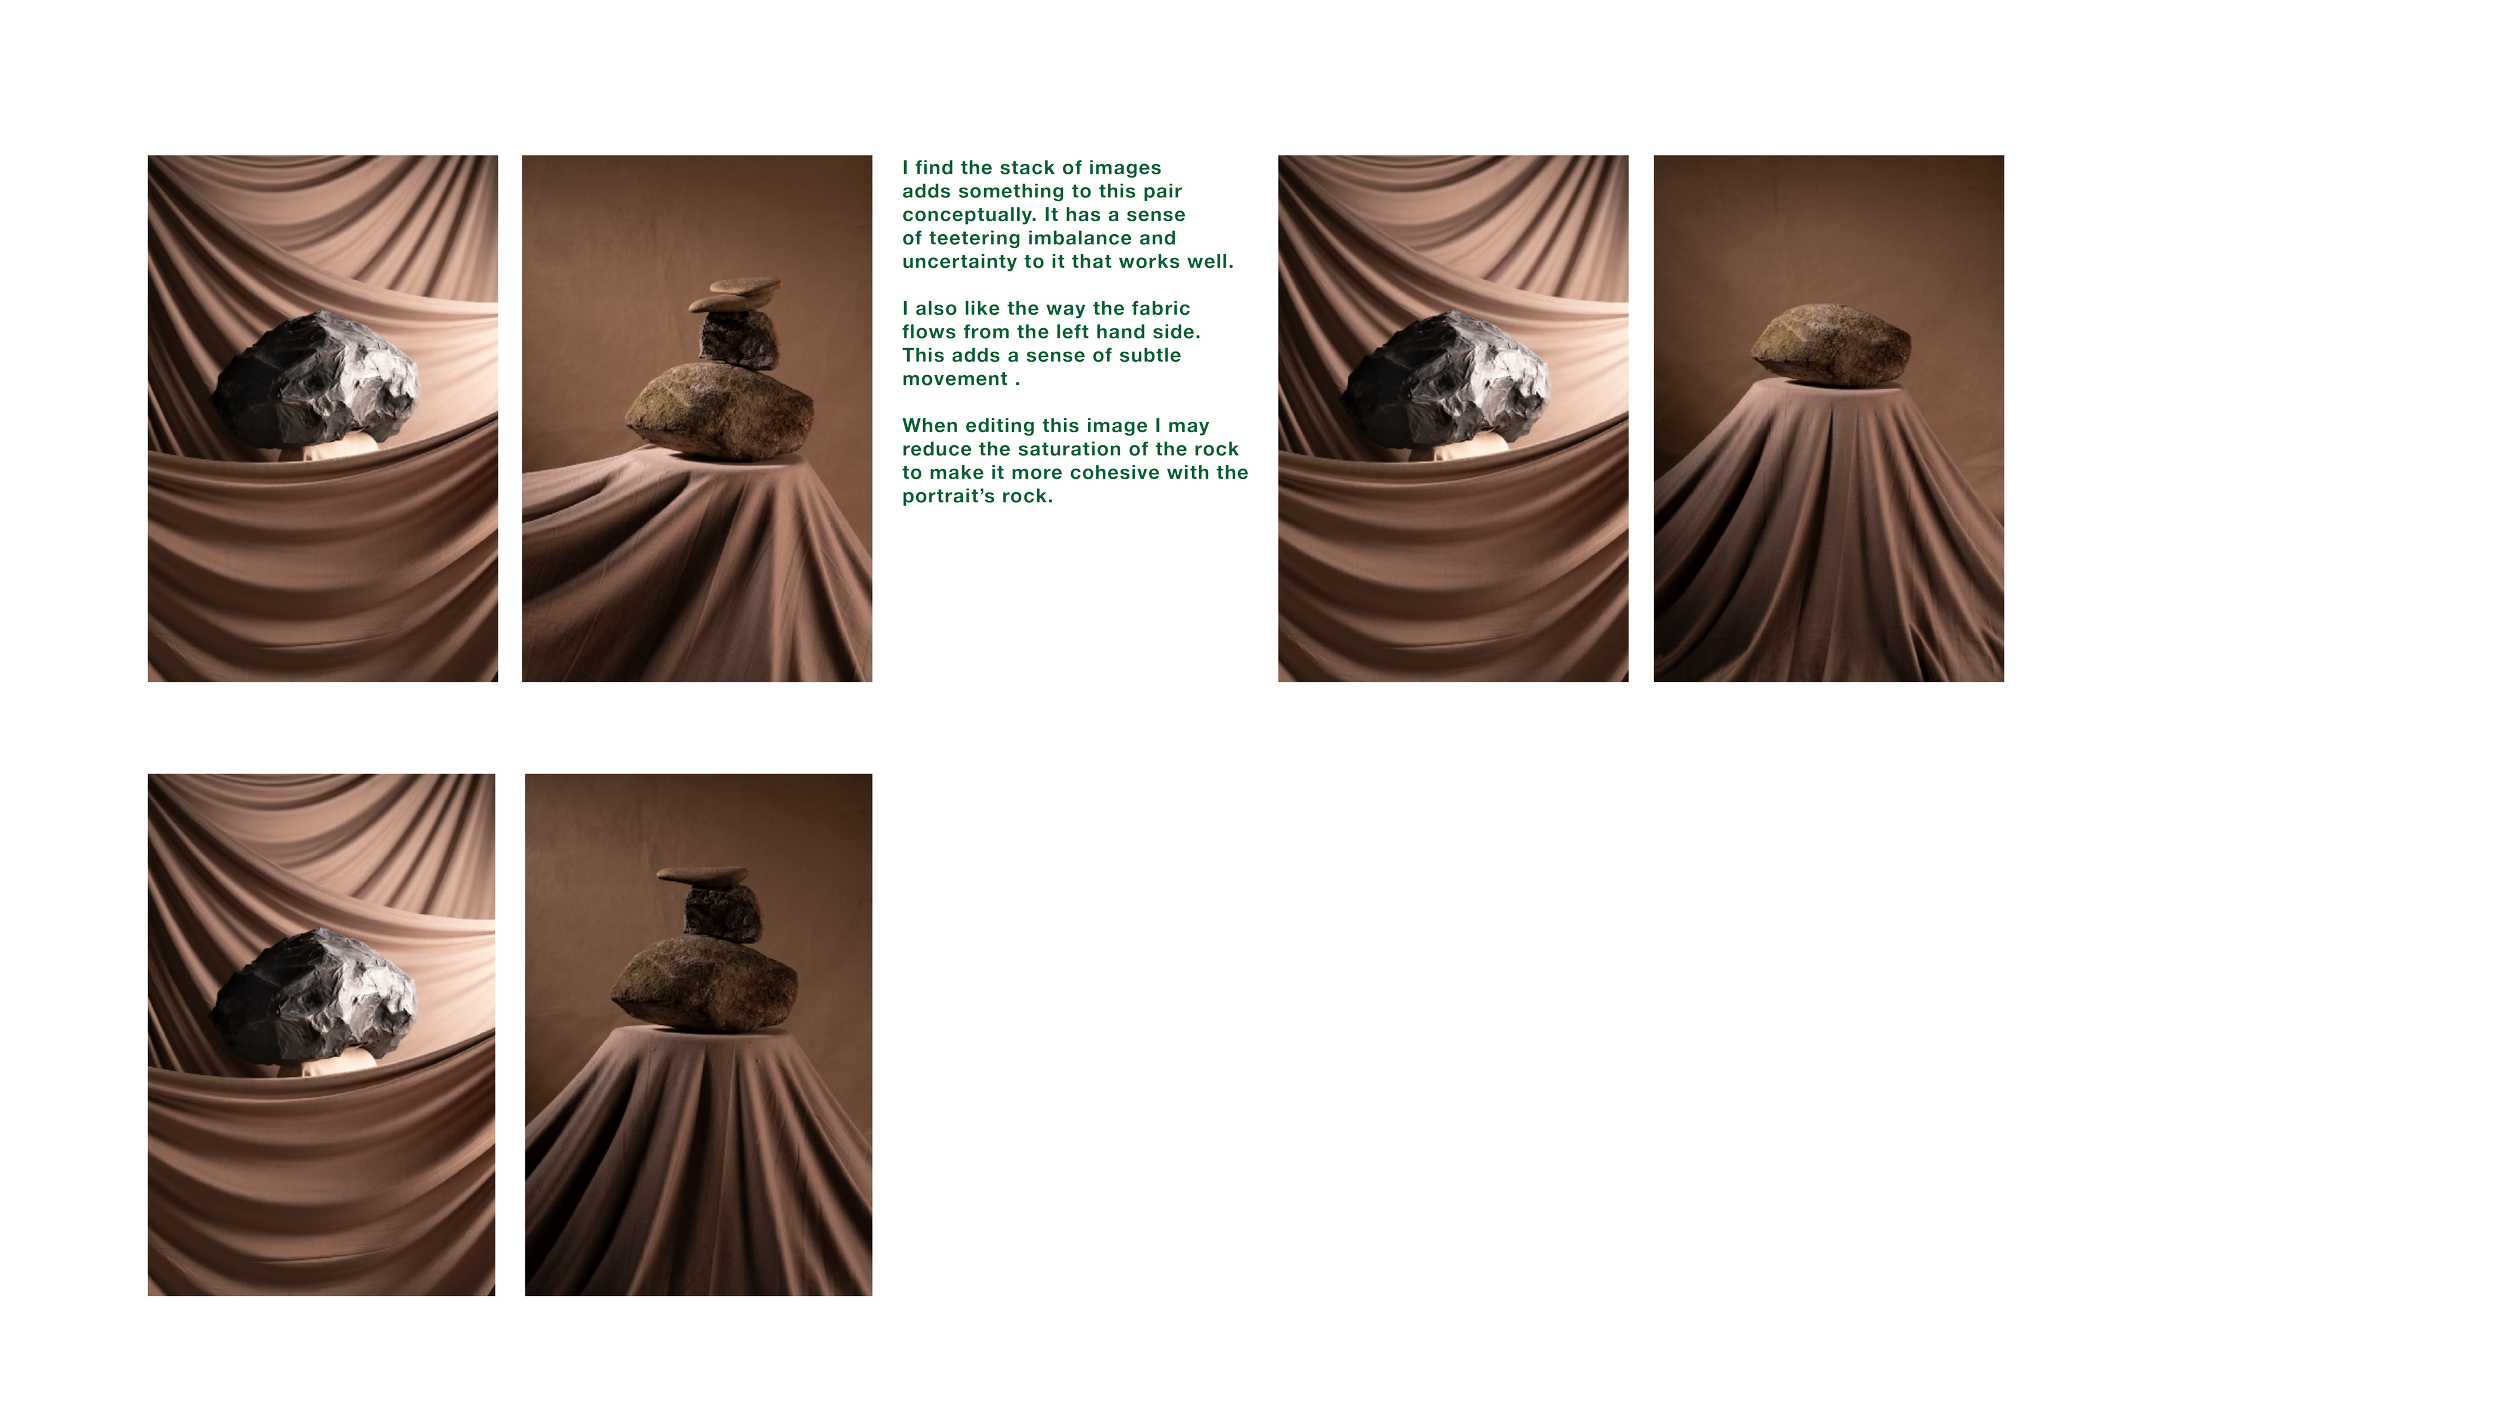
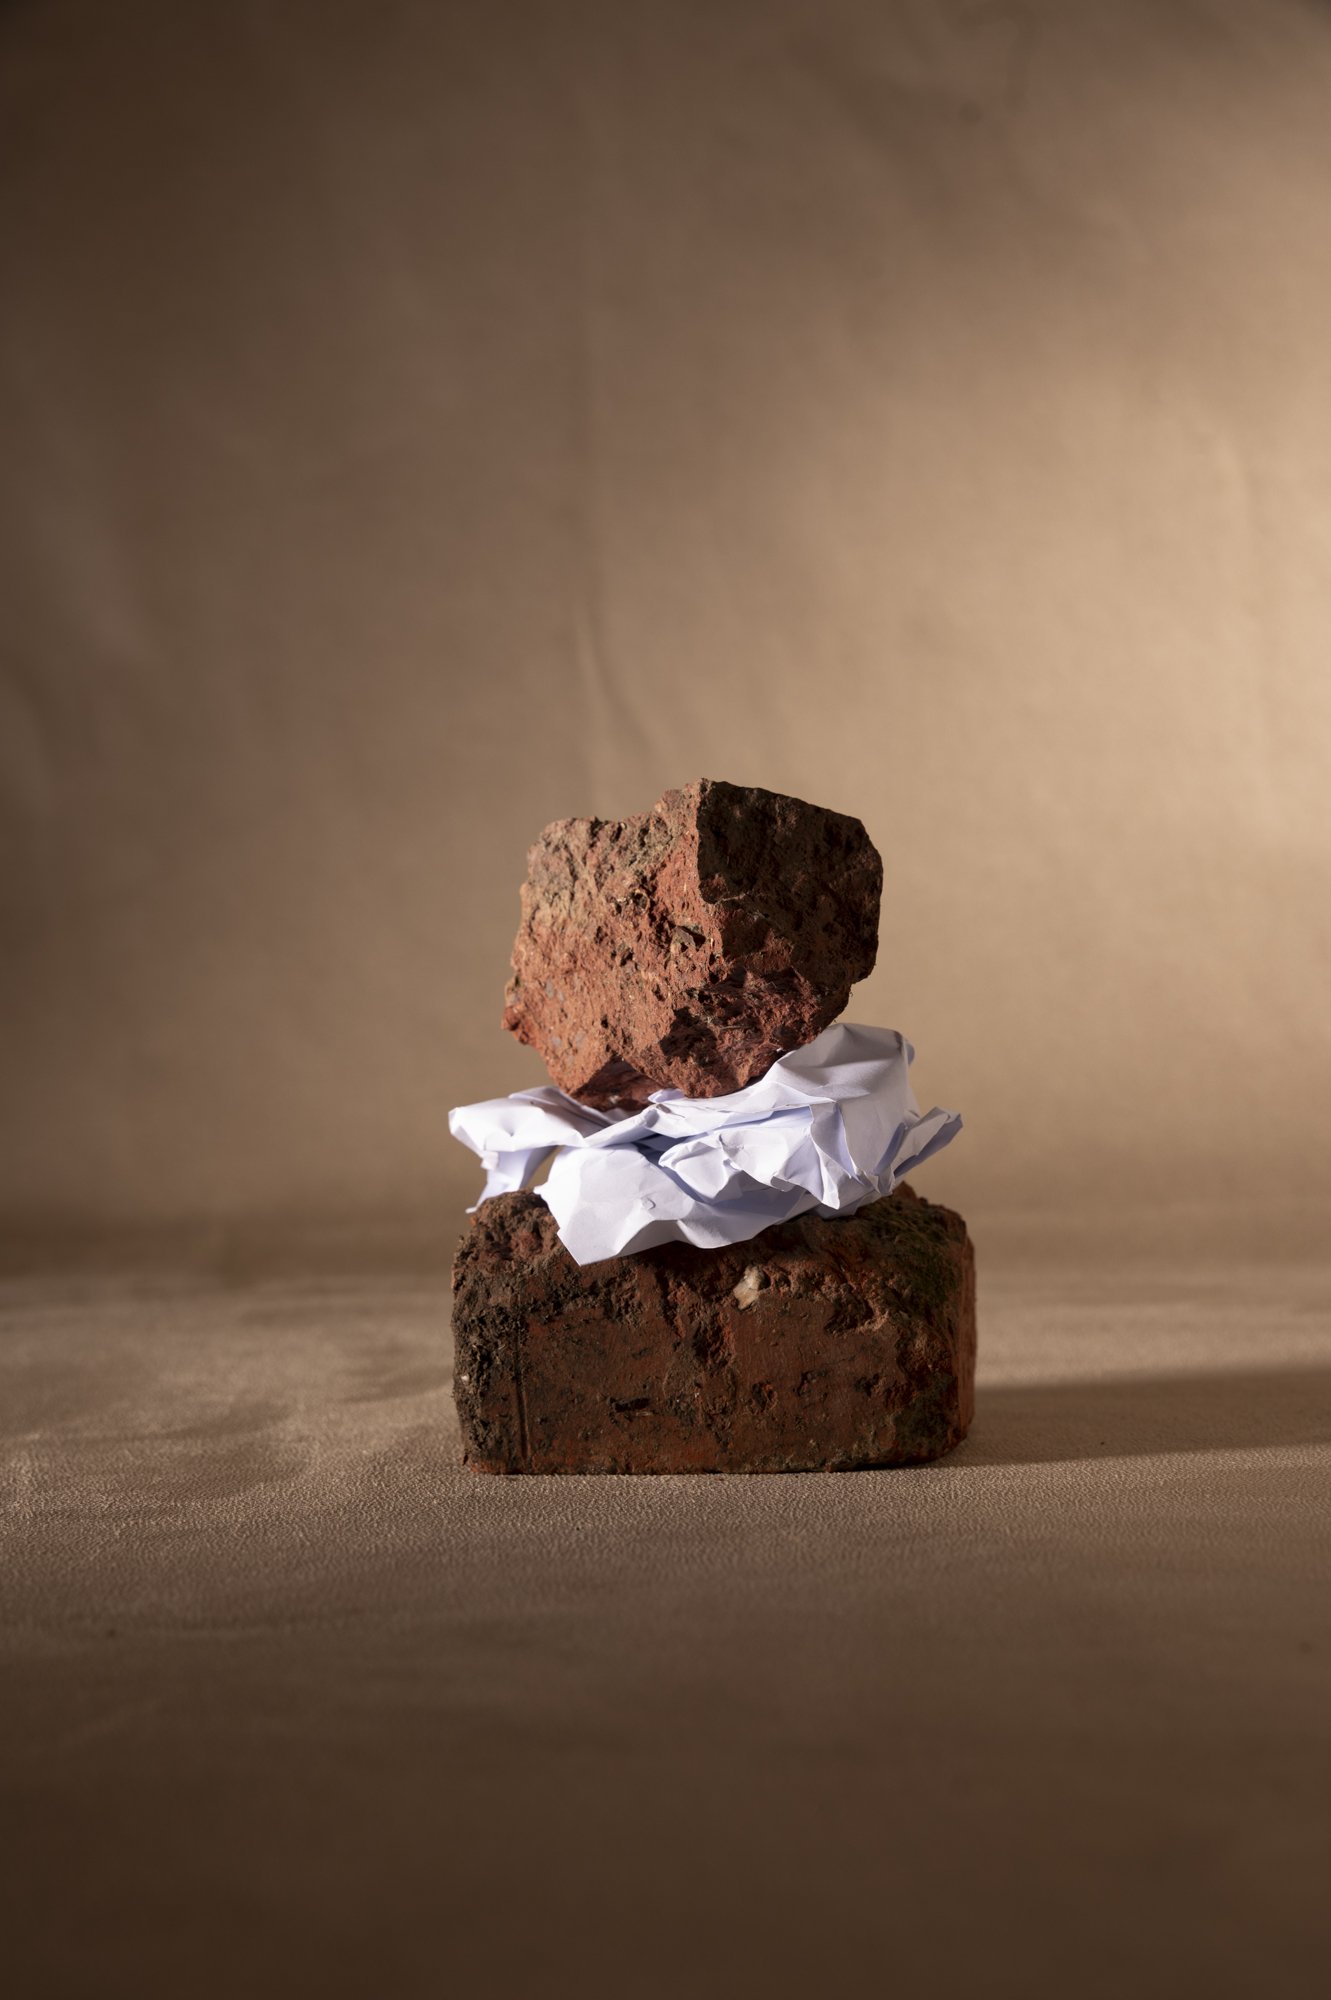
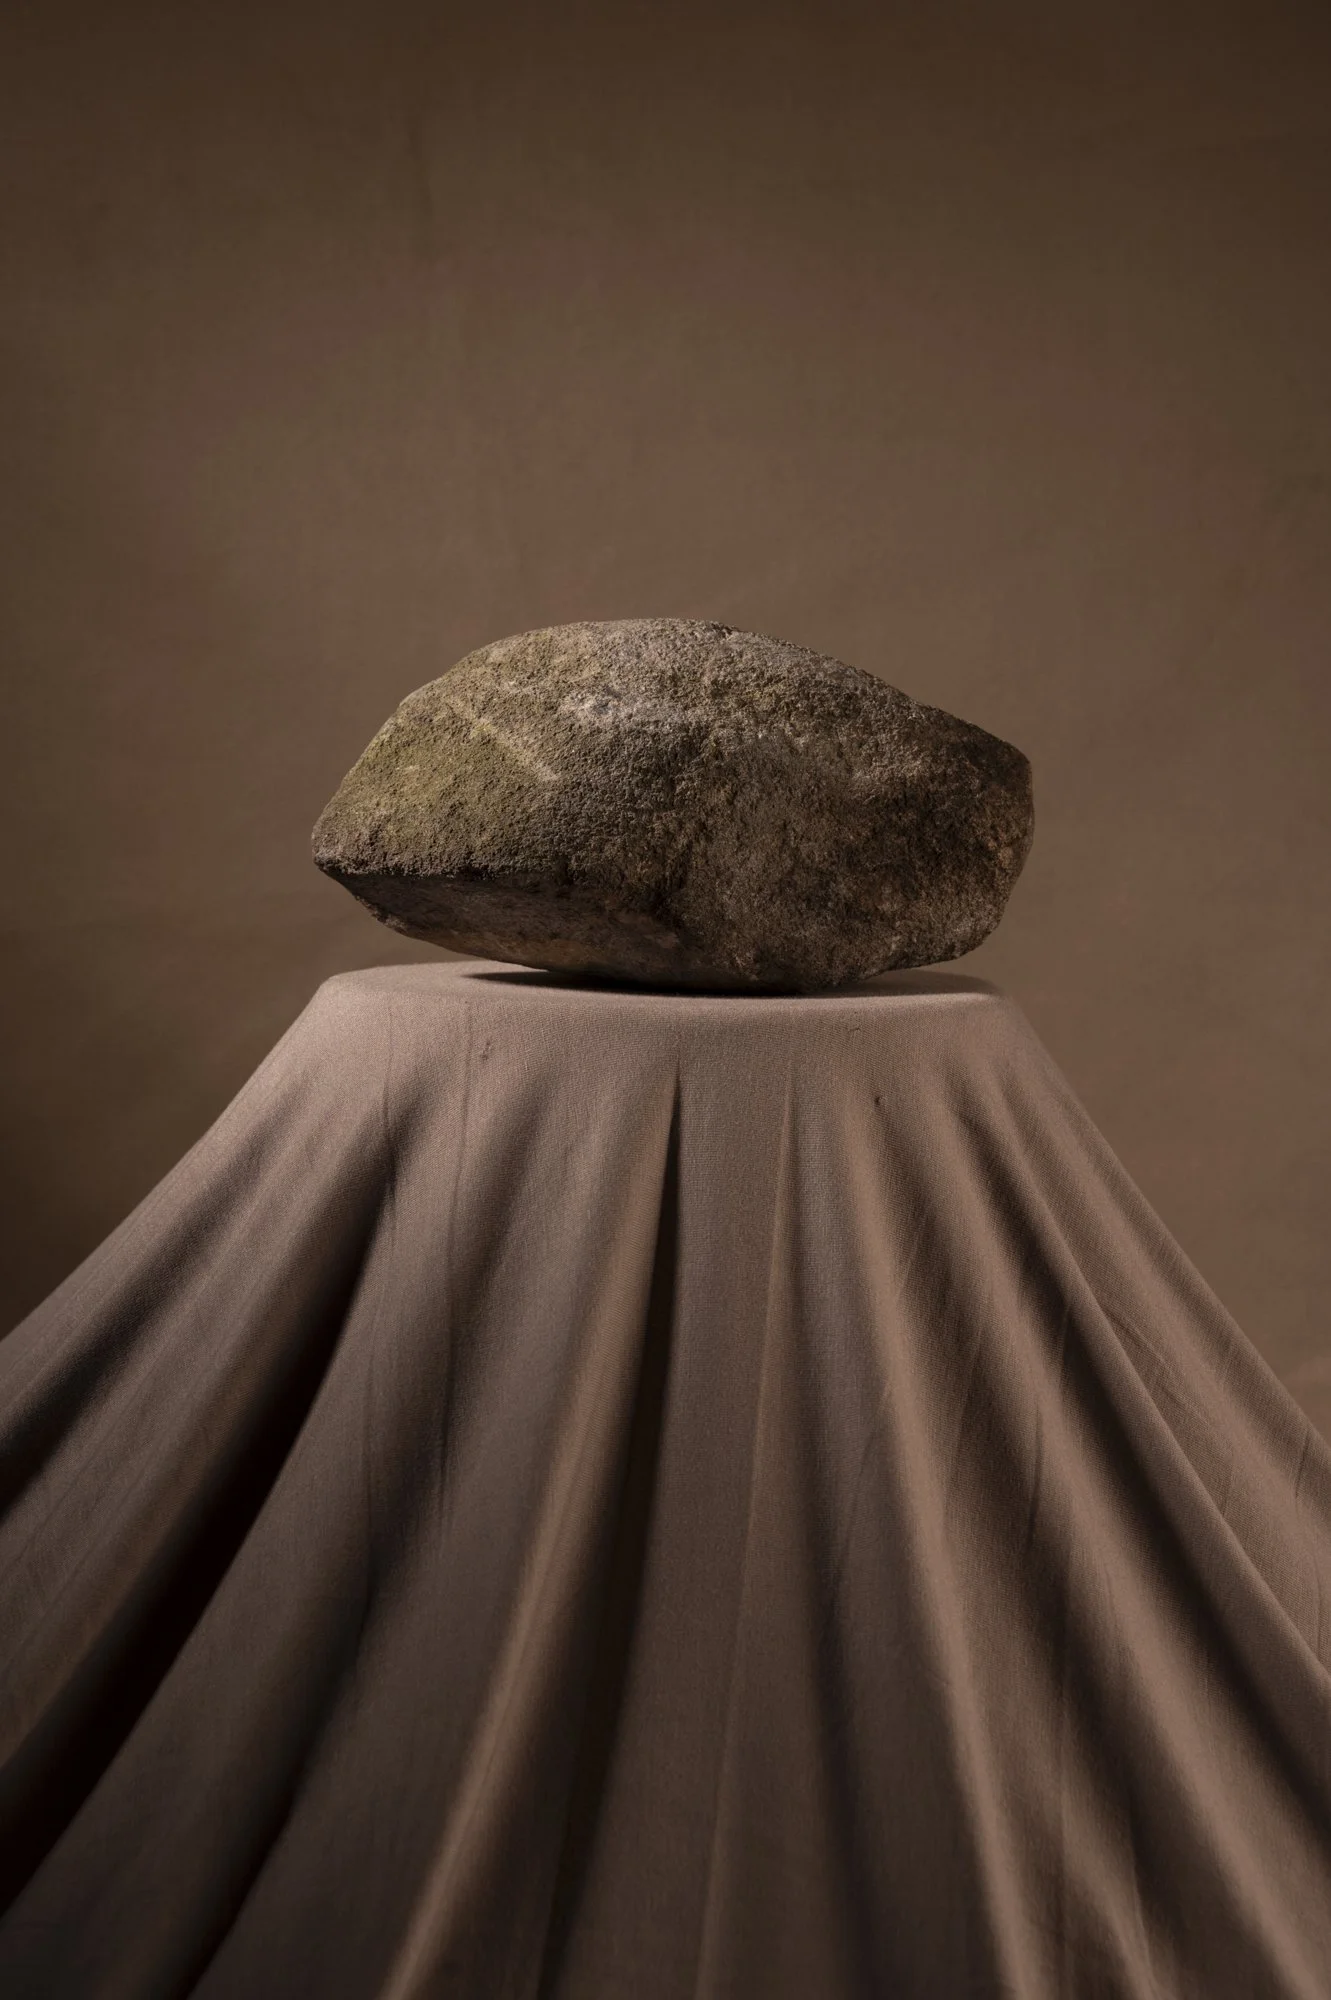
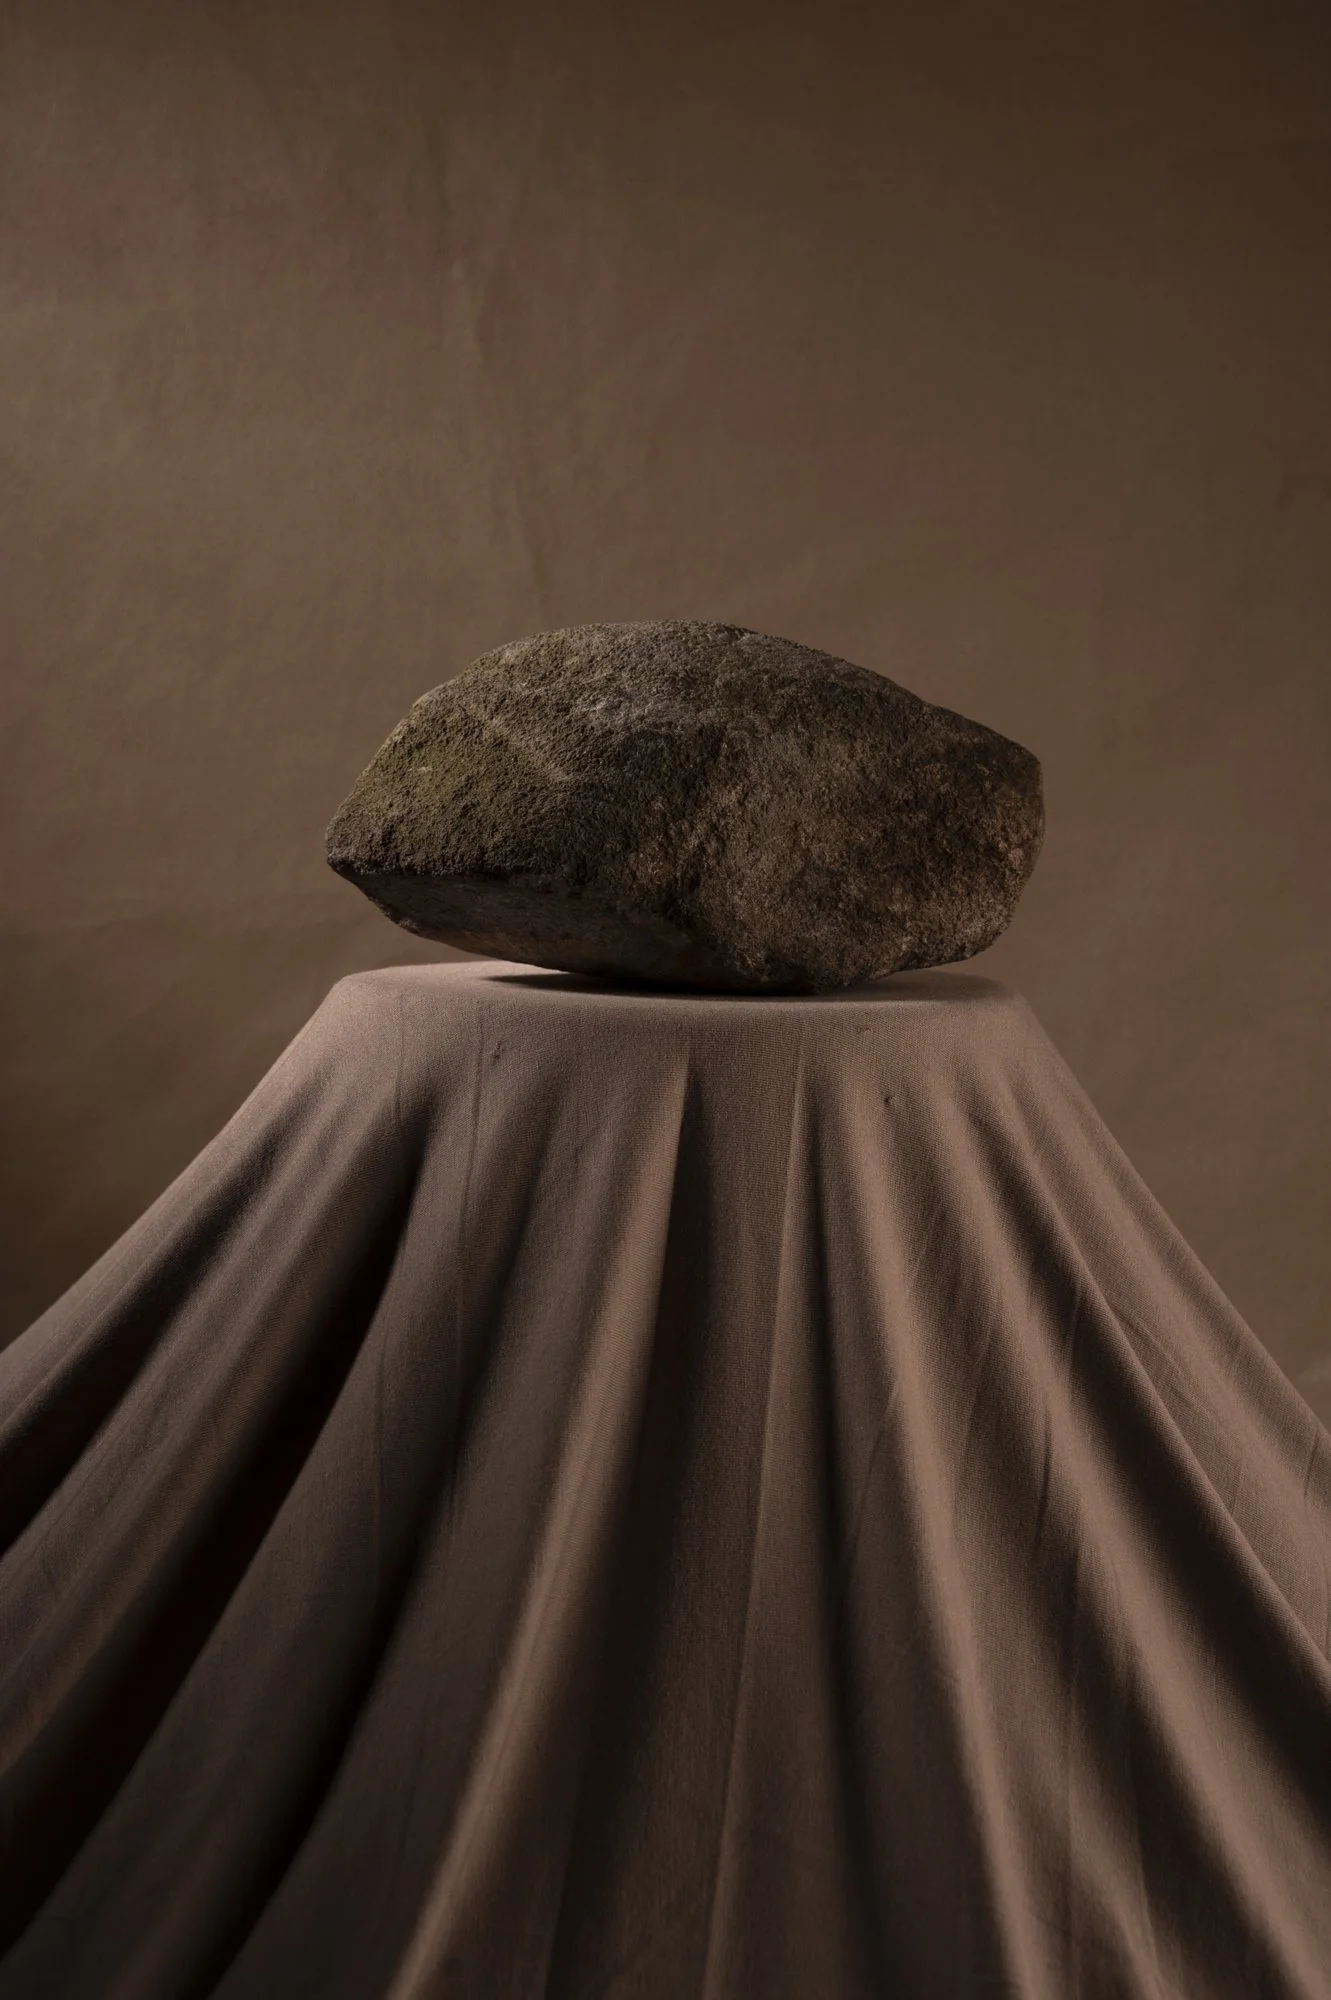
The rocks image is the most effective from this shoot. I love the way the fabric falls down from the left and then under the rocks. This adds movement to the image as well as improving the composition by making it more dynamic.
What next?
From here I will continue to experiment with the fabric drapery as well as constructing the remaining still life images.

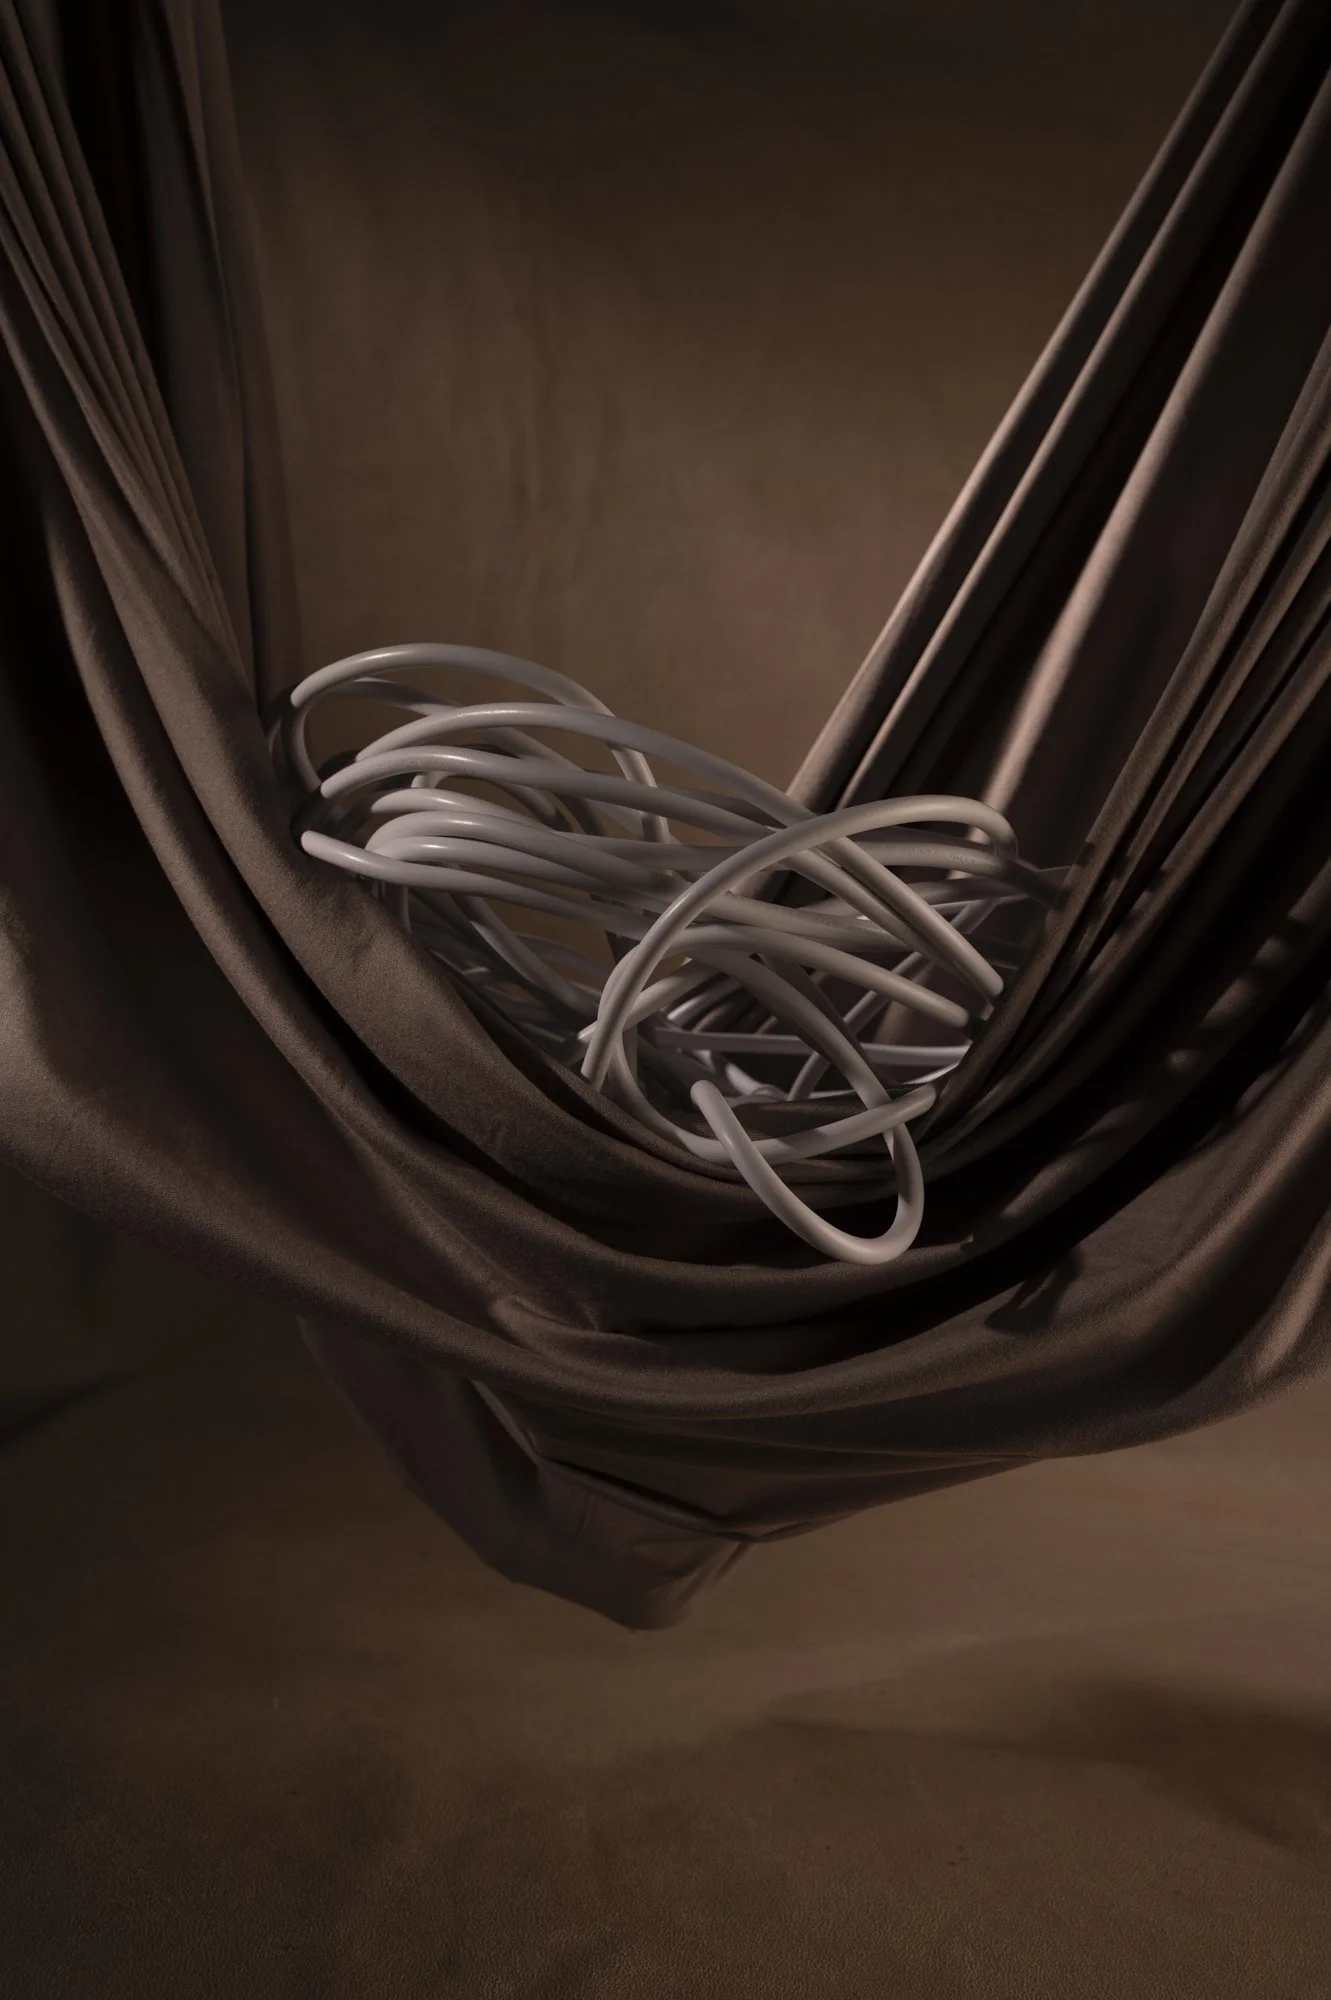
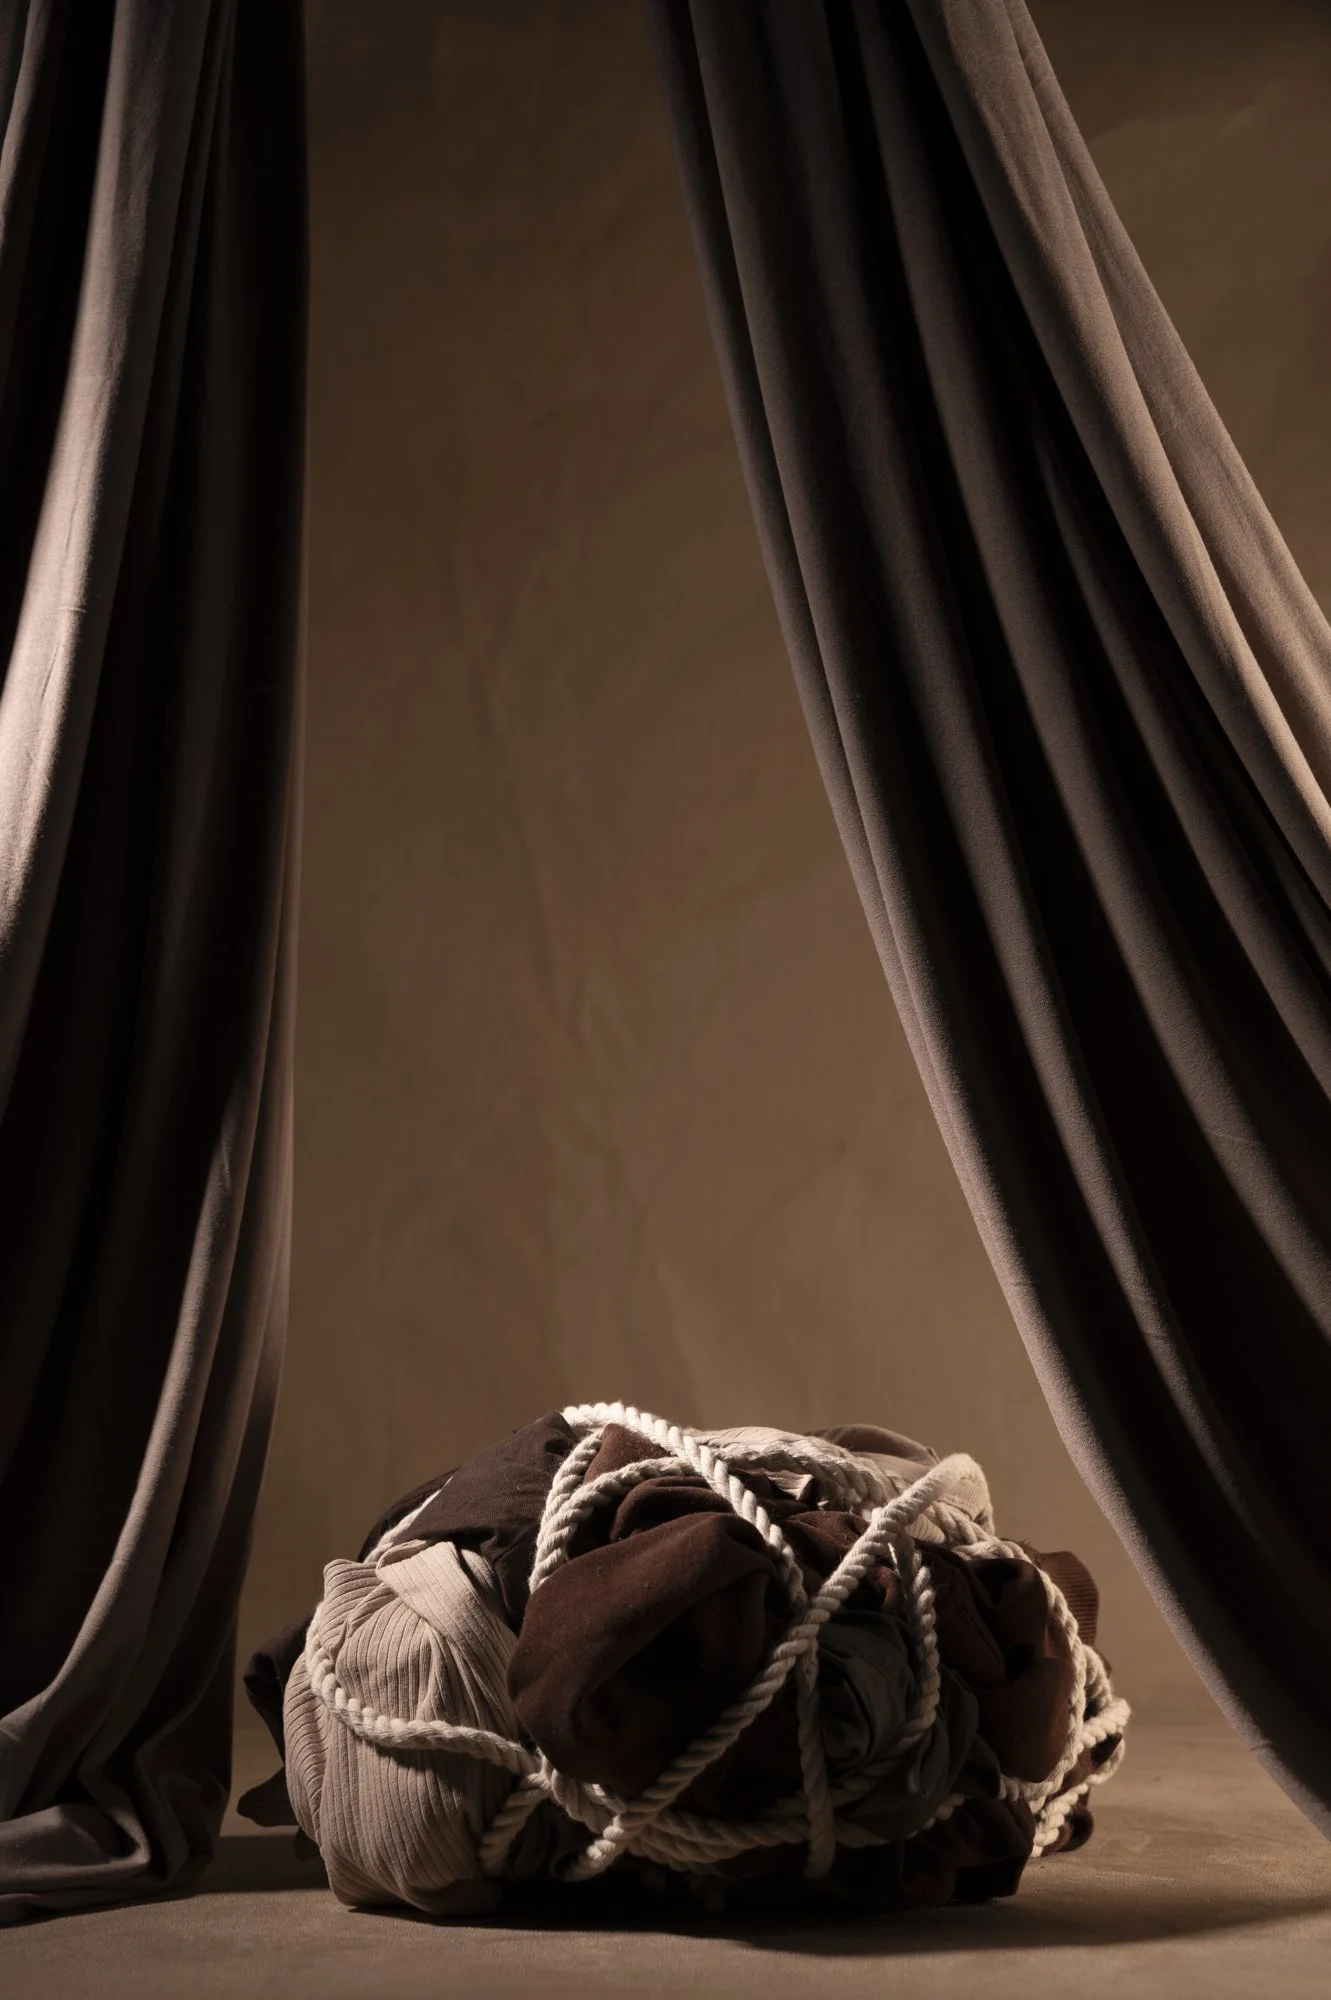
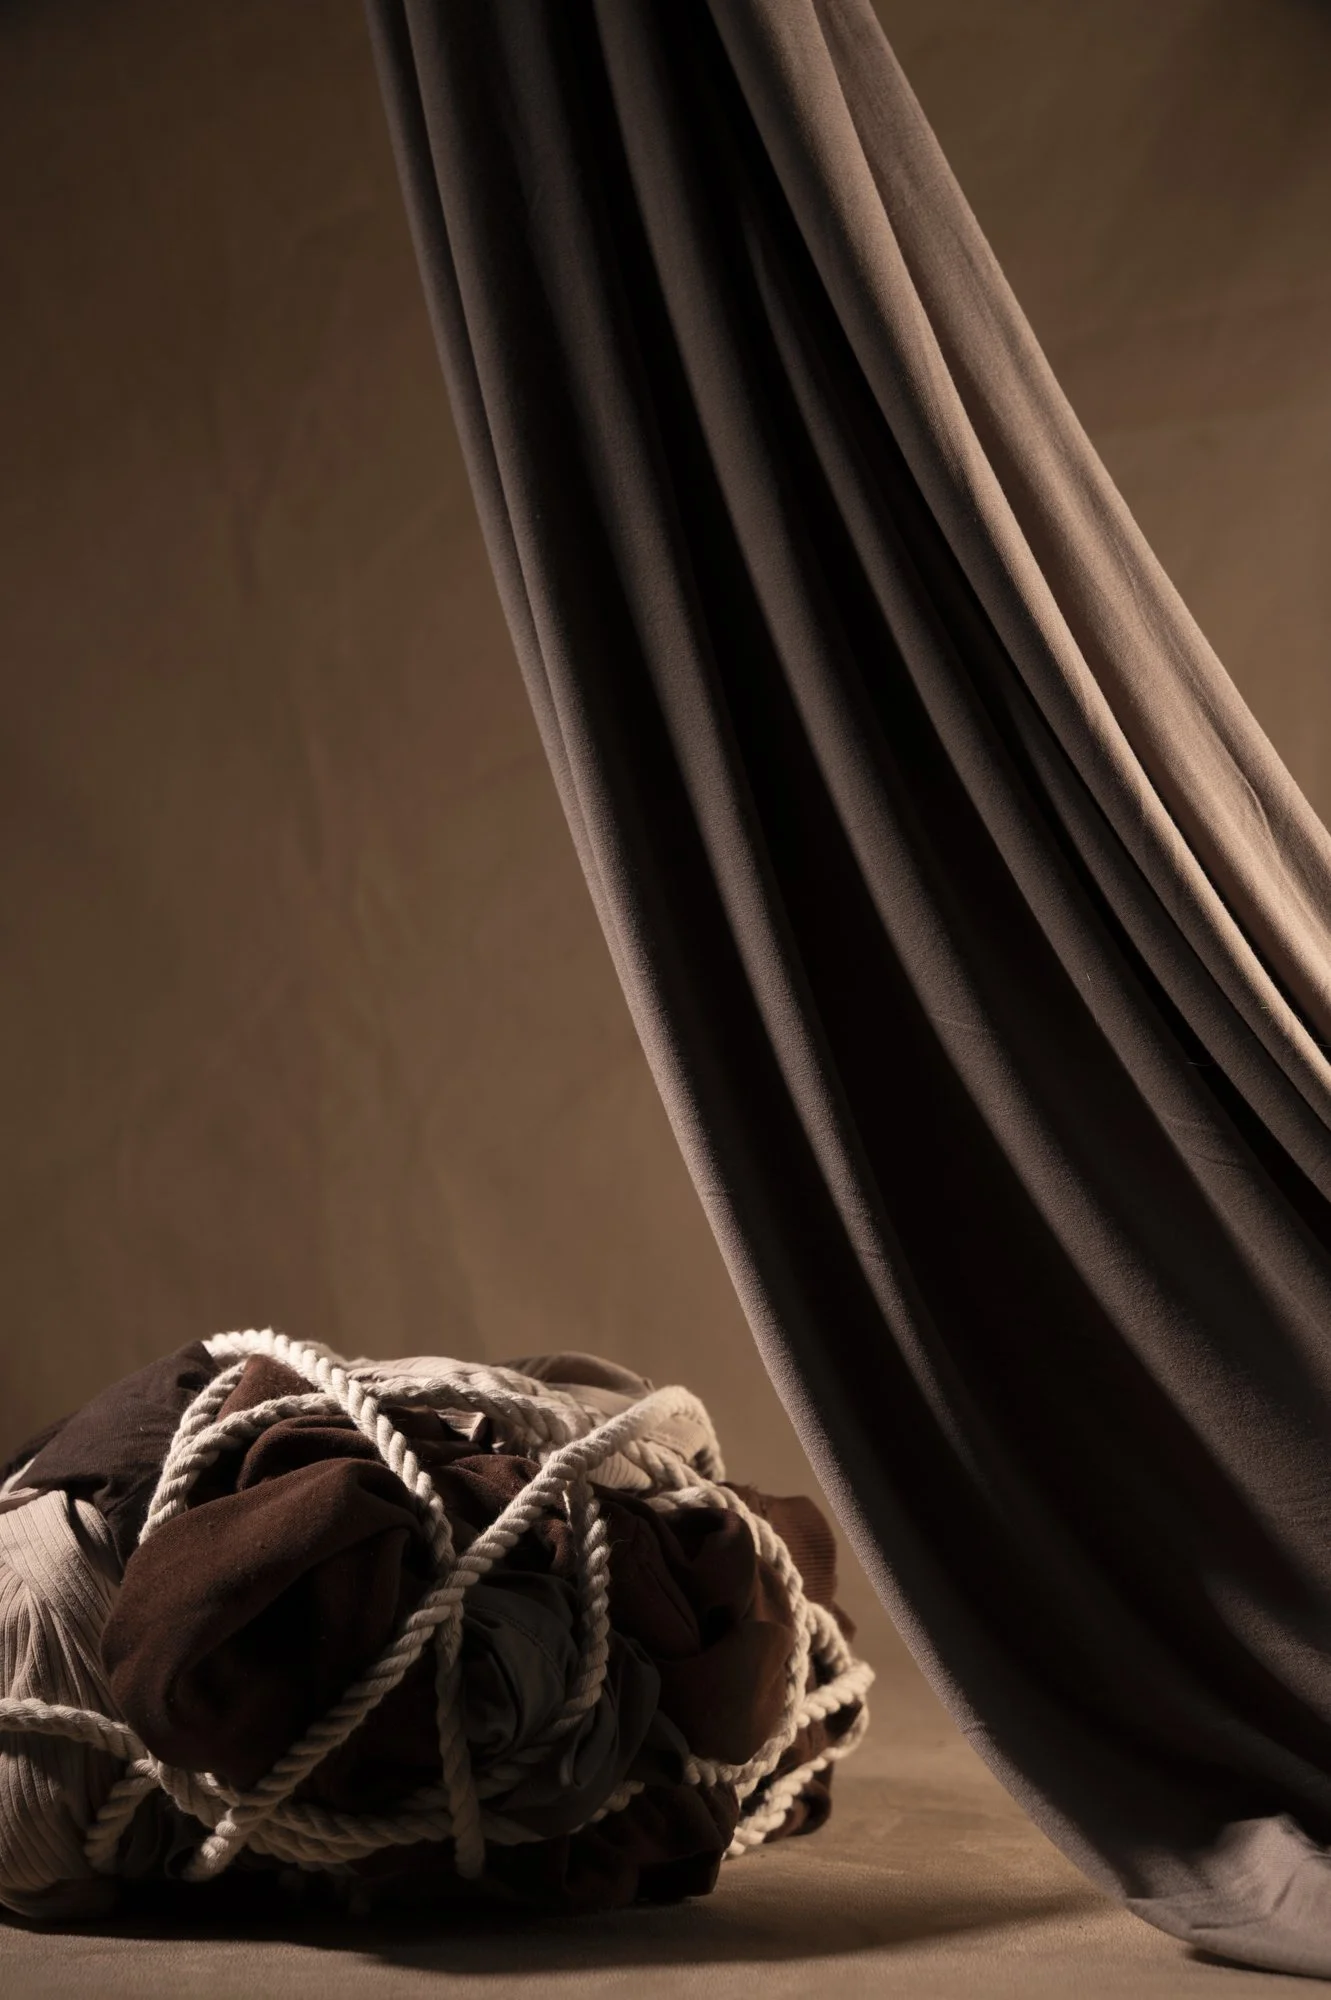
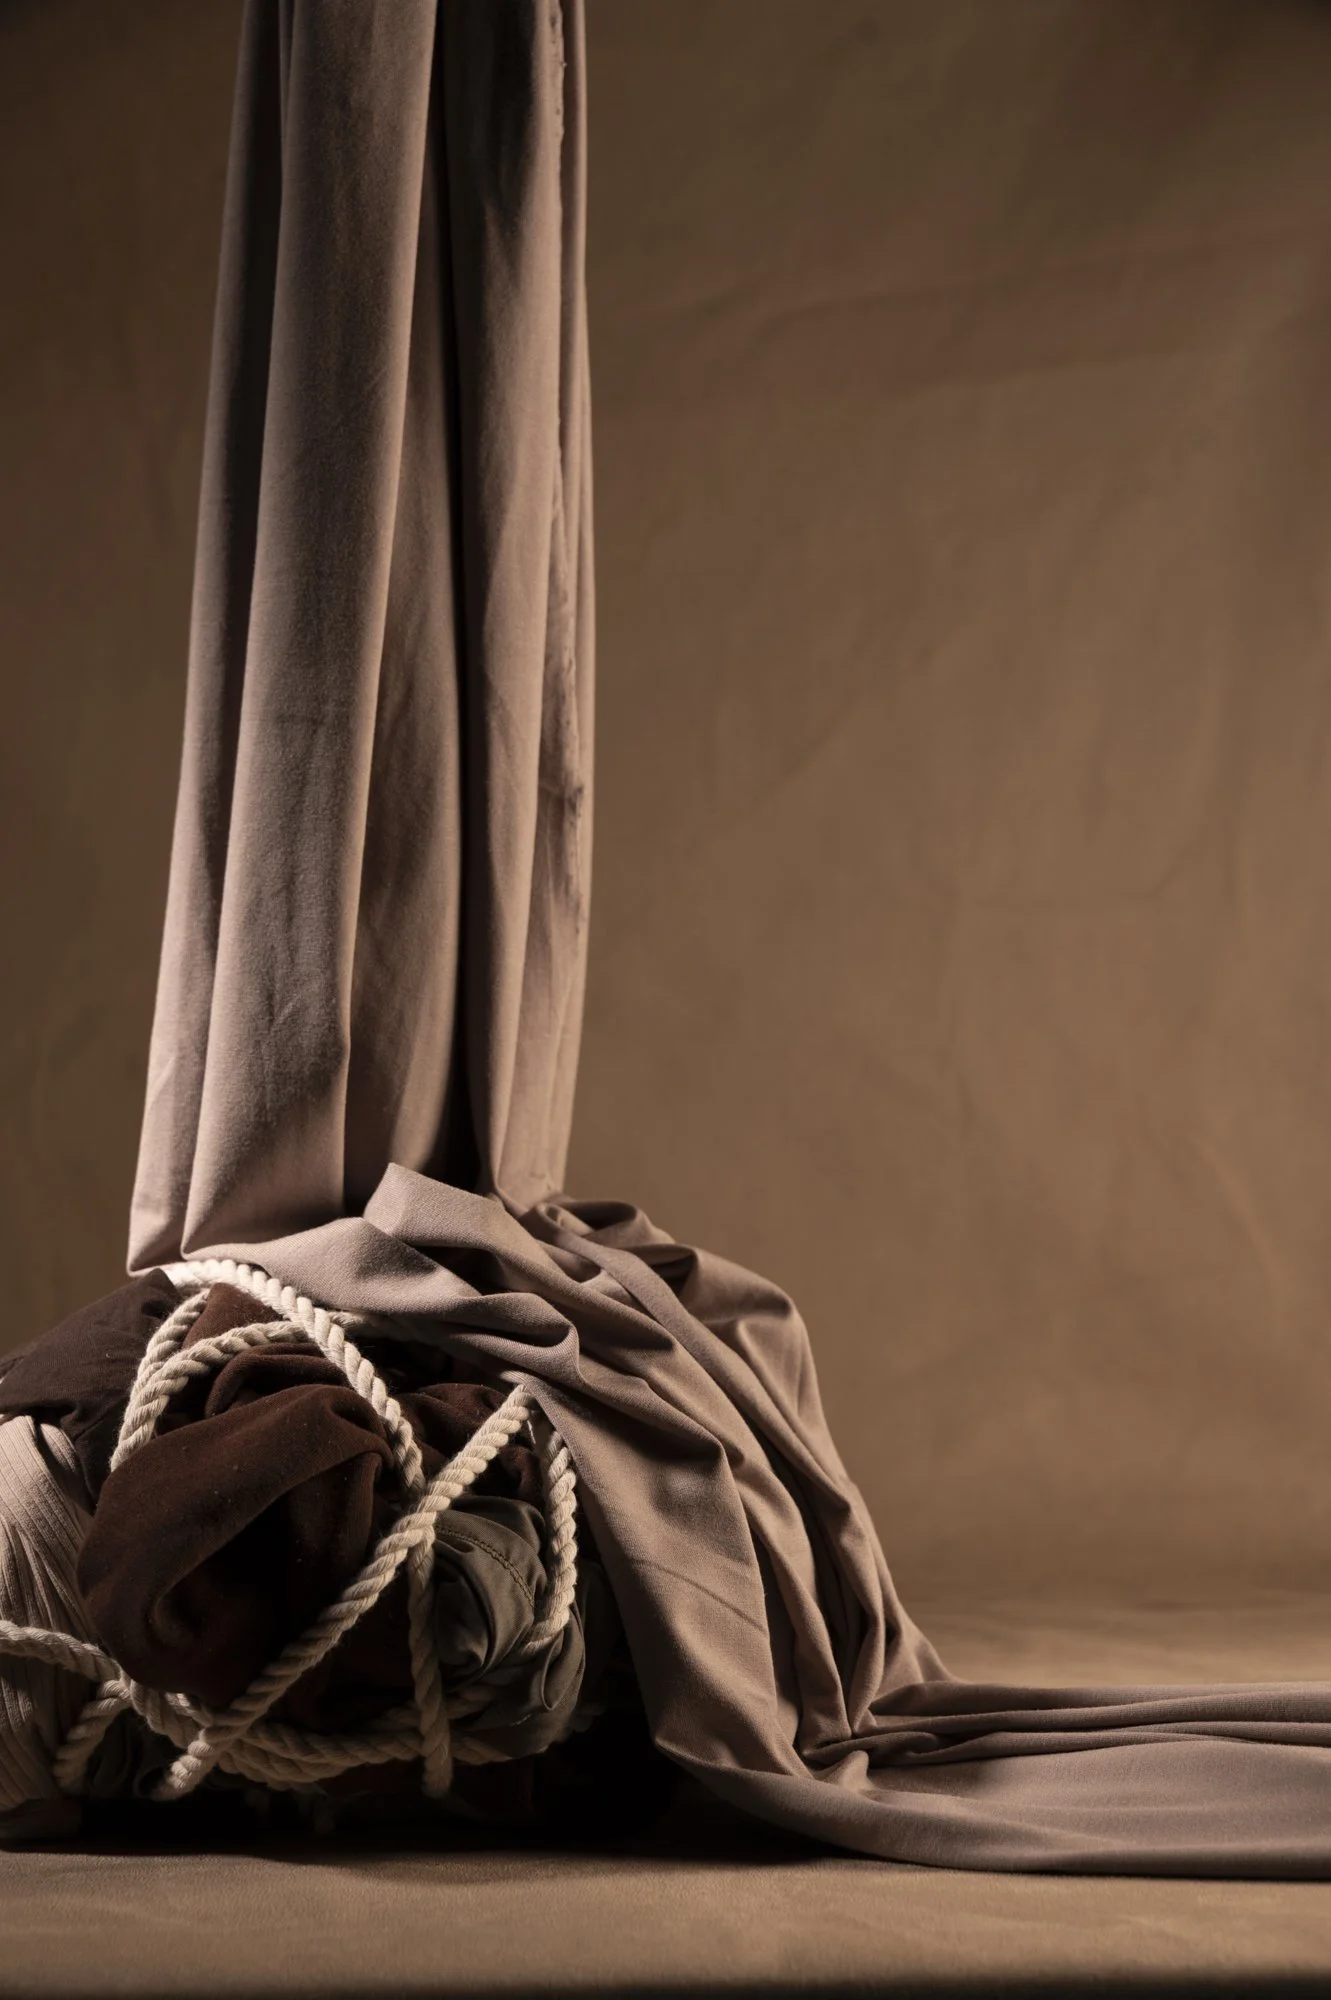
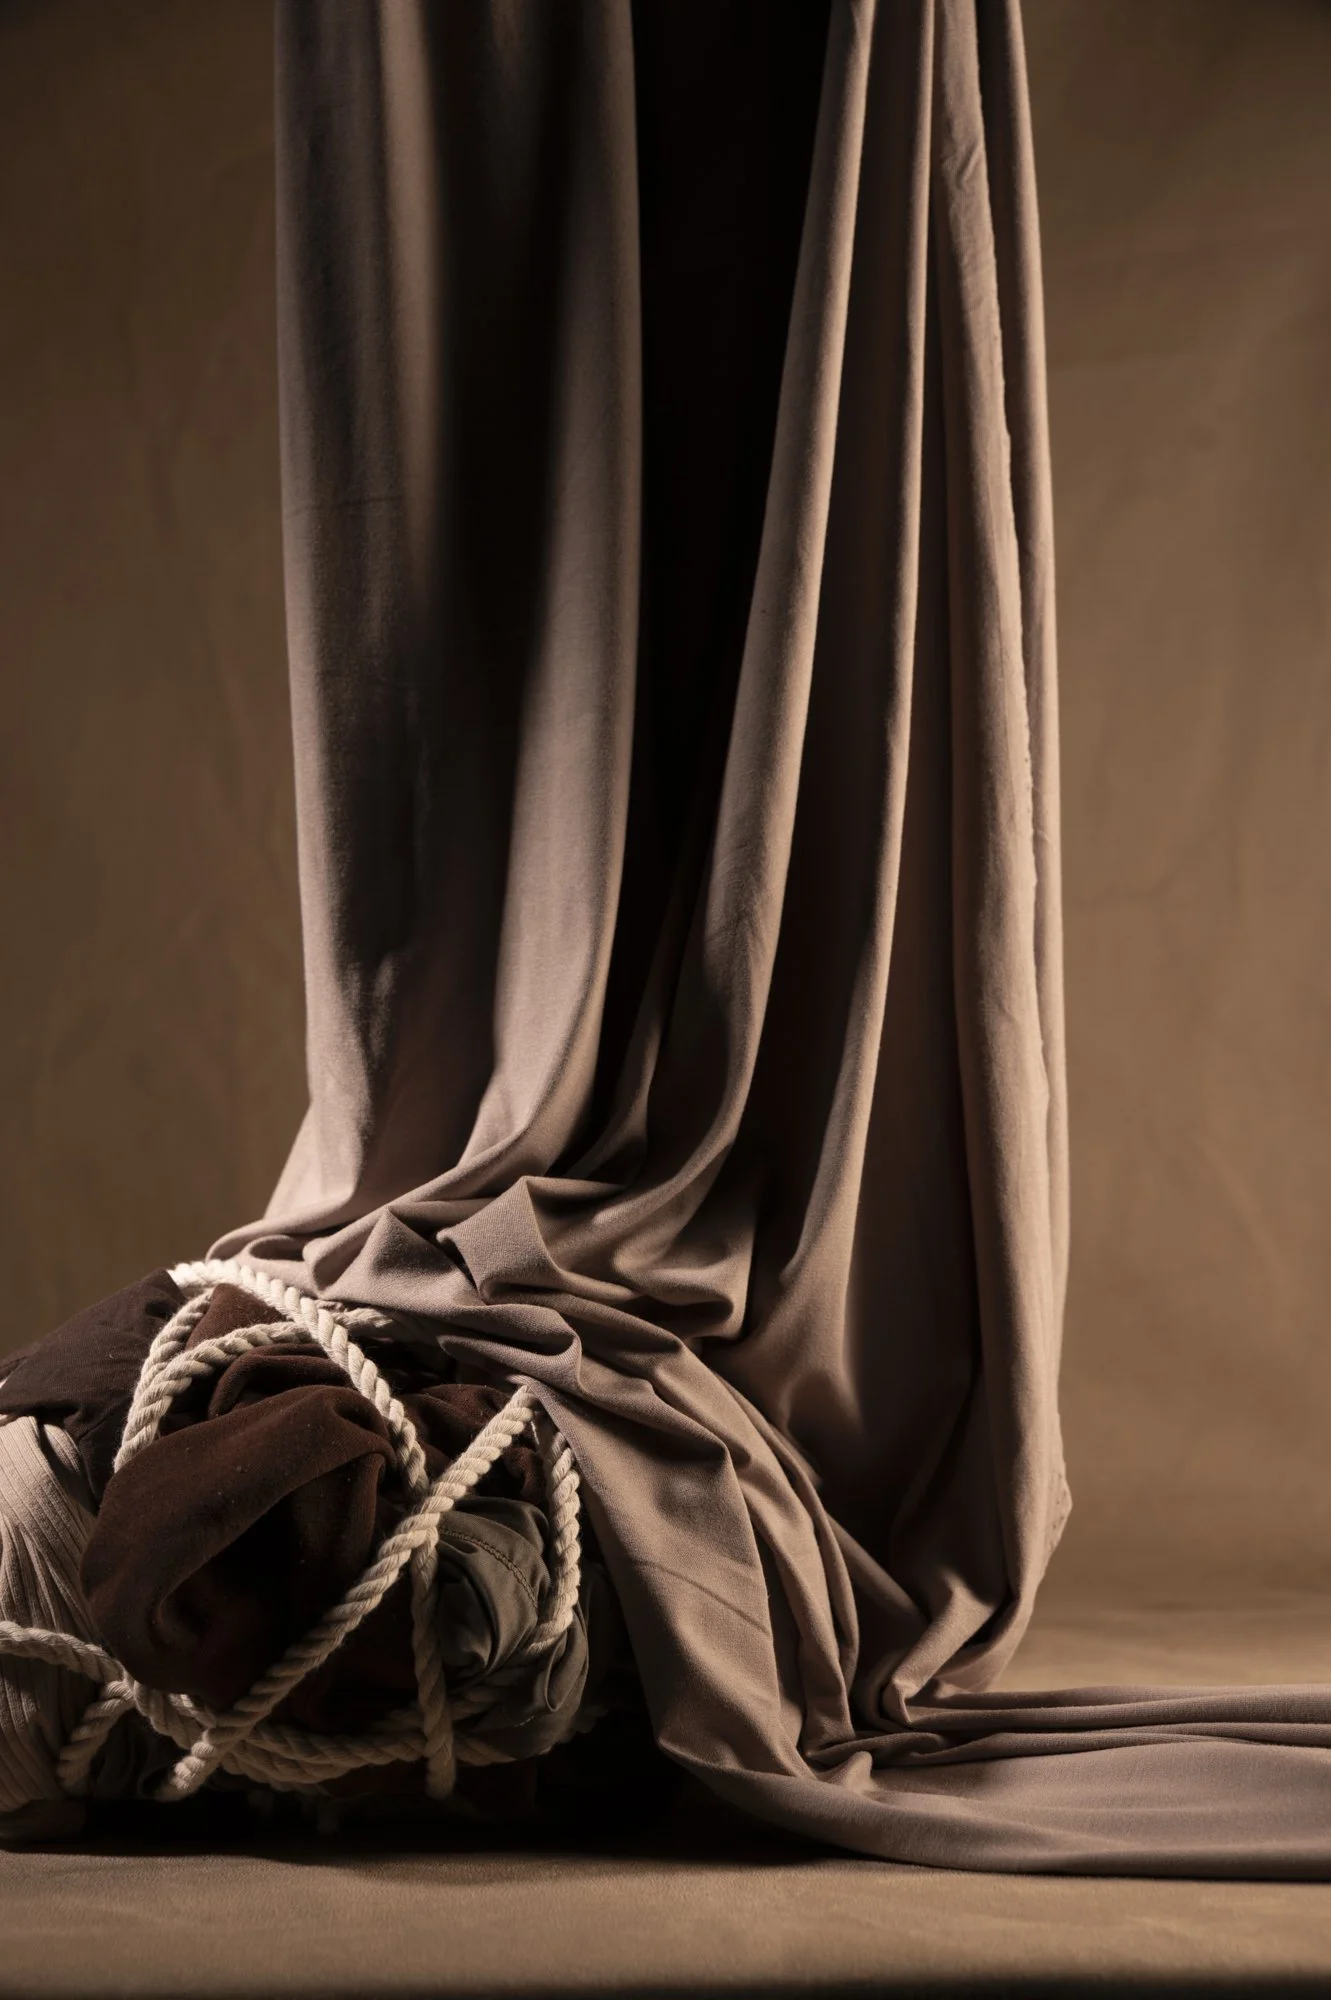
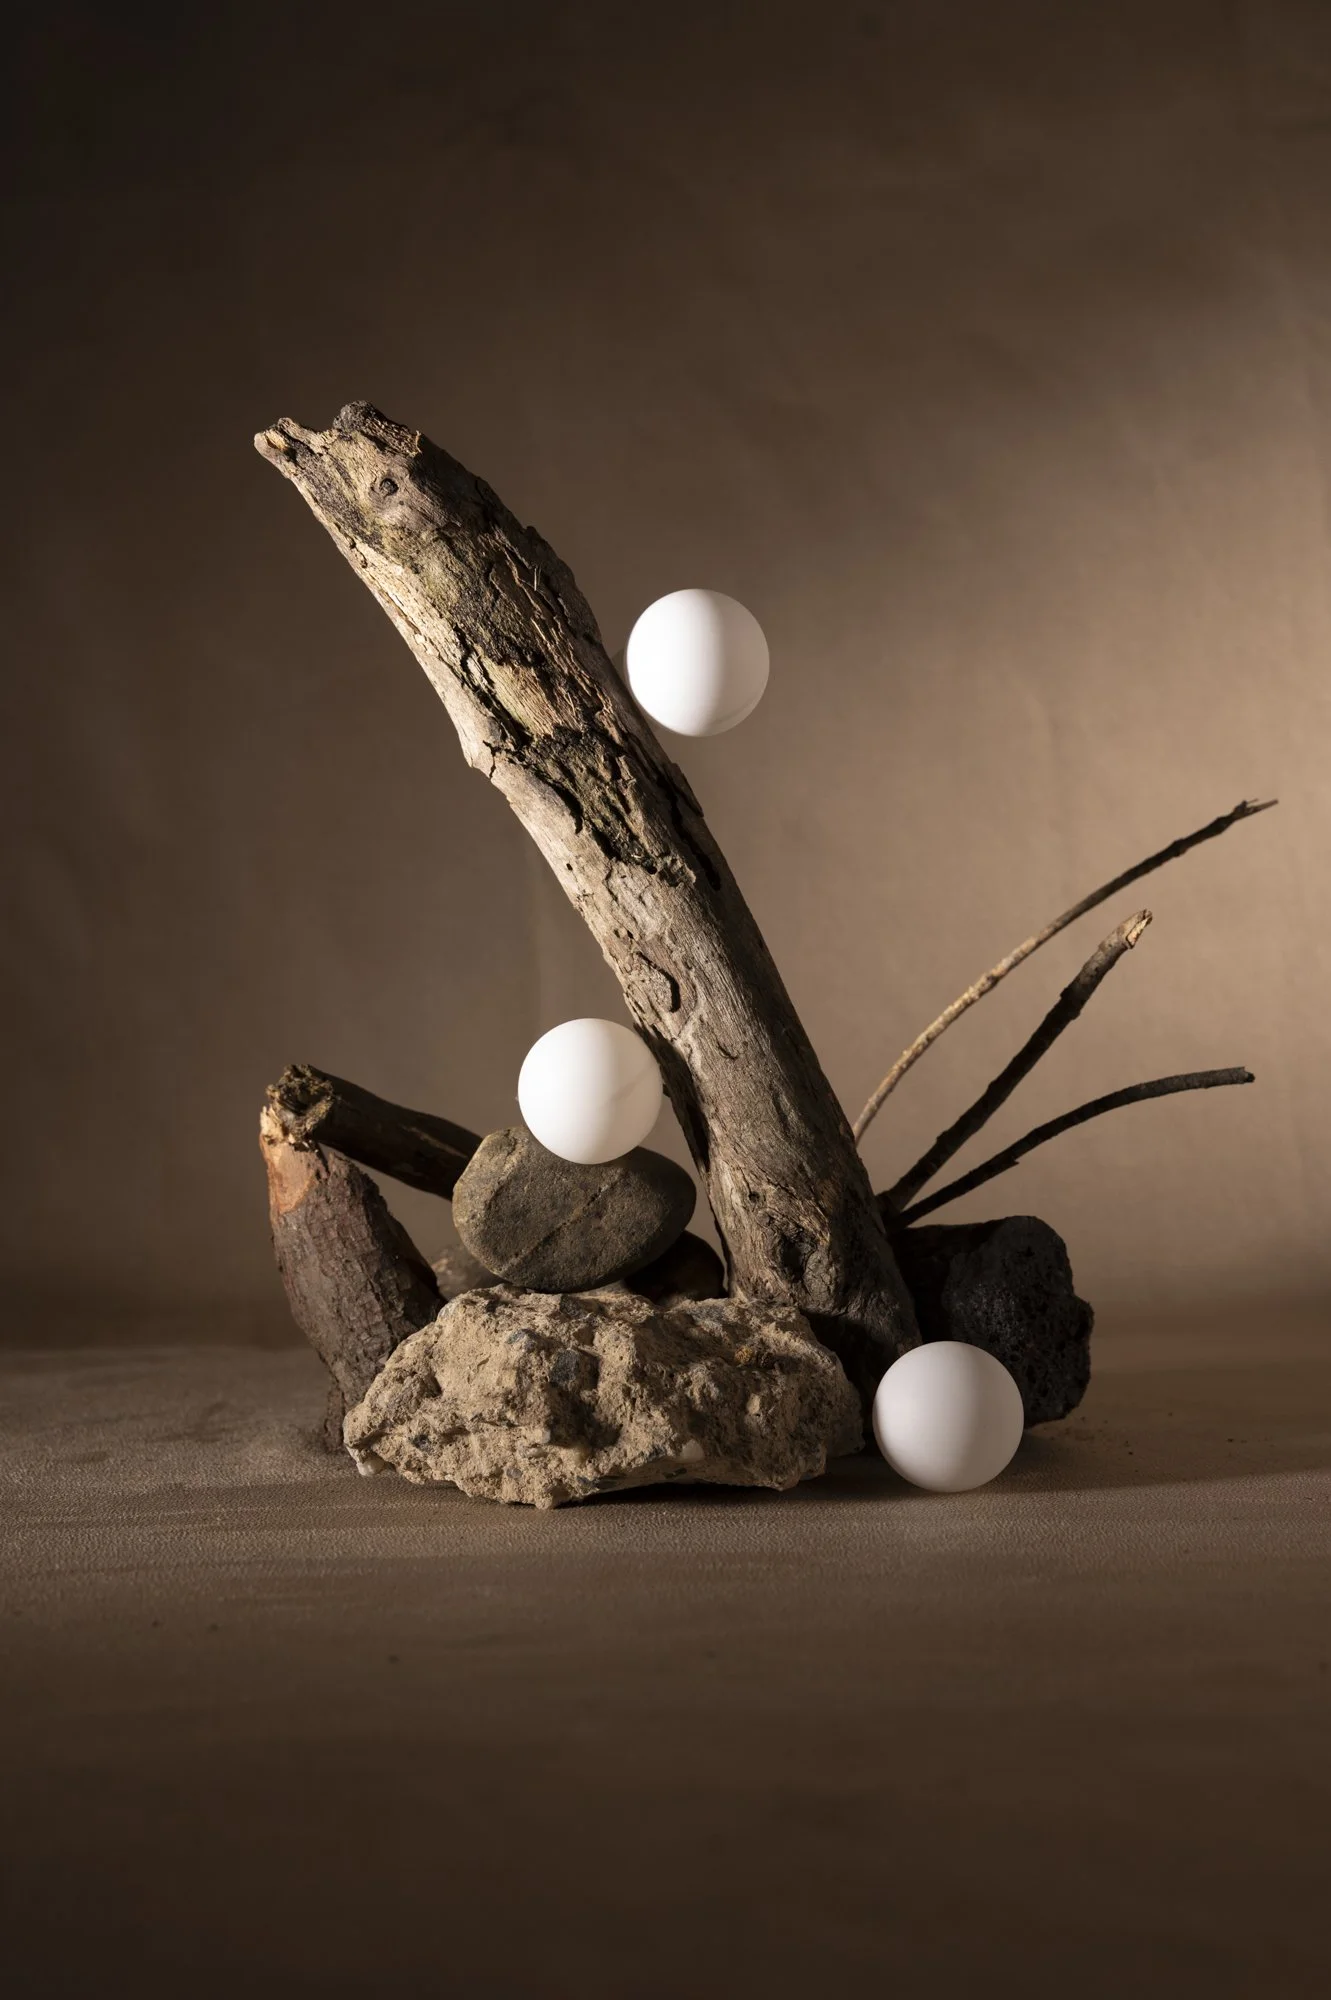
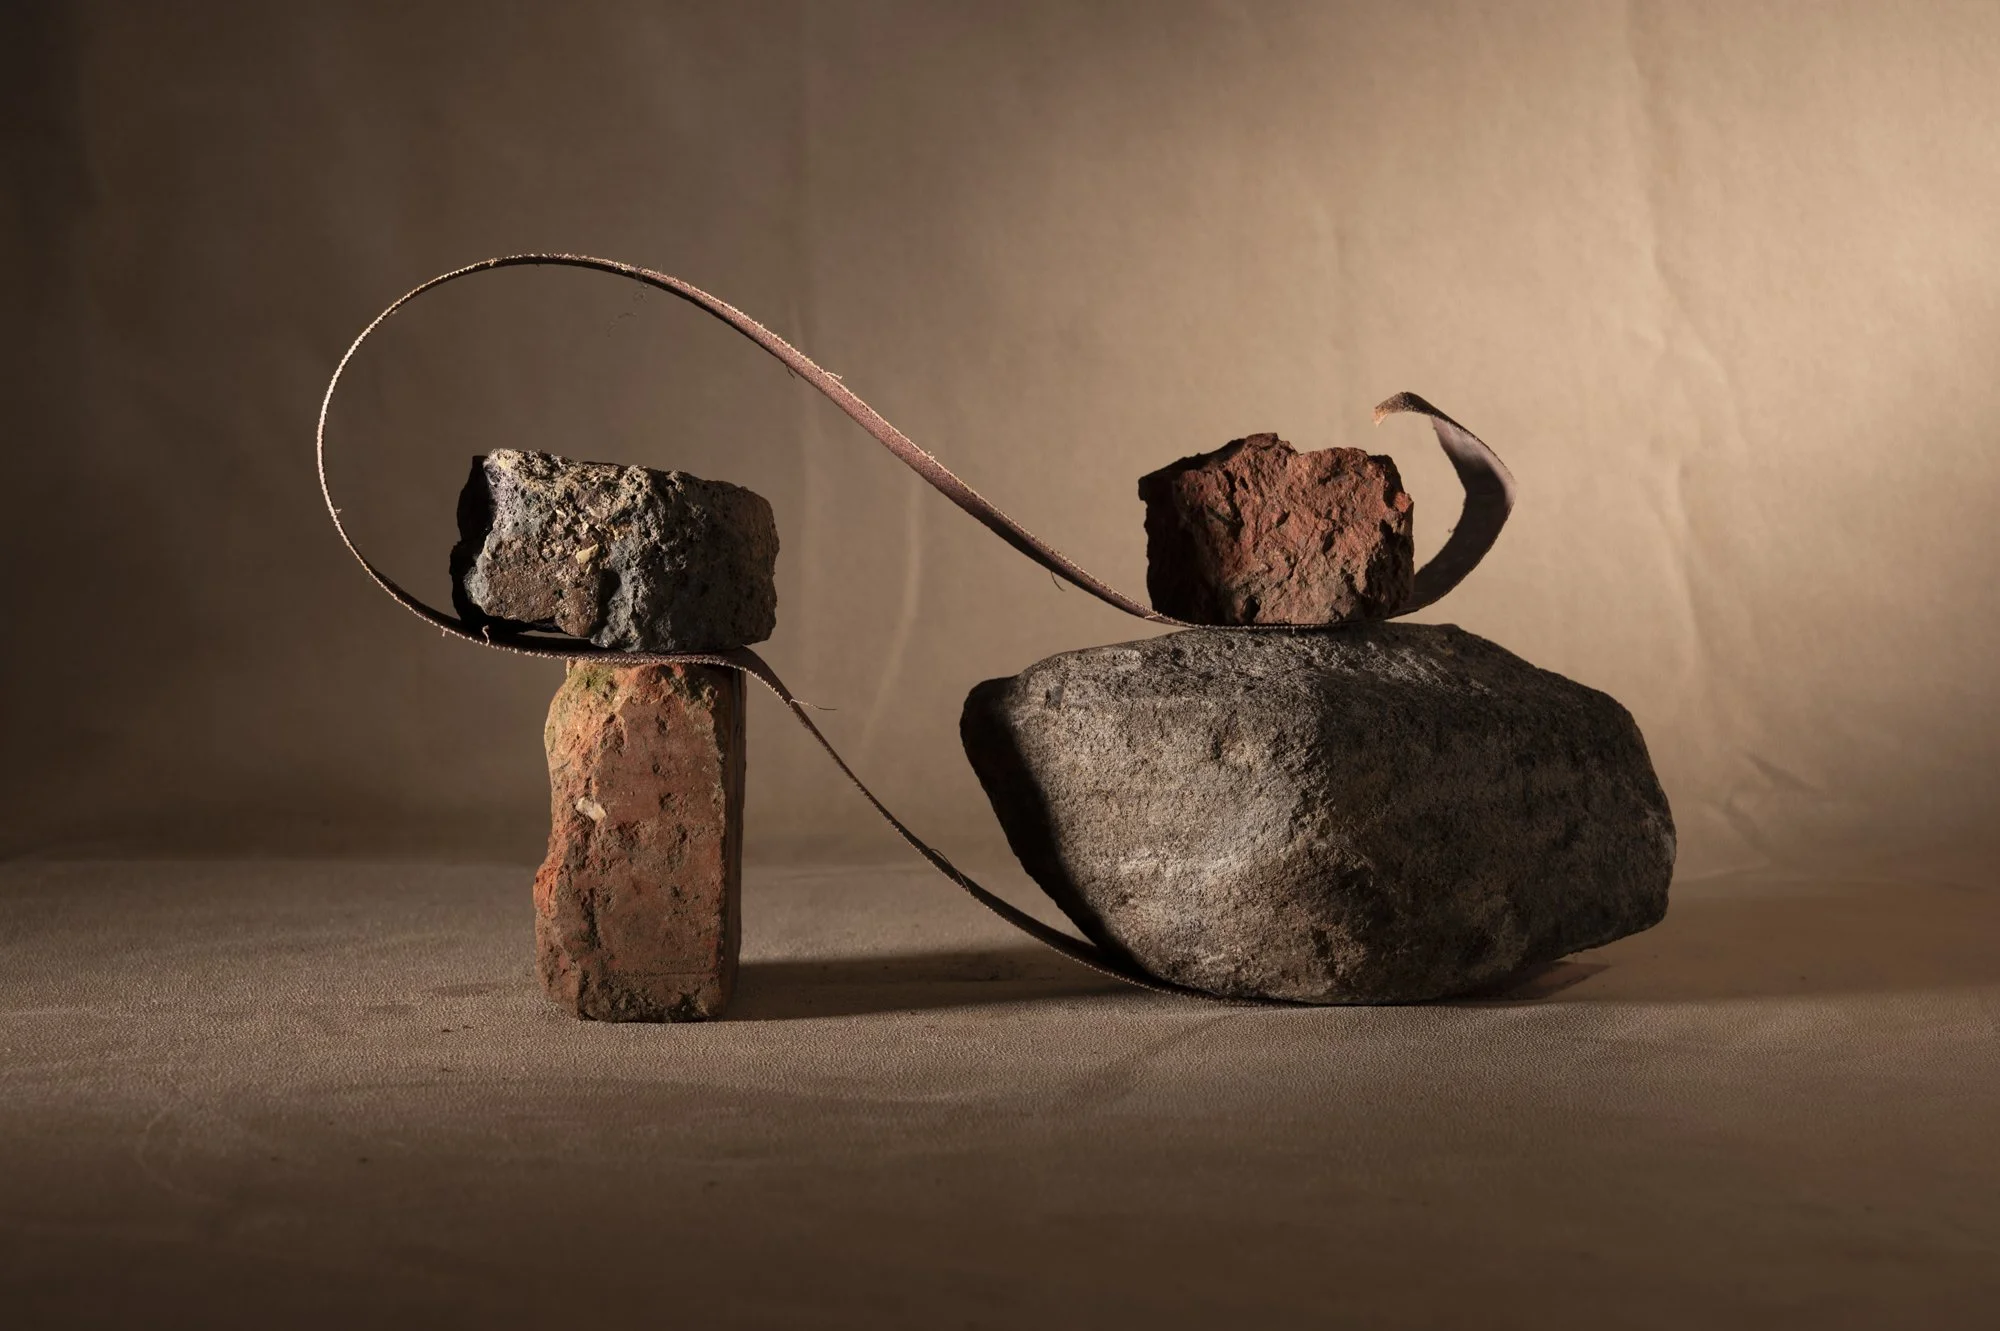
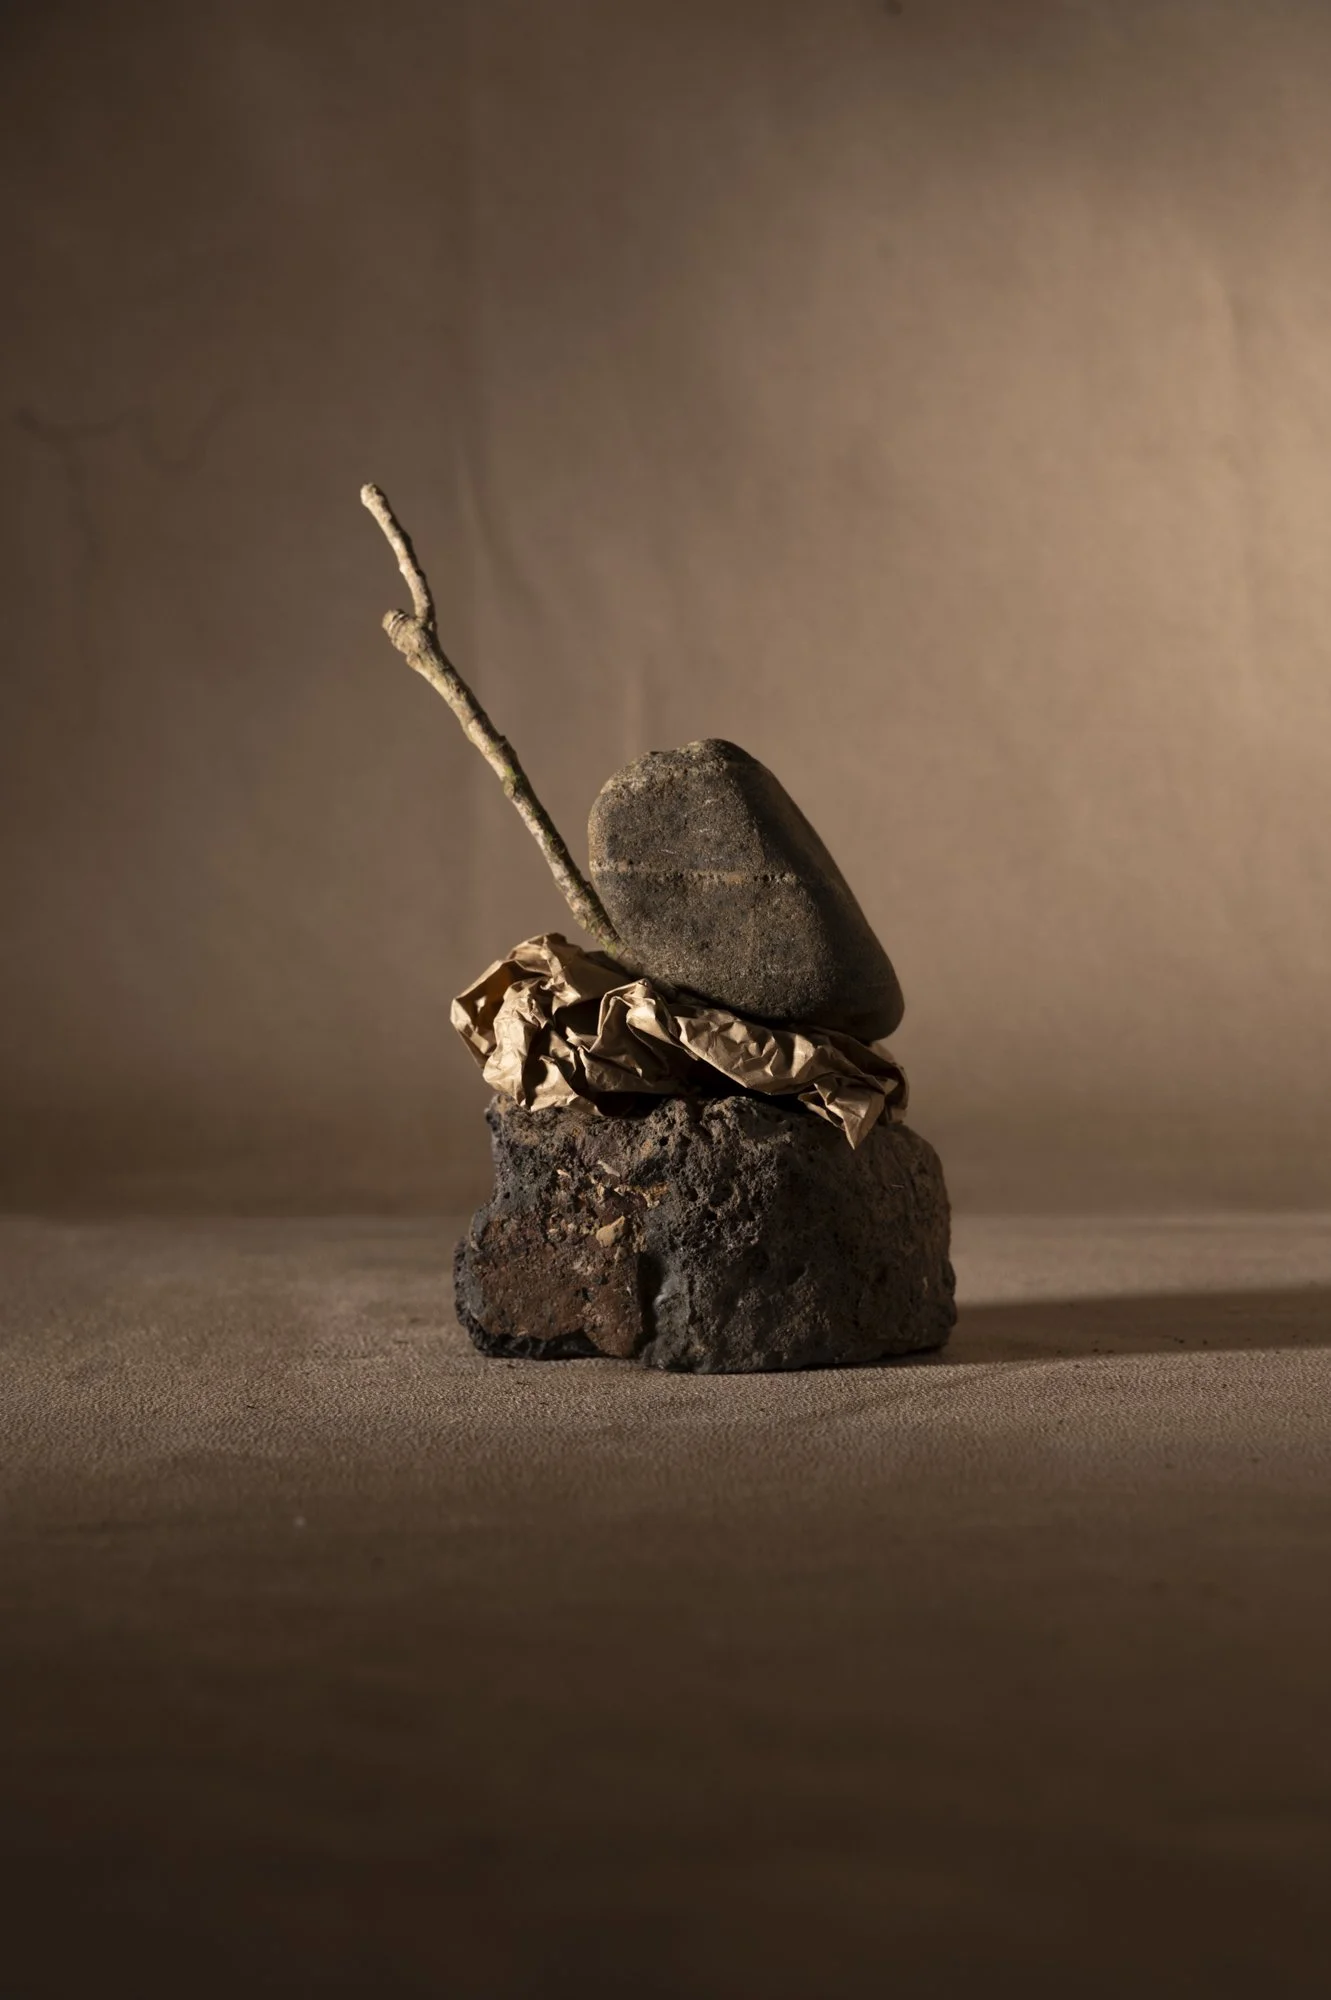
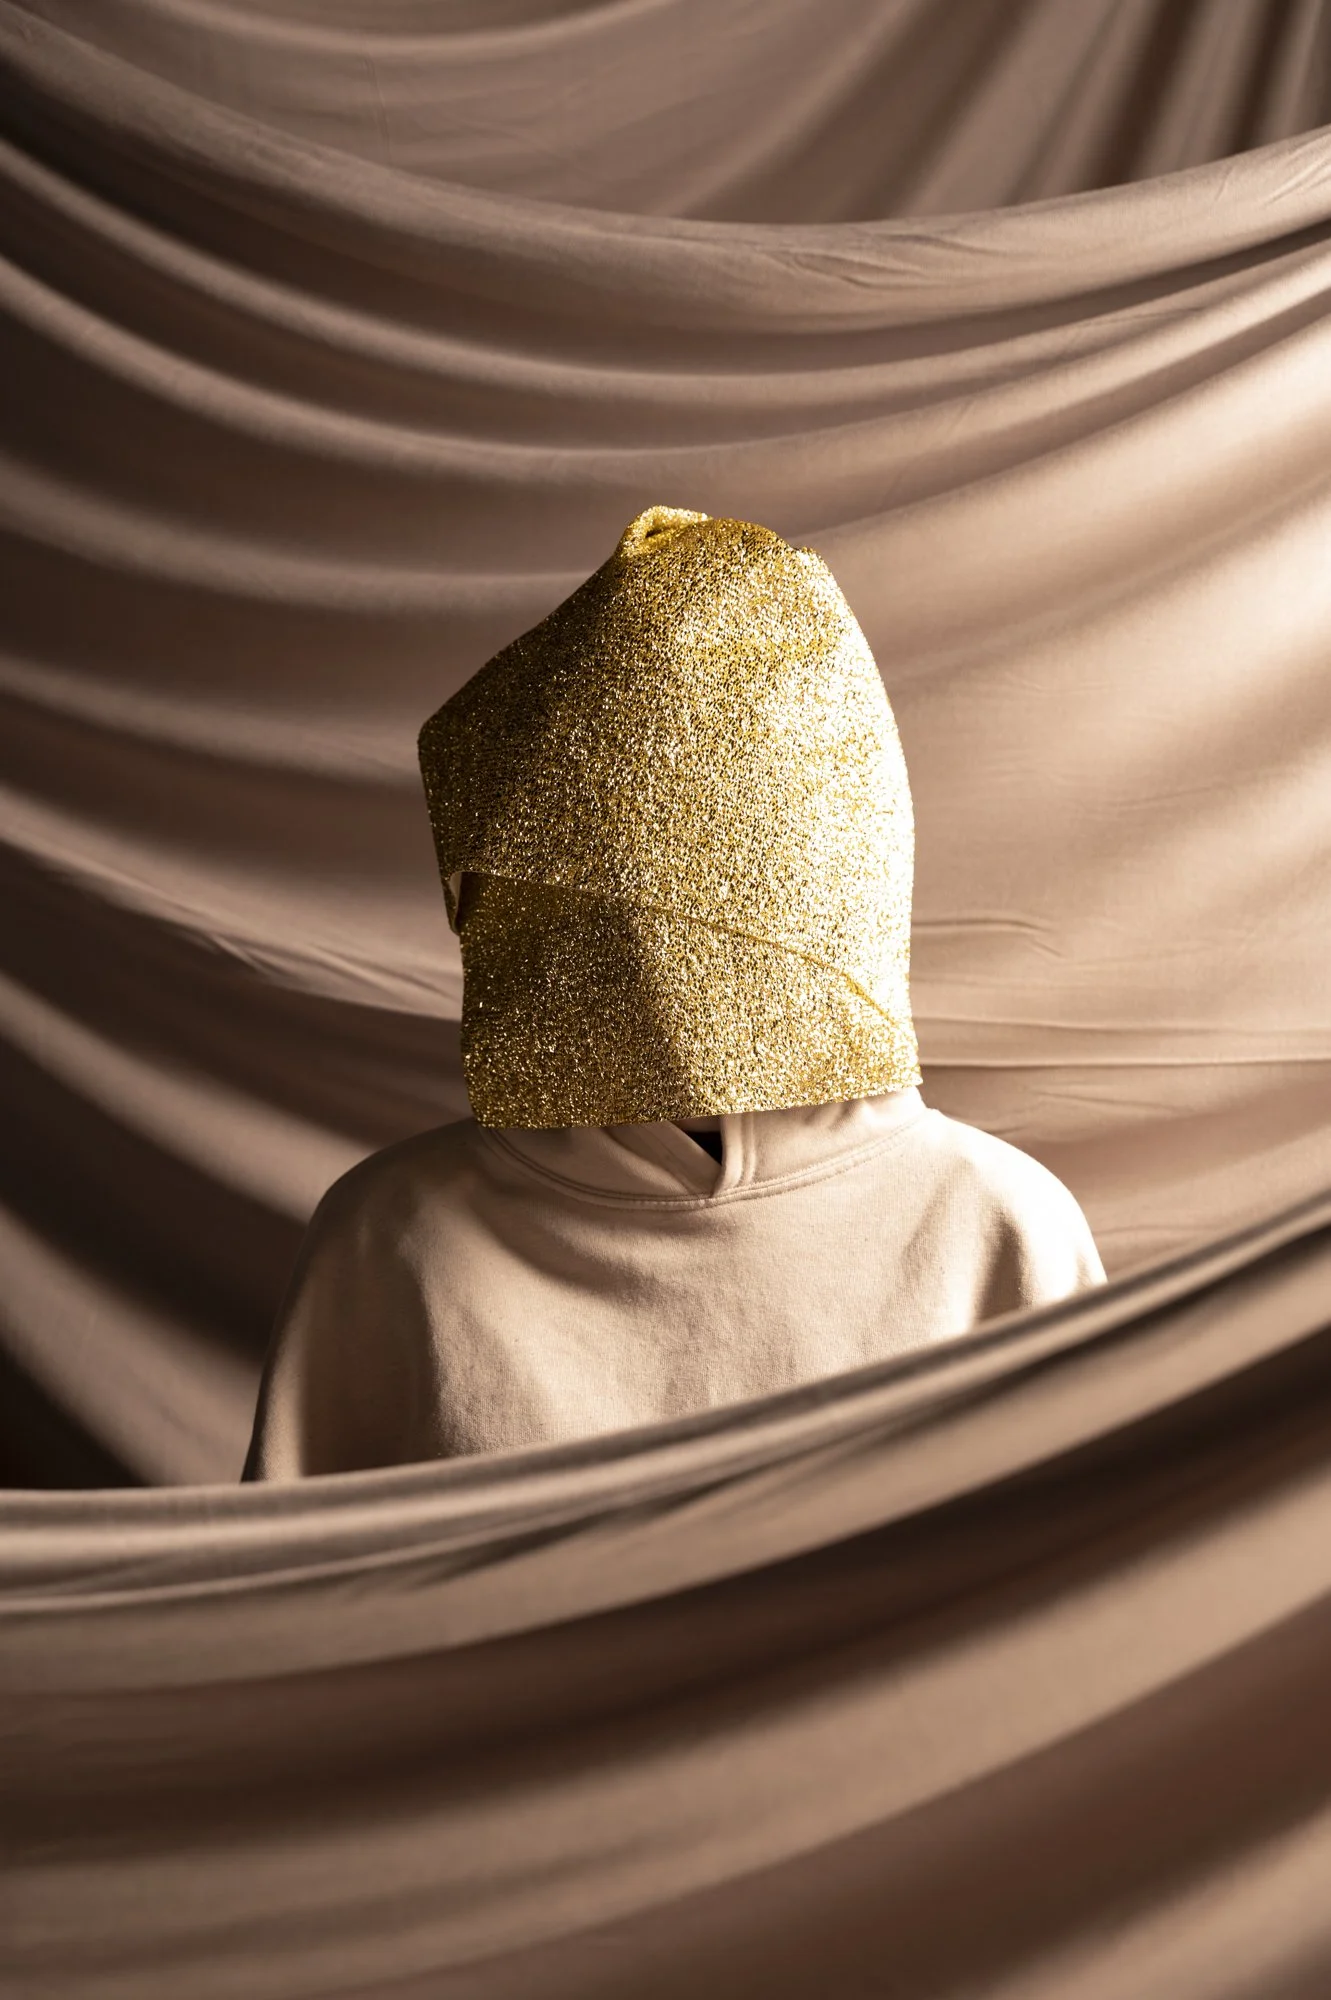
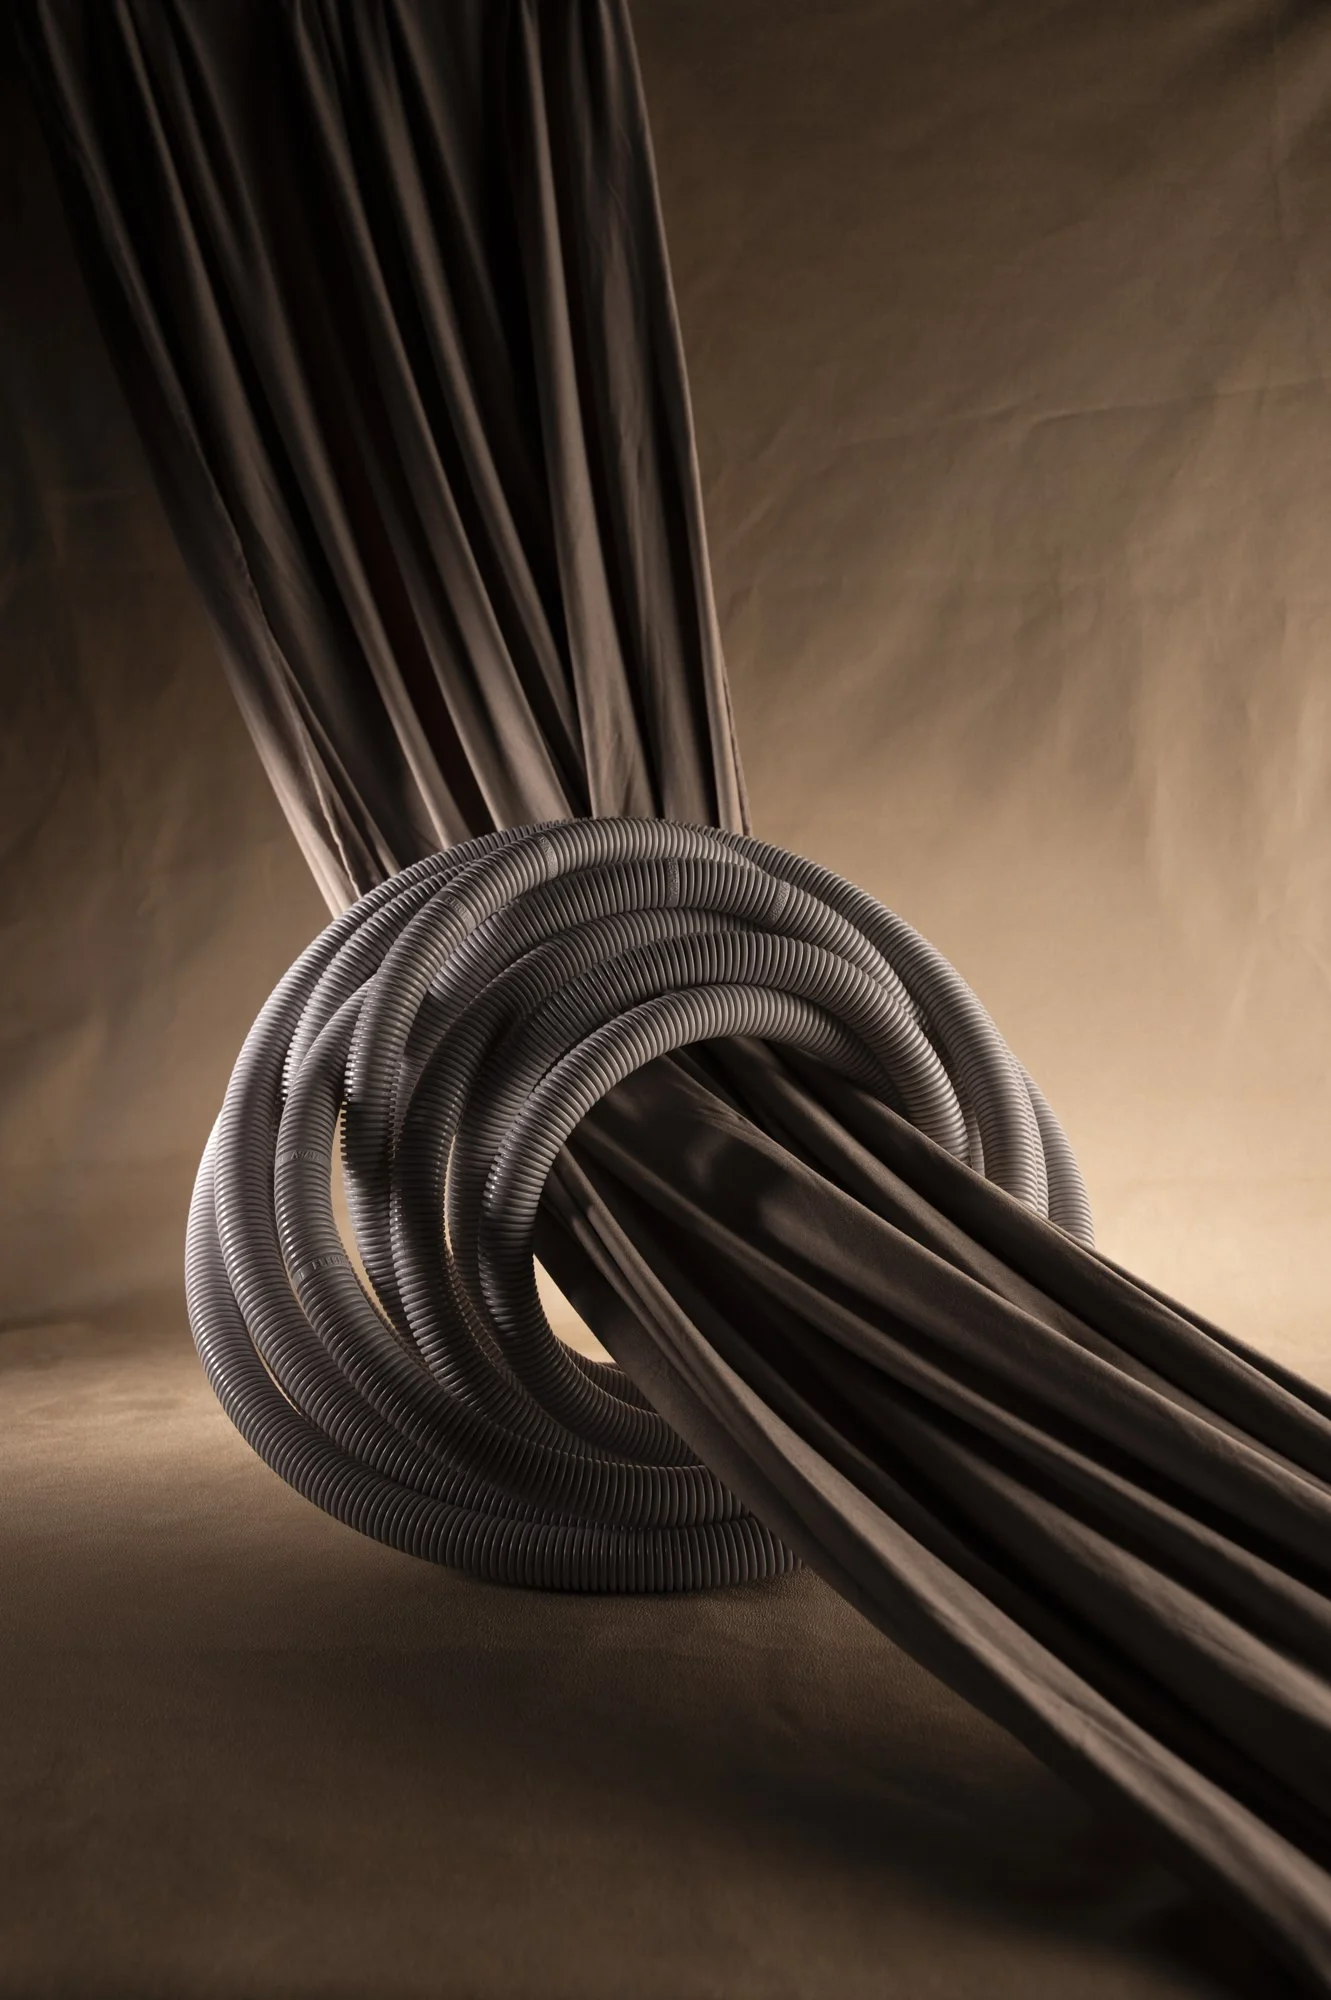
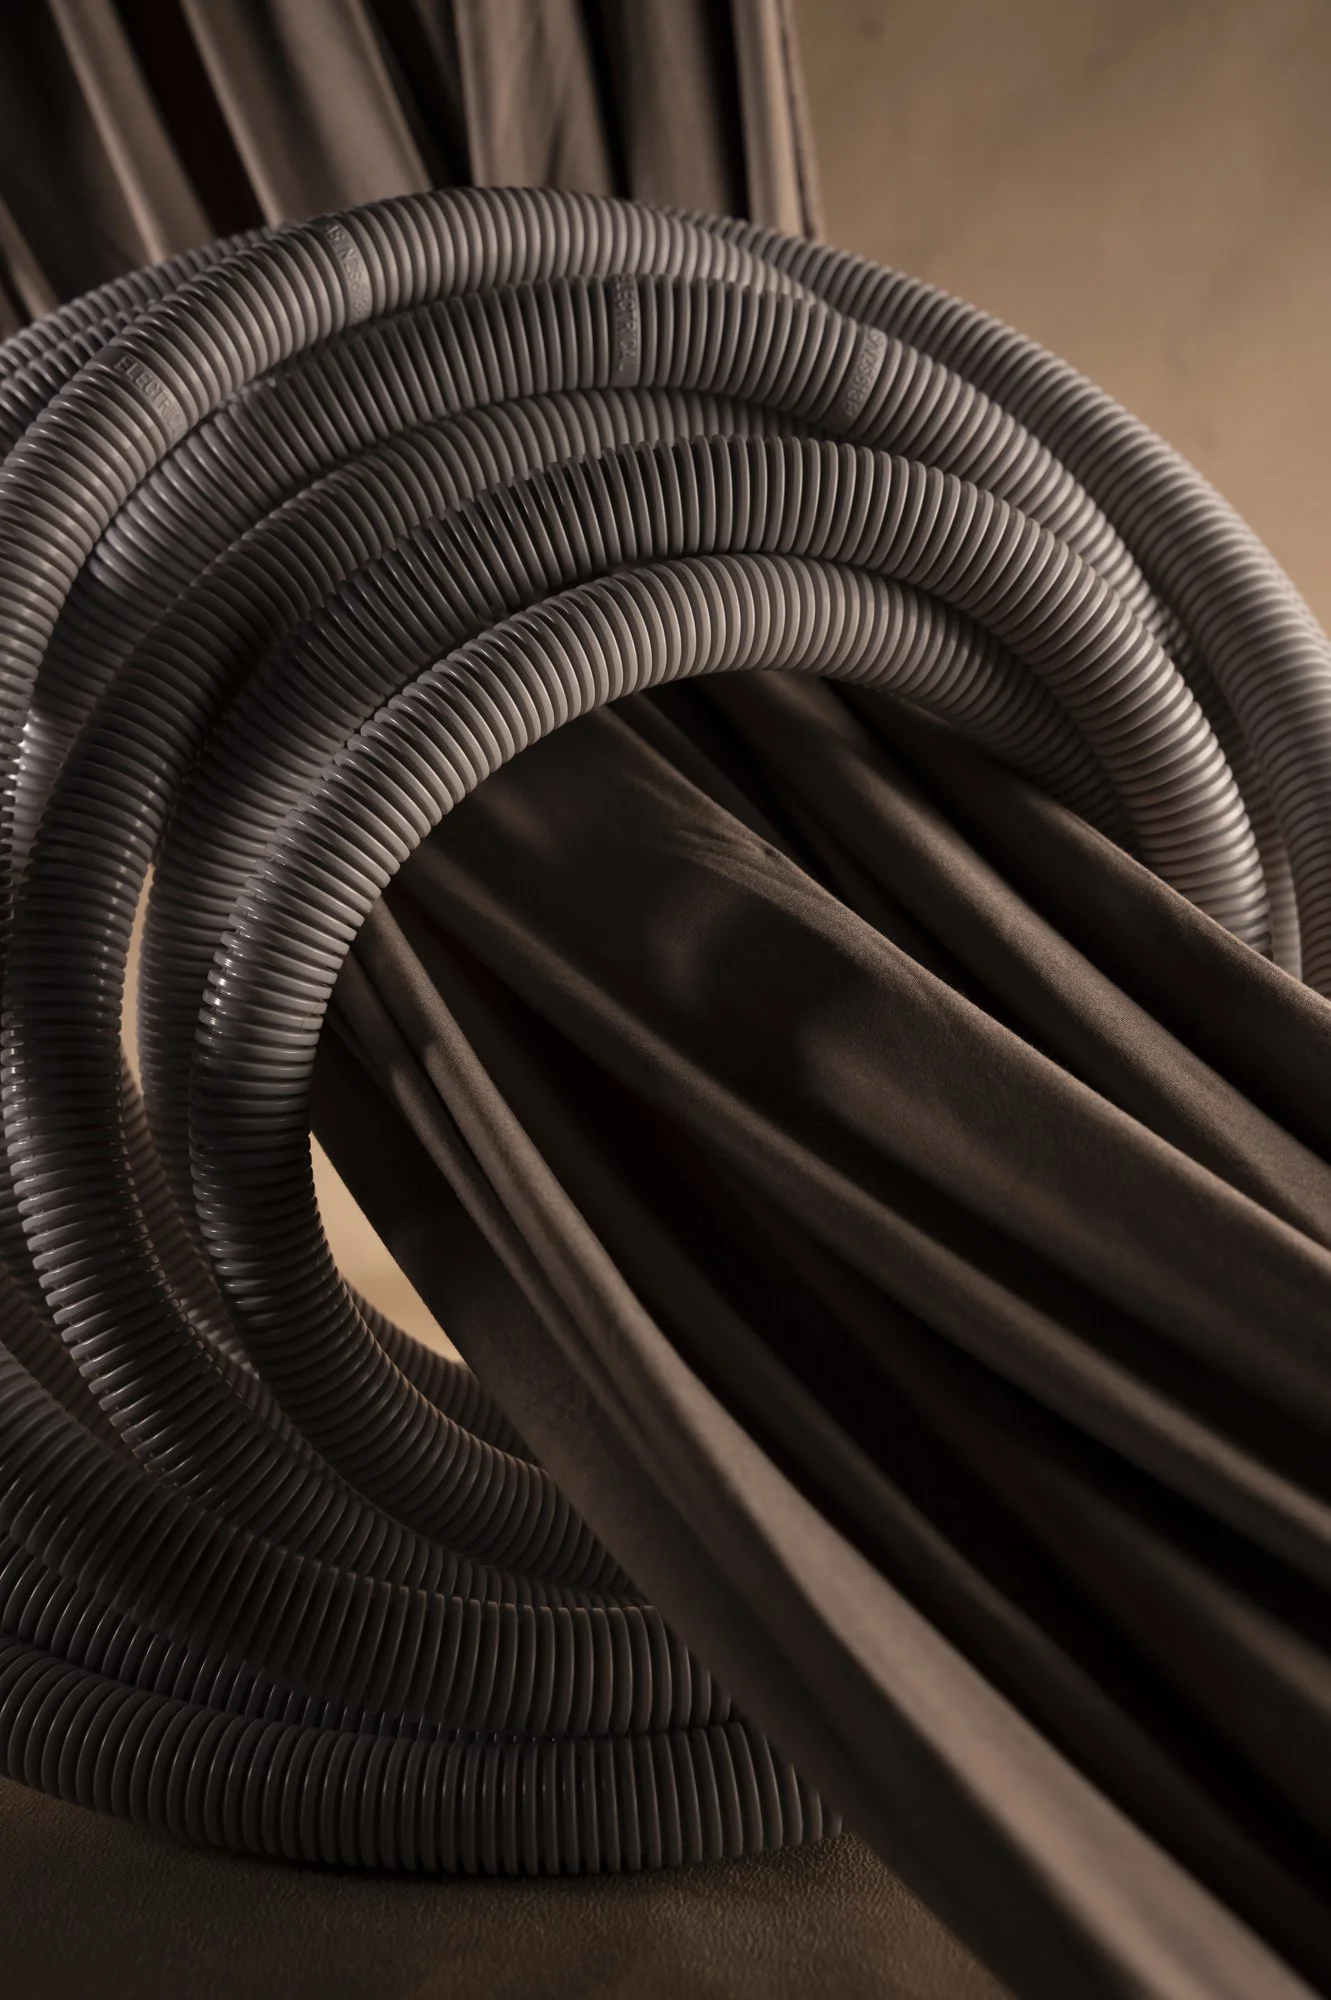
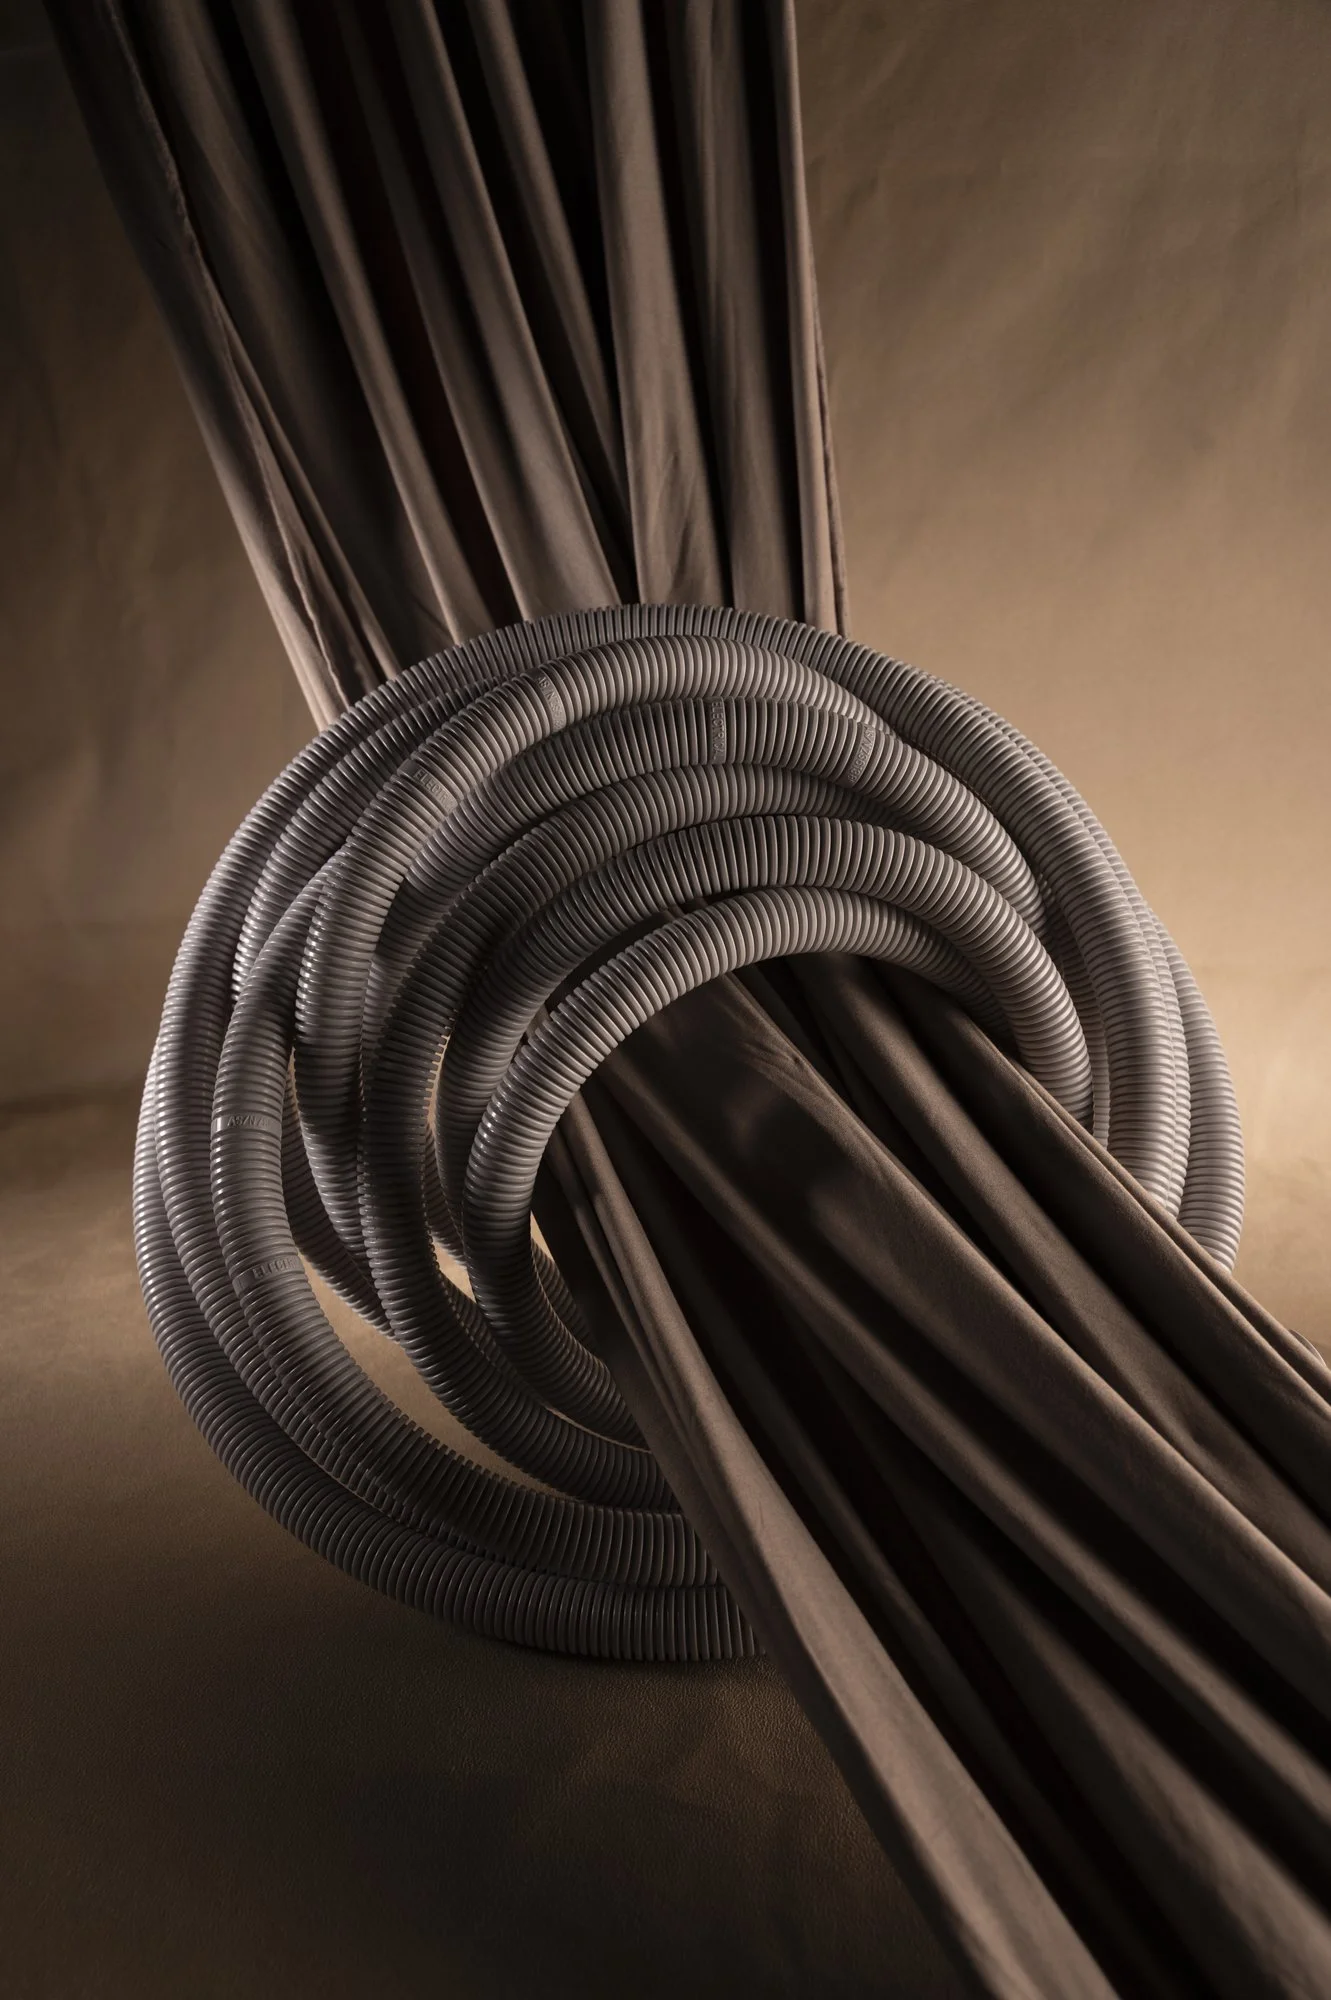
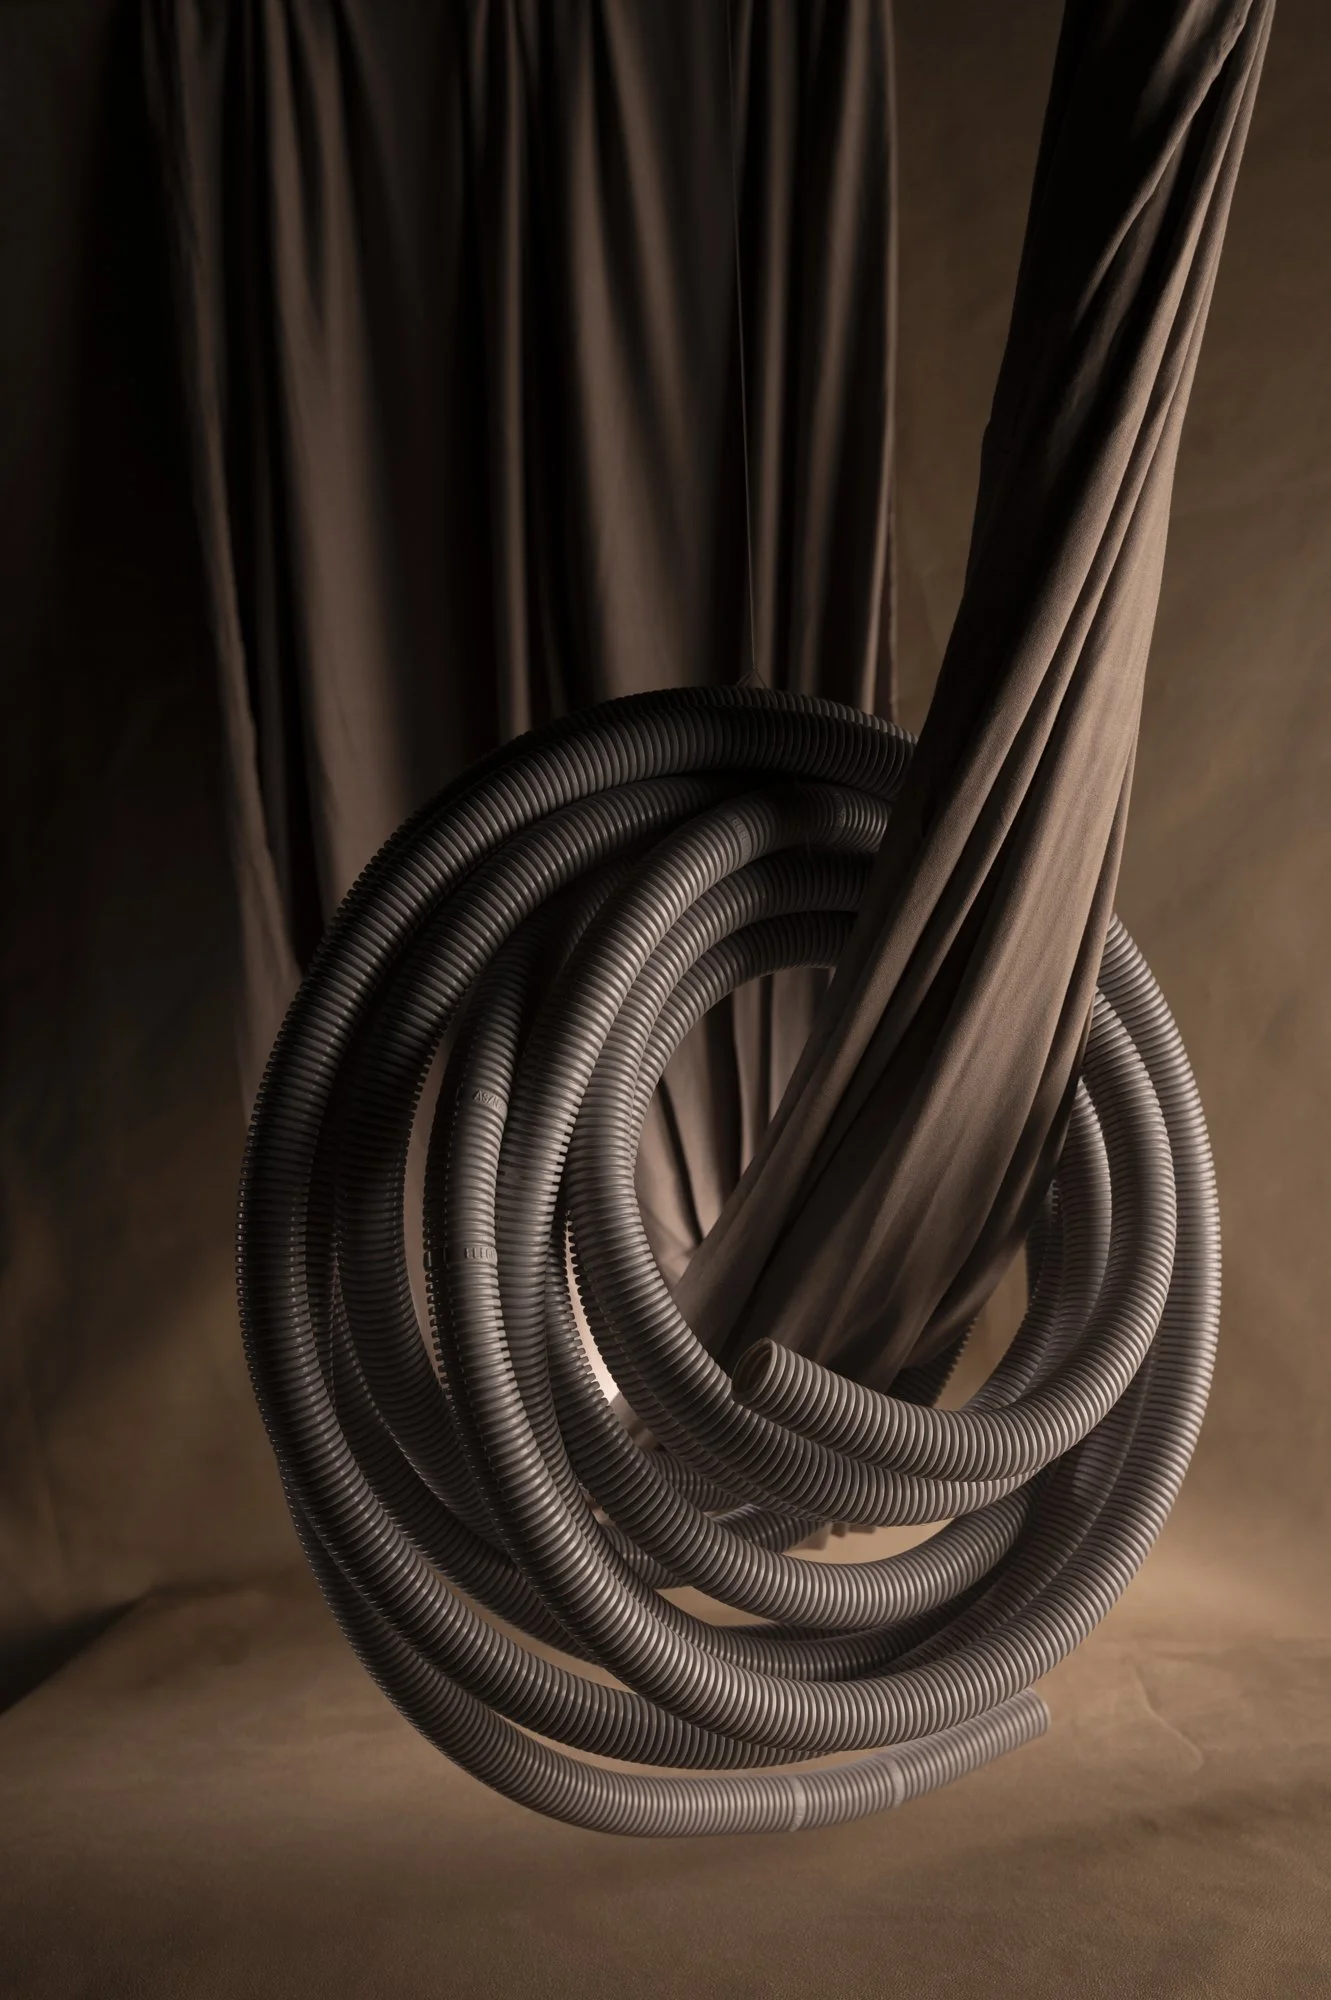
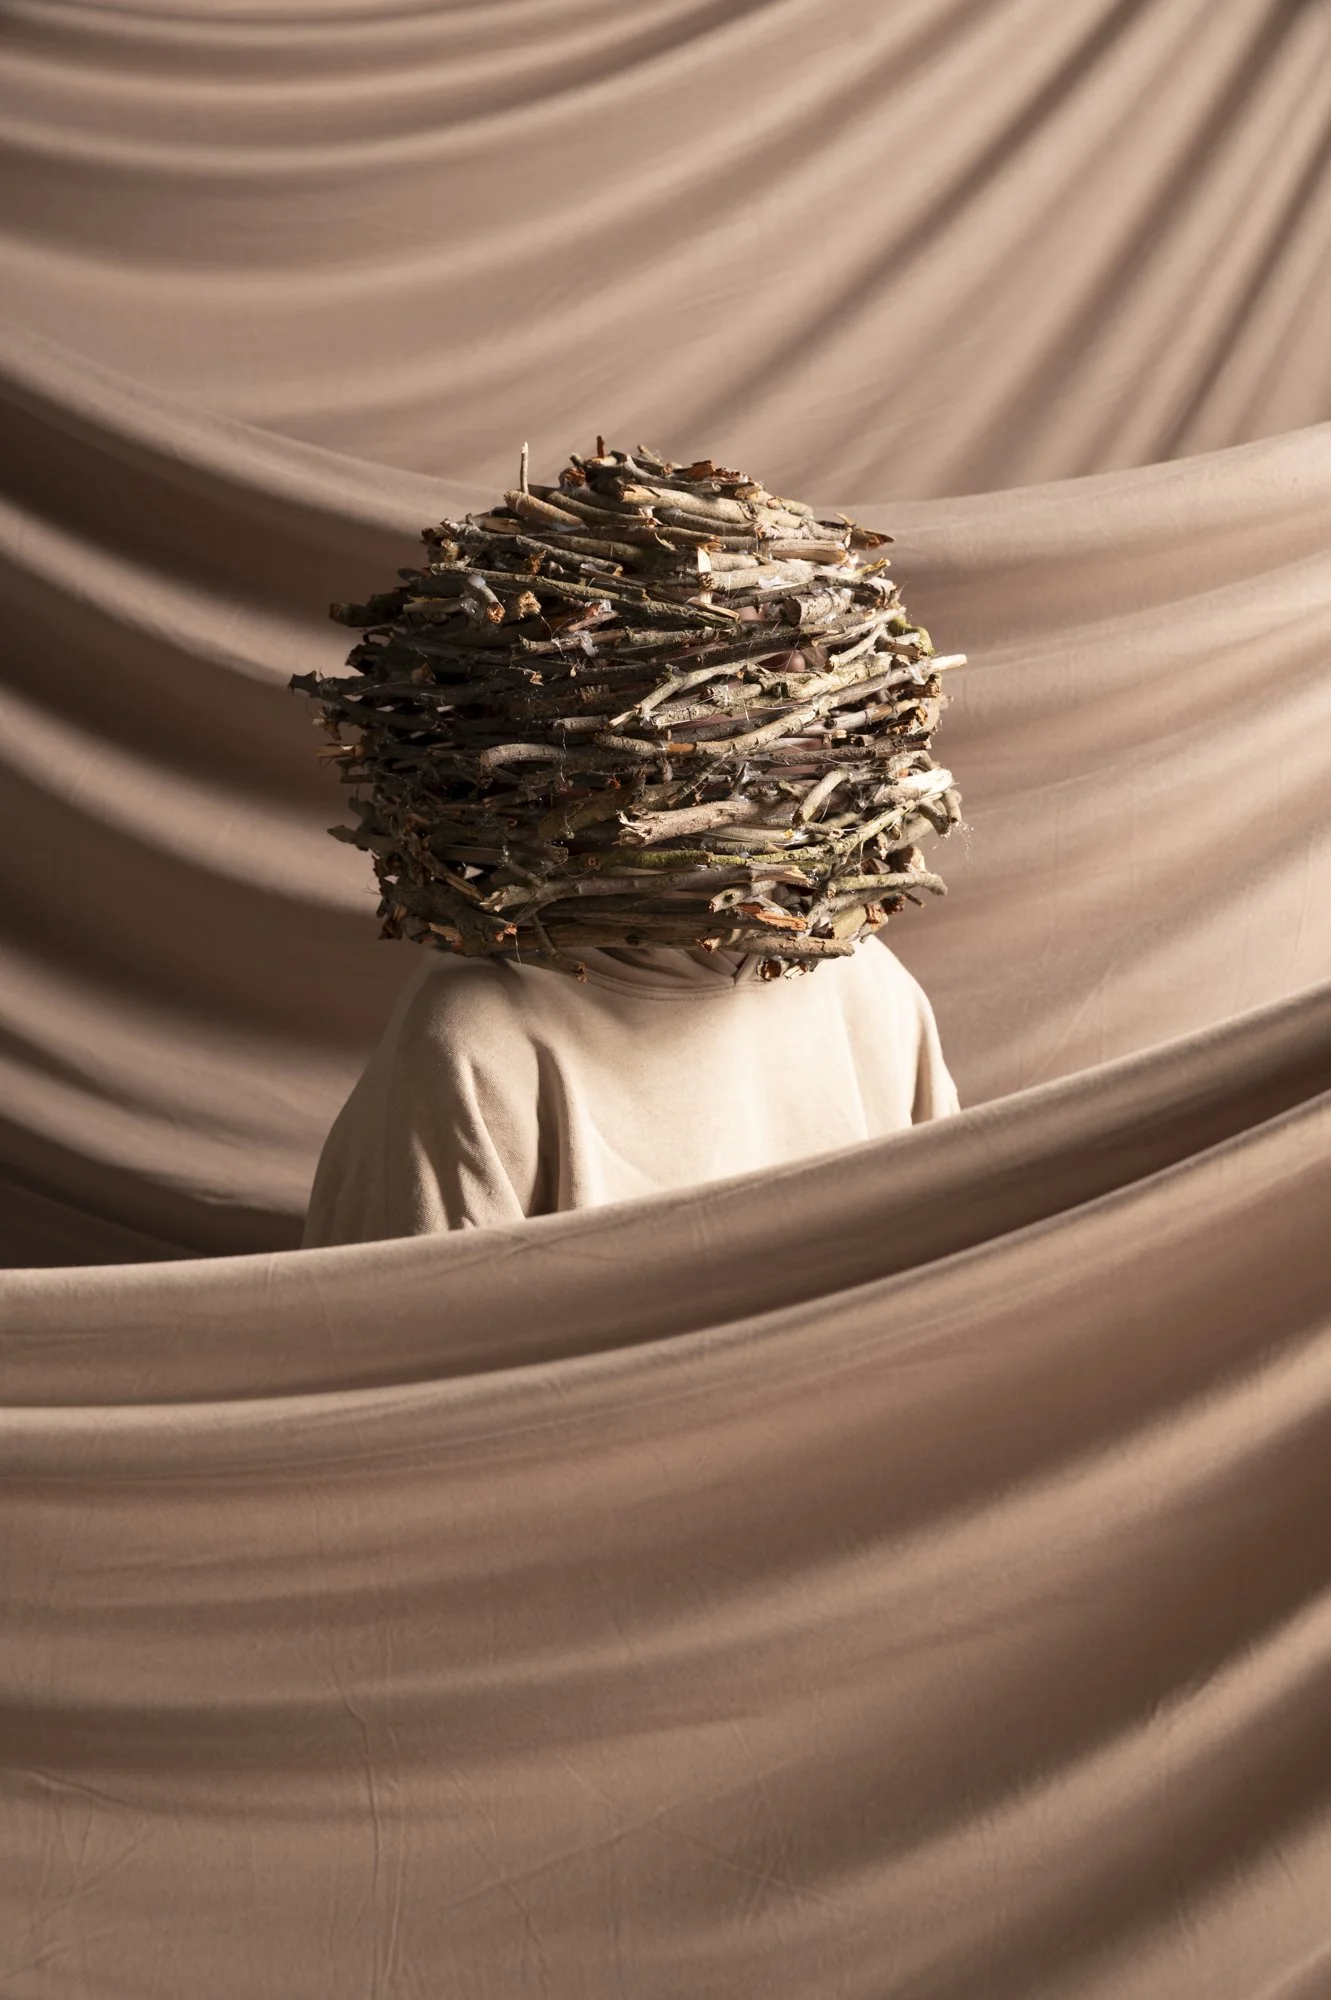
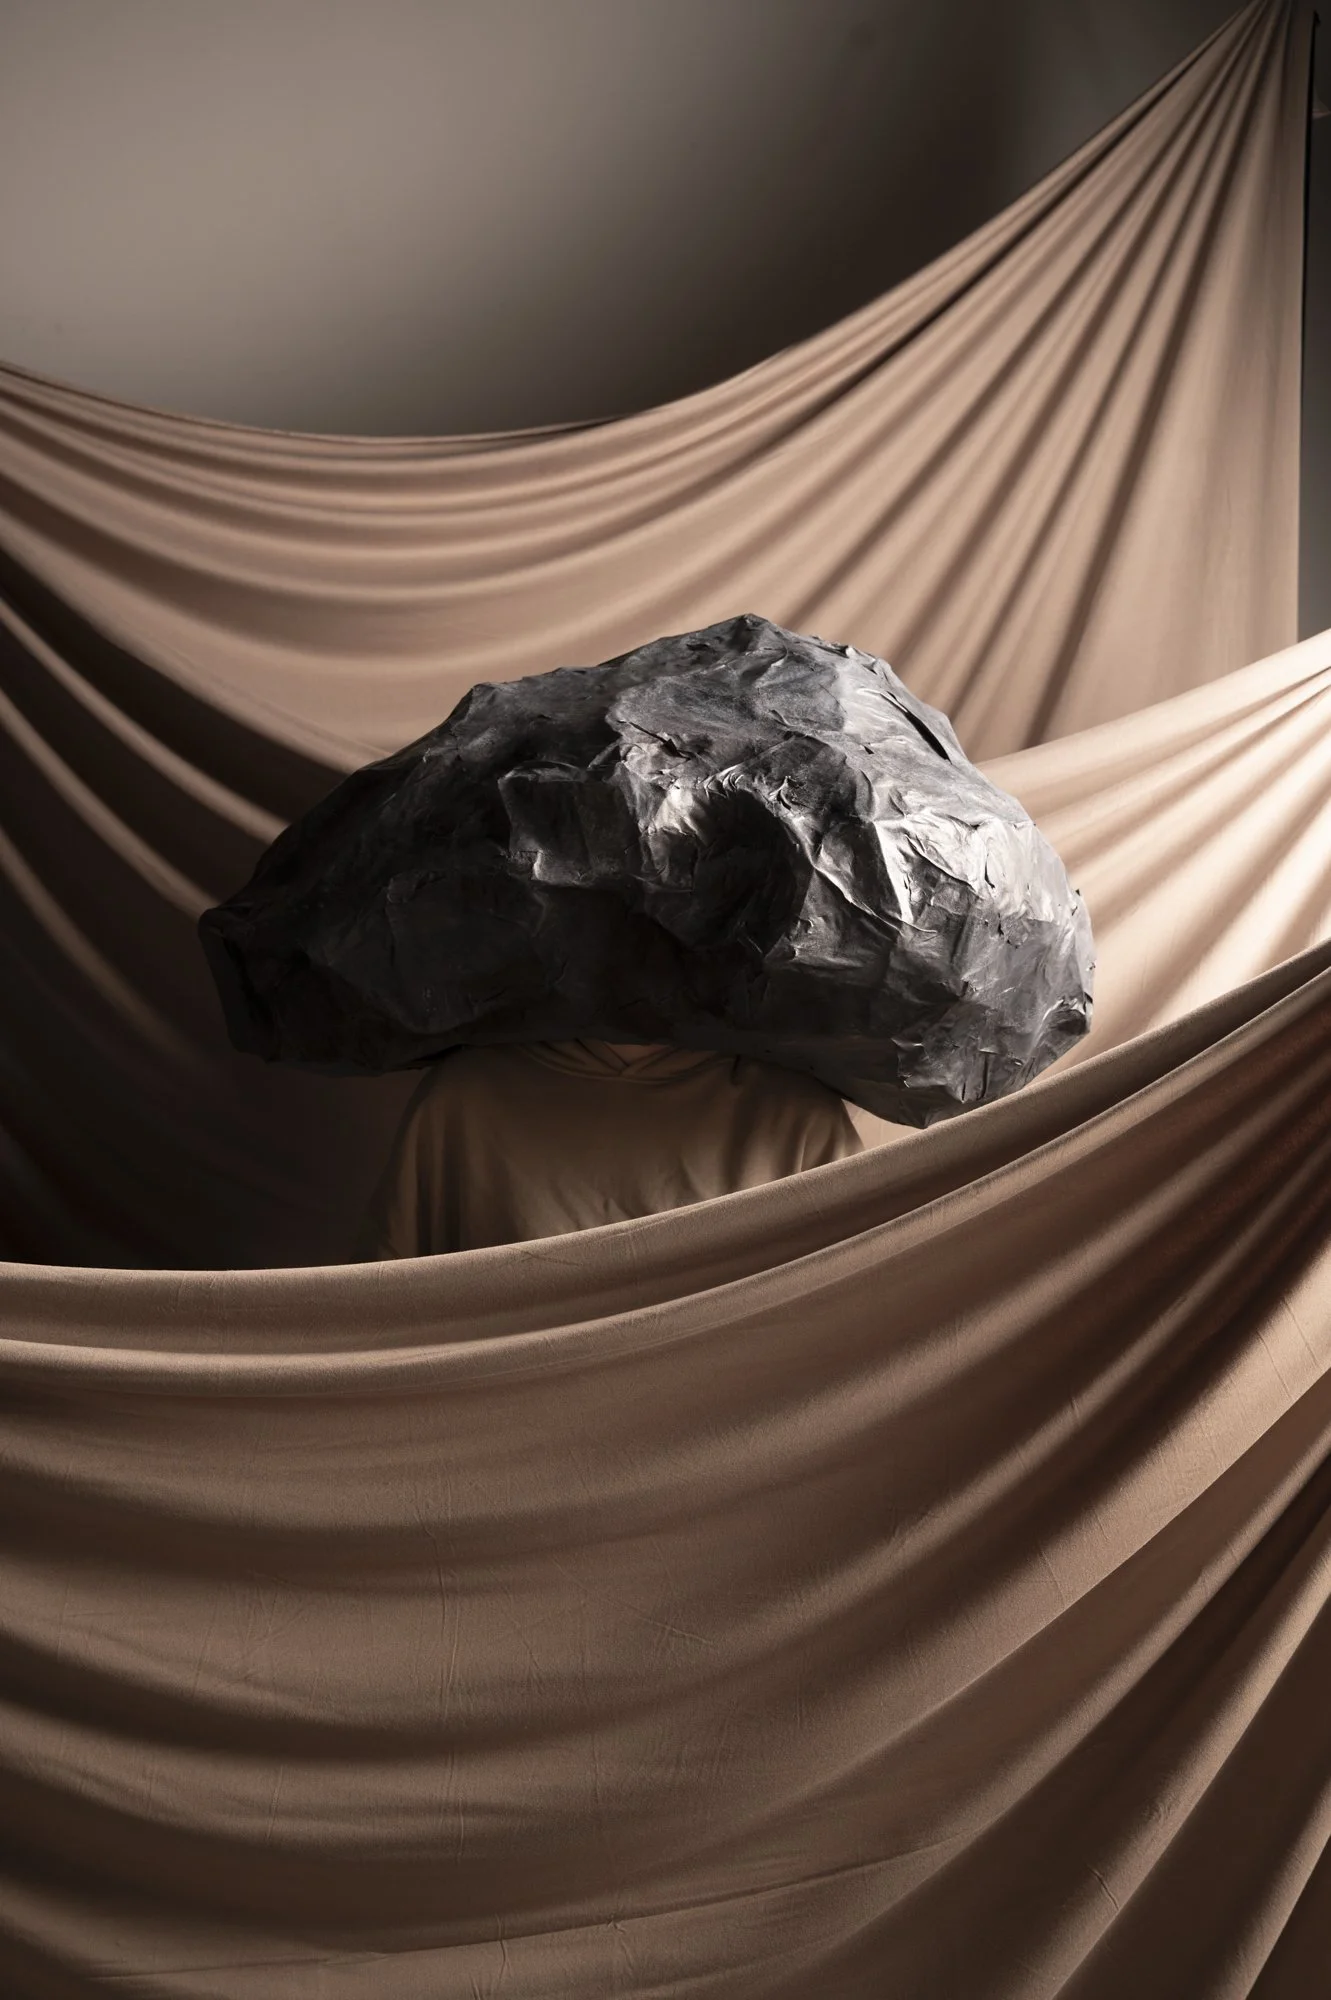
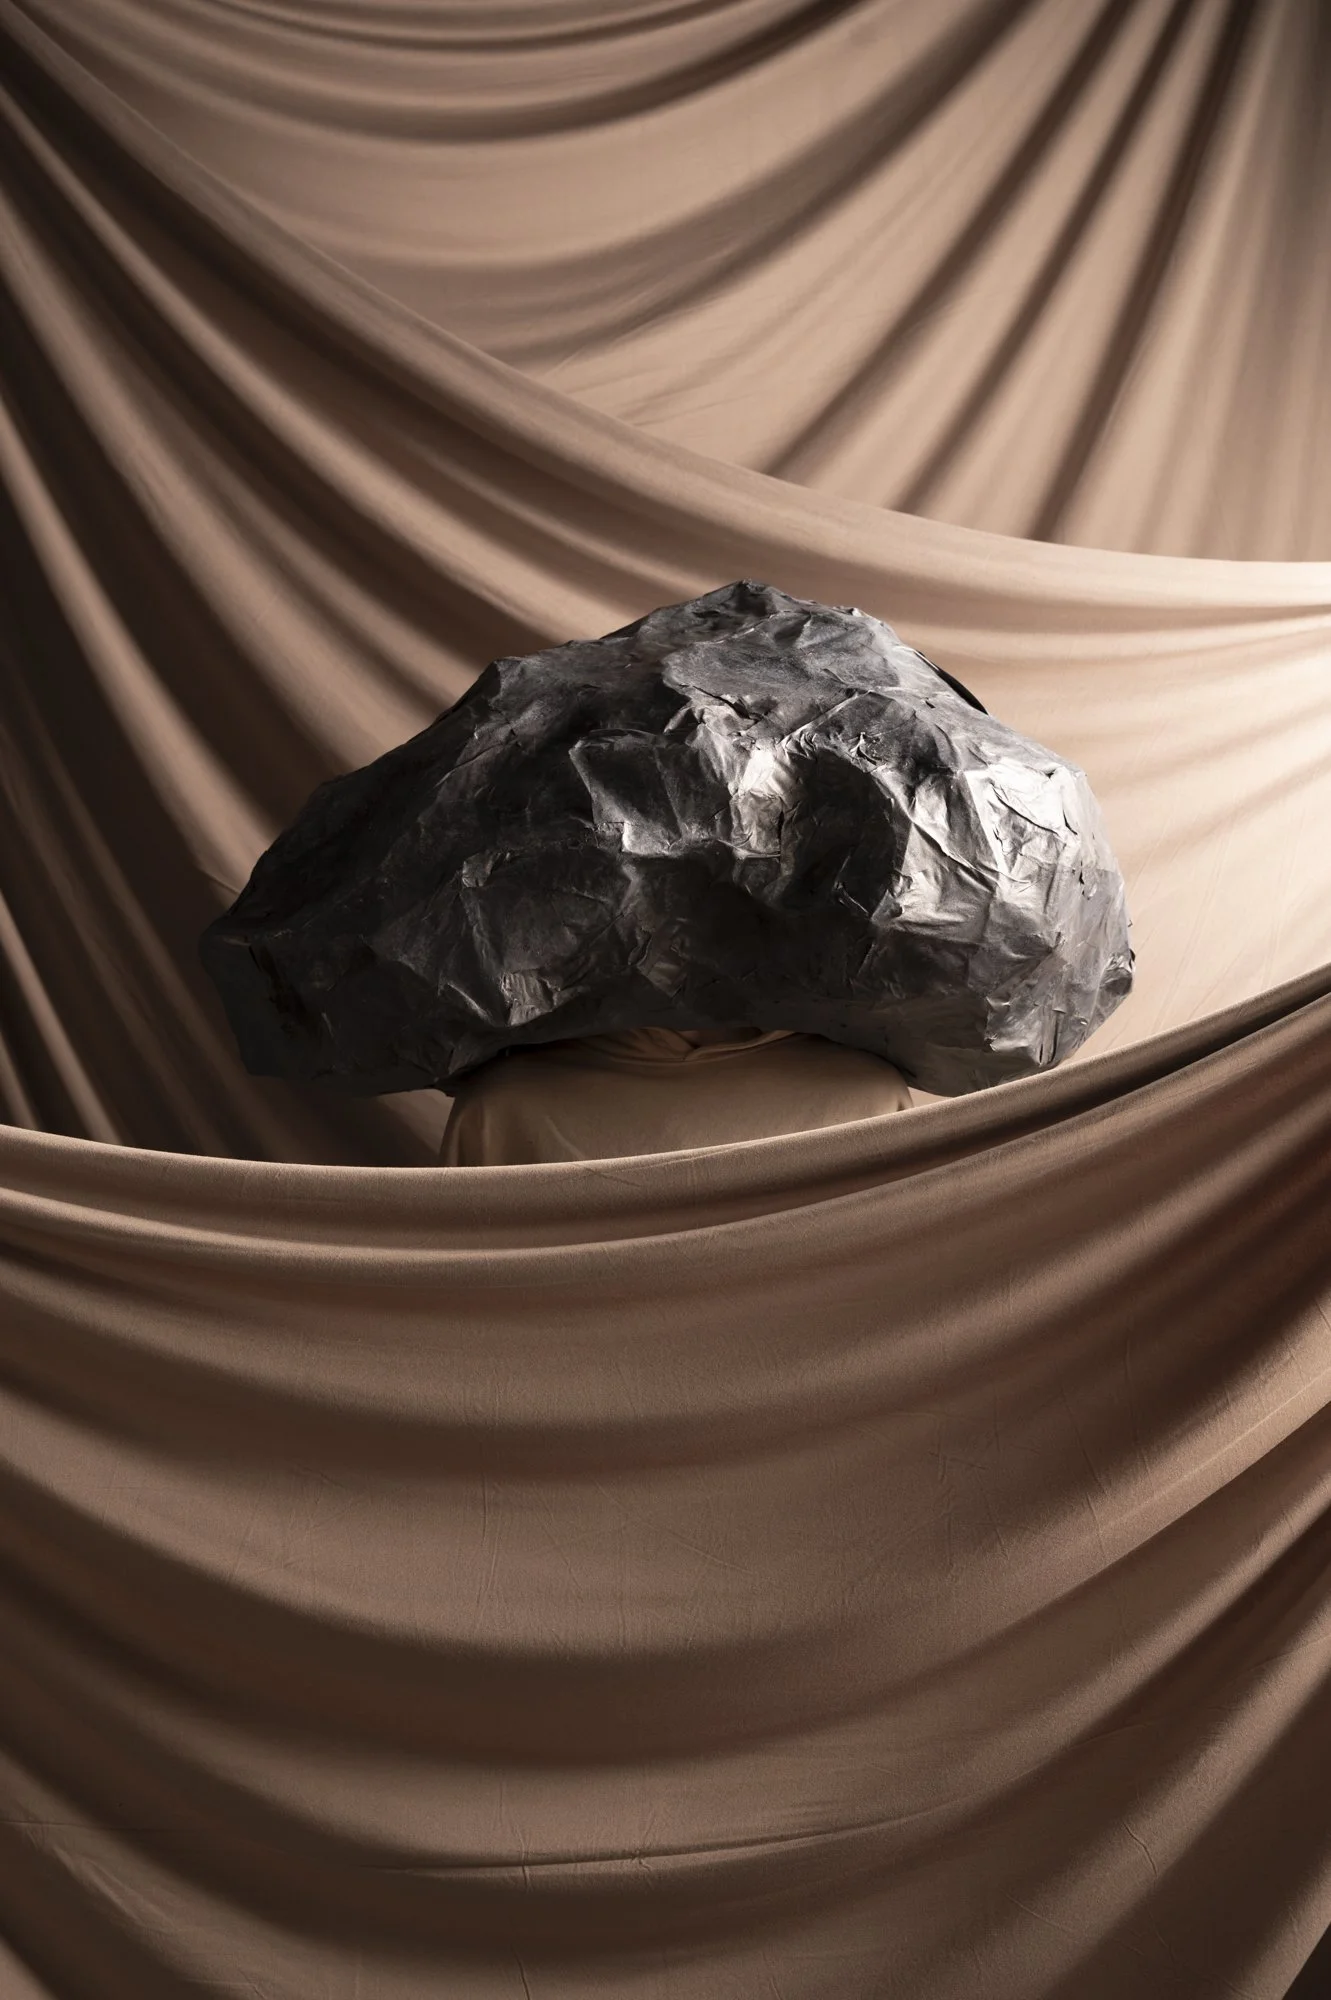
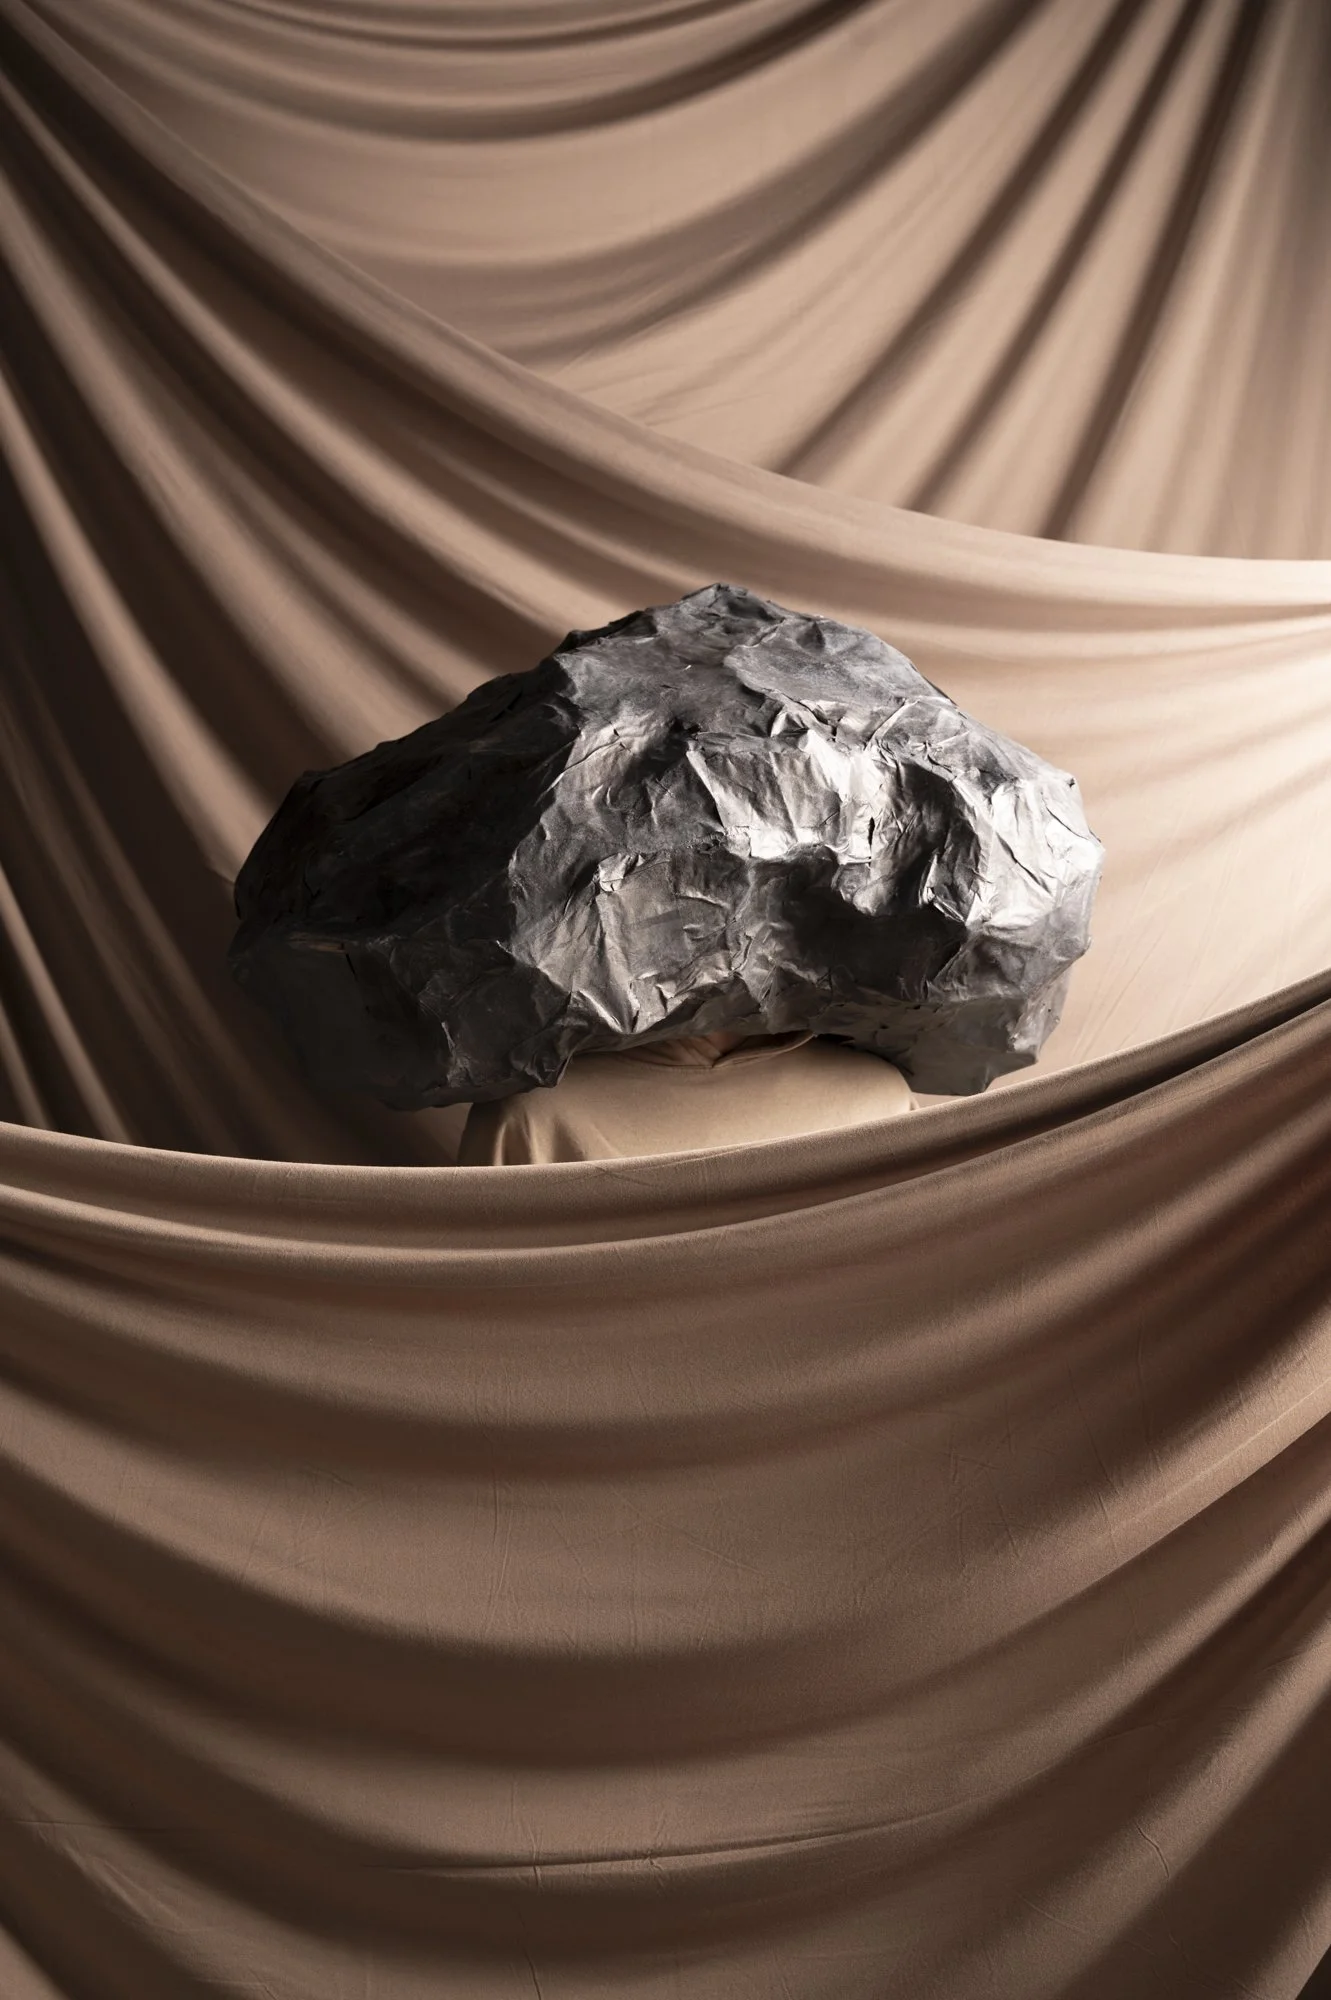
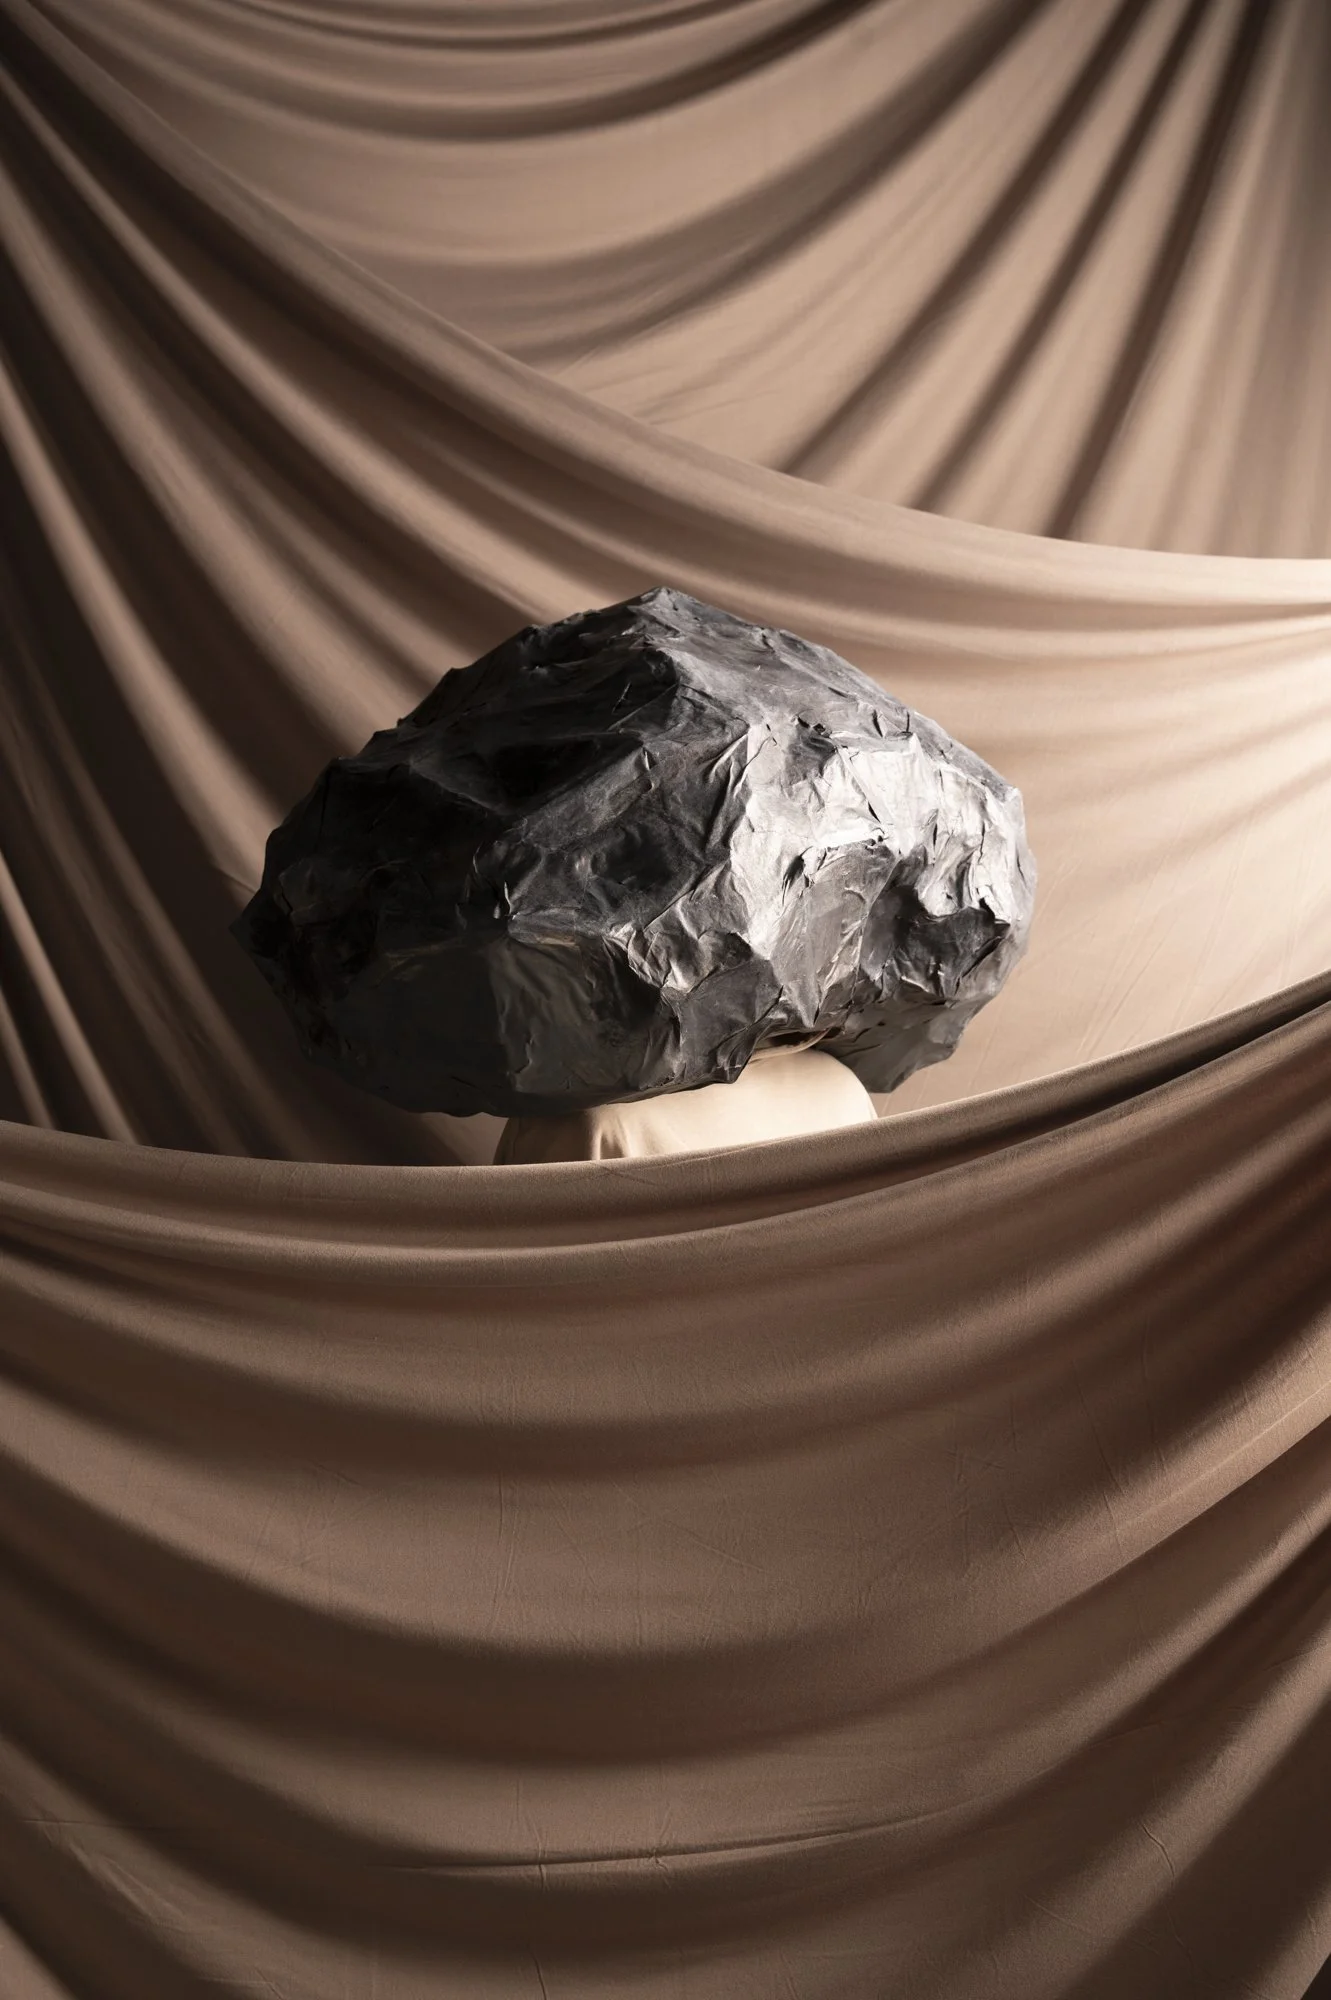
Shoot 9
Details:
When: 25/11 AM
Where: PSC Studio
Lighting: 4 x Elinchrom Lights
2 x Small Strip Box
1 x Large Strip Box
1 x Small Snoot + Grid
Shoot Plan:
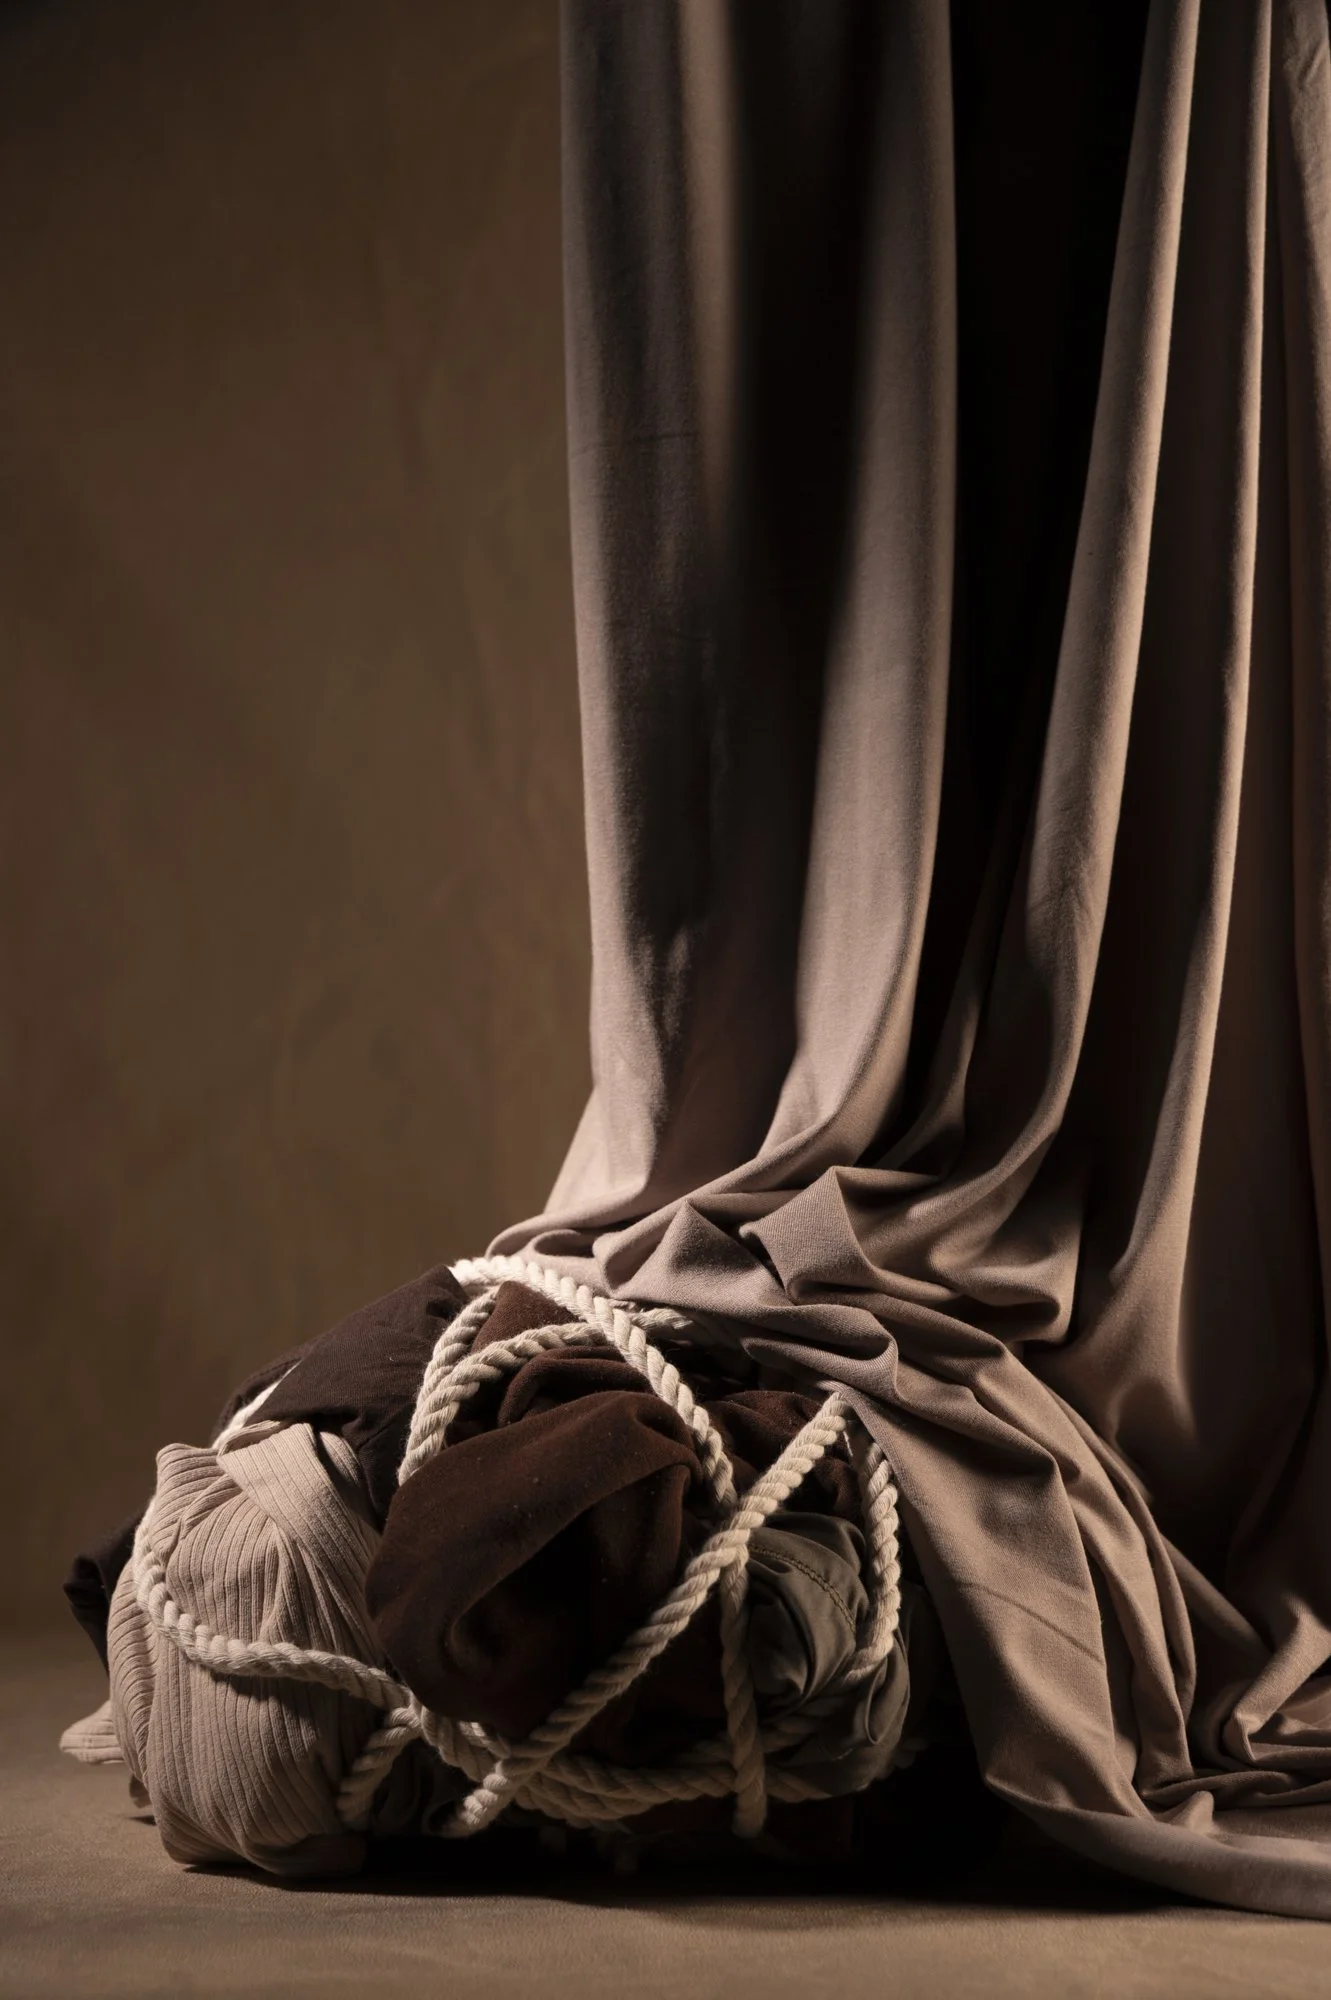
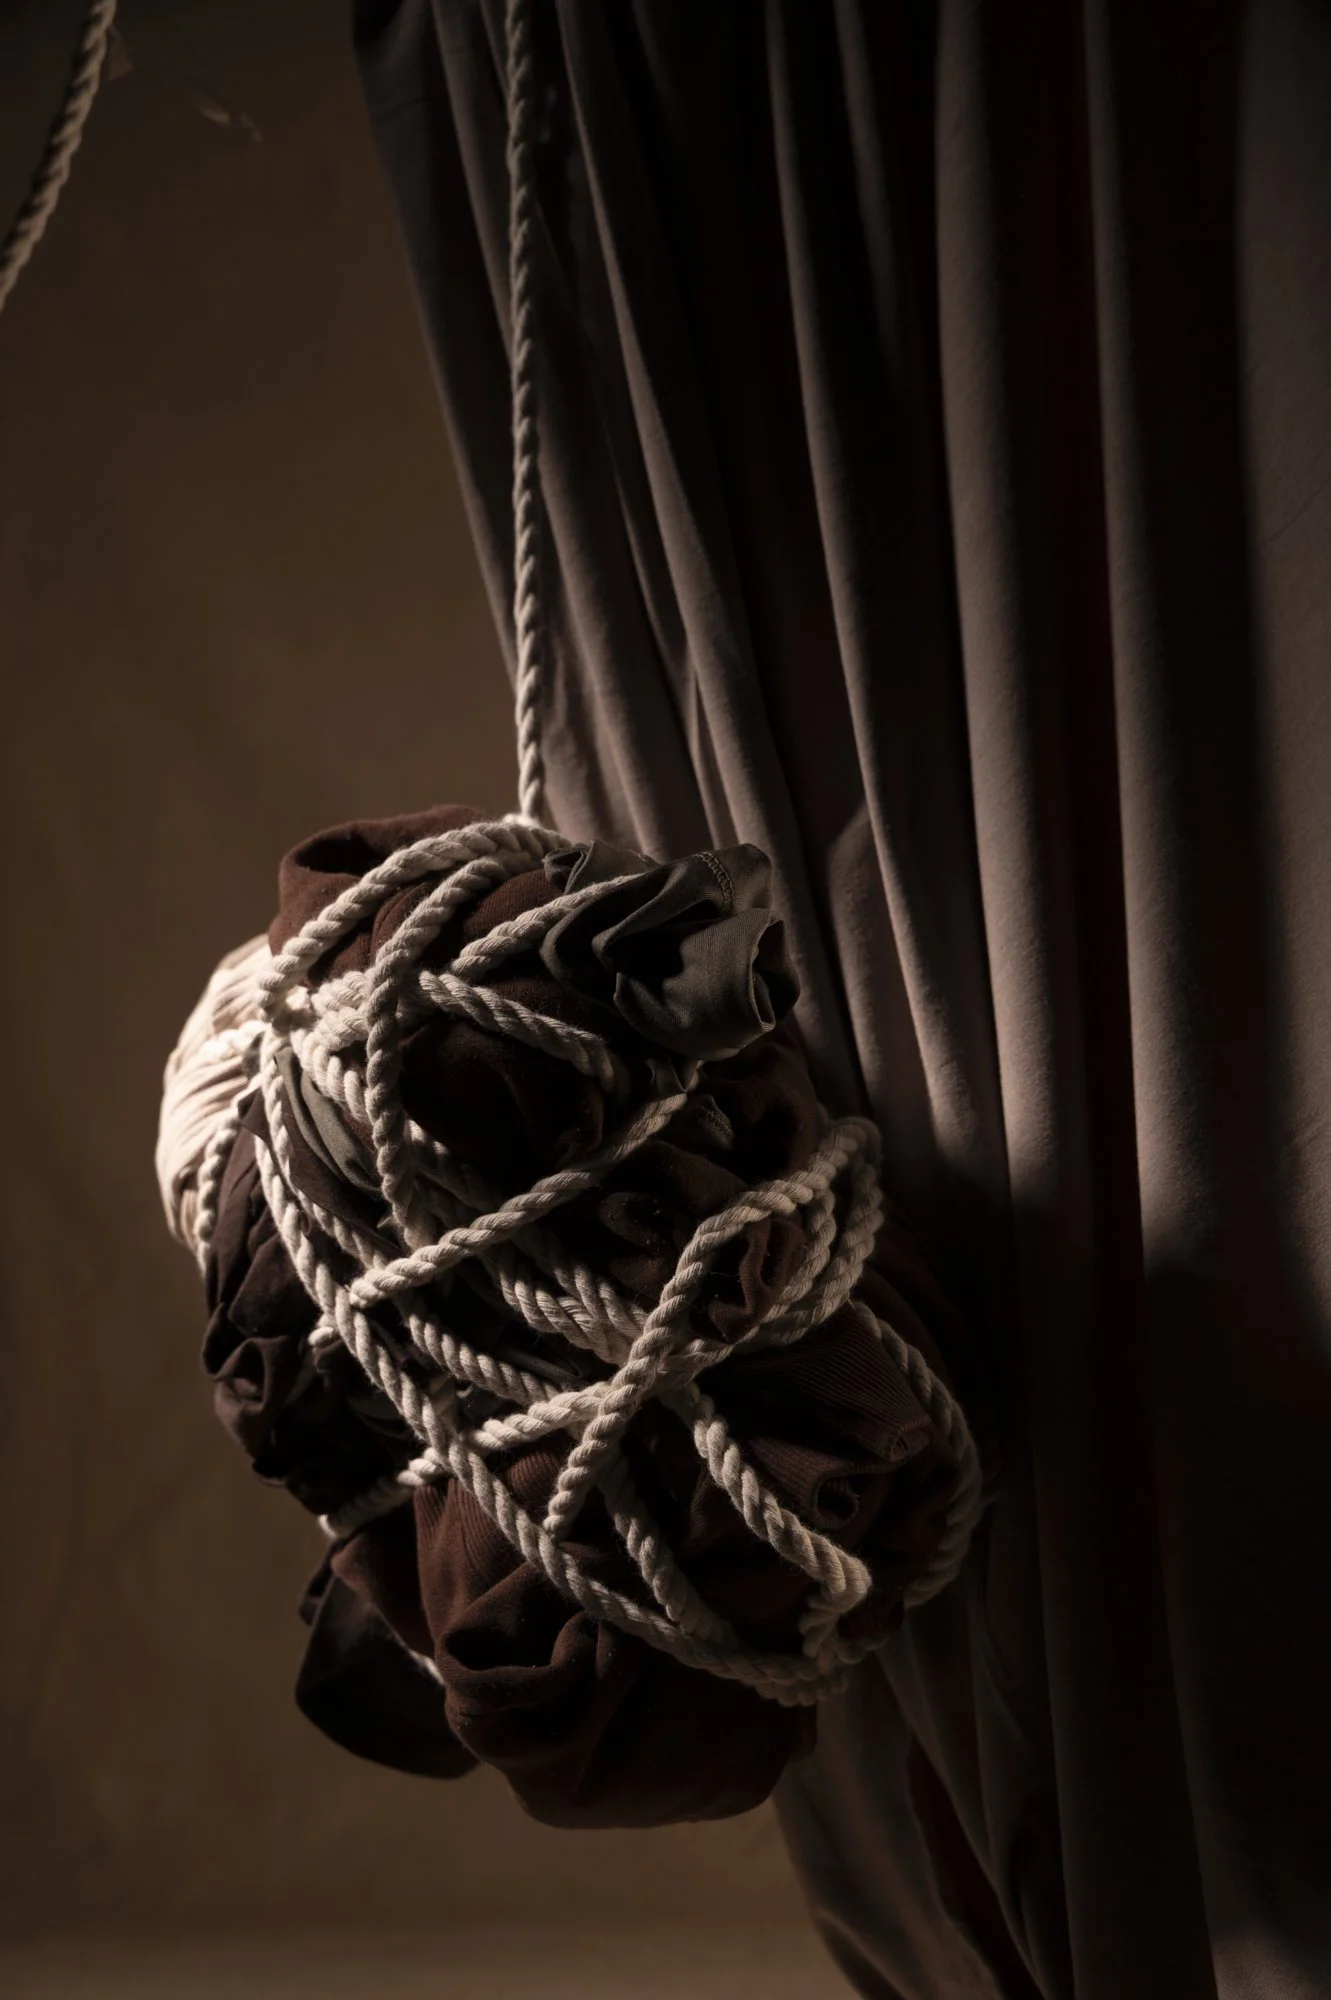
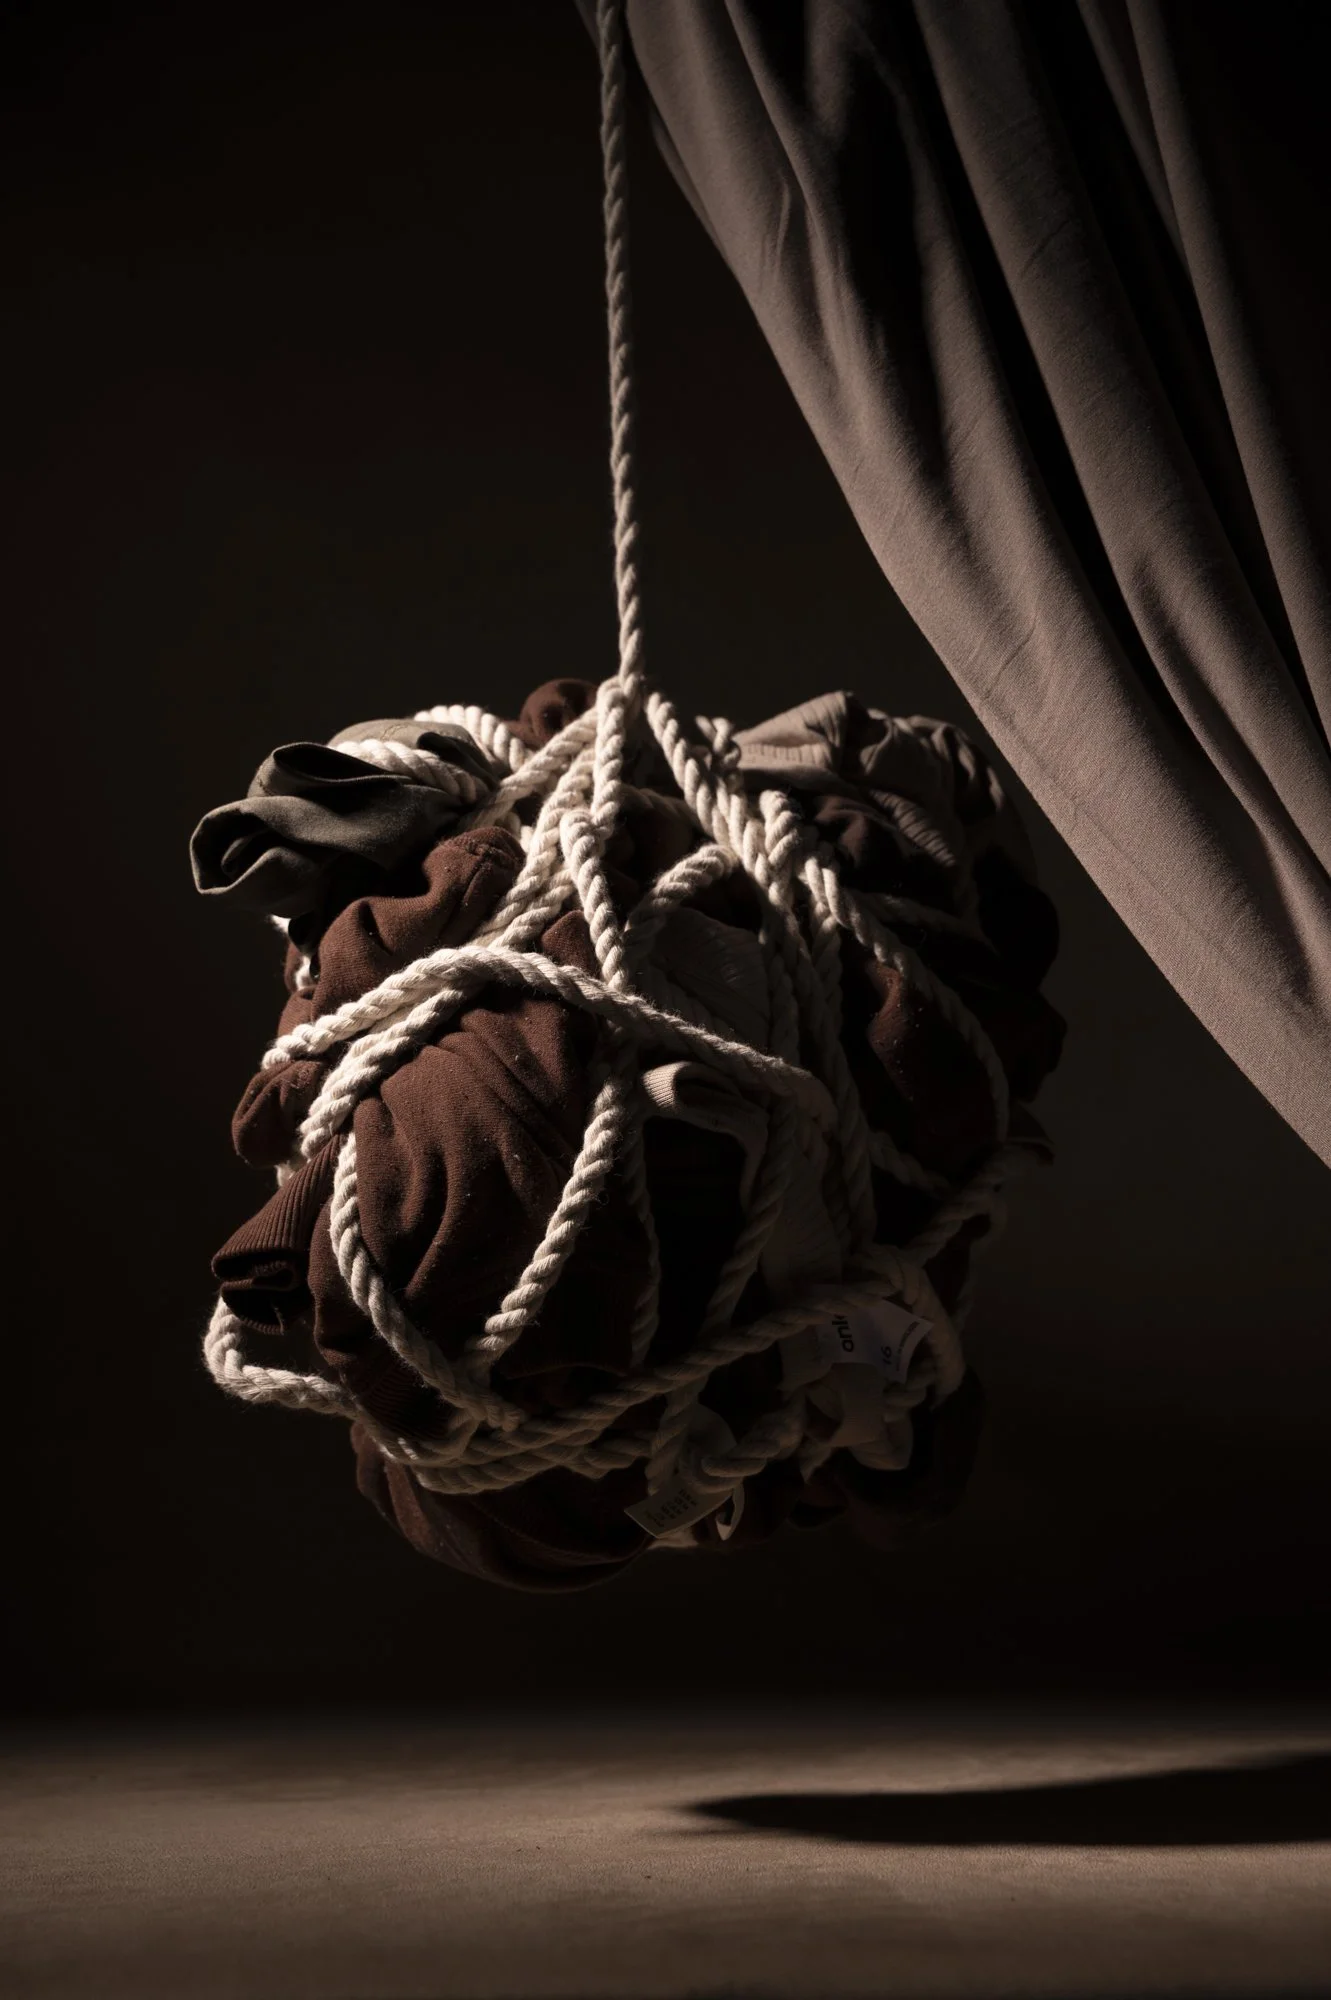
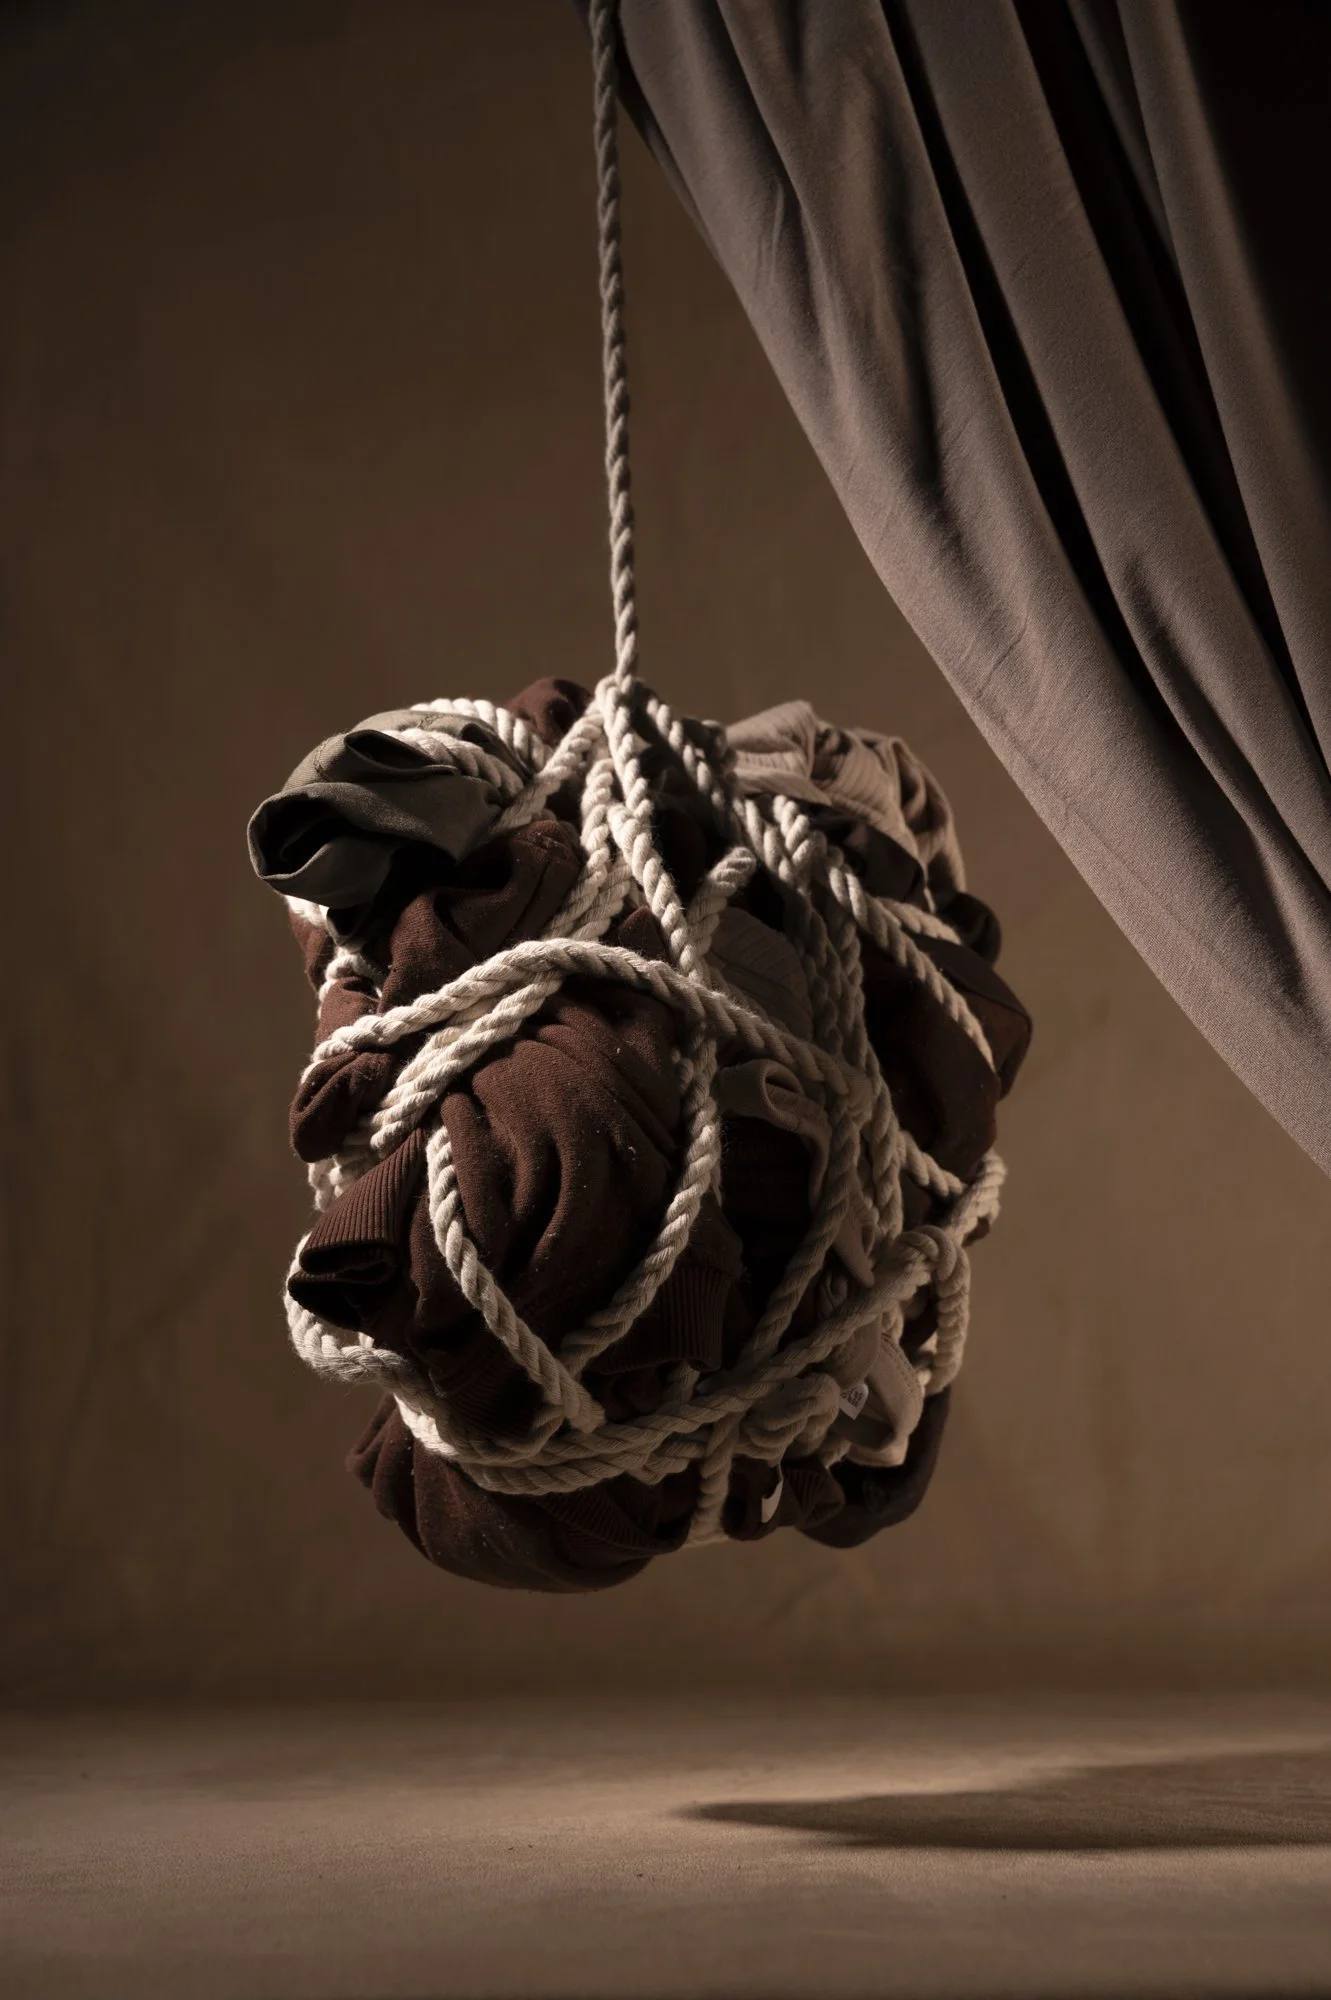
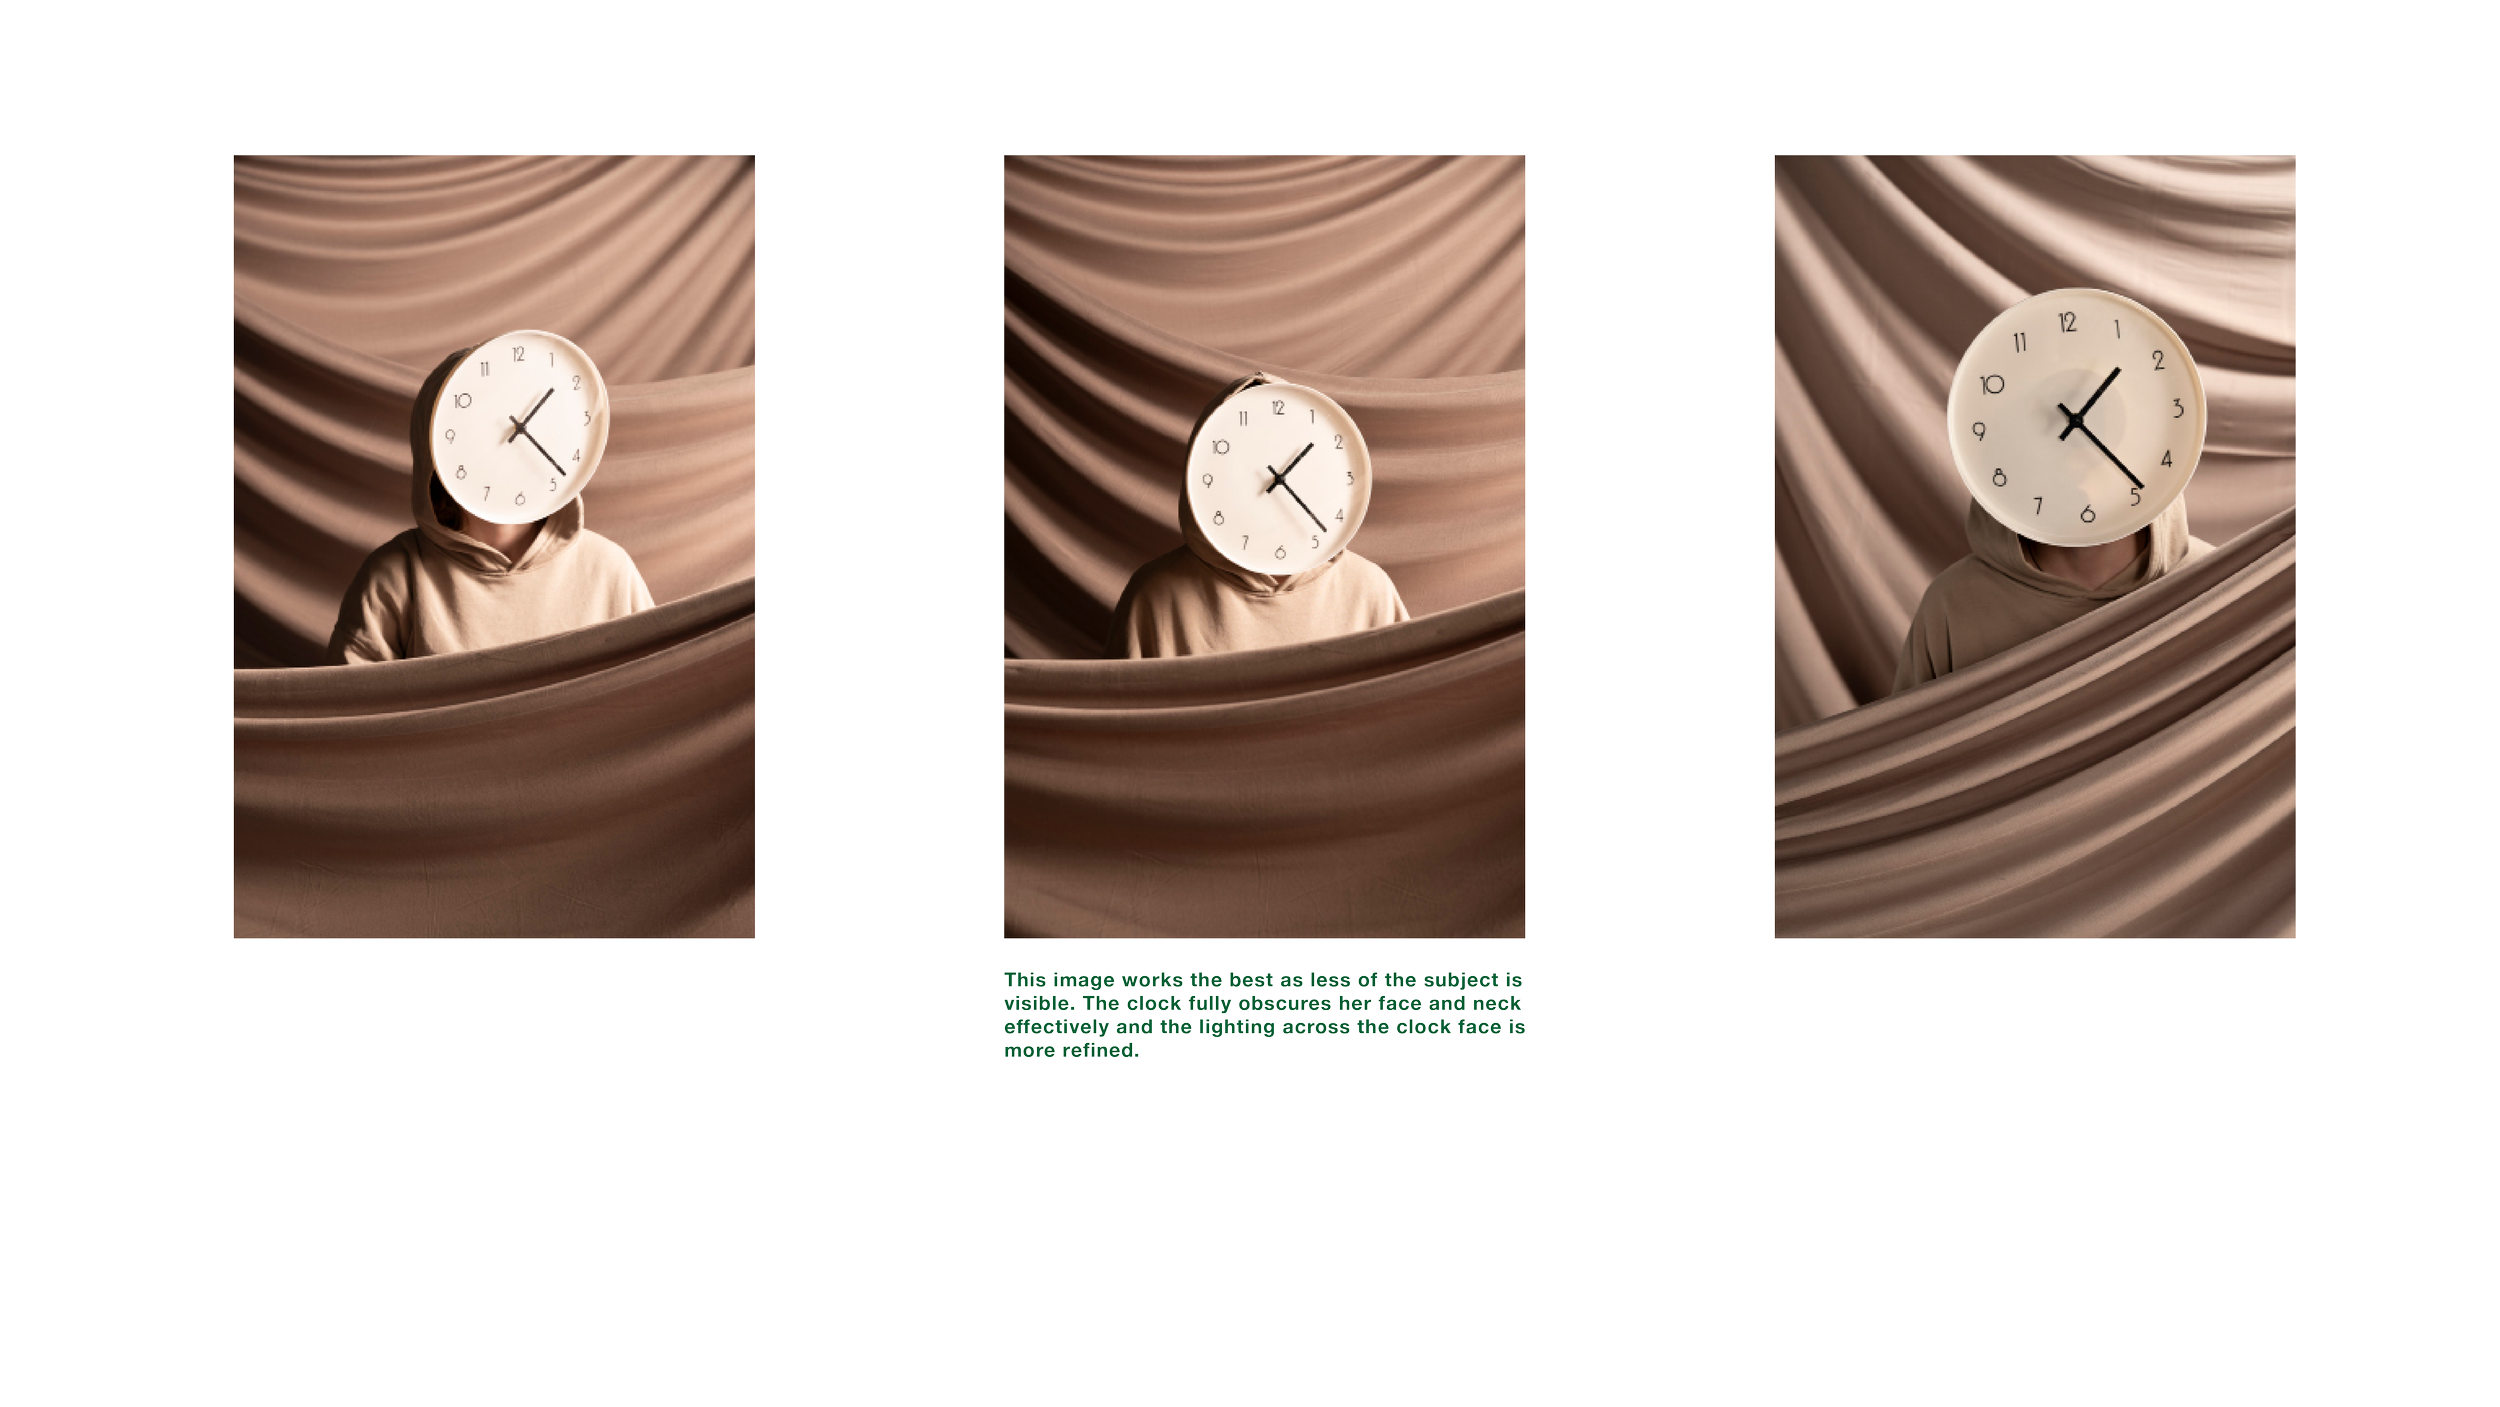
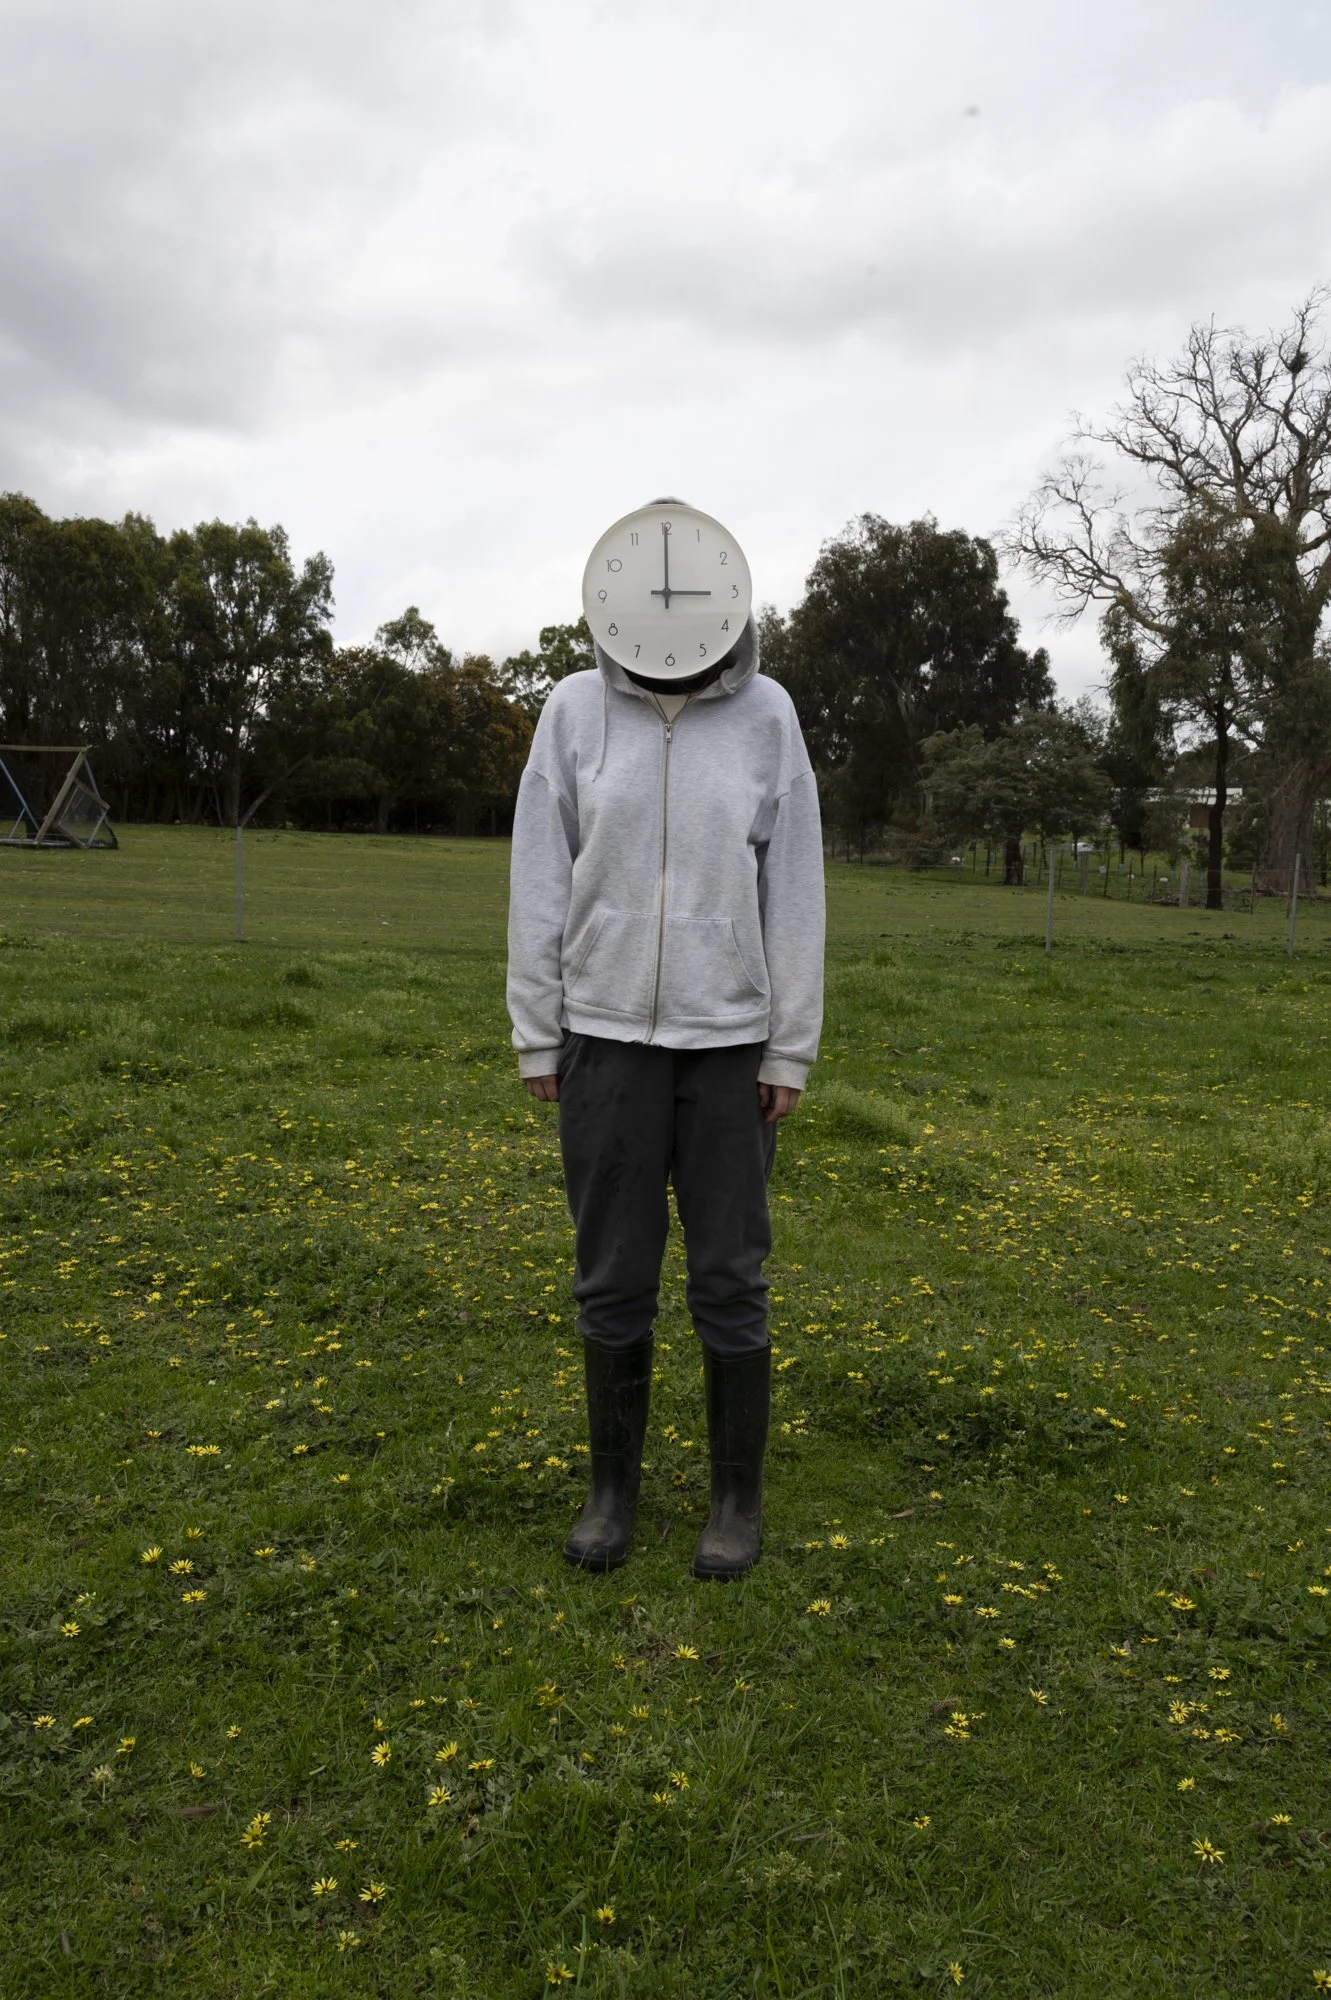
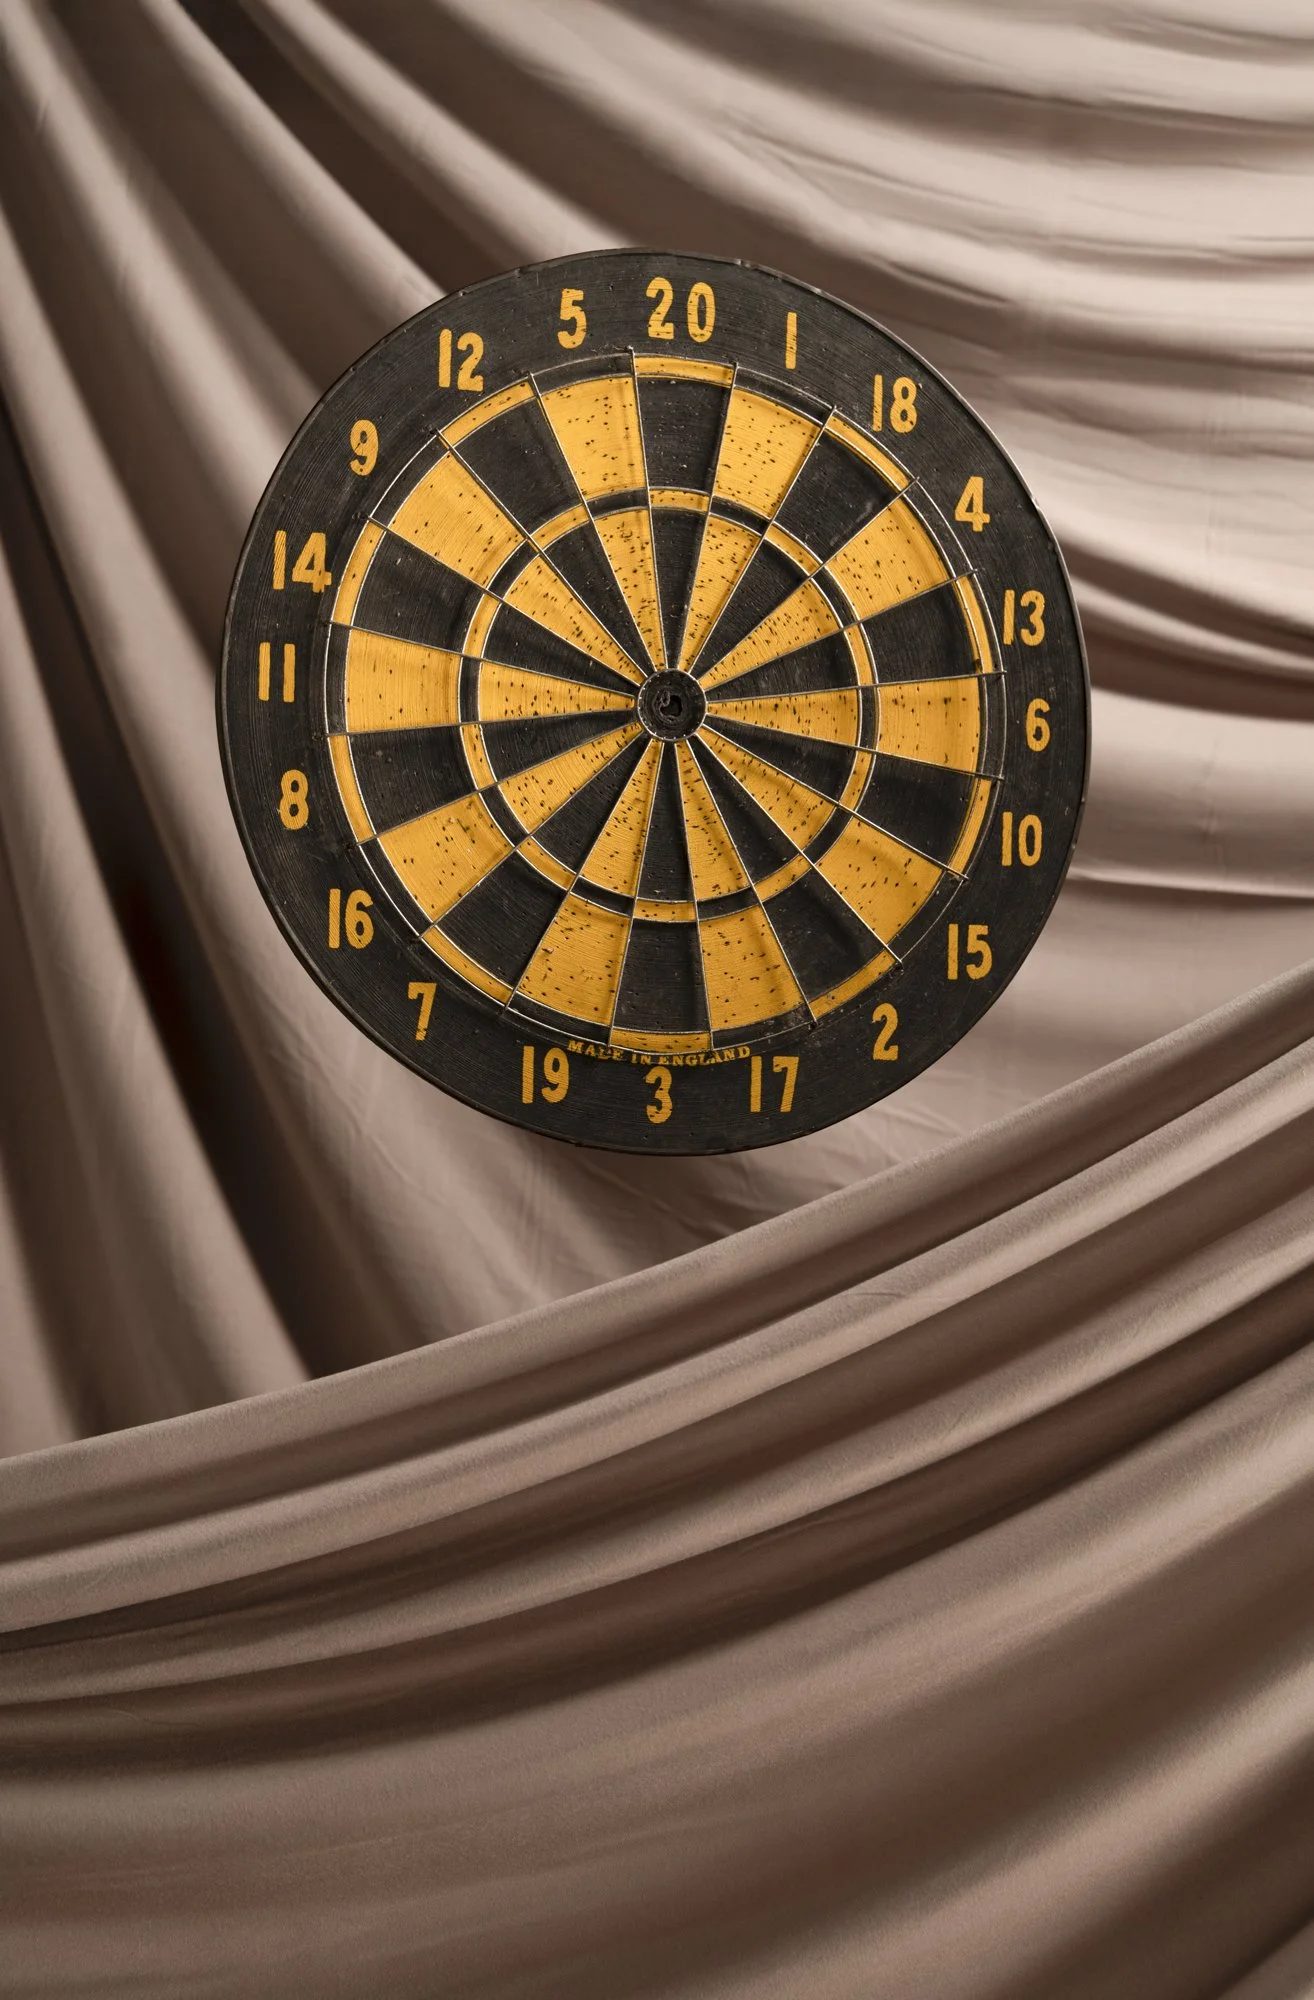
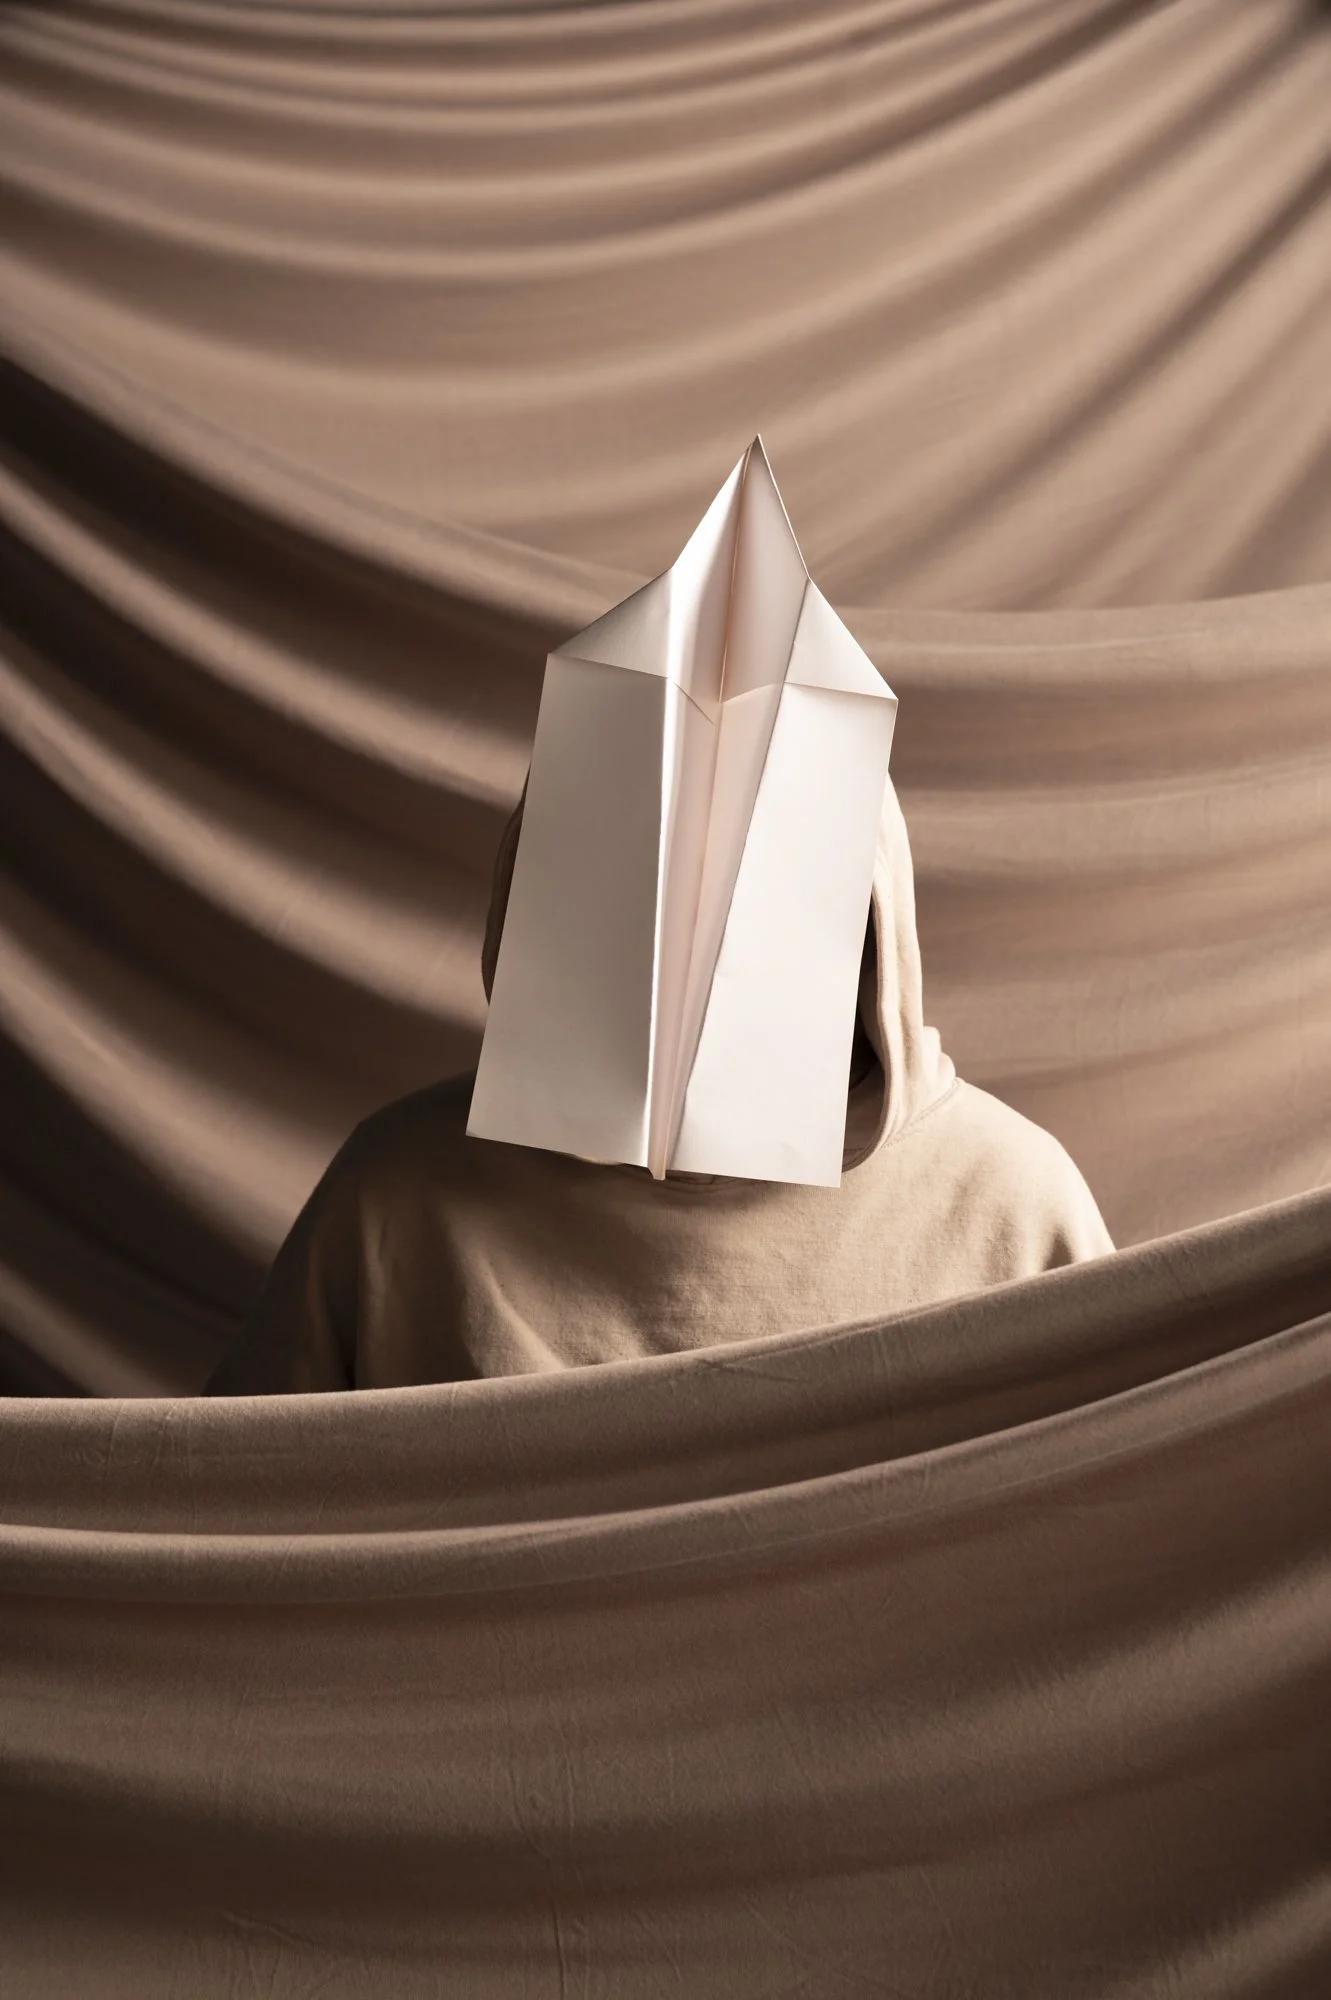
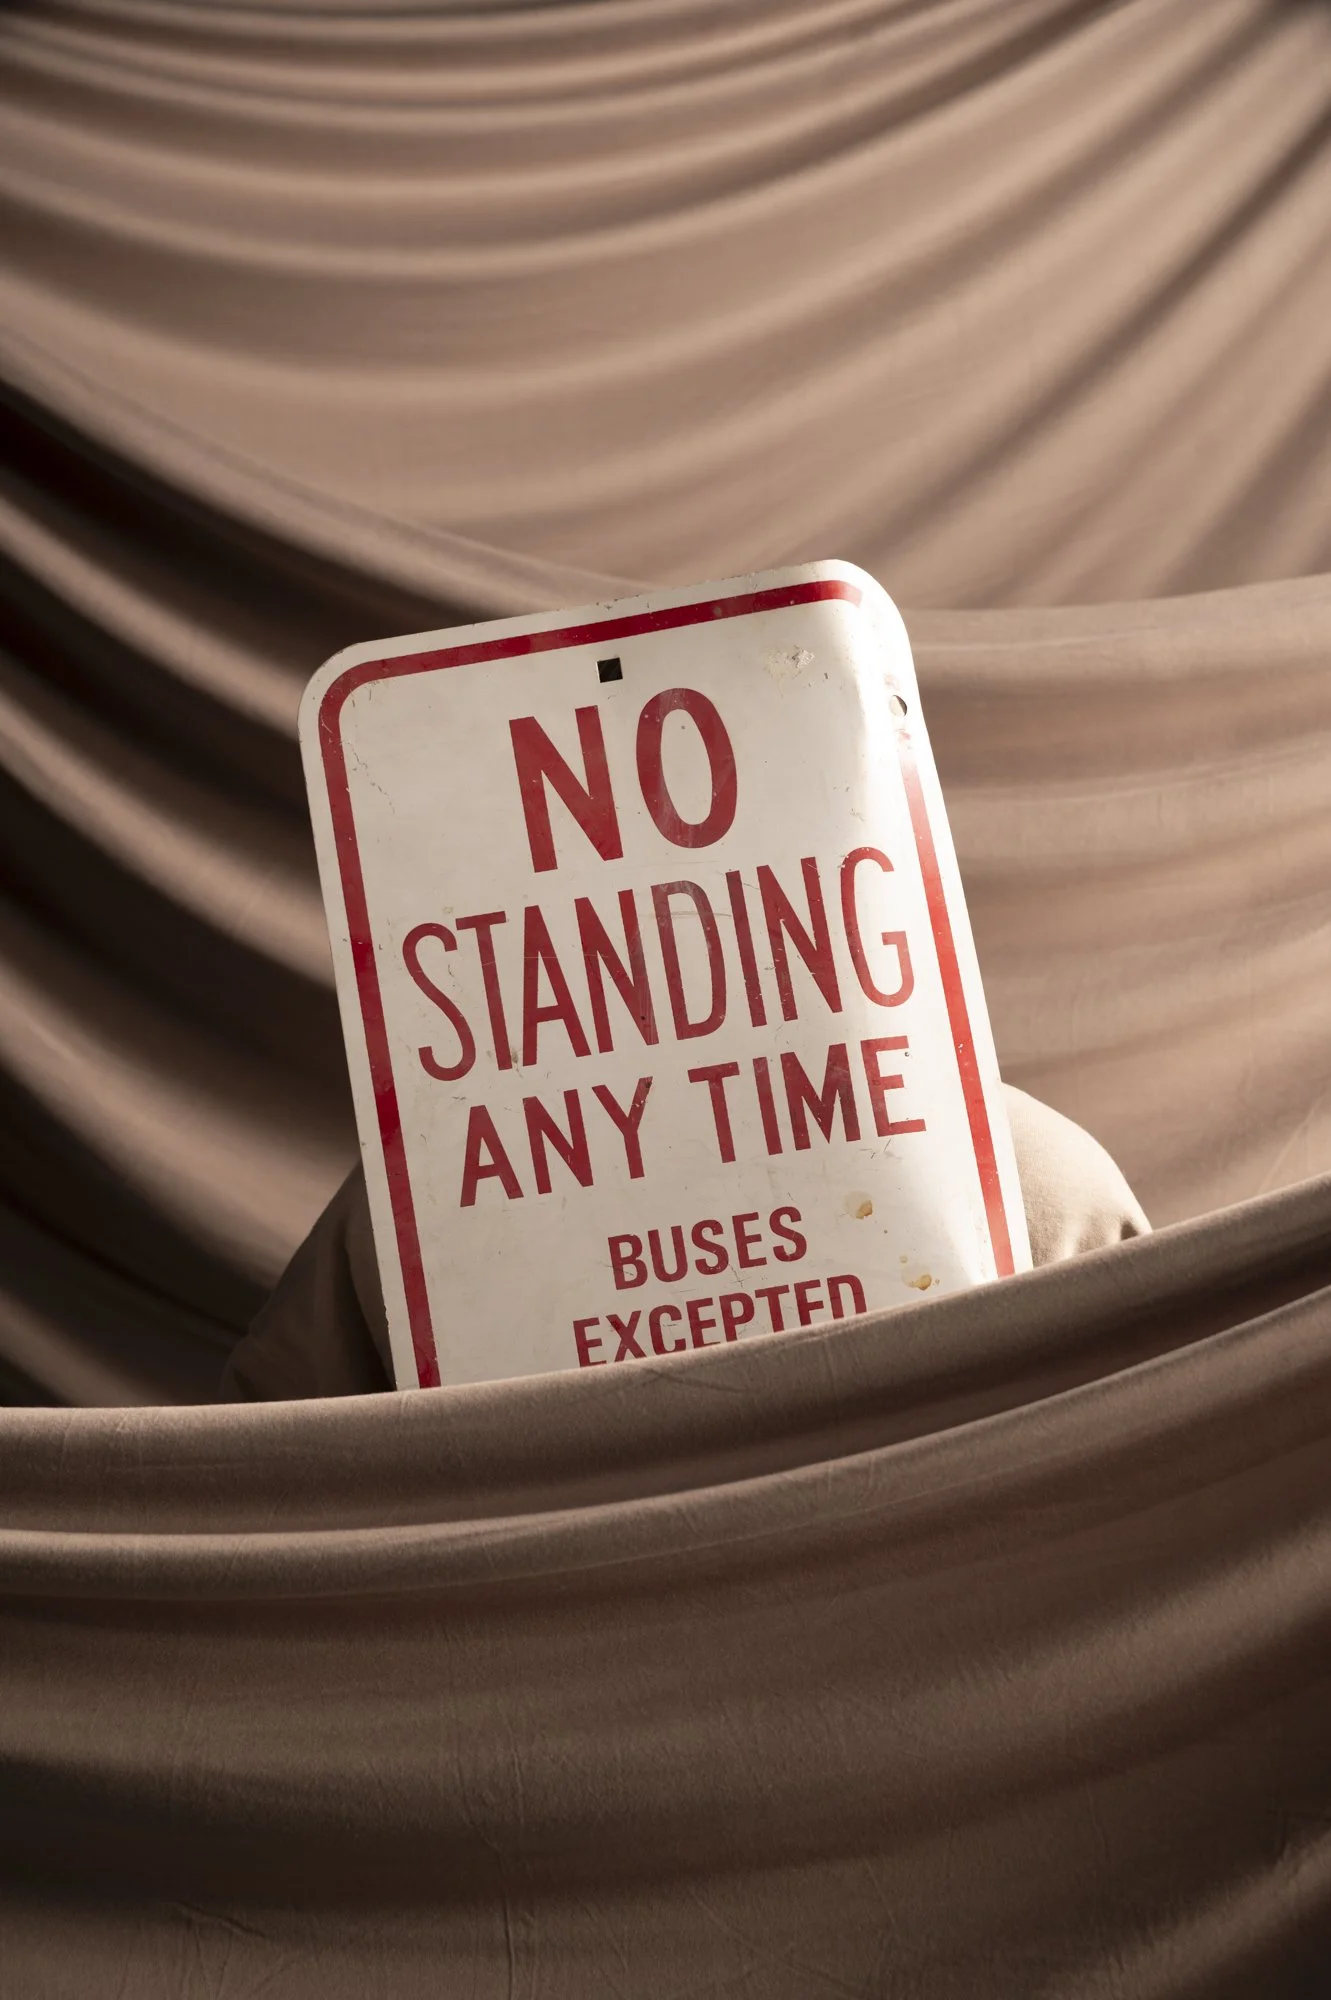
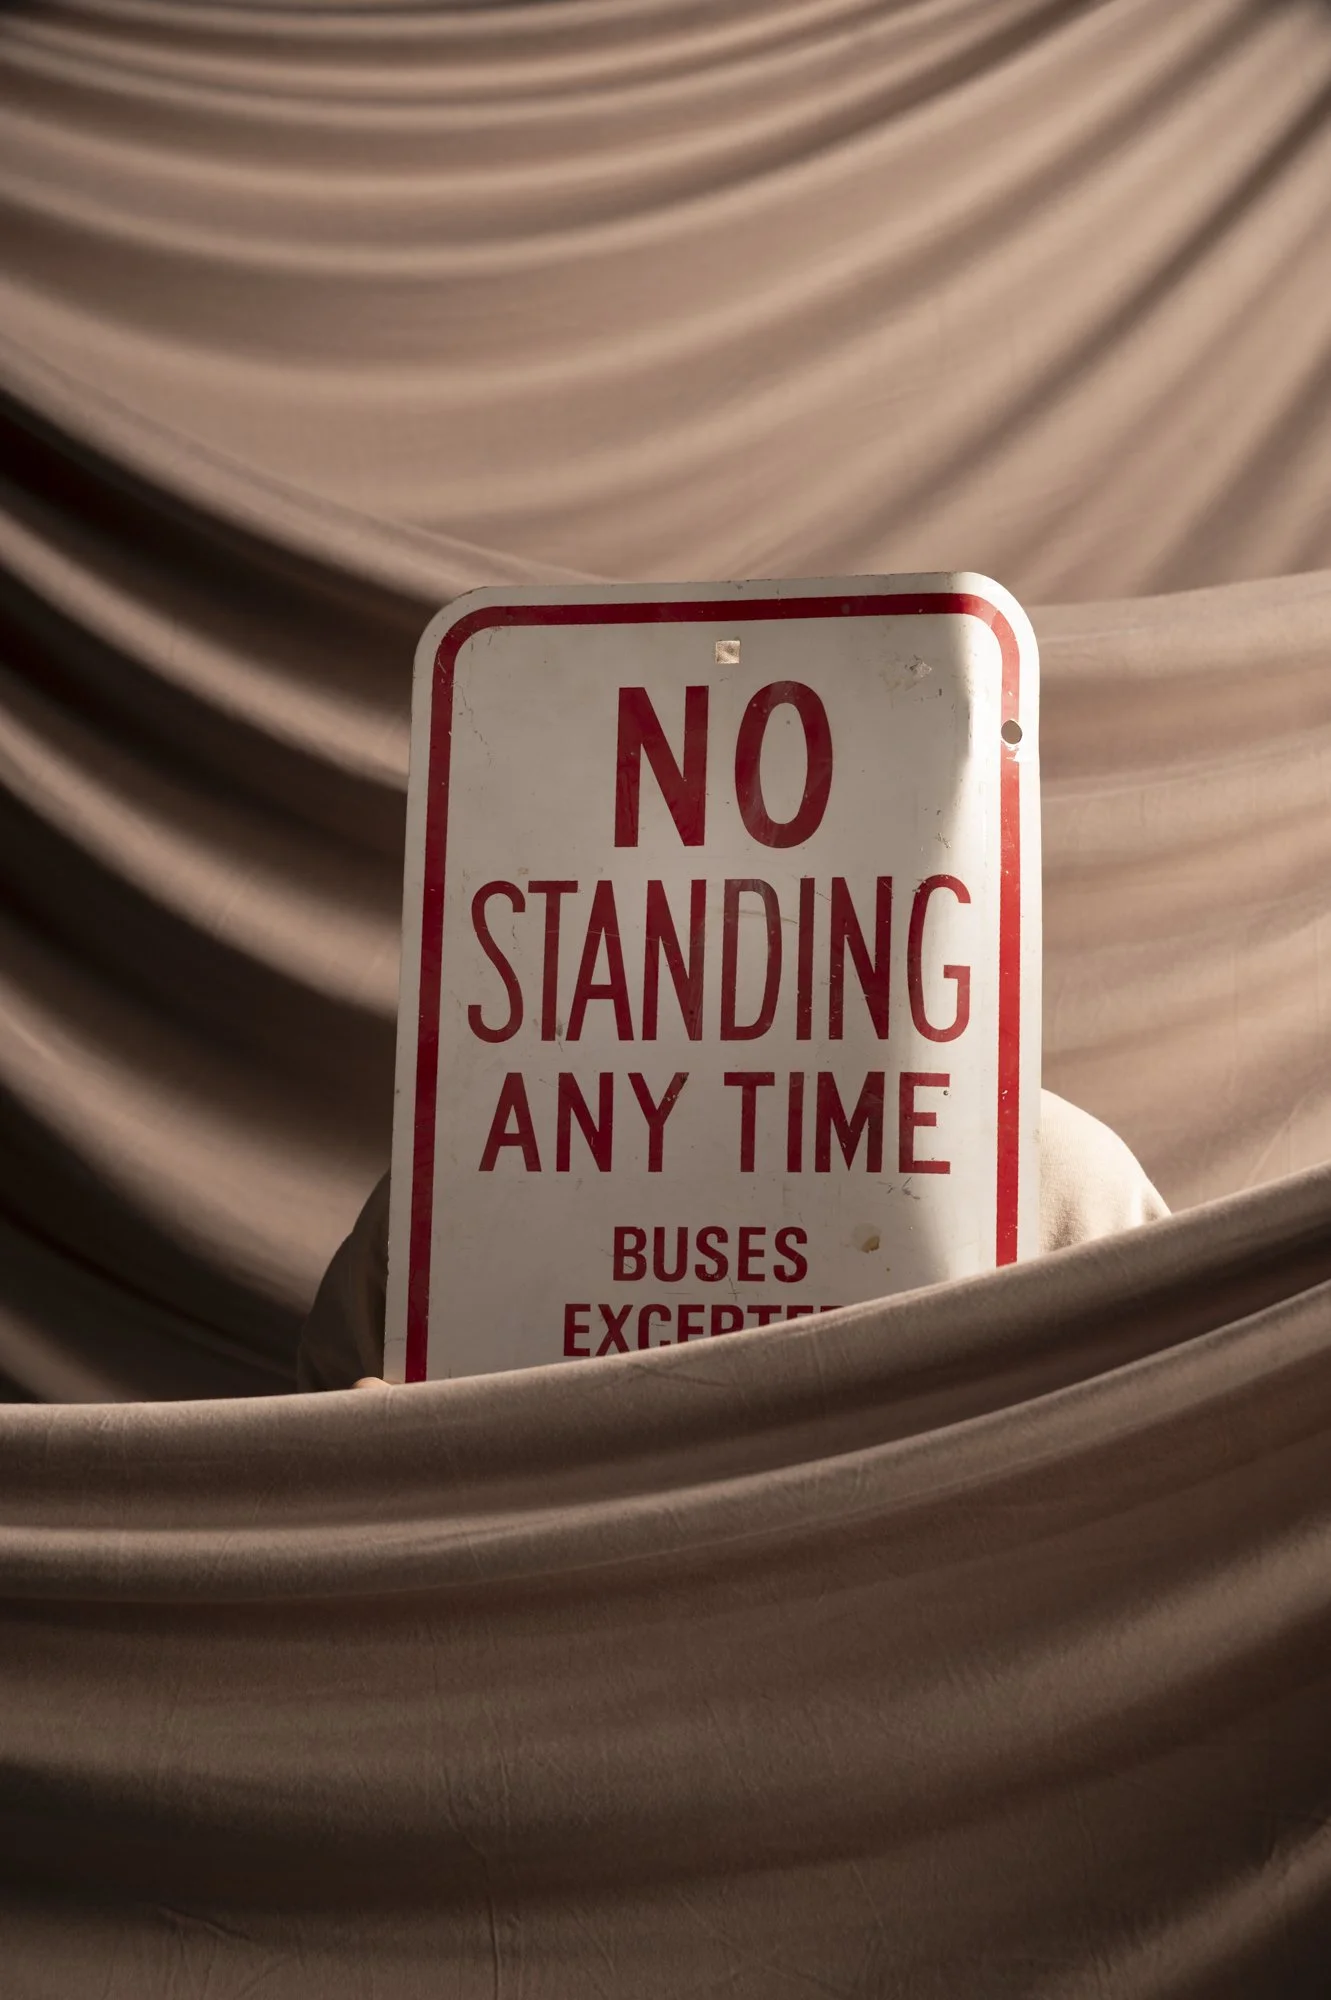
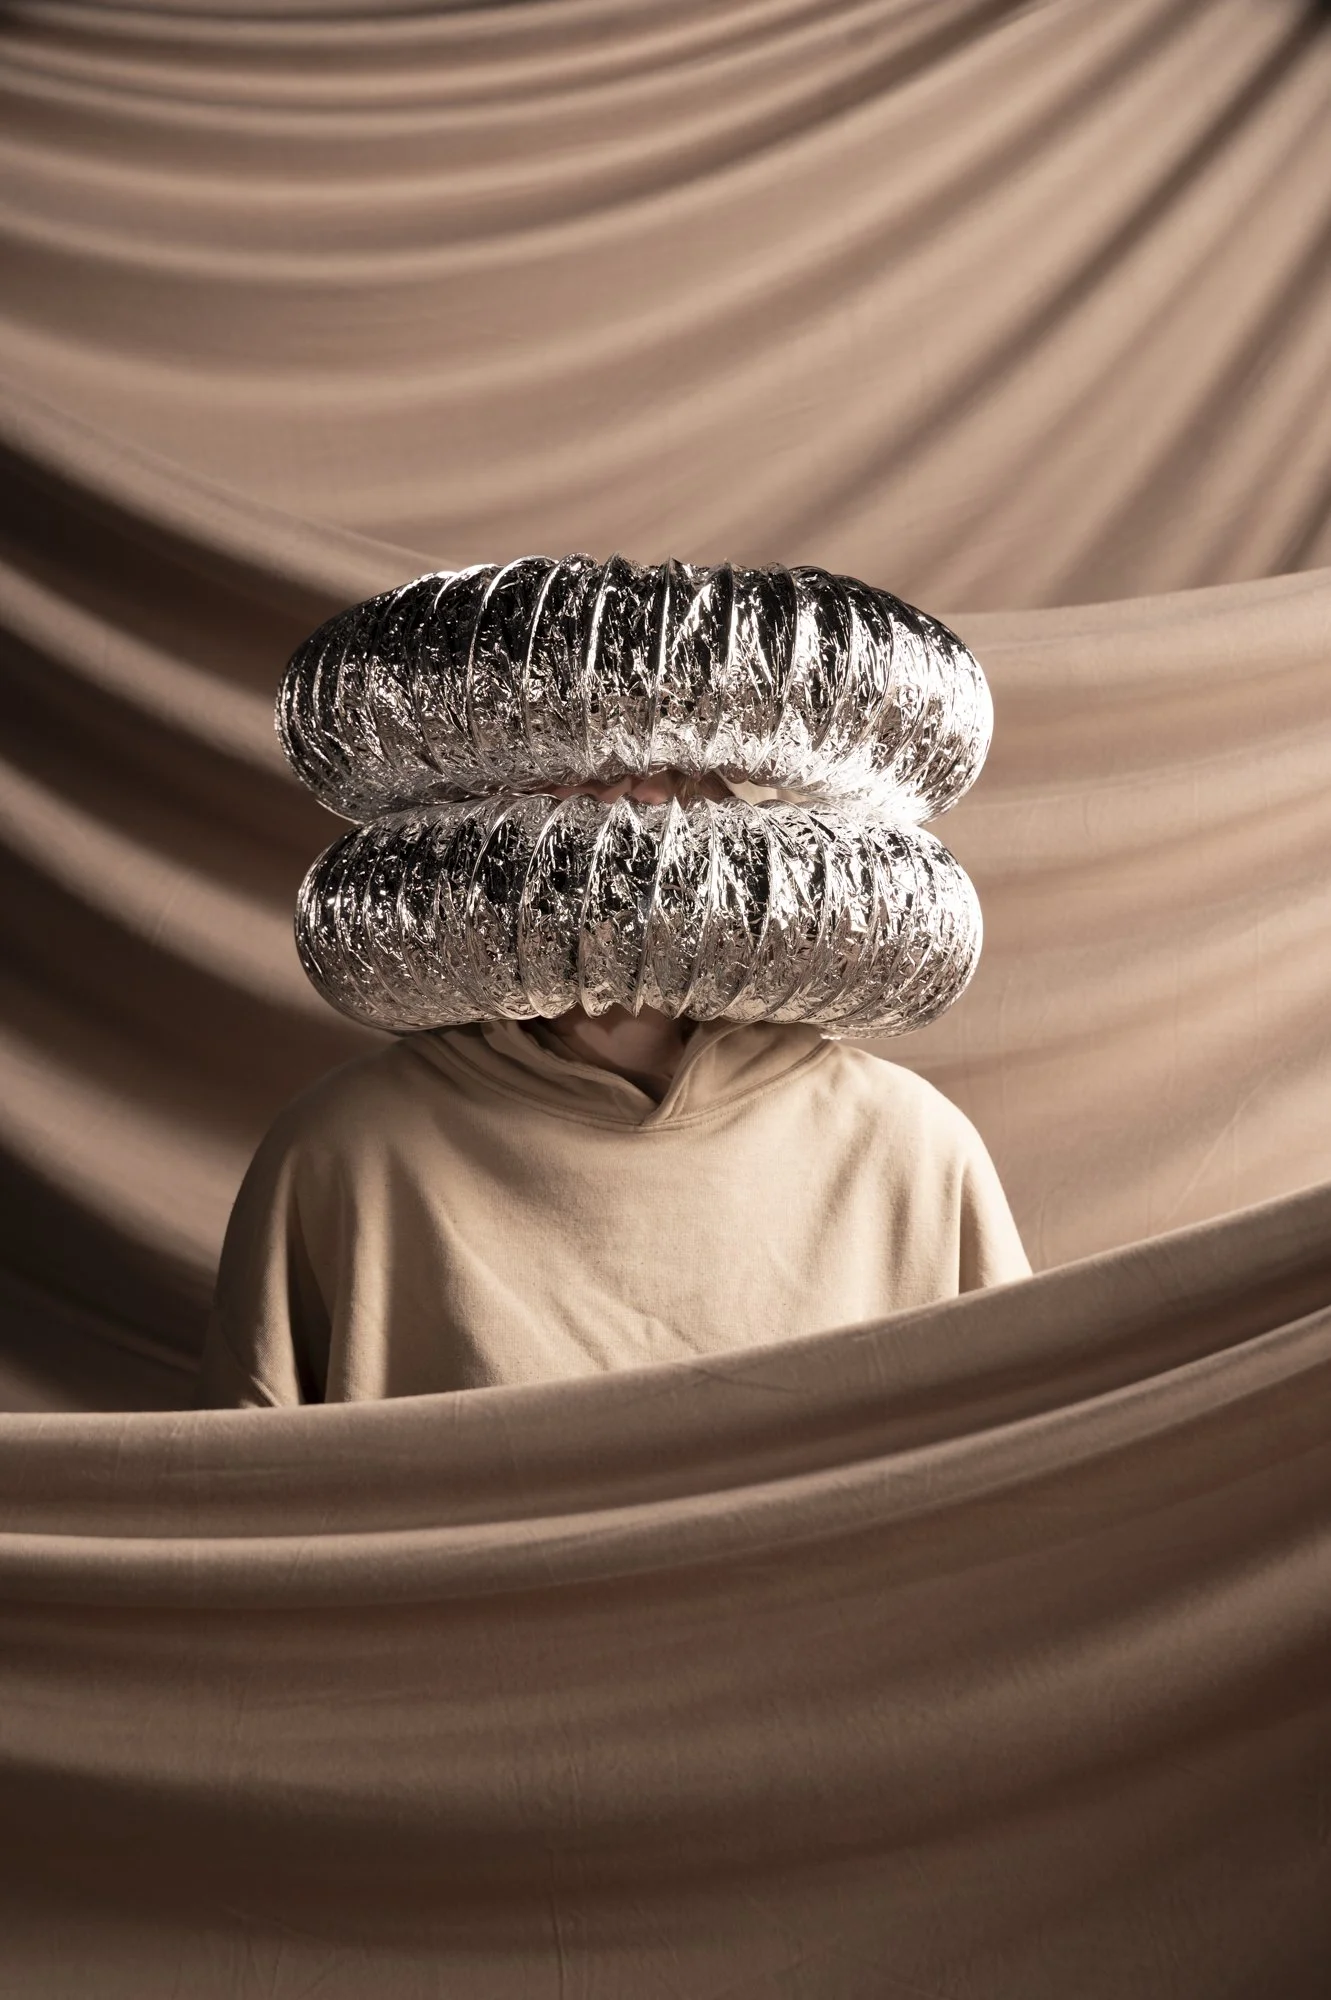
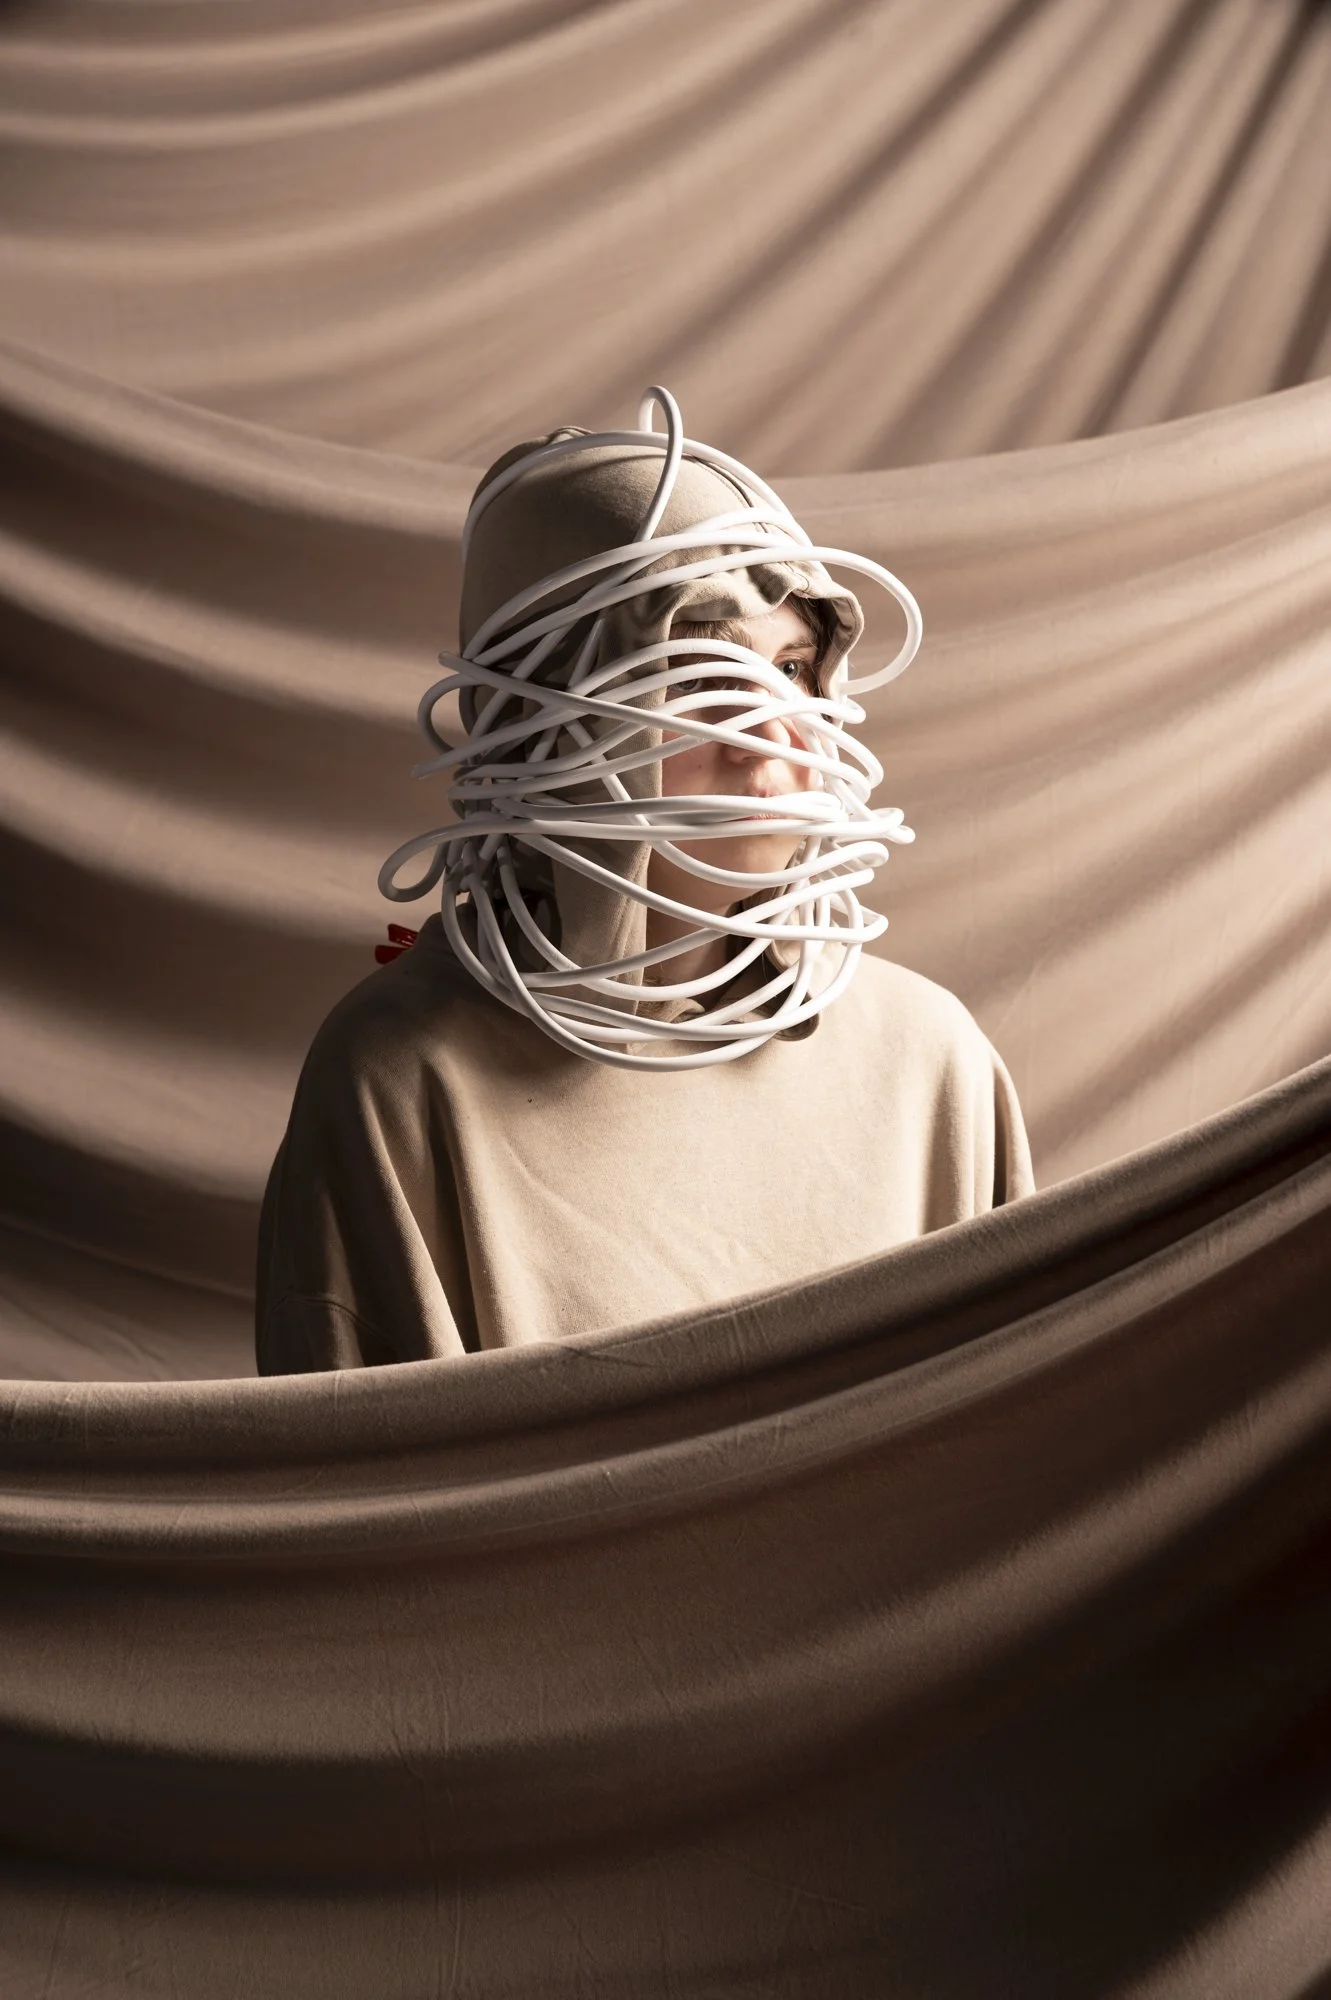
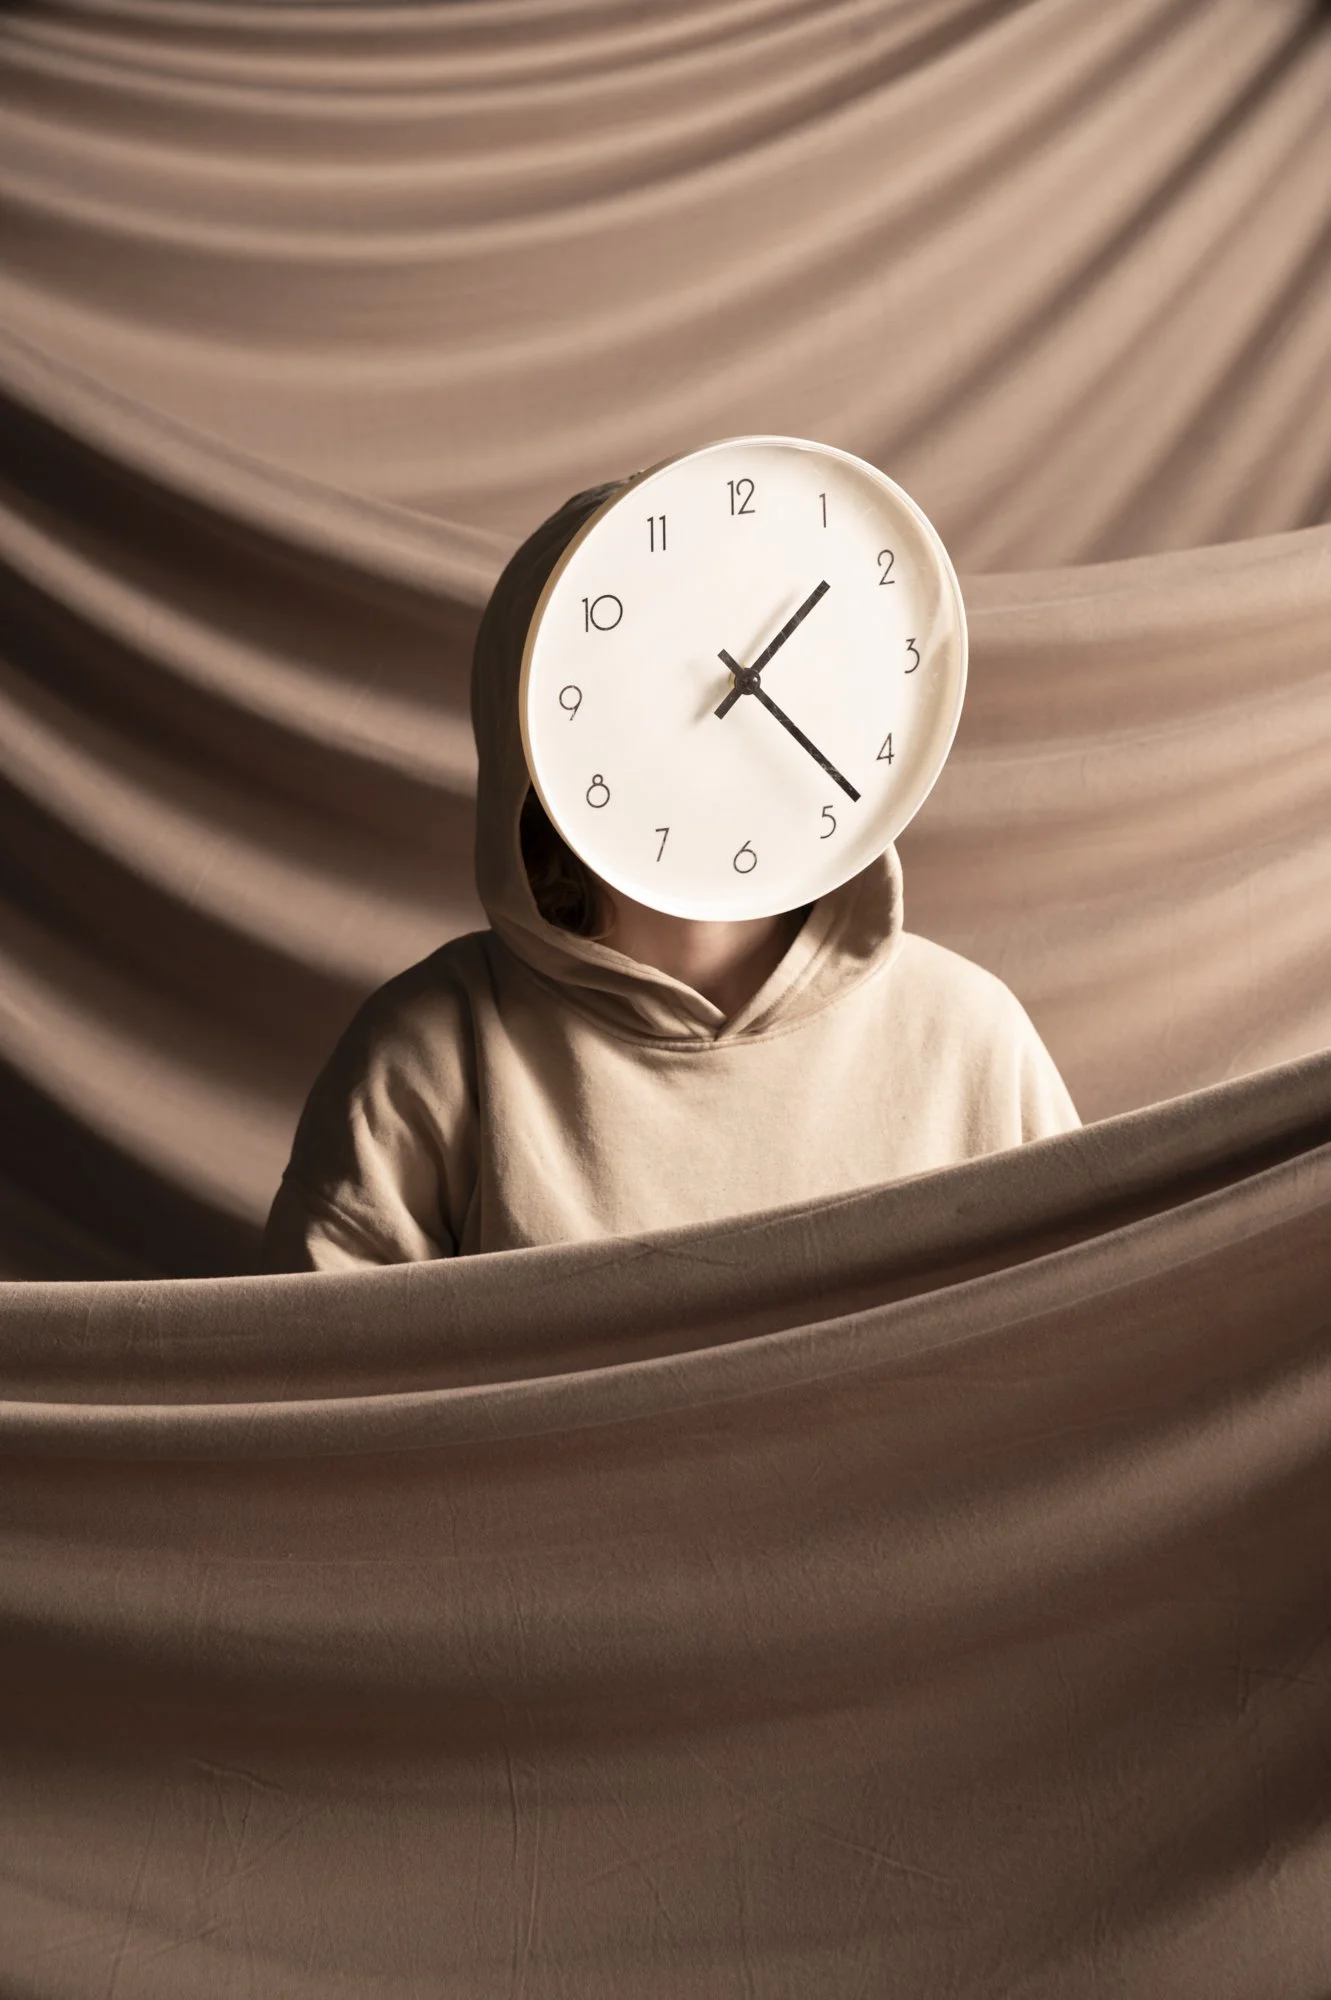
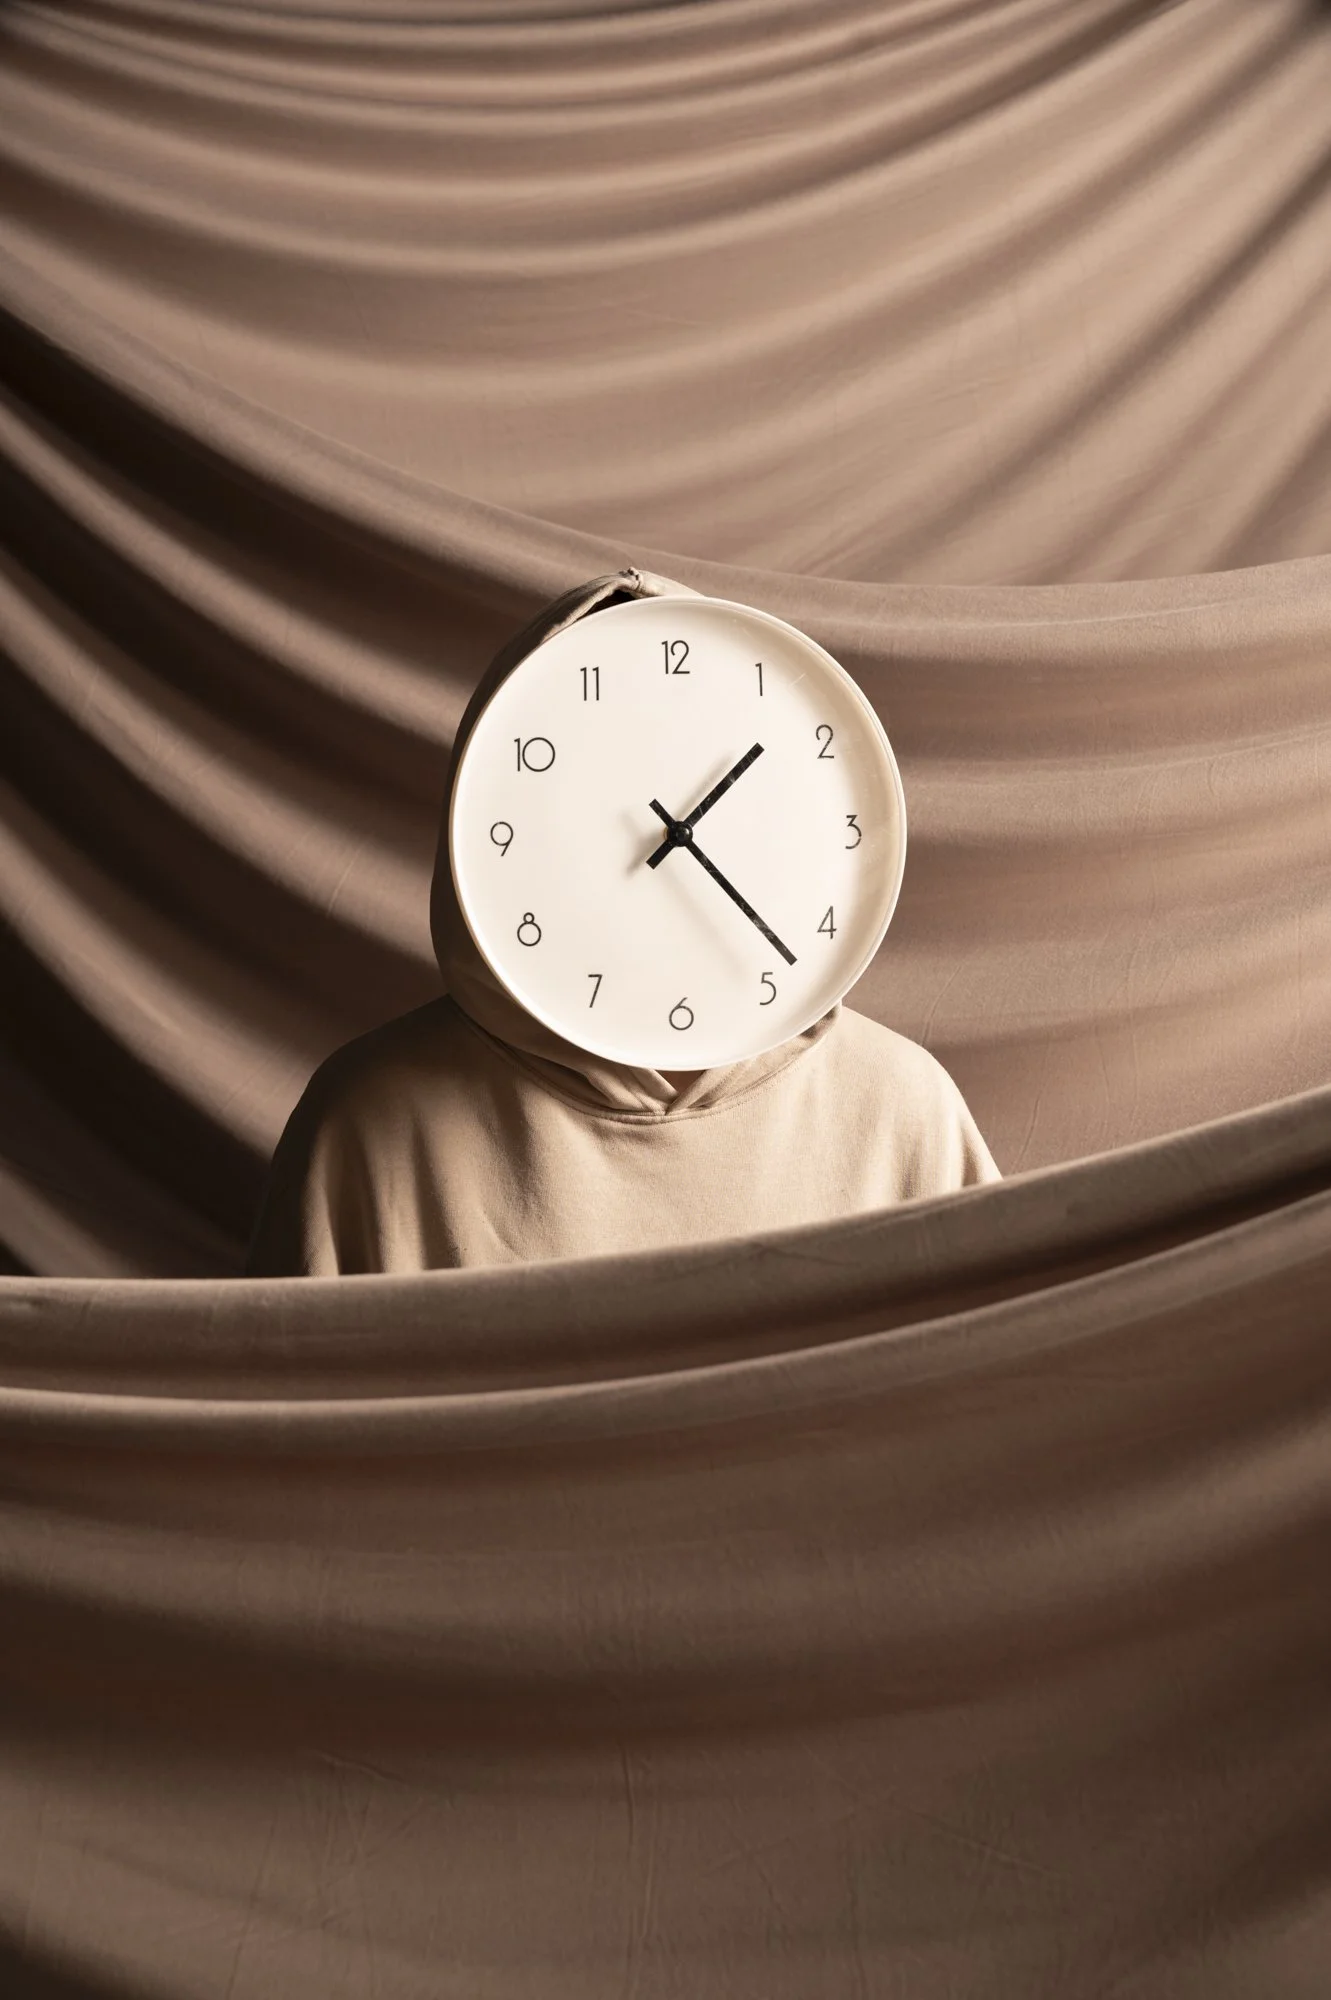
Final portrait shoot for the project. Aim is to reshoot the metal piping, clock and helmet. And to shoot the clothes, rock, sticks, paper aeroplane and sign.
Lighting plan:
First small strip box as key light down onto subject from the side. The side lighting will also assist in sculpting the fabric folds.
Second Small strip box to sculpt the fabric in the foreground.
Large Strip box front on as a fill
Snoot to spotlight some of the props when needed.
Styling:
Fabric suspended between 5 C-stands and light stands.
What didn’t work?
One key issue I had during this particular shoot was that the rock was so large that I had to pull the camera back a lot to fit it all in. This meant some of the background didn’t fill the composition. To fix this I waited till I had finished shooting the remaining props then raised the height of the entire set to accommodate.
Reflection:
What worked?
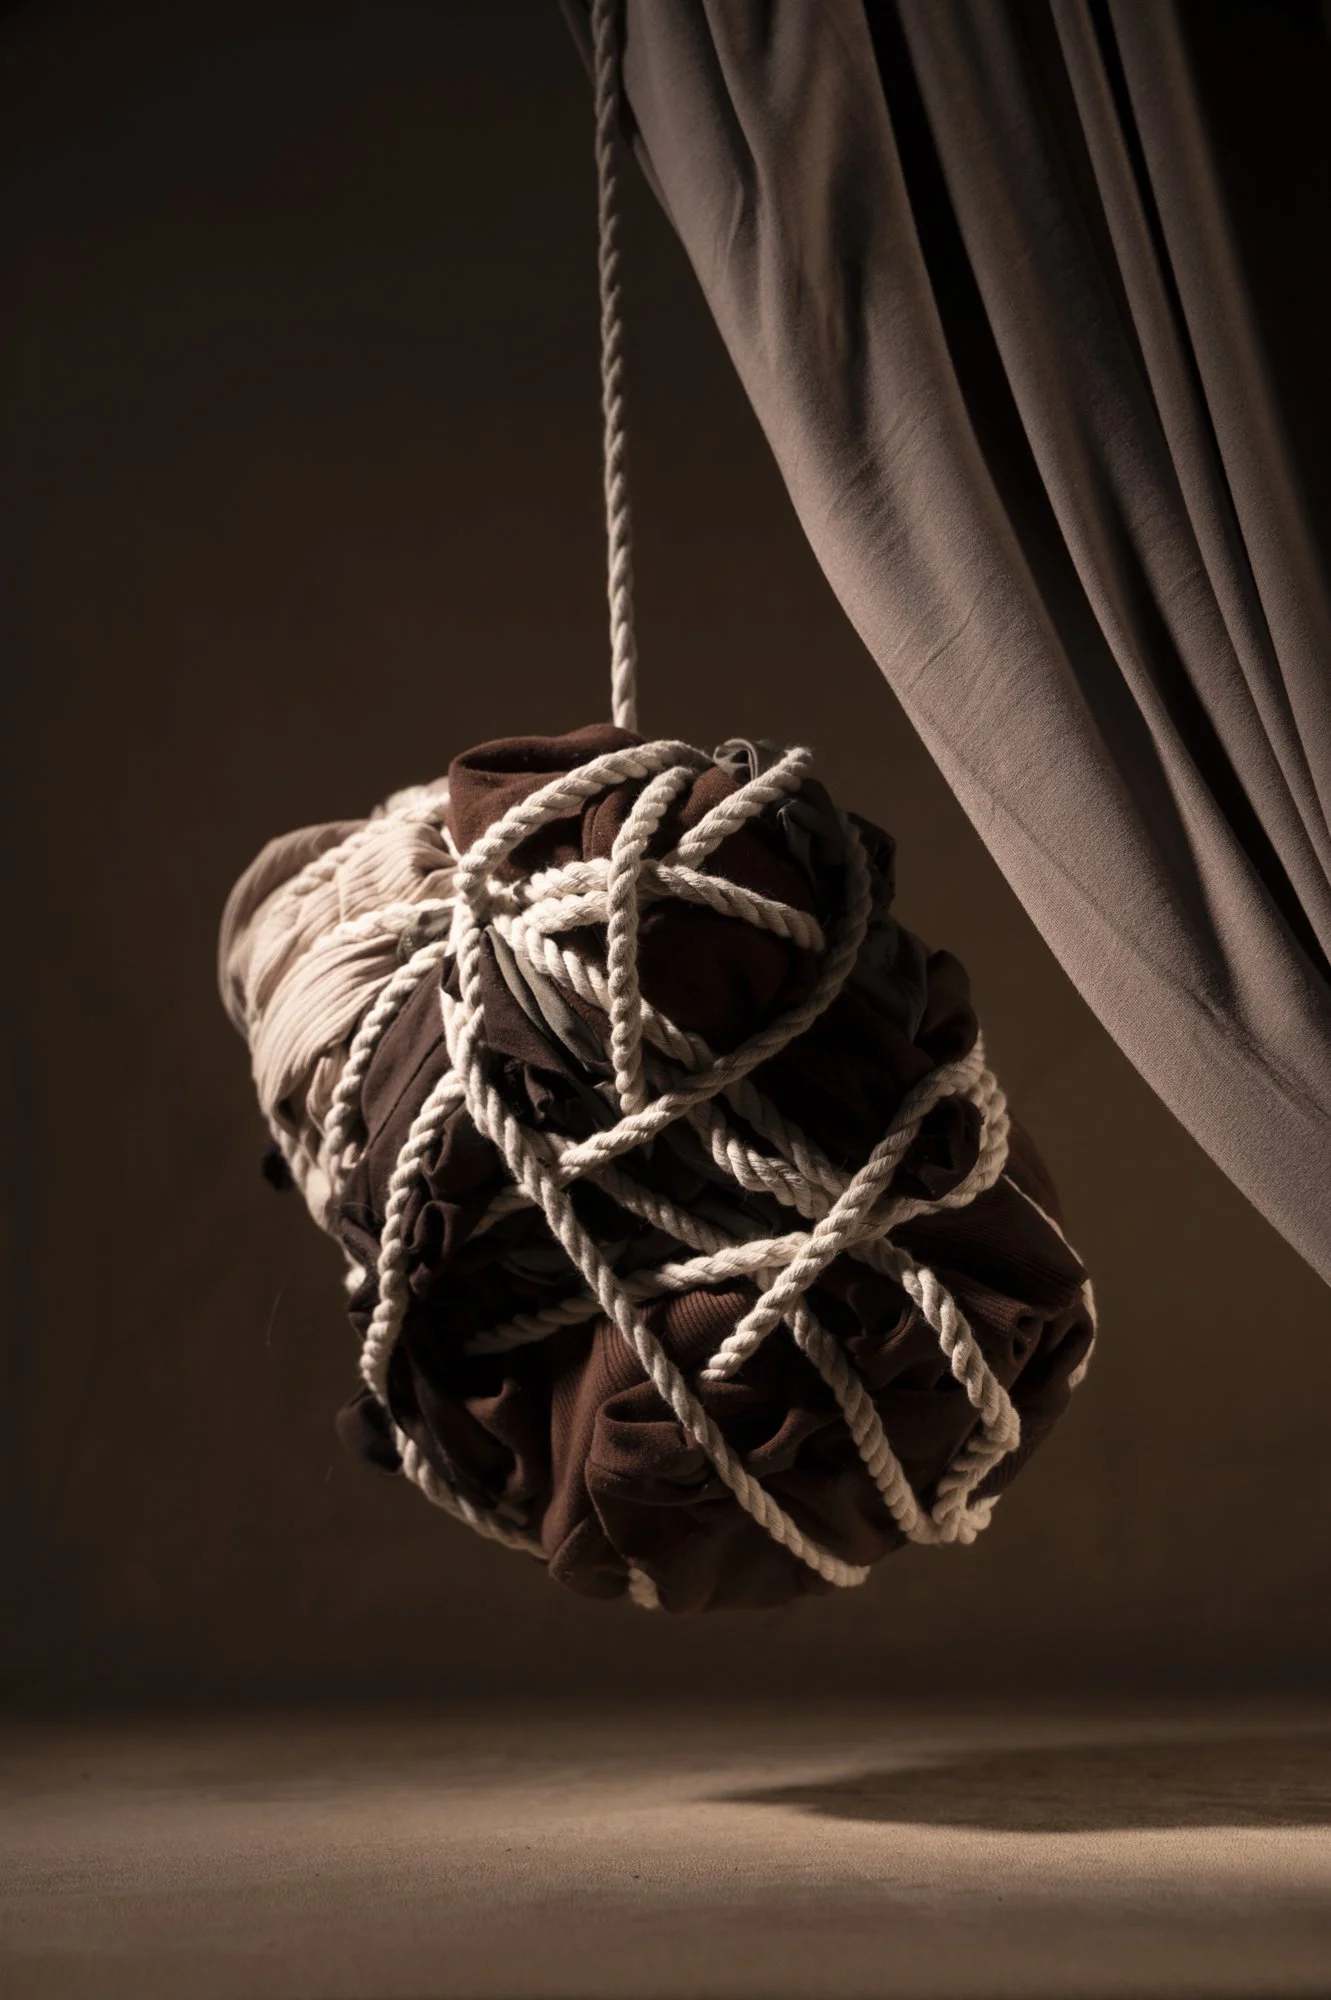
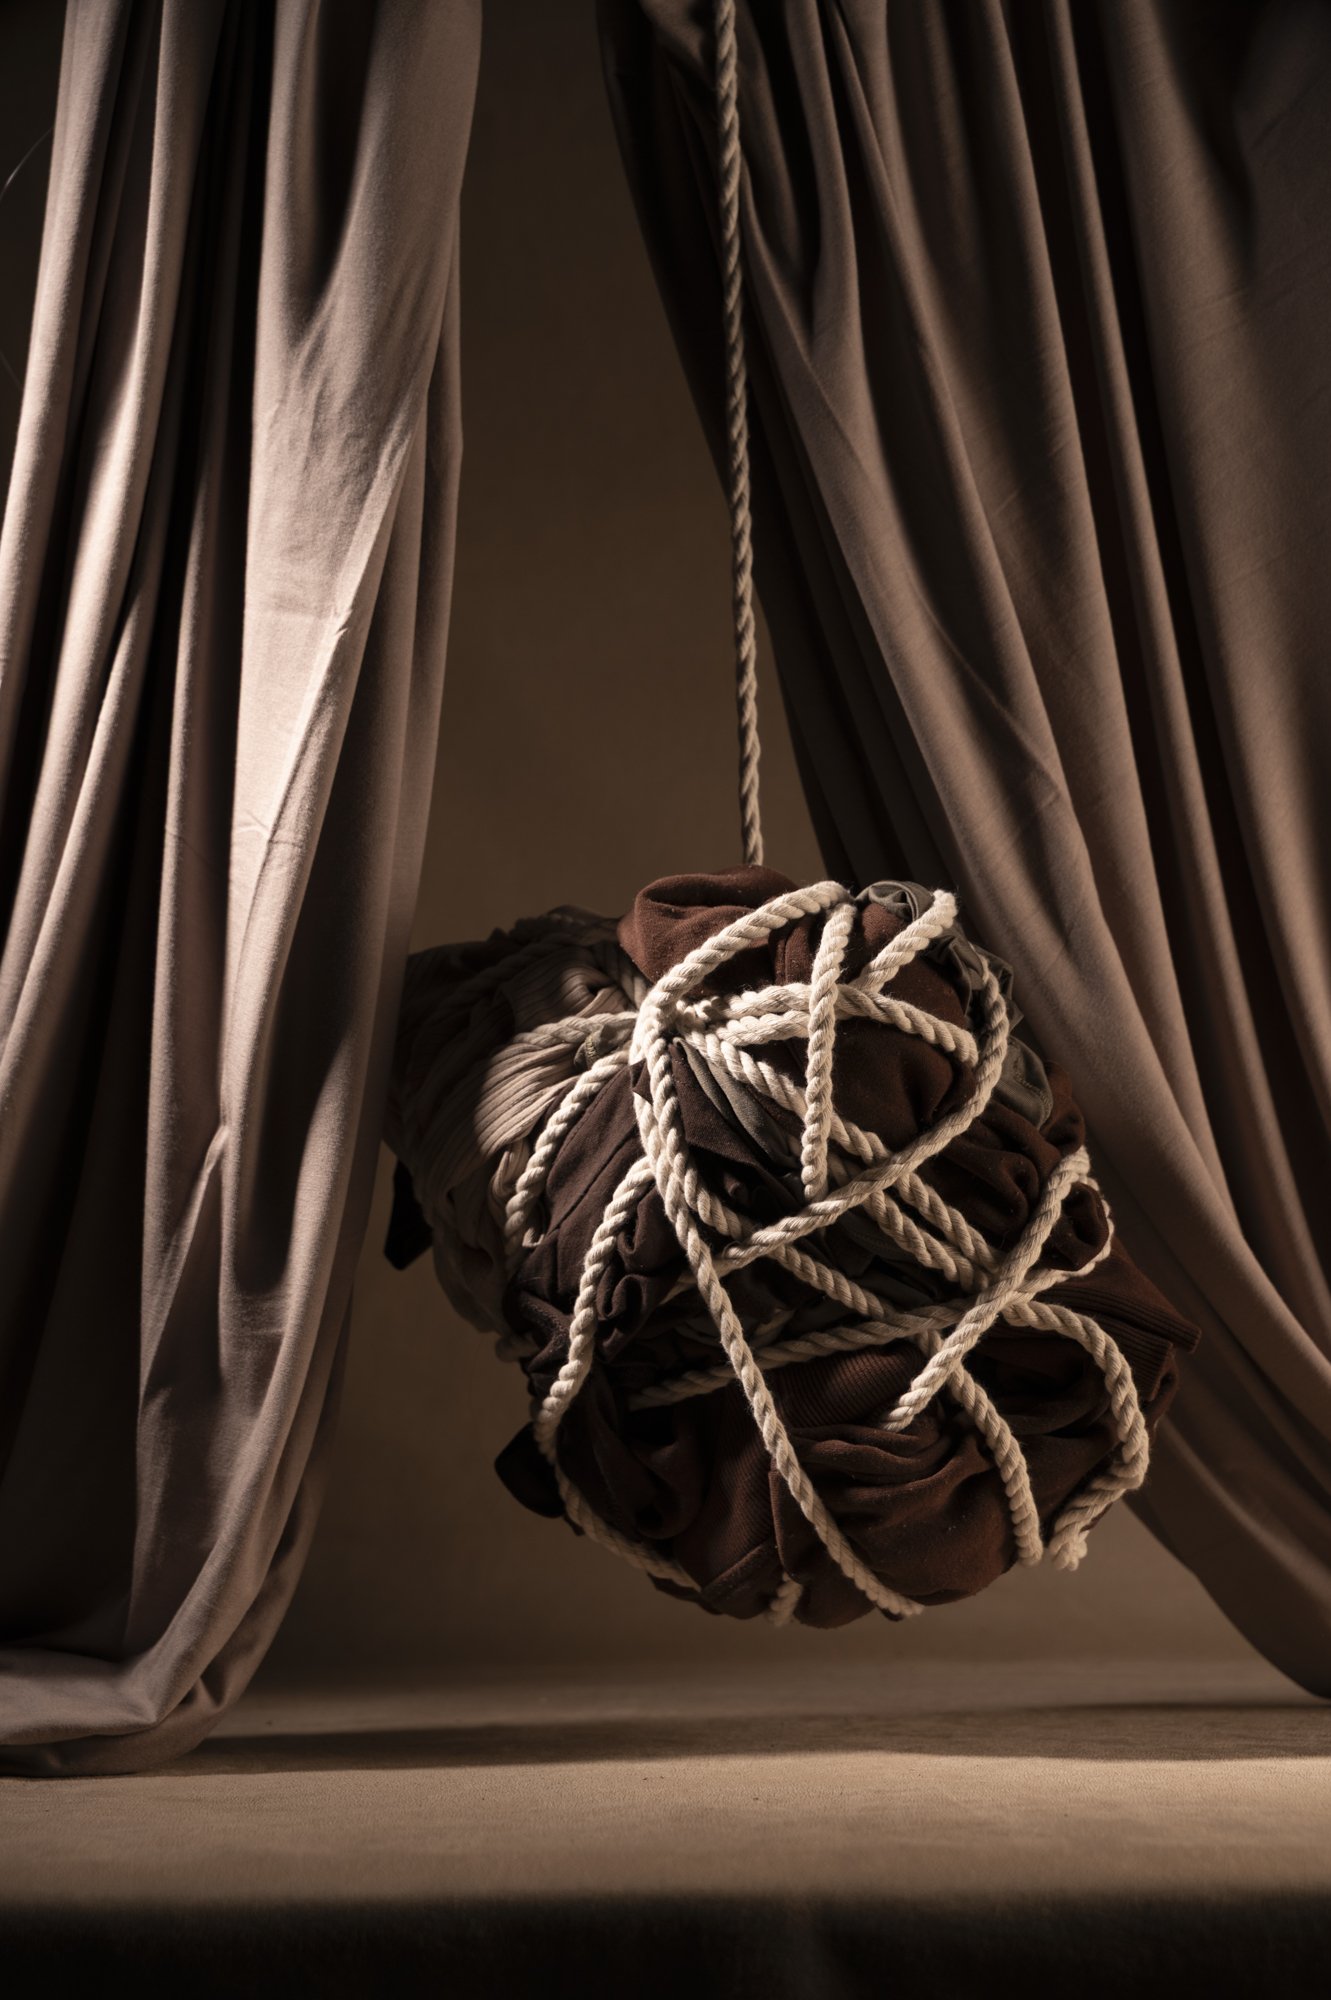
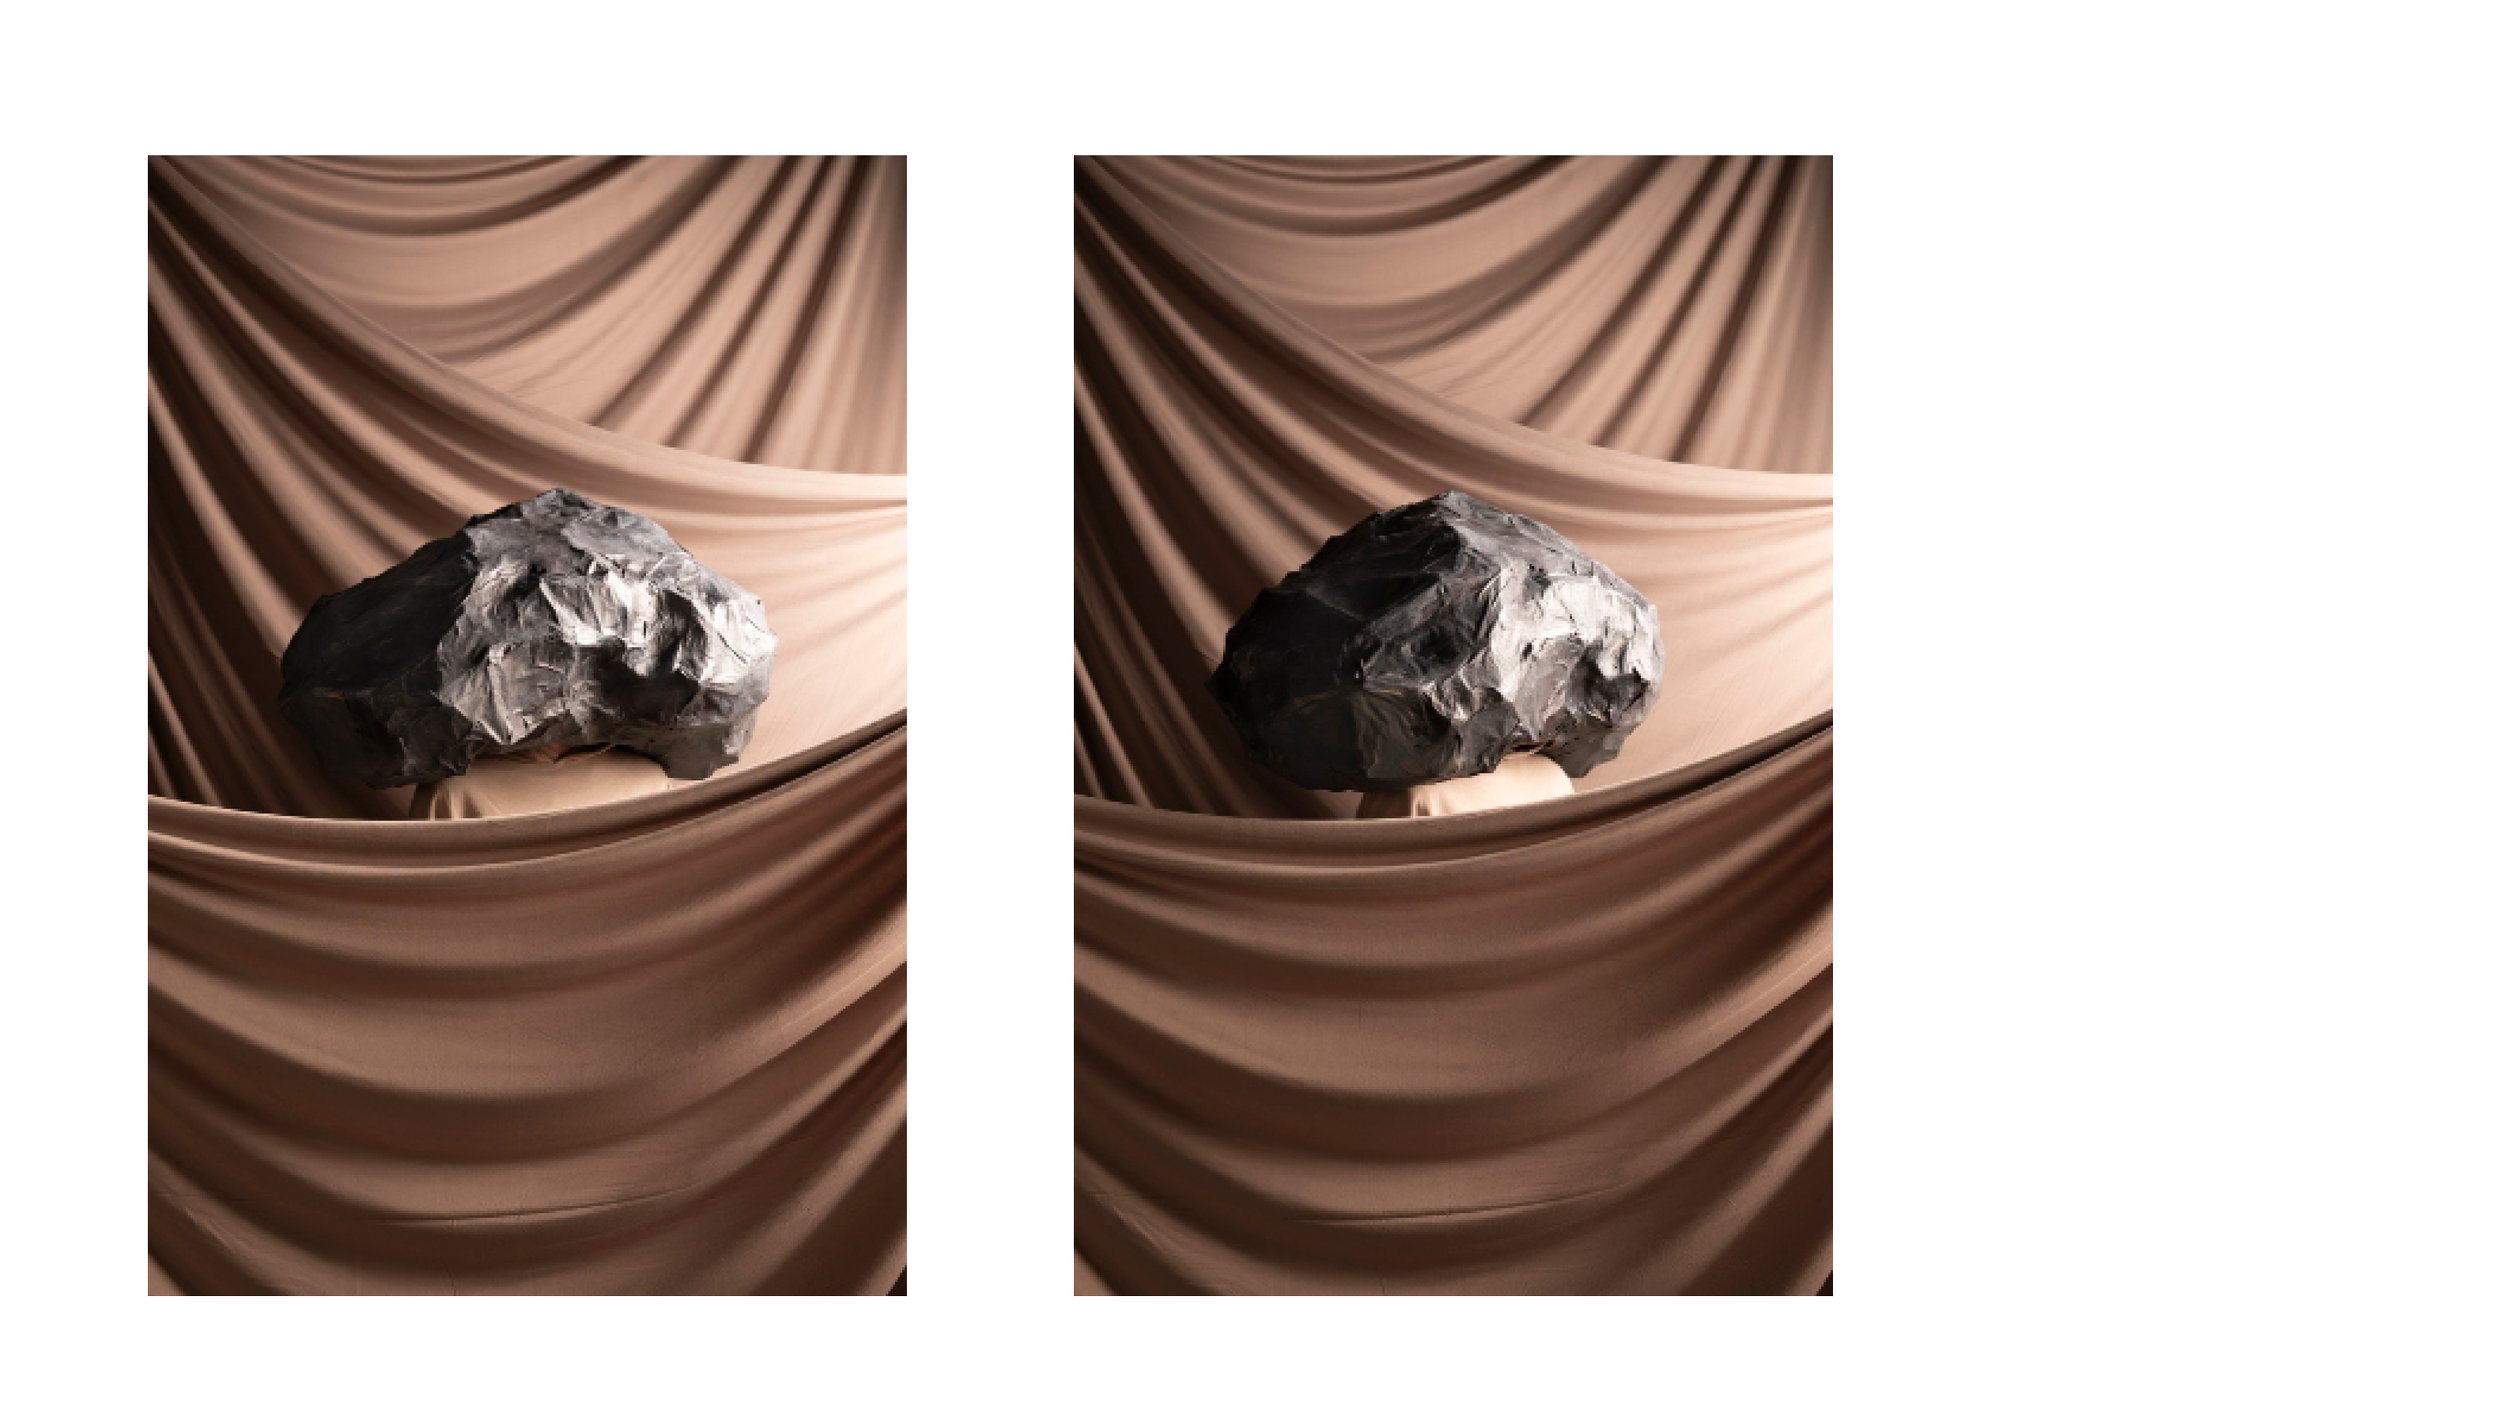
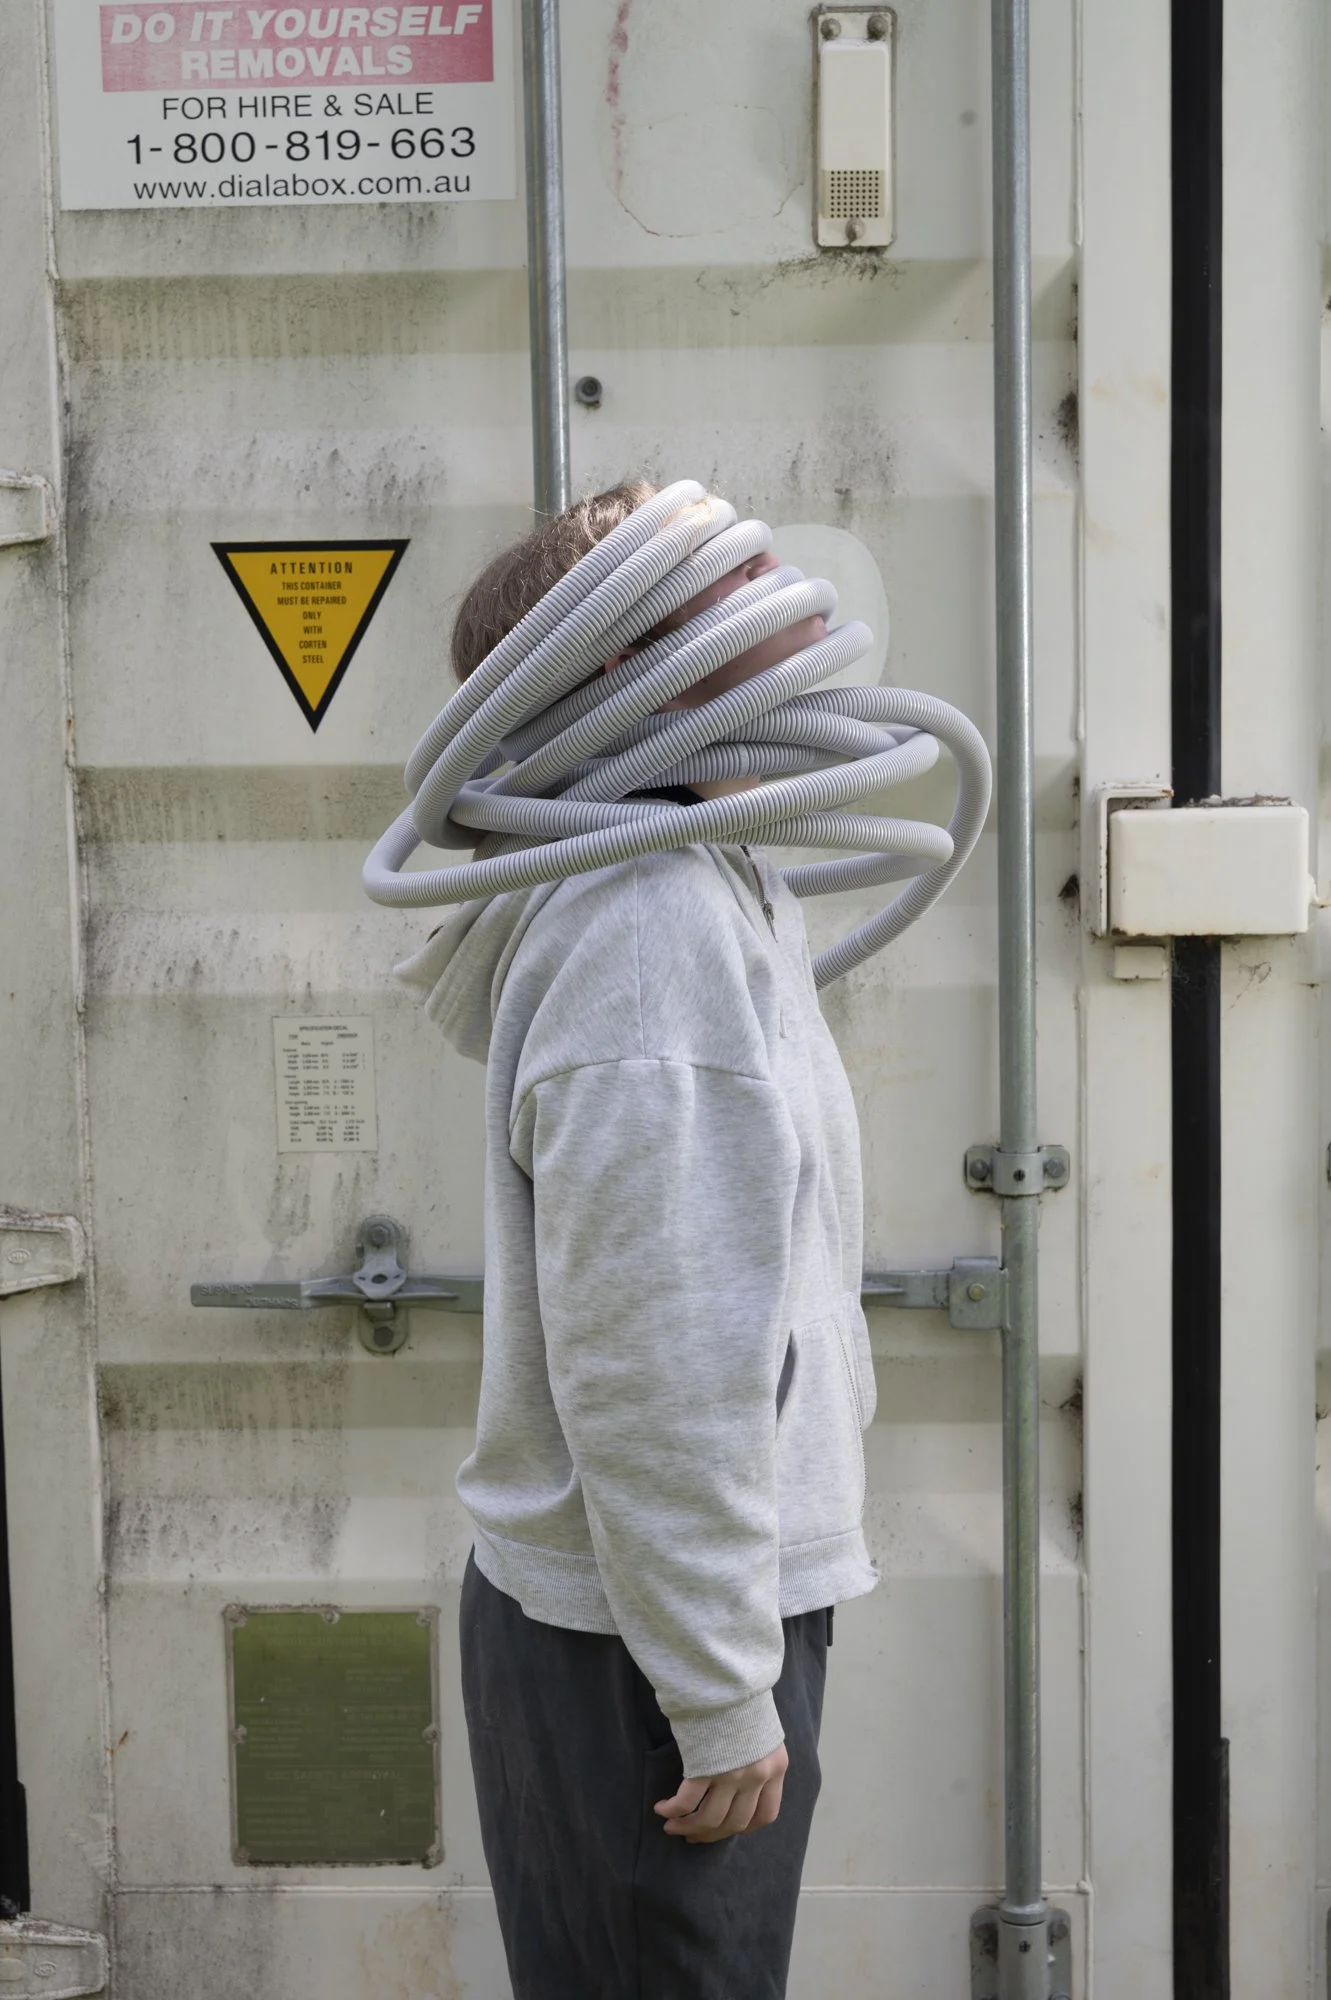
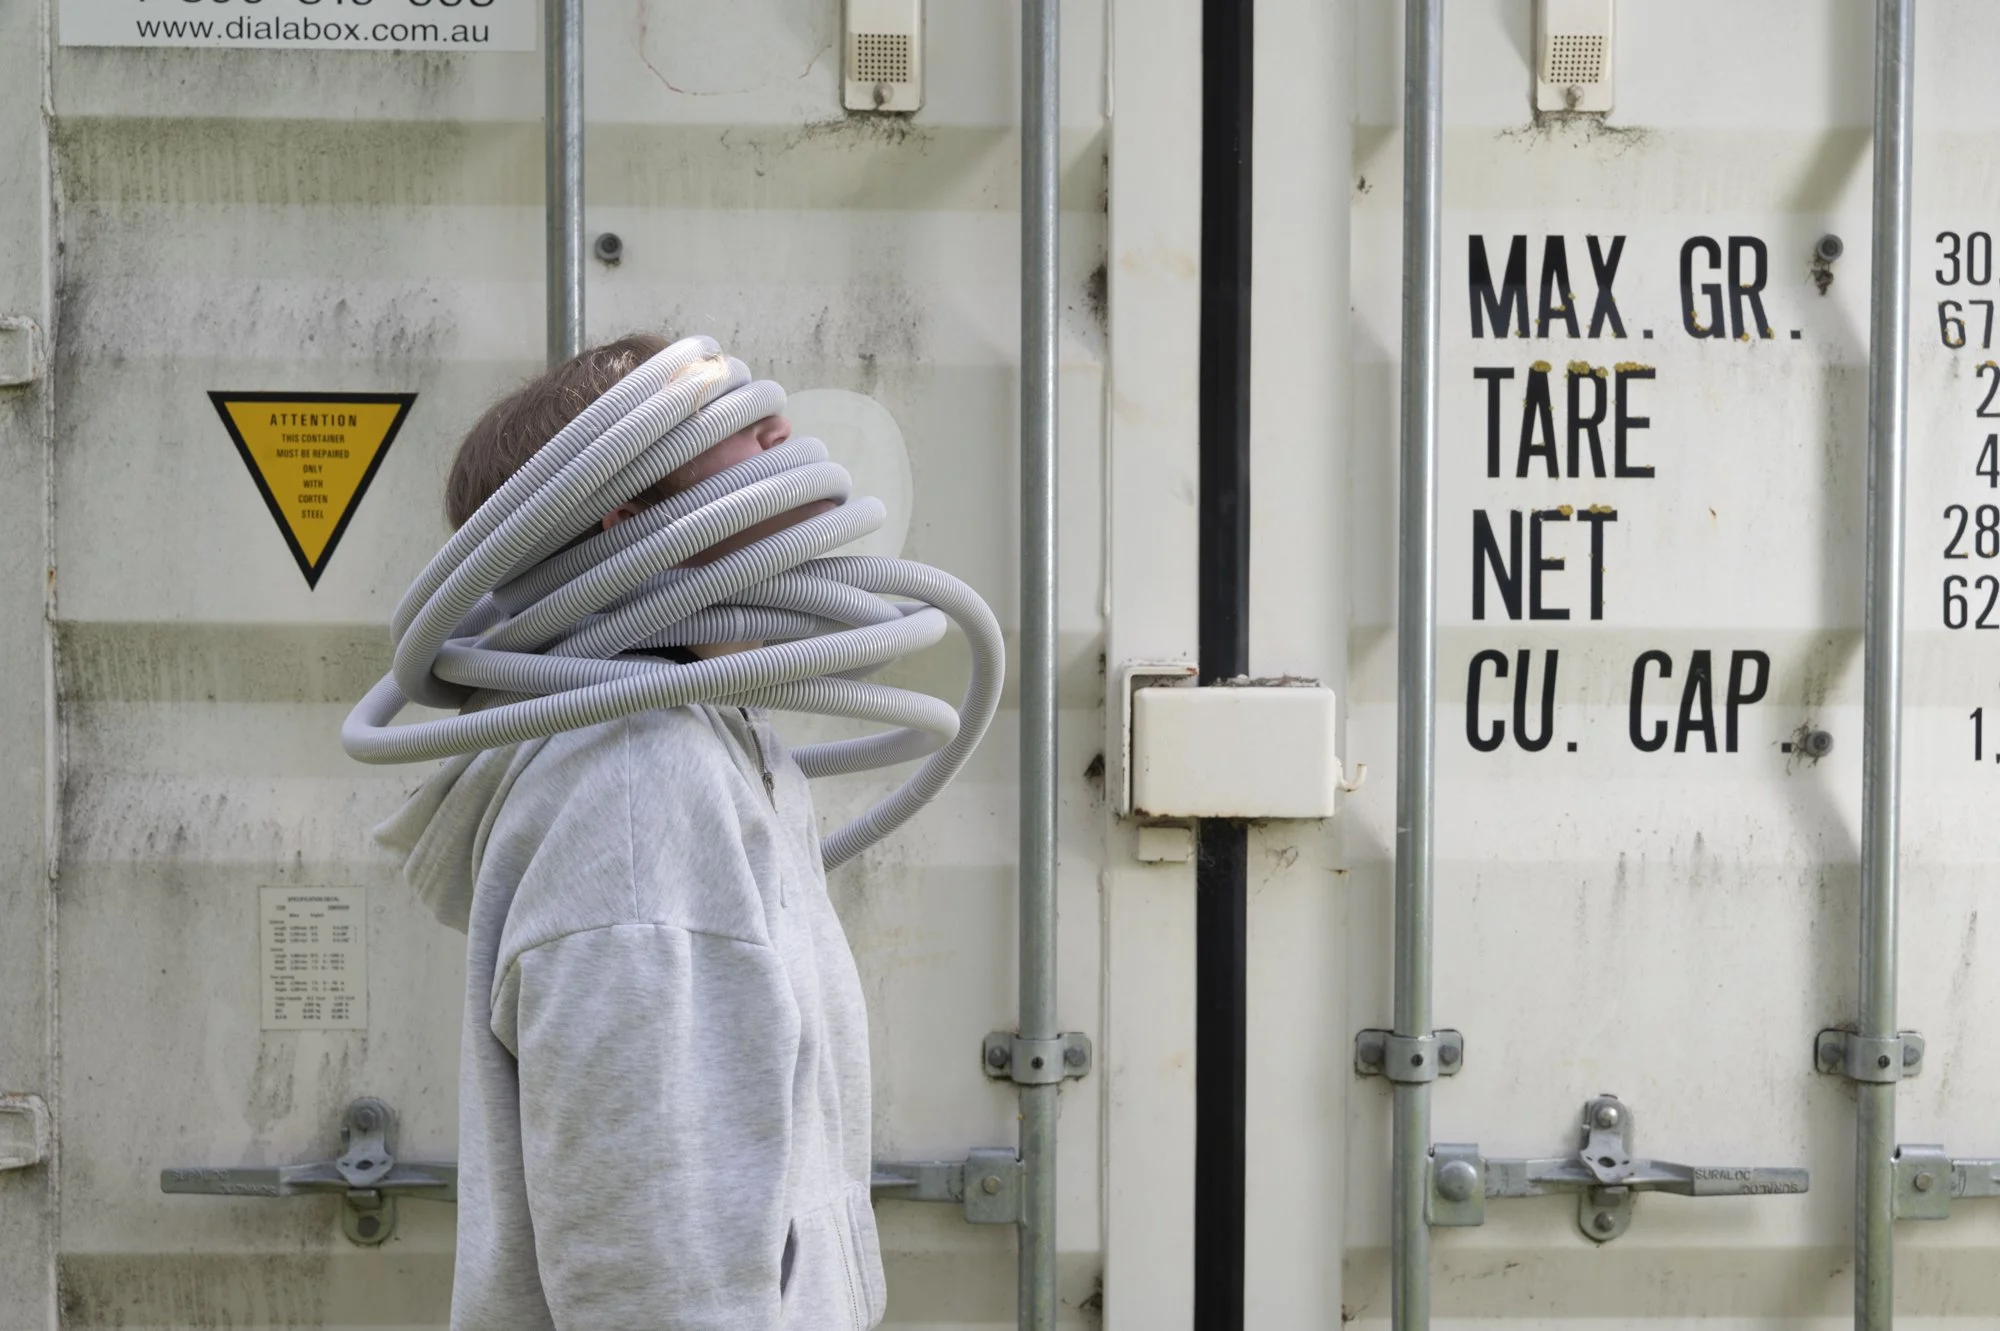
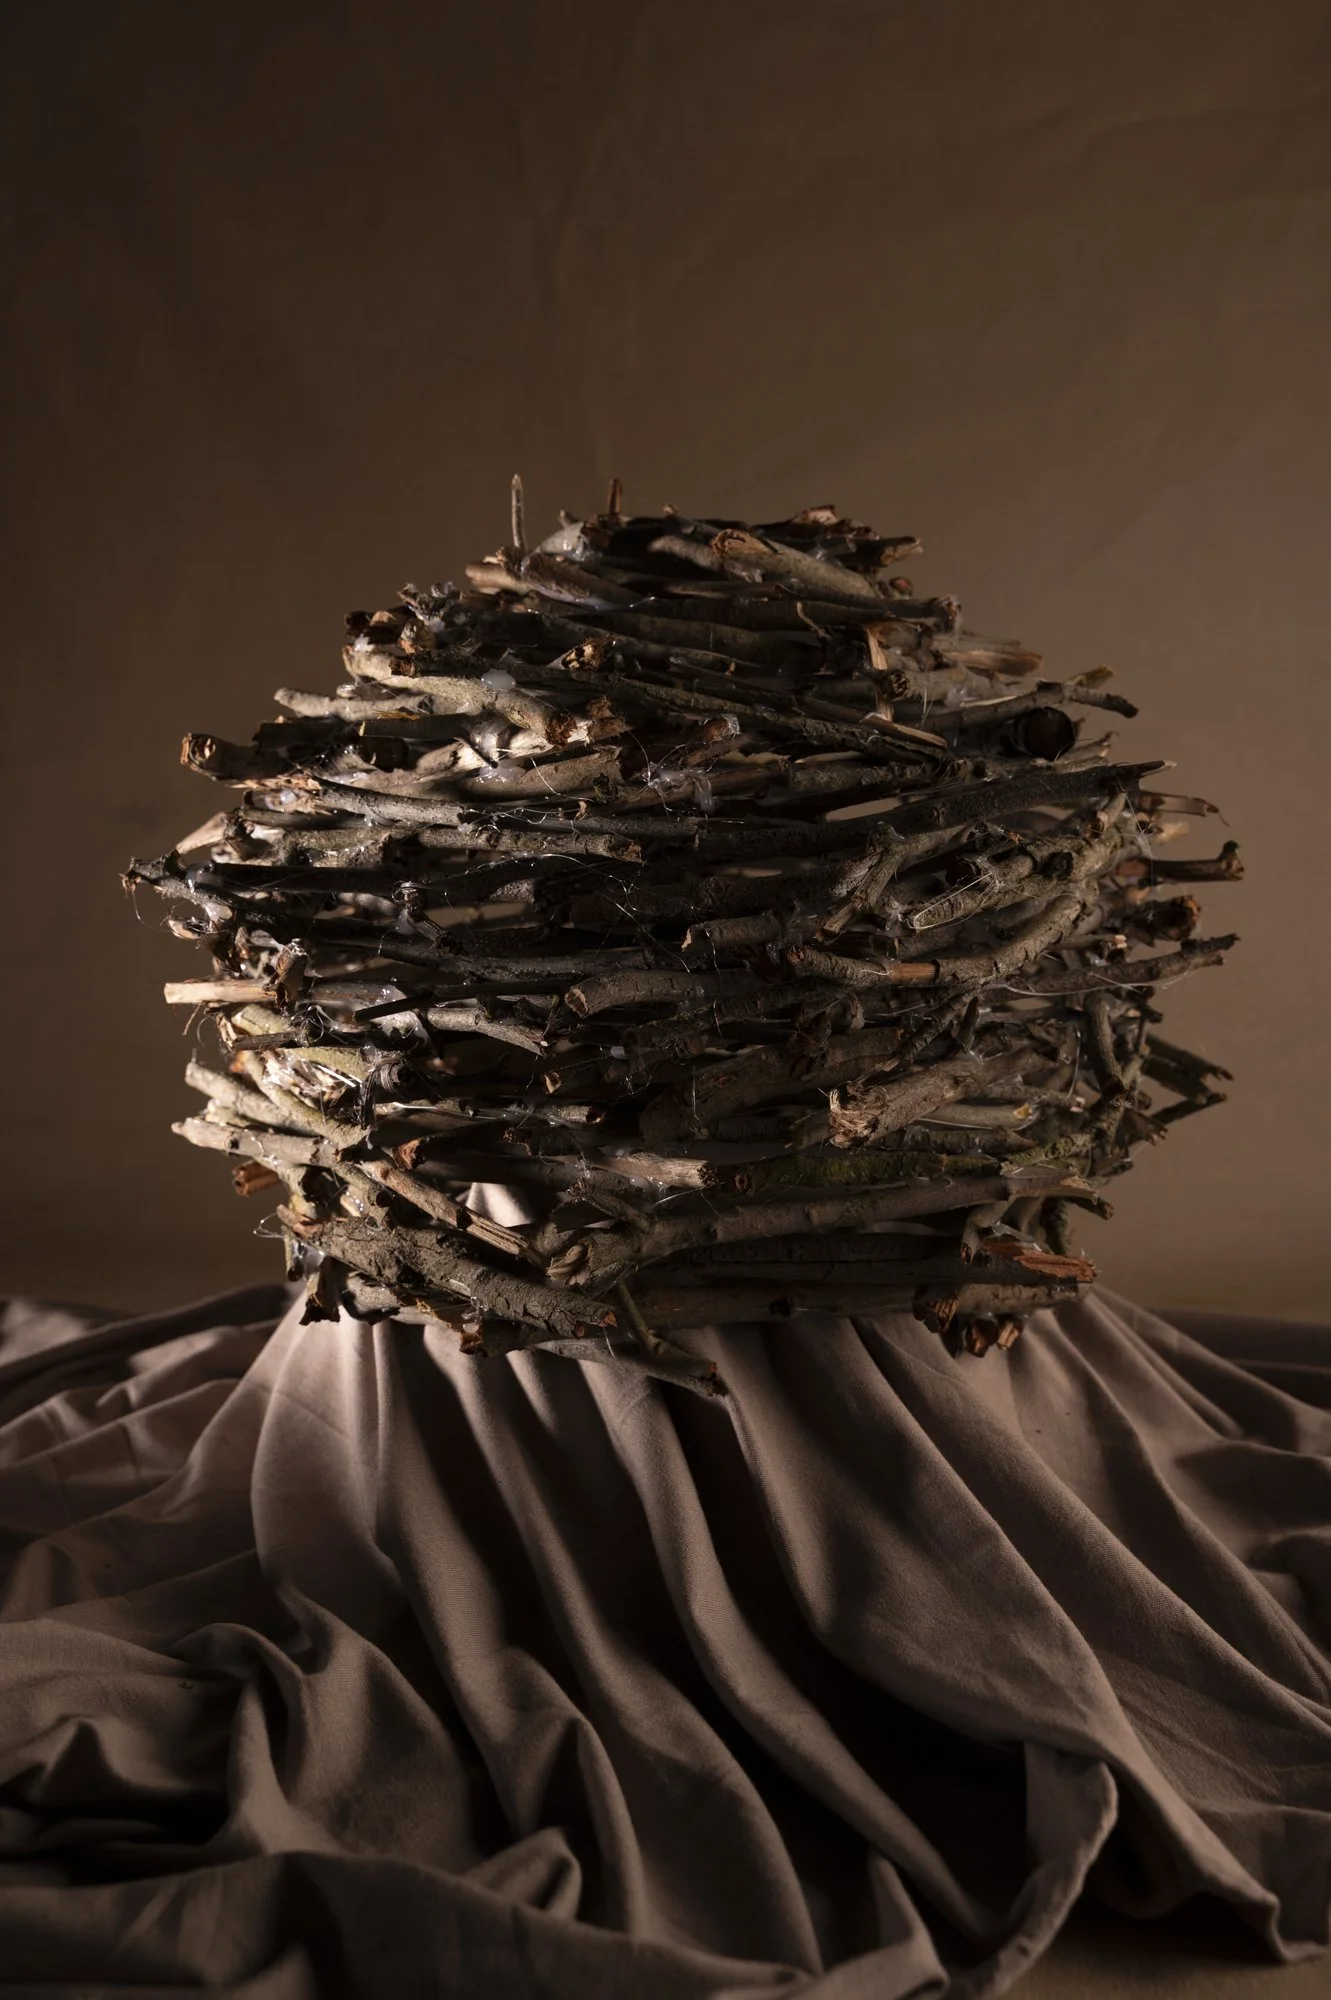
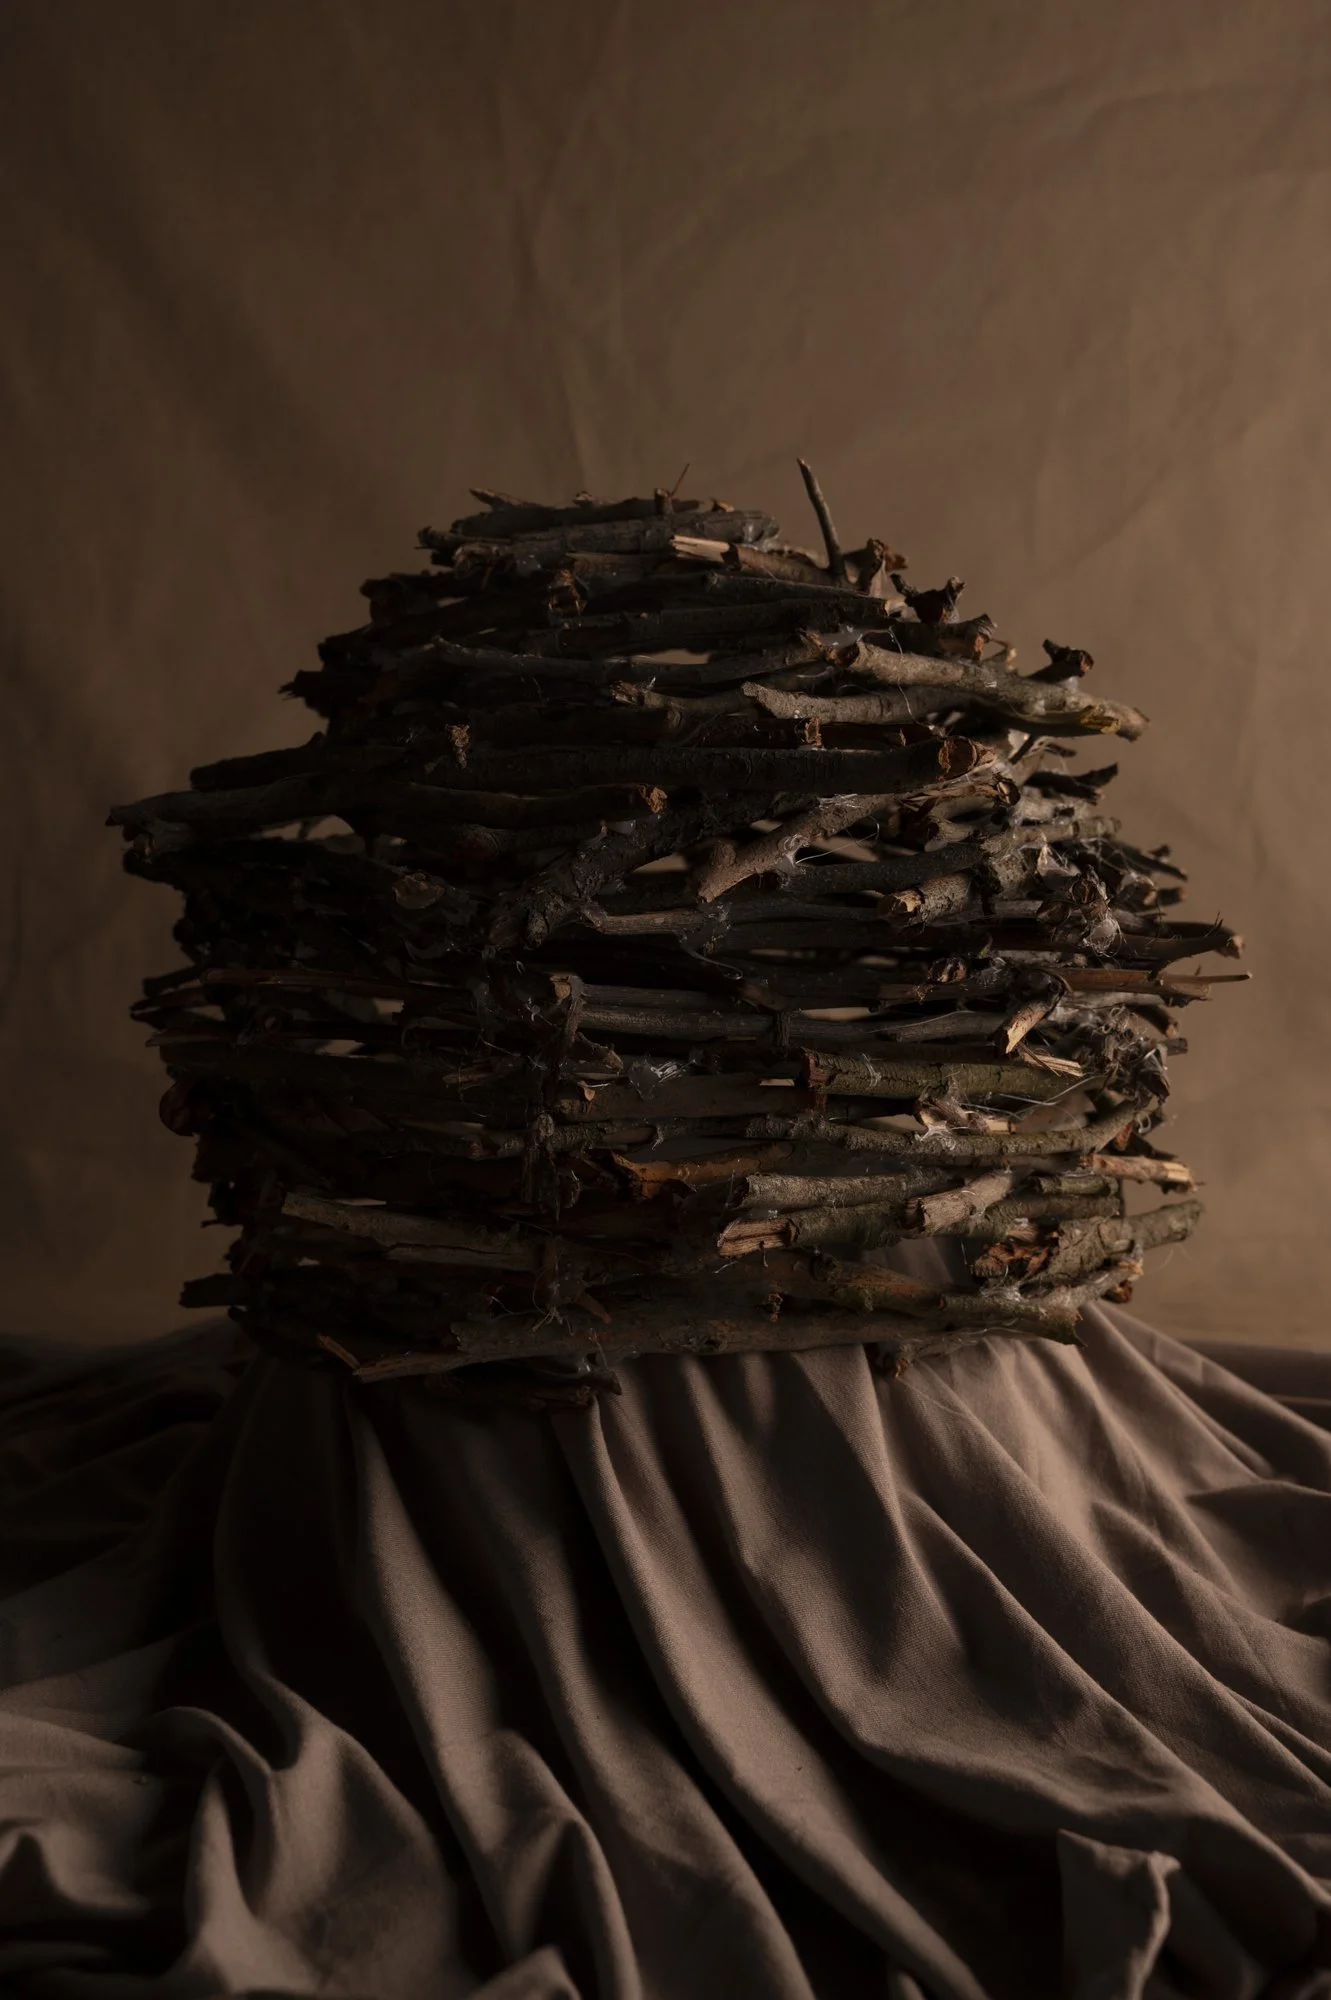
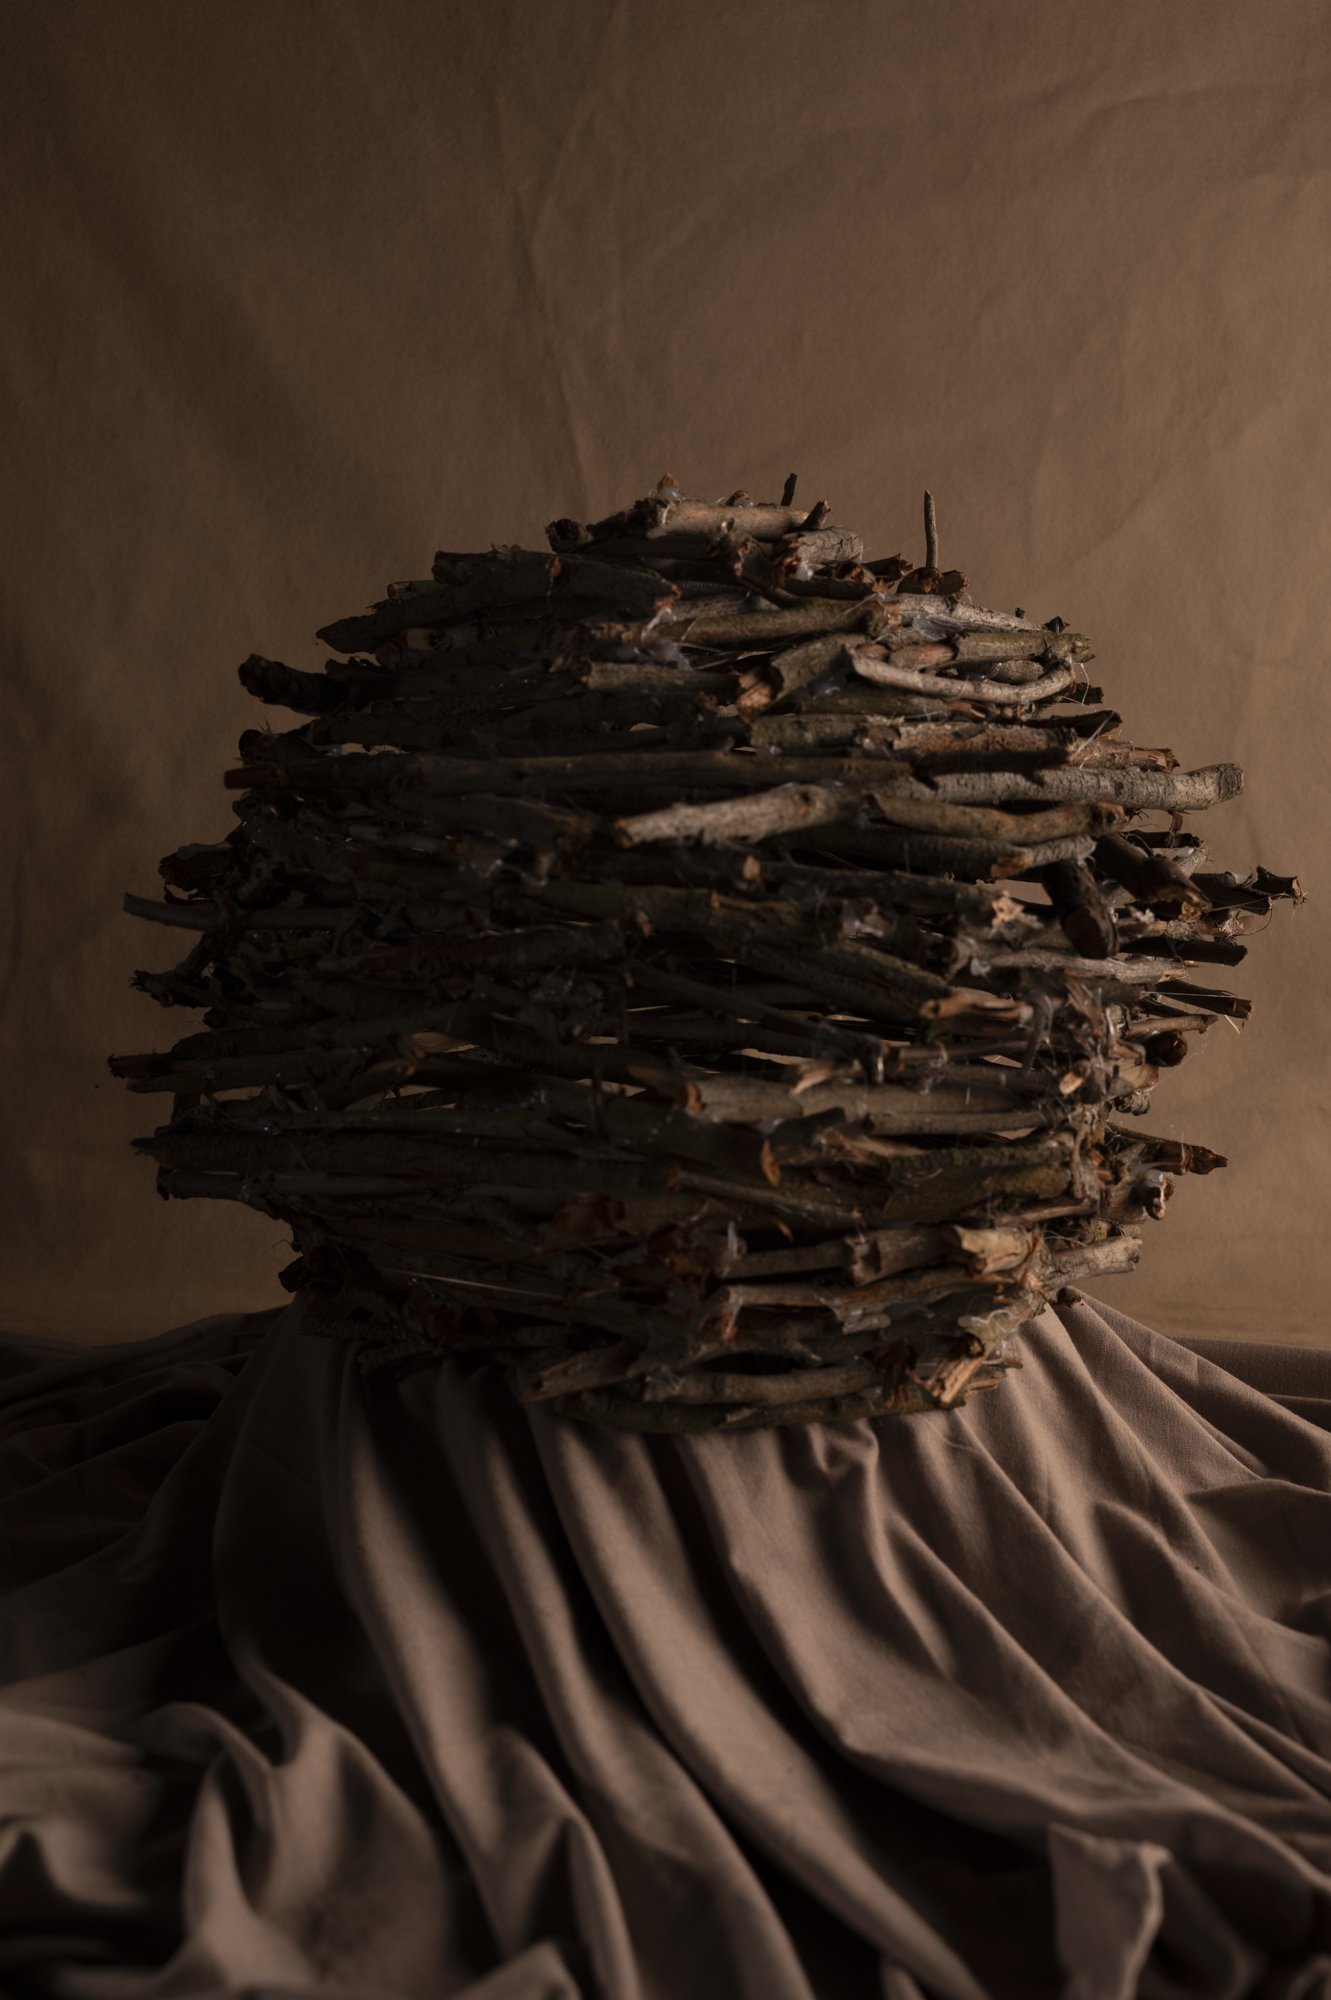
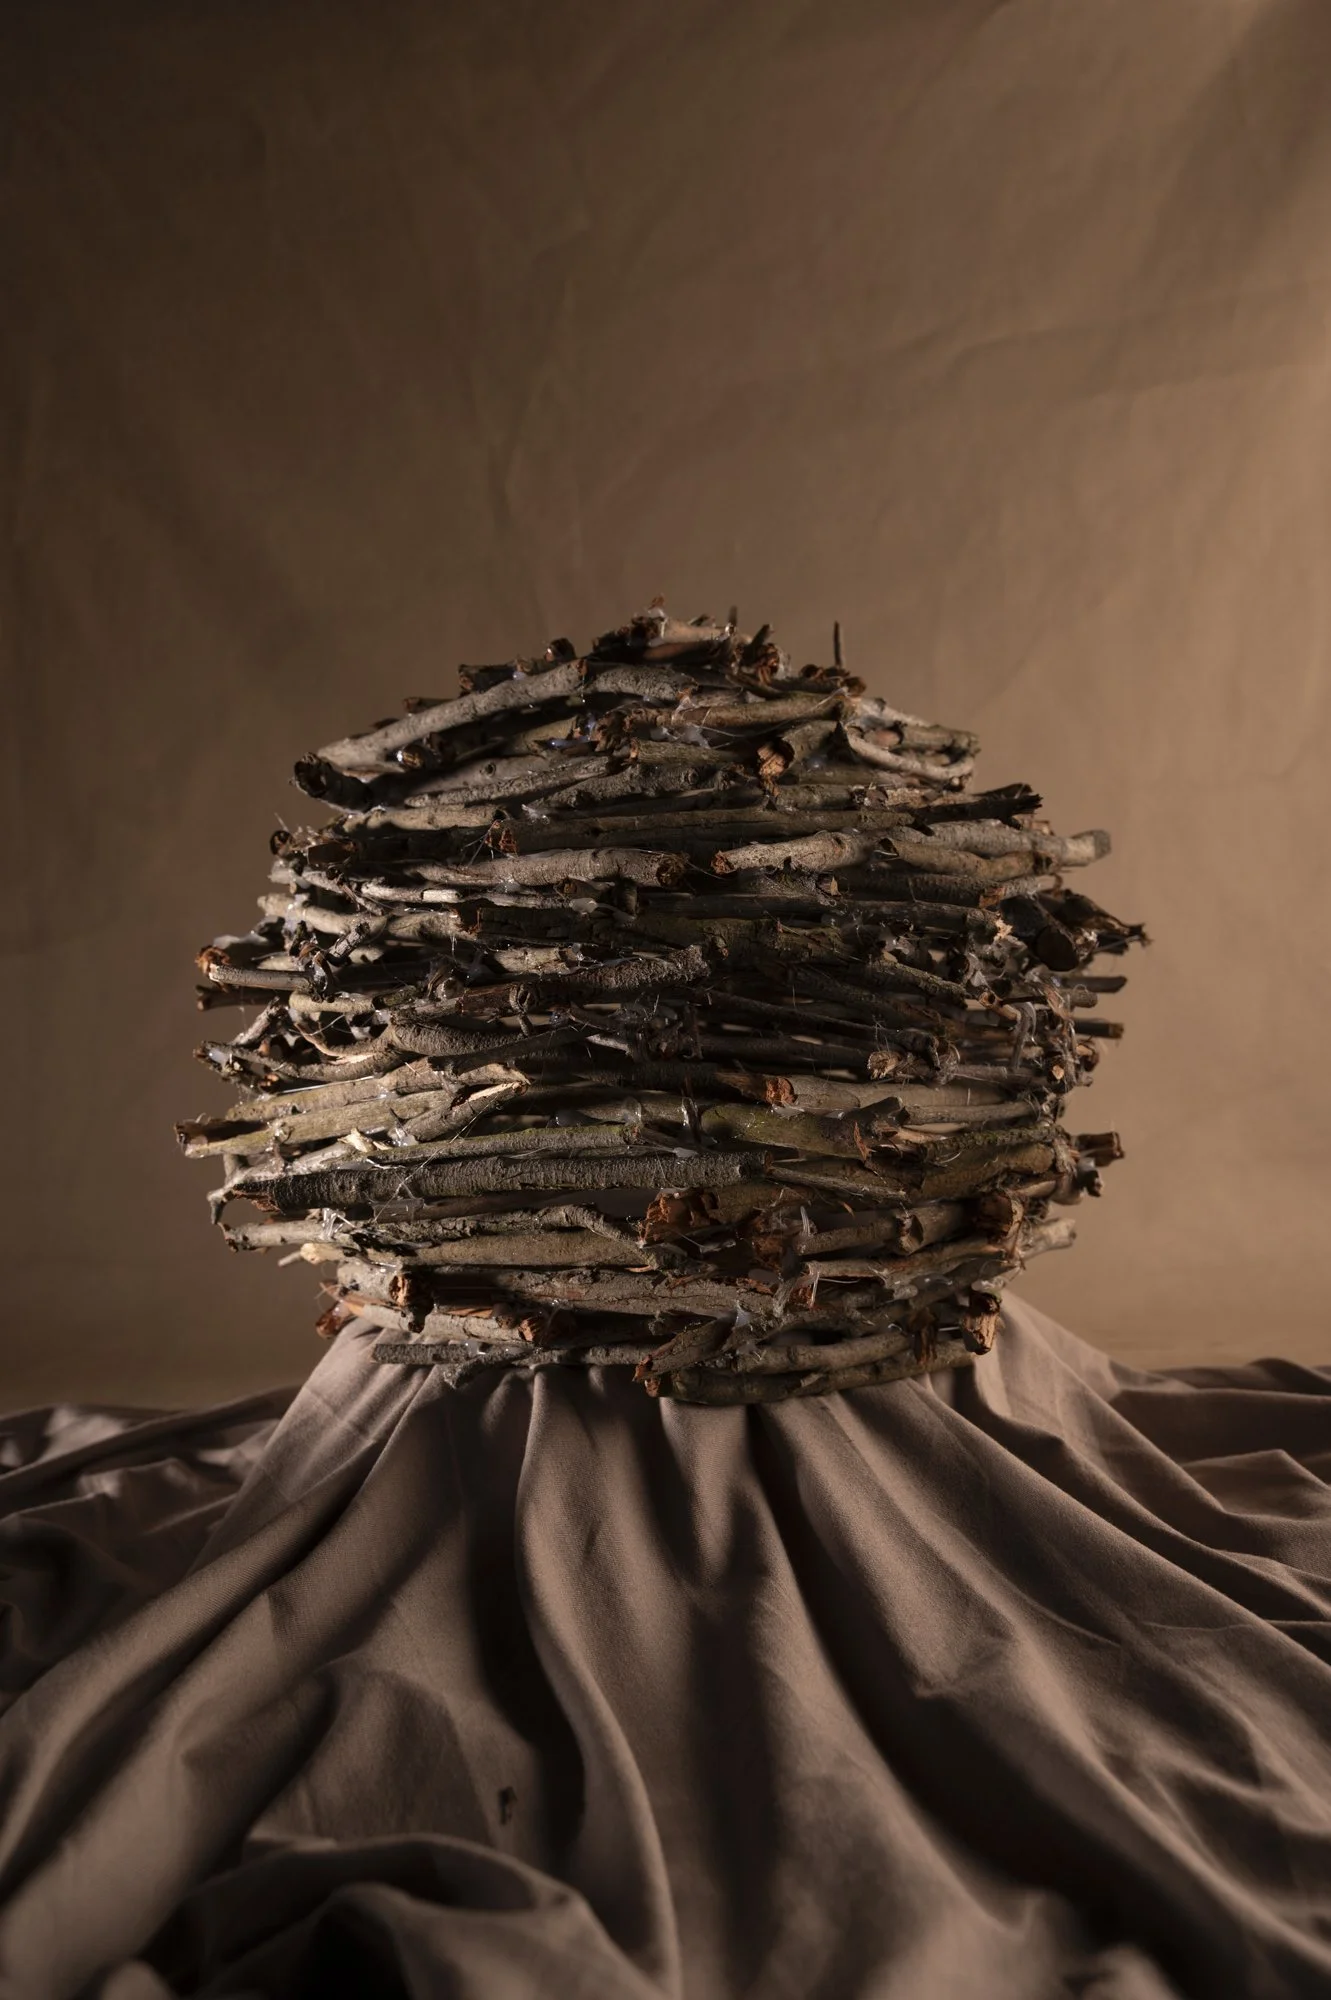
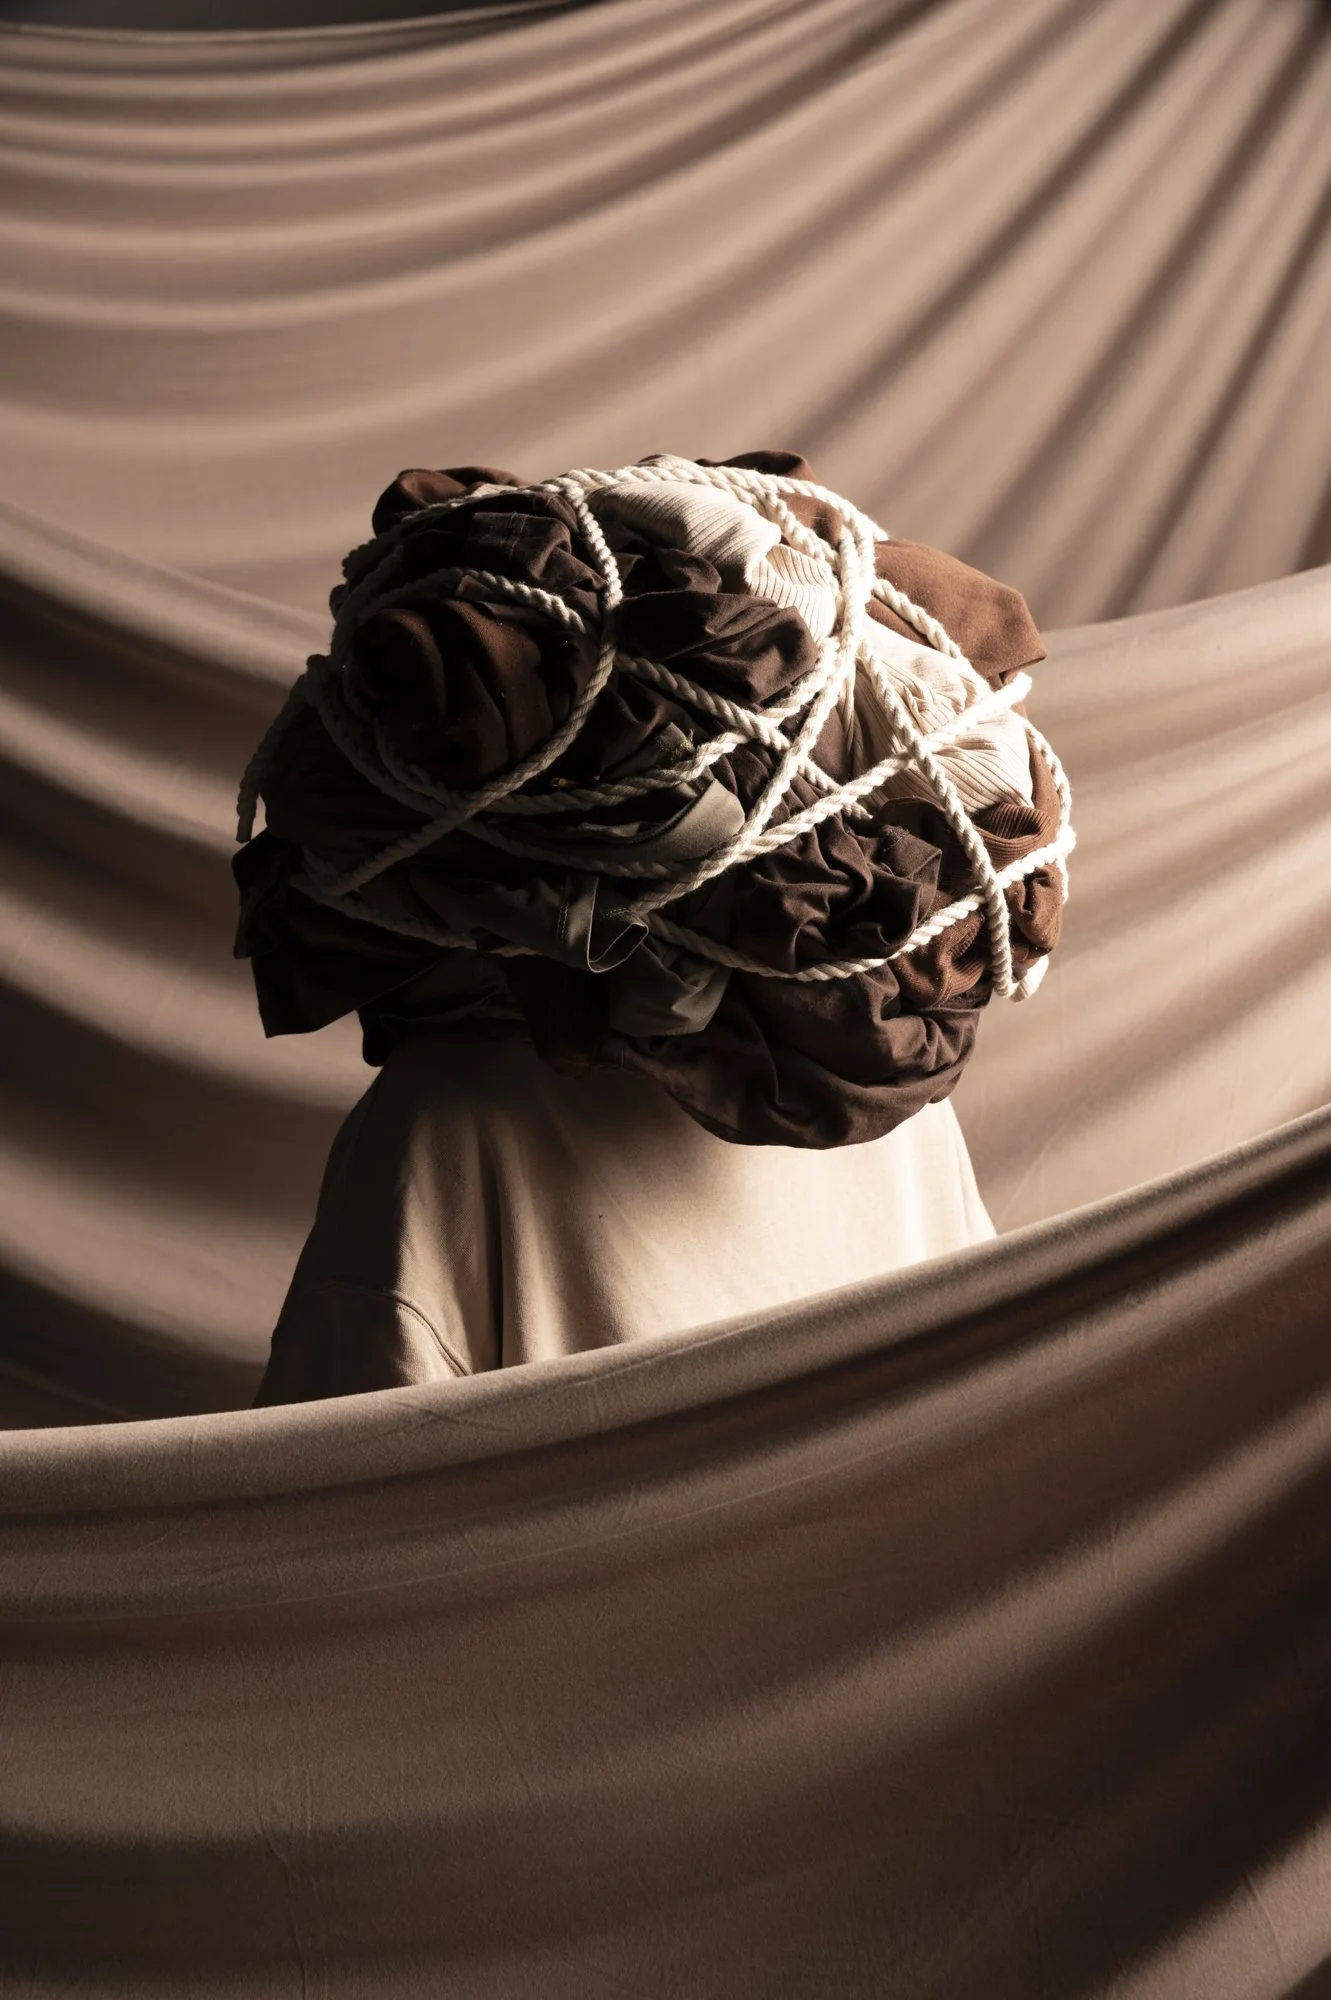
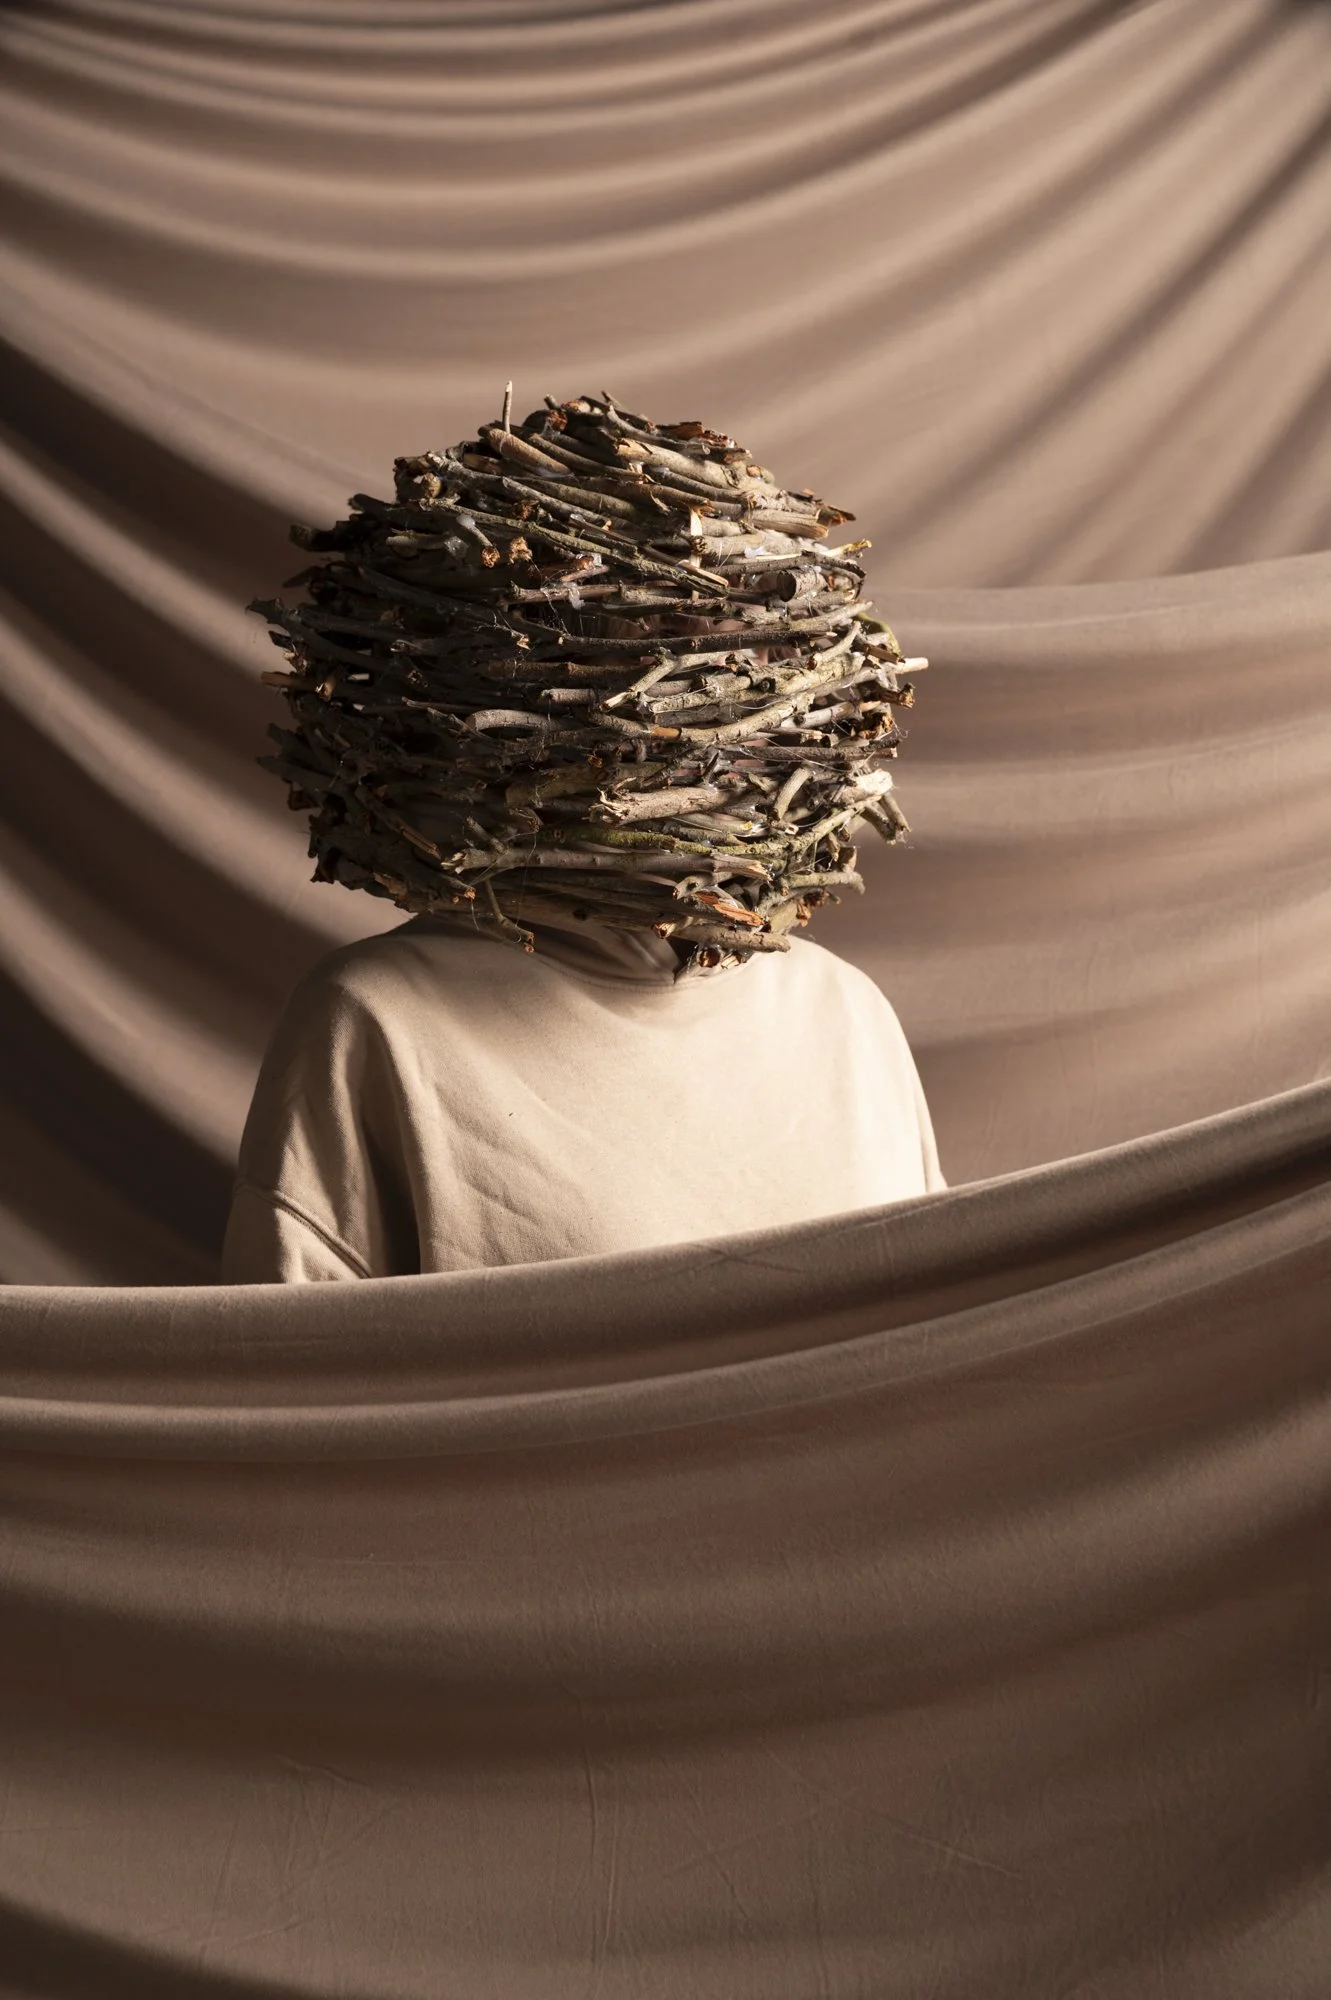
The most effective part of this shoot was probably the sticks. I found the helmet I had constructed using a hot glue gun to secure sticks around a balloon worked really well as a prop for the series. I used this same helmet to act as a base to secure the clothes on top of which worked well to allow for breathing room for the model. The rock also worked well. It was constructed from a popsicle stick frame which was paper machéd and then painted.
What next?
From here I need to photograph the remaining still life photographs and then curate the series from the images taken.

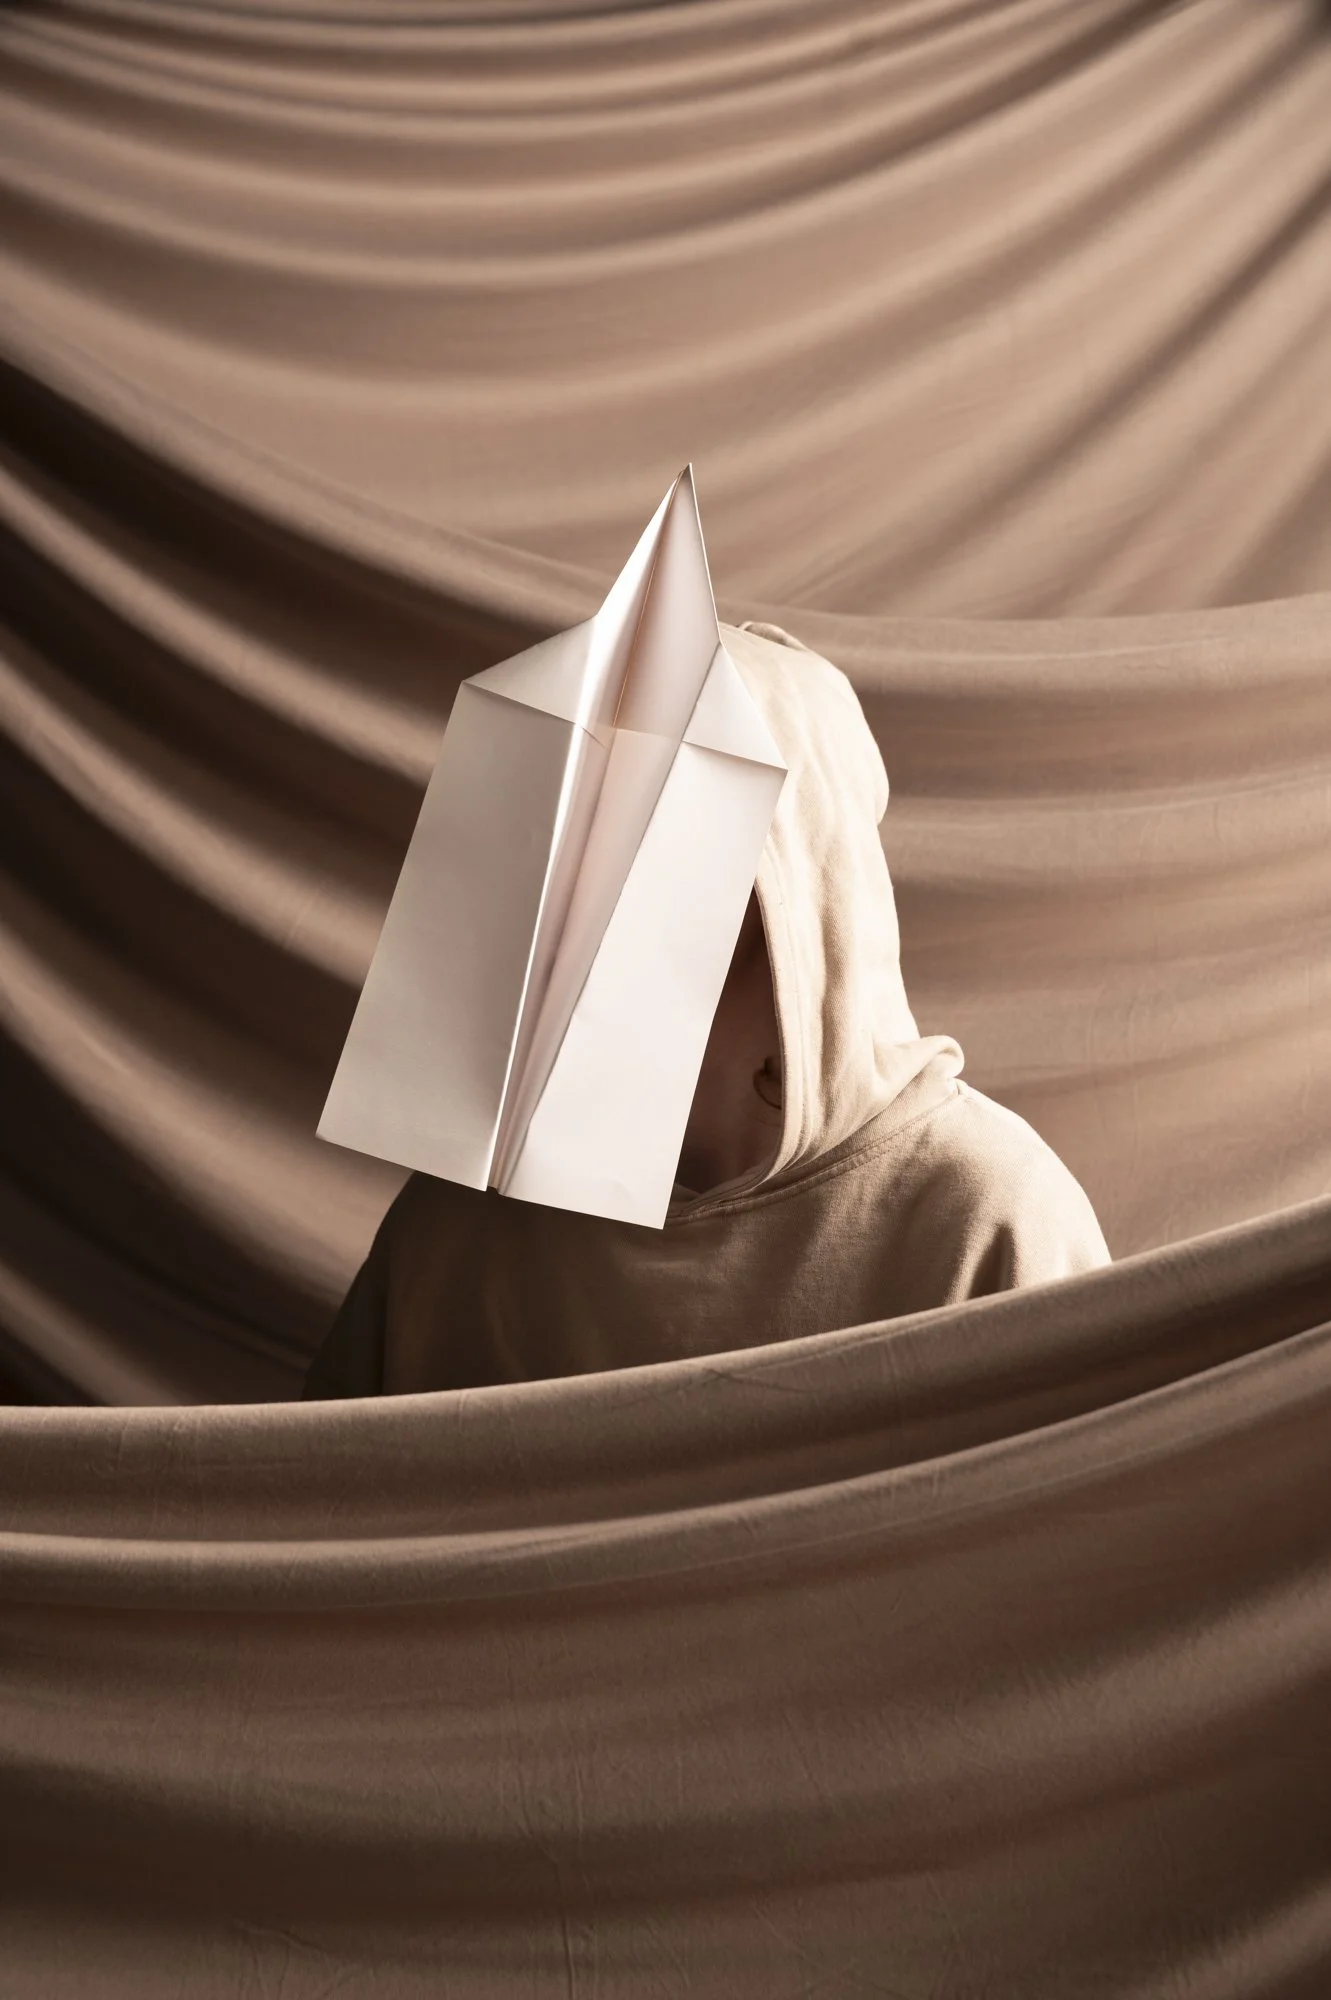

Shoot 10
Details:
When: 25/11 PM
Where: PSC Studio
Lighting: 2 x Elinchrom Lights
1 x Dish and grid
1 x Large Sq Soft Box
Shoot Plan:
This shoot continues the exploration into fabric and form. Applying the technique to the sticks, rocks, helmet and cords.
Lighting plan:
Dish and grid serve as the key light. This is angled to stream across the backdrop largely. This helps seperate the subject from the background, adding depth and visual interest.
Sq soft box is used to fill both backdrop and subject.
Styling:
In this shoot I experimented with ways to drape the fabric across various objects to create different pedestals of sorts for my subject matter to stand upon.
What didn’t work?
I am unsure whether I like the paper aeroplane image or not as the colour of the paper in particular is rather jarring to the eye.
The fabric also has some undesirable folds in this image too.
Reflection:
What worked?
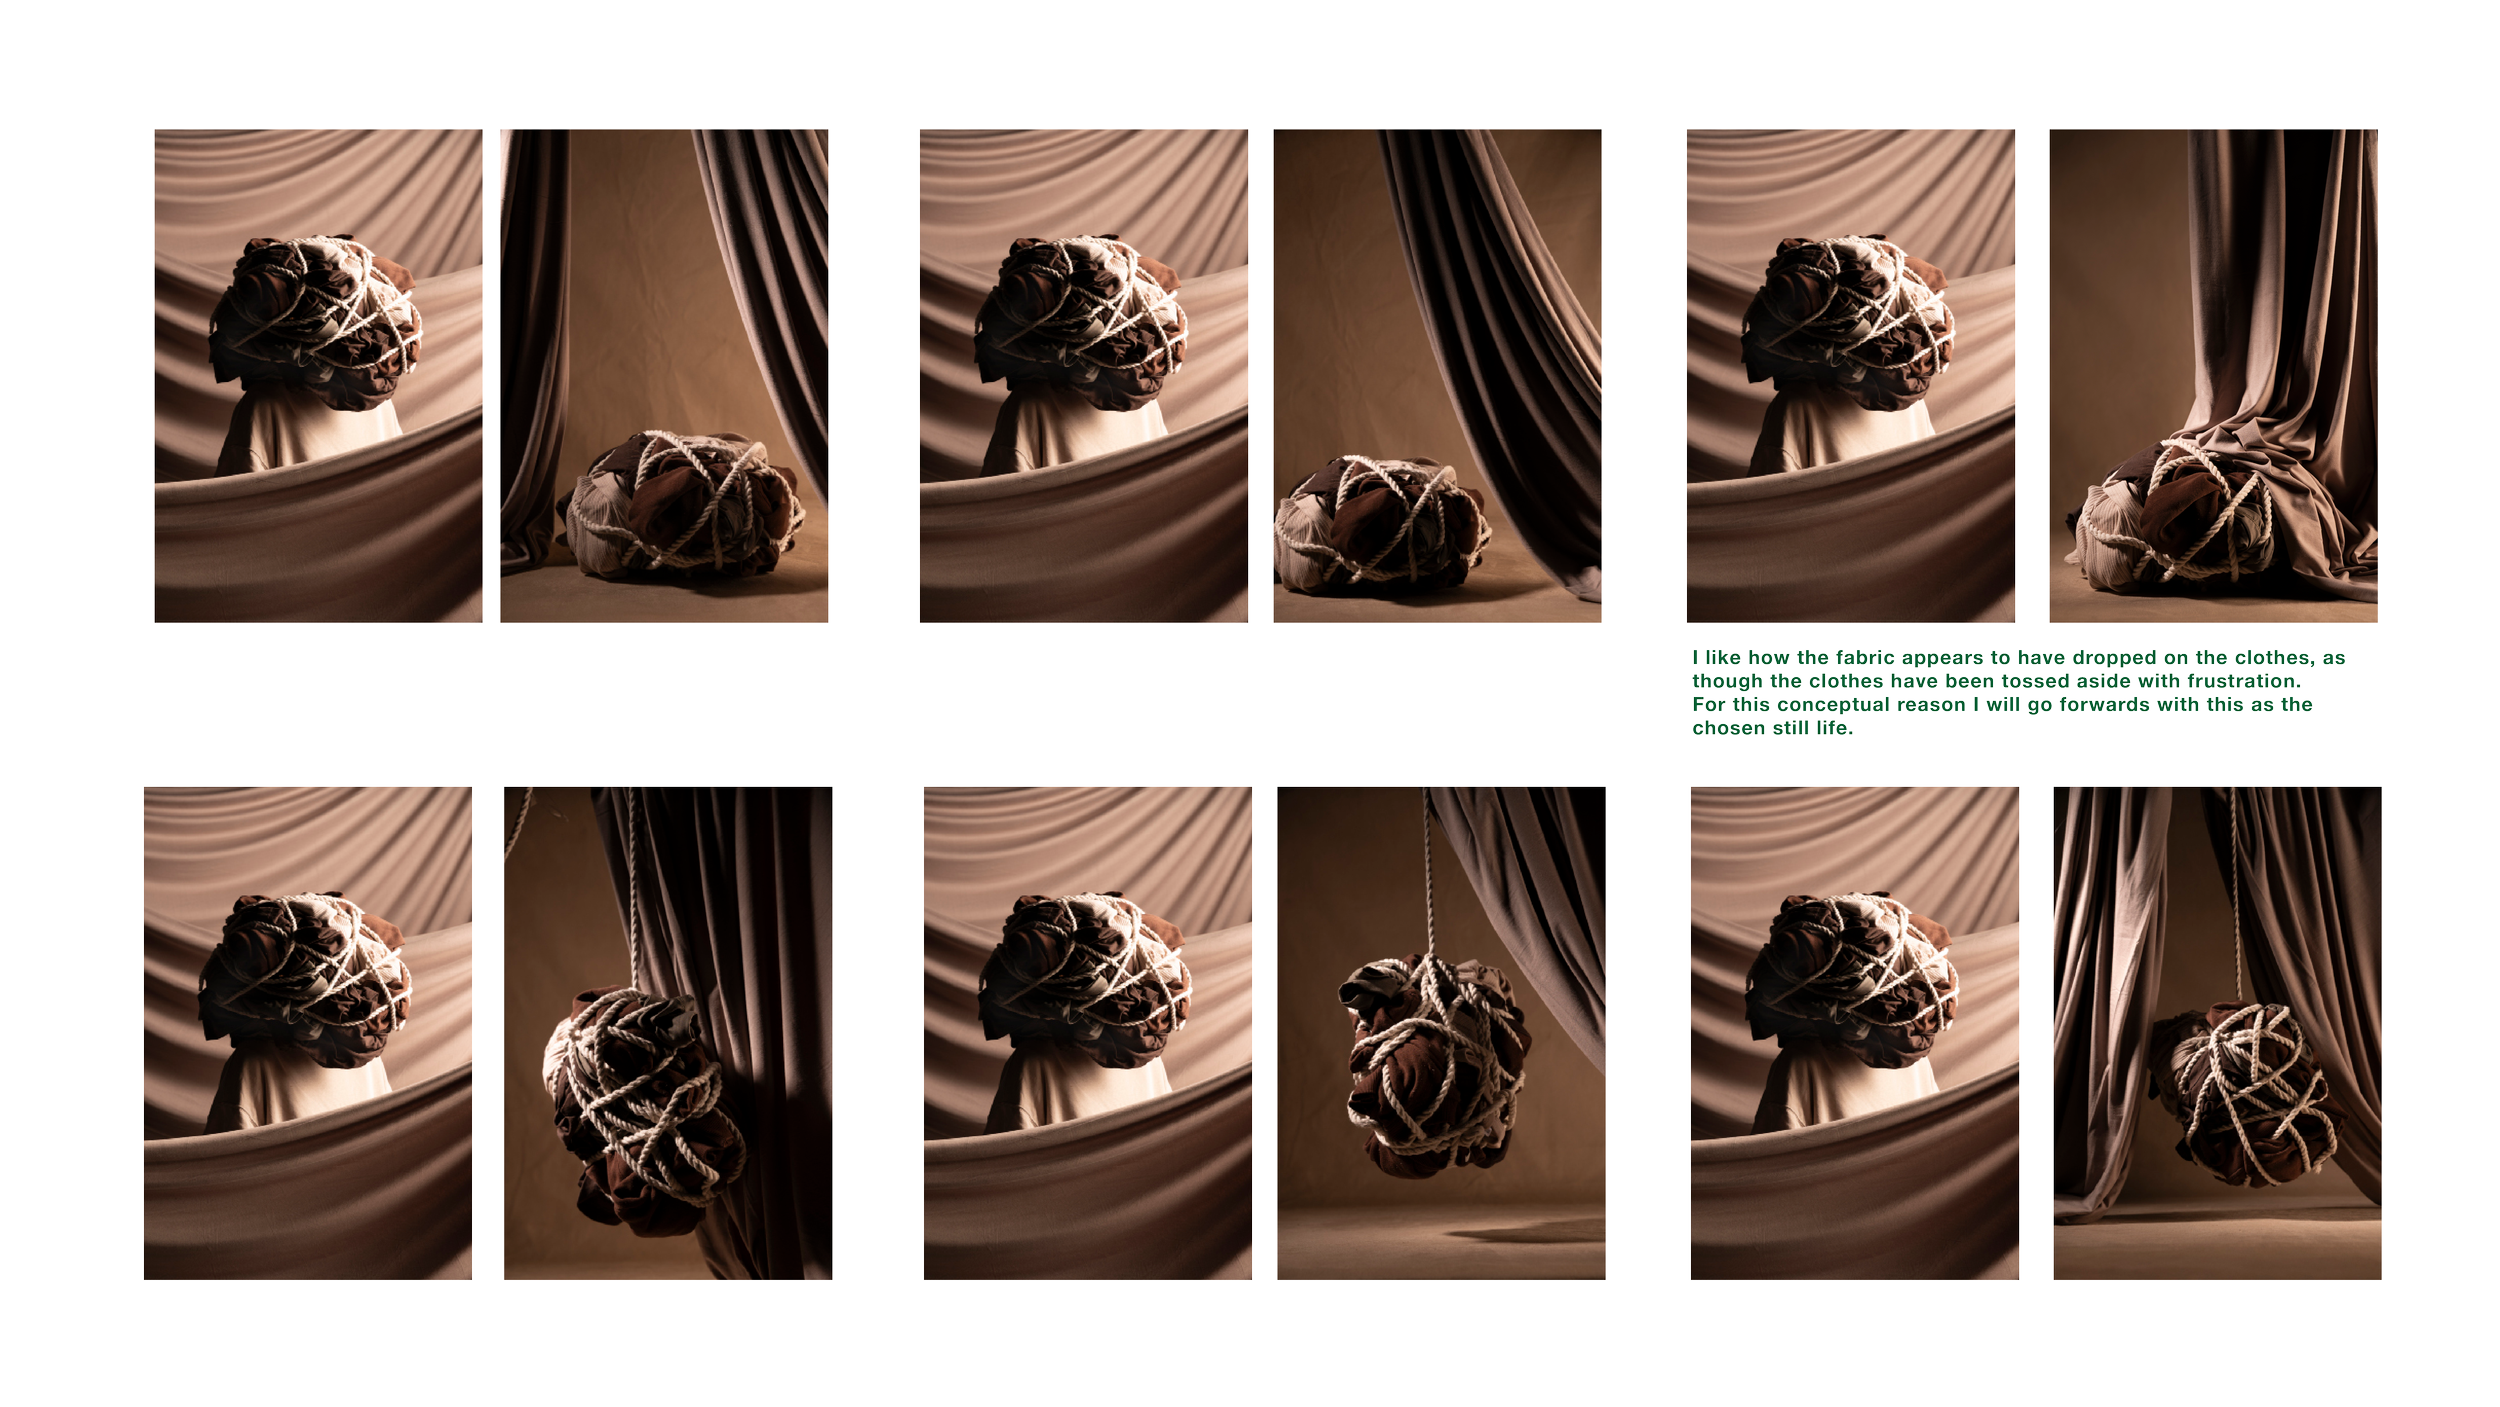
I am most happy with the play between light and shadows in the image’s with the clothing for this shoot. They work really well. interaction between fabric and subject matter is far more successful in this shoot then the previous still life one too.
What next?
This is the last available shoot date so from here I will work on the post-production of the images as well as the curation of the series as a whole.